DALEK Construction
![]()
DALEK Construction
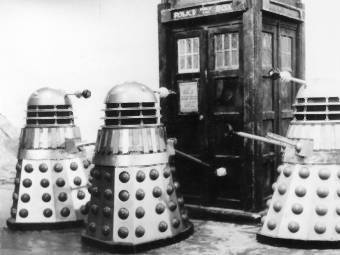

For the photo story I've written, I need a shot with a couple of Daleks. The more the merrier, but two will do, so I'm going to construct just the two.
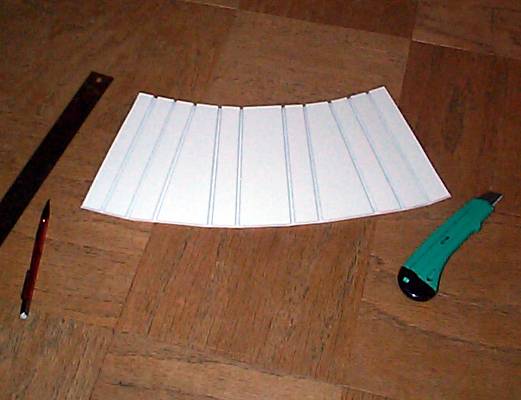 |
I began the Dalek
construction by creating the side panels. I used
foam-core, scored along the lines shown. I then cut
v-shaped channels down those lines on the back side,
first by cutting a straight line about half-way through
the thickness of the foam. Then I cut a V-Shaped channel down the lines by cutting on each side of the original cut. Then I gently pulled out the excess, leaving the V-grooves, and a score line. |
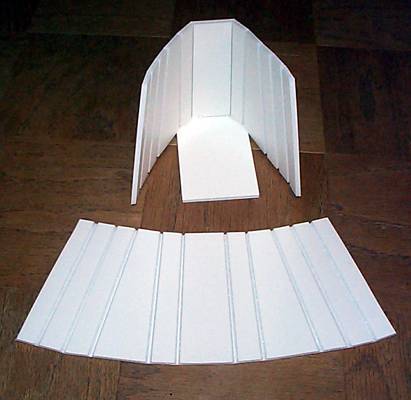
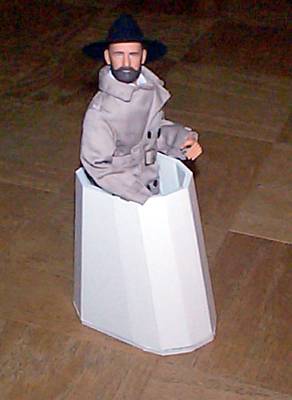
I bent the Dalek starting at the rear, and hot-gluing it as I went down to a rectangle that was the size of the base. |
 |
 |
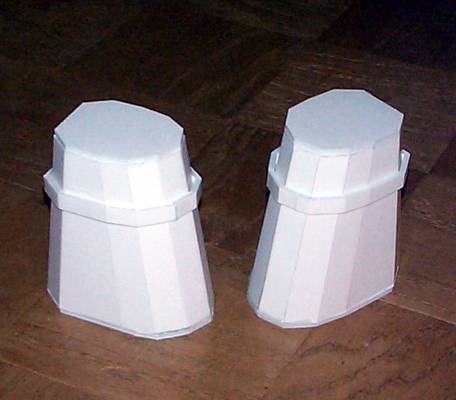
This picture shows one complete Dalek base, hot-glued down to the rectangular base, and a second Dalek base ready to be bent into shape. |
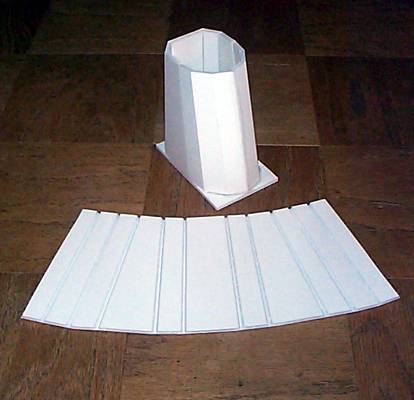
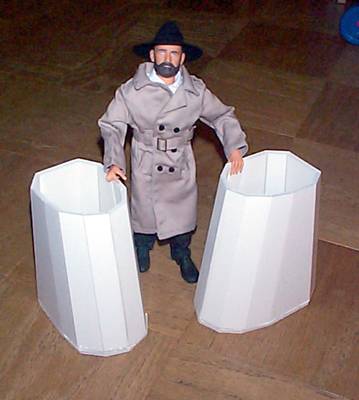
Here, the Doctor stands by the two Dalek bases. Note that I have trimmed the rectangular base to fit the countours of the Dalek panels. |
 |
 |
"Look at me! I'm
Davros! Exterminate! Exterminate! Exterminate!"
laughs the Doctor. Actually, this is an idea I had when I was leafing through the Doctor Who Technical Manual. It shows Davros, the creator of the Daleks, and I realized he could easily be customized from 1:6 scale figures. If a future story features Davros, you can bet I'll create Davros more or less the way you see the Doctor here. |
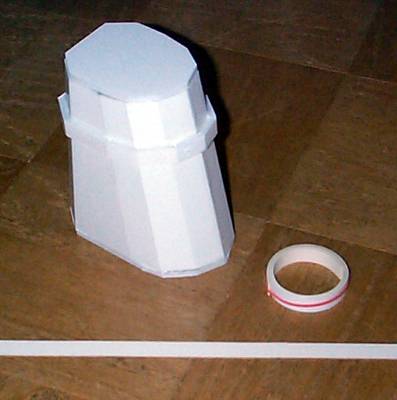
I capped off the top. On the flat part I'll put the cylinder that forms the "neck" atop which goes the head. The edging around the middle forms the divider between the sensored skirt and the screened upper torso. Just above these, the "plunger" and other arm will go. |
 |
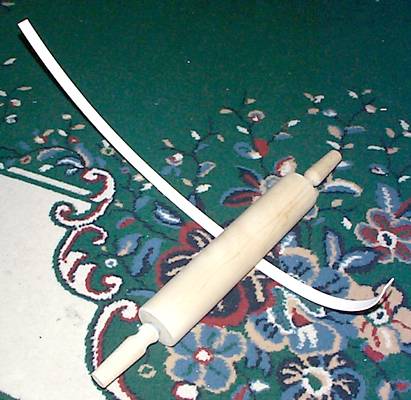 |
The edging I put on
last night is angular, to contour with the Dalek base. On
a real Dalek, this is smooth, so I took a 1.5cm strip of
matte board (the same height as the edging) and curved
it. This is done without creasing by using a rolling pin on a carpet. Gently at first, until you are able to roll the strip up around the rolling pin. |
I put elastic bands around the two strips, to keep the matte board curved. |
 |
 |
This time, I wanted
the joint around the back, so I hot-glued the strip to
the angular edging, to make a smooth edging. Original Daleks had some difference in height at the front, but I ignored that. My aim here is to approximate a Dalek, or create a variant, not to create a blue-print perfect Dalek, as that's just too much effort. I just need it to look enough like a Dalek to achieve the desired effect, not be a museum piece. |
The skirt sensors are 1.5cm hard styrofoam balls. I found these at a craft shop (not the crystal-flaky styrofoam balls) but they were $.19 each. That meant for the 60 I bought, I had to pay about $12.00. I used a knife on a cutting mat to bisect the spheres along the natural molded seam. I rocked the blade back and forth over the seam, cutting deeper and deeper until the halves separated. Warning! Some of these crumbled pretty badly. Always buy more than you need. |
 |
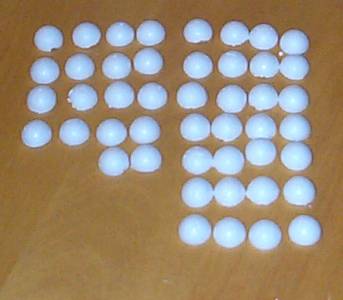 |
Here I am not even
completed enough sensor sphers for one Dalek. Sigh...
tedious. But I have a plan for the imperfect and crumbled ones. I intend to choose the best ones to paint gold, for the black Dalek, and leave the worst ones to be painted black for the red Dalek. That way I can hide some of the detail on the less-than-perfect ones. I intend to prime these with grey and then spray-paint them with many coats of gold and black, to give them a sort of enamel finish. |
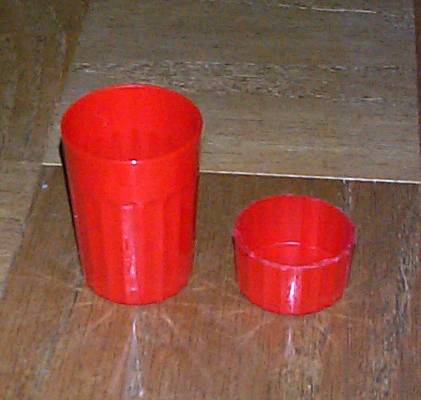
Next up is the neck column. I neede a tapering cylinder, and at first I was going to use a mailing tube, but then I stumbled upon these plastic cups. I cut them down to the little stub you see here. |
 |
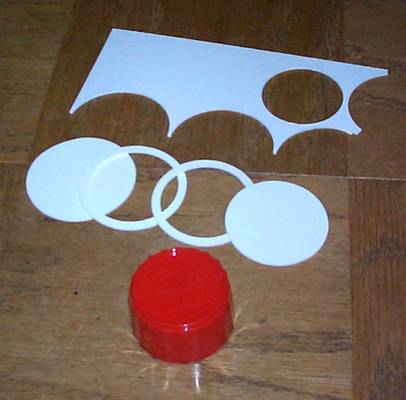 |
For the flares around
the neck structure, I used a compass with an X-Acto knife
in it. I measured out the neck flare radii and by trial
and error figured out how to cut the interior circles. The bottom one and the top one will just be glued to the cup. The middle two, however, have to be slipped down over the neck. |
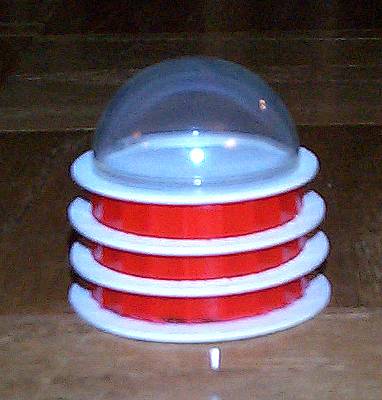
Here is the neck structure underway. The spherical head is from a craft shop. It comes in two pieces, each of which have a tab that requires removal. Support structures will have to go between the round plates here. |
 |
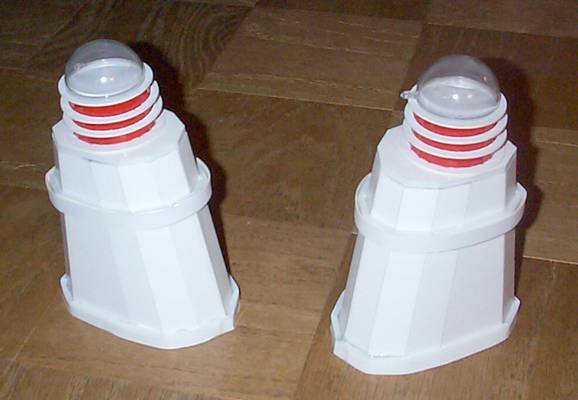 |
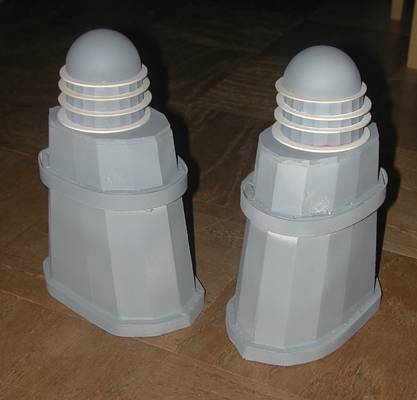
Here the necks sit on
the Daleks. Also, I hot-glued a strip of foam-core to the very base of the Daleks, to form the skirt base. At this point it's ready for priming and painting. Then I have to add screening to the upper body, supports between the round plates on the neck structure, the arms and eye pieces. It's been a long haul, but we're finally able to see the light at the end of the tunnel. |
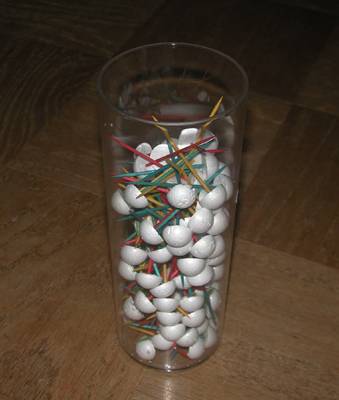
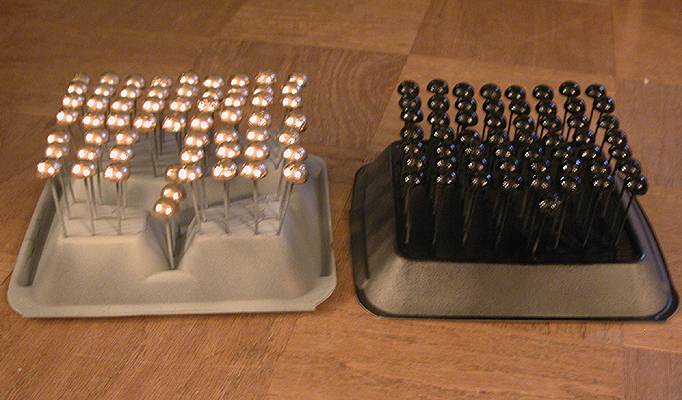
There are over 100 subdivided styrofoam balls in this container. I inserted pointy toothpicks in the backs of them so I coud array them in styrofoam for spray-painting. |
 |
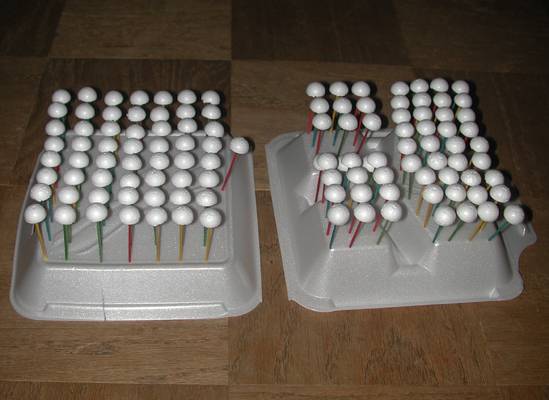 |
Here they are. Ready
for painting. Though I didn't get a picture, I primed
them first with gray primer. Sadly, the imperfections in styrofoam surface don't show up clearly when they're nice, white and bright. Once they are primed, every imperfection shows up. But no matter, even bumpy, these will do the trick. |
This picture blurred a bit, but it shows the gold and black paint on the sytofoam half-balls. While this picture doesn't show it, there are severe imperfections quite visible in each ball. By their very nature, some of these were smooth and perfect, while some had serious crags.. |
 |
 |
Primed and ready for
painting and detailing. The arms will be next, then the detail on the head. Then I'll add the detailing to the "chest" portion and the head. |
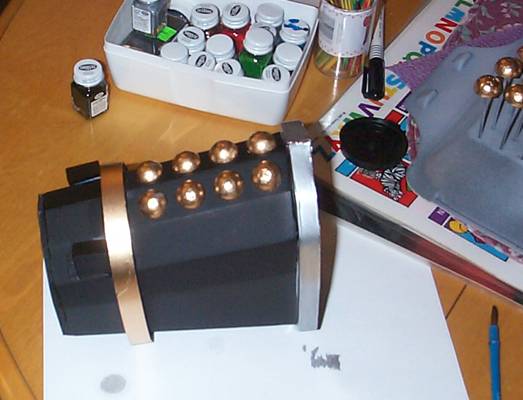
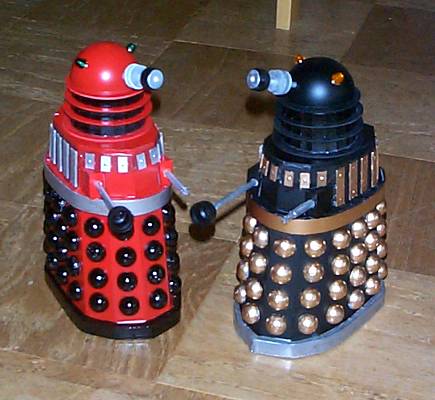
Here I have painted one Dalek matte black, with a silver skirt at the bottom, and gold ring around the middle. I have begun to apply the gold ball sensors. |
 |
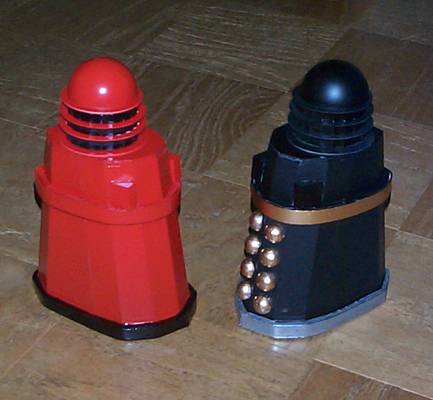 |
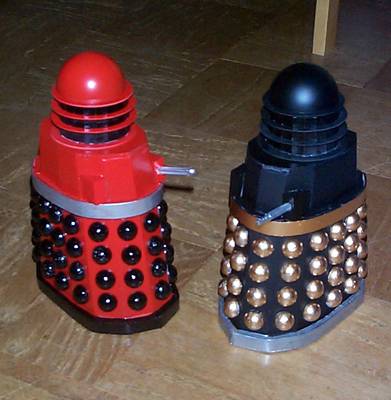
Here is the second Dalek painted red. Both heads are painted and ready for attachment. |
All sensors attached, and the left arms in place, there is little left to do. I have to put the "torso" strips on, and the eye-stalk and ear lights. |
 |
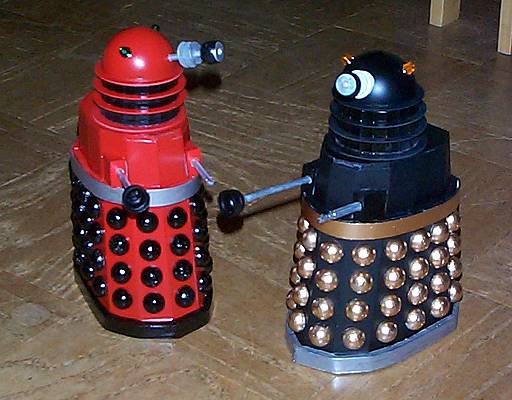 |
Tonight I added the
"ears" and "eyes". The ear lights are
purchased from Radio Shack. They still have wires
attached, so I can hook them up to light if I want. The
eye stalks are wooden dowel, with wooden disks, and a
bead for the tip. The plungers are dowel painted silver, and the bases of chess pieces epoxied to the dowels. Except for some vertical struts in the louvers of the neck, and the screening and strips around the chest area, these are done. |
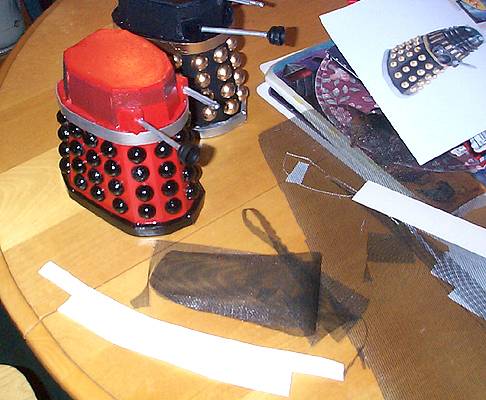
I bought some fiberglass window screening material for the Dalek "chest" area. I first cut a form out of paper that fit perfectly around the Dalek chest, joining in front. I probably should have joined it in the rear because that seam would be on camera less, but it would have been more difficult. I then used that form to cut the screen. Luckily the fiberglass screen cut very easily, and is quite flexible. This picture shows the red Dalek with screen attached (with hot glue at key points) and the second screen about to be cut. |
 |
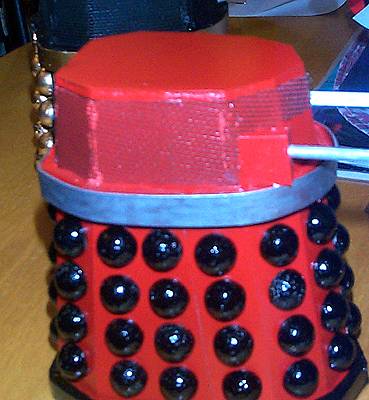 |
This camera is not so good, so this shot is enhanced slightly, but still I couldn't get around the blurriness of the shot. But you can clearly see the hot-glue I used near the rear to attach the screen. It doesn't look quite so bad in person, though, and once the chest slats go on, those areas should be nicely disguised. |
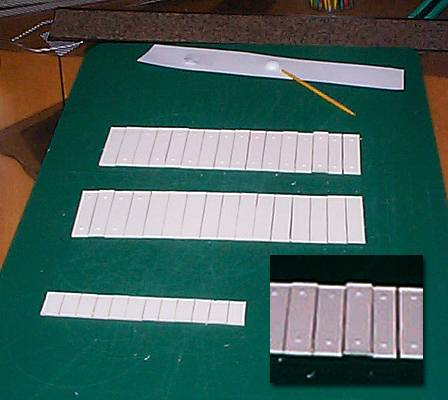
Here I cut the chest slats. I figure from blueprints and photos about 16 long slats and 6 short slats (for the front) per Dalek. These are cut from the same sheet of matte board I used elsewhere in the project. 3.5cm tall and 1.77cm tall. Note that I used white glue to form "rivets" at the top and bottom of each long slat, and in the center of each short slat. Note: Problem here. When I applied the first dots of white glue, once dried, they basically disappeared. They faded into the cardboard. So I applied a second time. Same result. Then I used a yellow wood glue. The inset here is enhanced to show contrast, so shows off the rivets fairly well. |
 |
 |
Then half got painted
silver, and half gold. The wood glue rivet application held up a little better, but I was concerned that the rivets were still too shallow, and paint would basically erradicate my efforts. To my utter delight, when the paint went on, the rivets were very accentuated, even exaggerated, rather than being hidden by the paint. |
Using hot glue, I applied each slat to the screen in even intervals until they reached all the way around the Daleks. Long ones start just behind the "shoulder" of the weapon casings, and around the back. Short ones go above the housings, and across the front. |
 |
|
This is it. Done. I
had to completely disassemble the neck portion, which
meant ripping the louvres off, which ruined some of the
paint. First I had to cut three triangular cuts in the inner portion of each ring. Then I cut toothpicks and painted them. I had to re-prime and repaint the red Dalek's neck completely. A little glue to hold the toothpicks in place, and voila! Done. Whew! |
Back to the TARDIS Construction
Page
Go to the Console Page
Go to the Sonic Screwdriver Page
![]()
![]()
![]()
![]()
![]()
![]()
![]()
![]()
|
|