Many of my own photo stories take place outside. Sometimes you need some
background items to make a scene seem real.
My first project-tutorial will go over the creation of the larger Traffic
Barriers we see every day on the roads near construction.
-
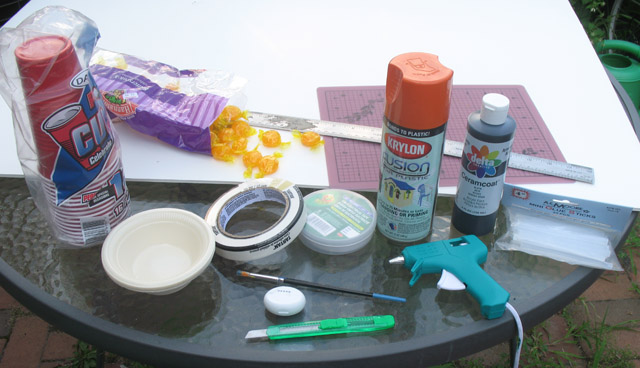
Foam core board (small piece will do)
-
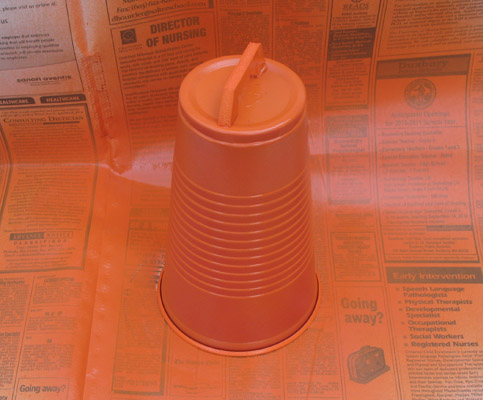
Large plastic drinking cups (near Halloween many
stores sell orange ones. Get those if you can.)
-
Styrofoam dessert bowls
-
Masking tape (optional.)
-
White plastic electrical tape (preferred to masking
tape)
-
Krylon orange spray paint
-
Black craft paint (water based will do)
-
Orange or yellow hard candy (bag)
-
Paint brush
-
Sharp carpet knife or X-Acto knife
-
Glue gun
-
Glue sticks
-
Metal cutting ruler
-
Cutting board
-
(Shown, but not used - an empty dental floss container.
This was intended for the box that powers the light. This can
be anything roughly square or oval, and should be painted yellow.
however, I didn't use it for this project.)
|
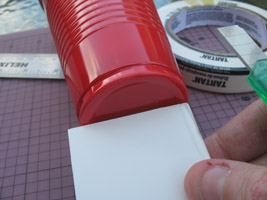
First, cut a piece of foam-core board that will fit across the bottom of the
cup.
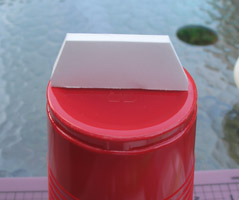
Shape it on an angle from the edges.
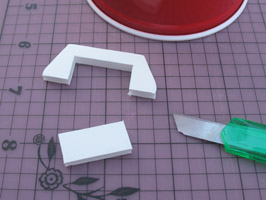
Cut out a rectangular under-section.
Hot-glue the handle to the bottom of the cup.
Spray-paint the cup orange. (Or if the cup is already orange, just paint the
handle before gluing it on.)
Done. Let dry thoroughly.

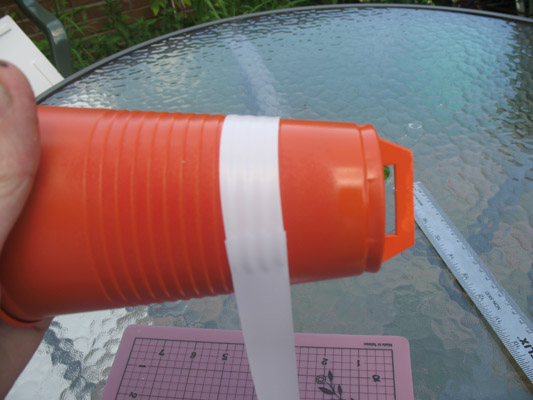
Plastic electrical tape is perfect. It is flexible and as you bend the tape
around the angled cup, you can subtely bend it. Often these cups have ridges
like this one. Follow those.
Overlap a bit. (The back is generally never going to be seen by the camera or
the viewer of the diorama, but even if it is, it should be ok.)
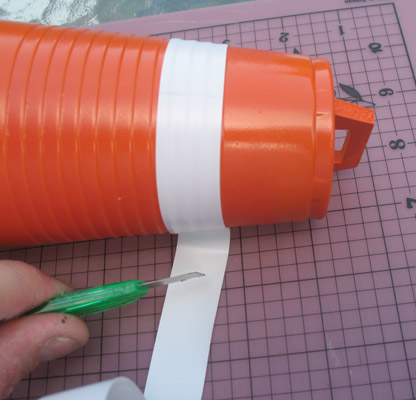
Cut the tape.

I did two white stripes. You can do 3 as well, depending on your preference.
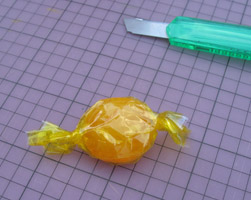
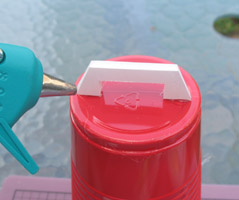
Unwrap a Butterscotch candy.
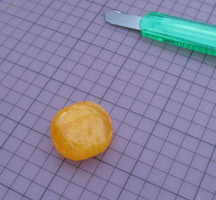
Like so. Keep in mind that candy will get sticky. Do not let this get wet. I
use this only because it would be used for a photo shoot, and is not a toy to
be played with. If you want something more long-lasting and sturdy, try to find
a yellow or orange small light fixture of some kind.
Hot-glue the candy to one side of the handle.
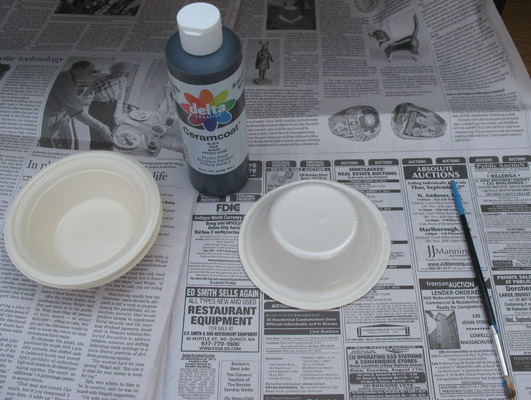
Paint the styrofoam dessert bowl.
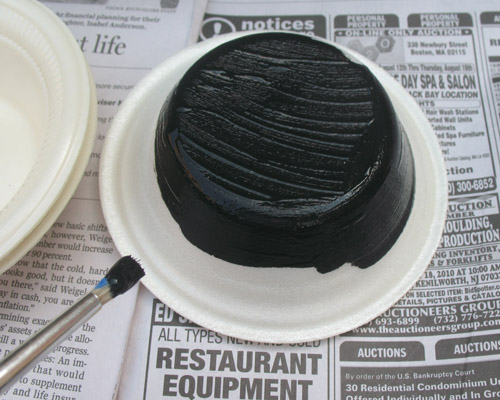
Water-based craft foam is fine. Just slather it on, and get some underneath
too. If you plan to have one knocked over in your scene, paint the entire underneath.
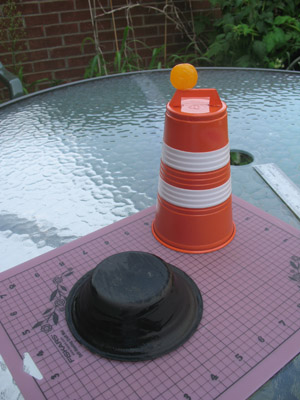
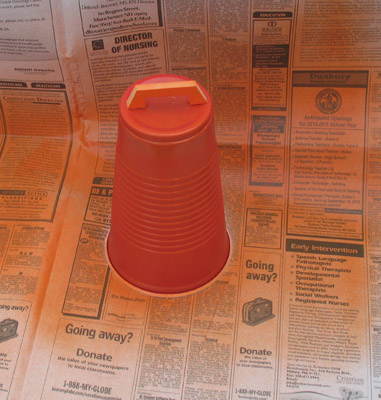
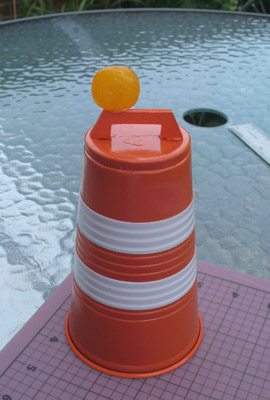
The two main pieces. Run hot-glue under the rim of the cup.
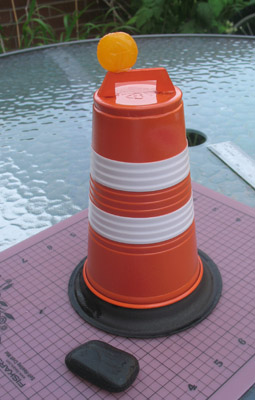
Here the two pieces are glued together. However, note that it will be very
light and may not stay down where you put it, especially on windy shoot
days. So get a rock (of whichever weight makes you feel comfortable it won't
blow away)
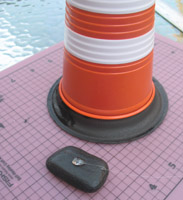
Put a bead of hot-glue on the rock.
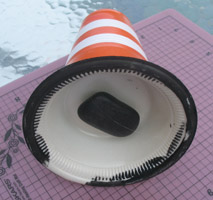
Stick it to the underneath. It now has some weight, and shouldn't blow away
in light wind.
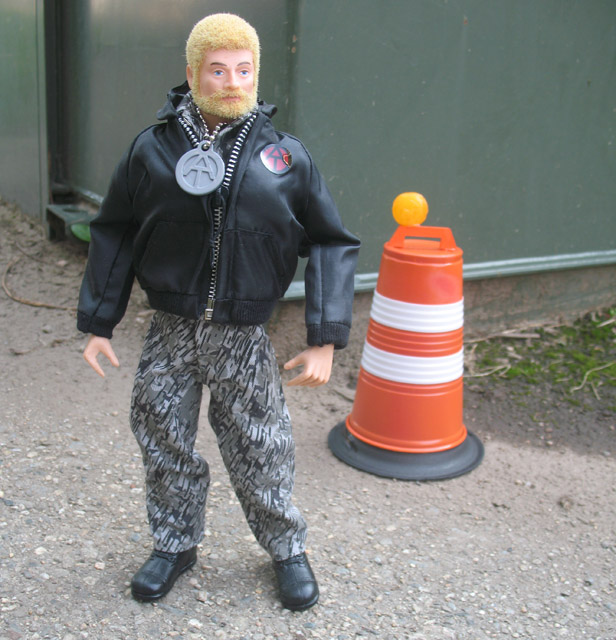
Here it is, with the Urban Adventurer.
Note:
More elaborate things could be done, including adding flashing lights, if a
more reasonable light could be found to substitute for the Butterscotch candy.
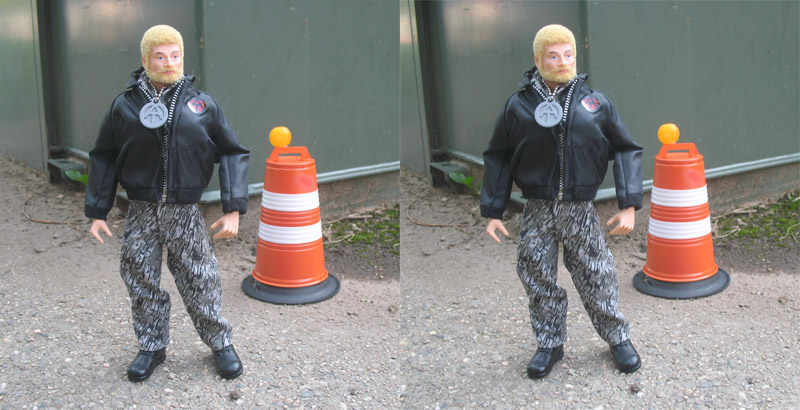
Cross-eyed stereo image if you can view it.


