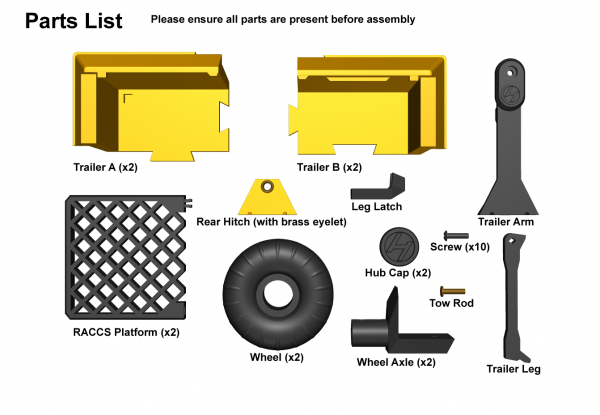
Adventure Team Vehicle (ATV) Trailer Assembly Instructions
The Huxter Labs ATV Trailer with RACCS Platform is the first GI Joe scaled toy I’ve created that requires assembly. There are a few reasons for this. One is sheer bulk. Shipping a bunch of these would take up huge amounts of room. Plus it’s time consuming to do a lot of them. One is easy.
And I’m hoping the IKEA mentality kicks in. When you make something yourself, you invest more into it emotionally. I want people to have an emotional investment in my toys. I sure do.
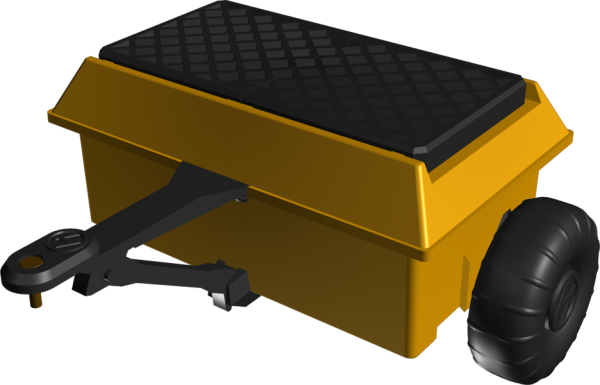
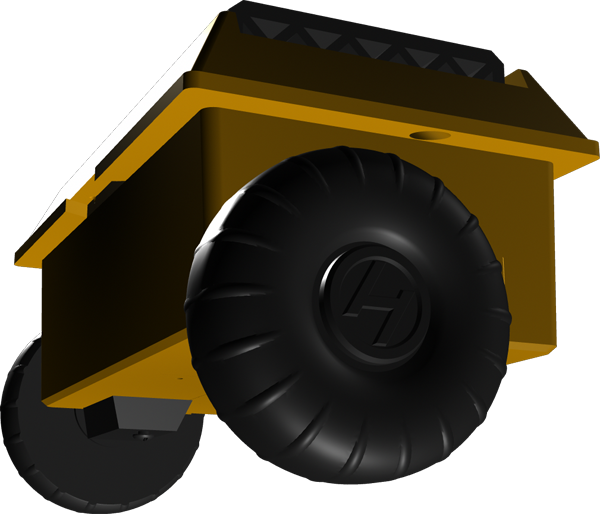
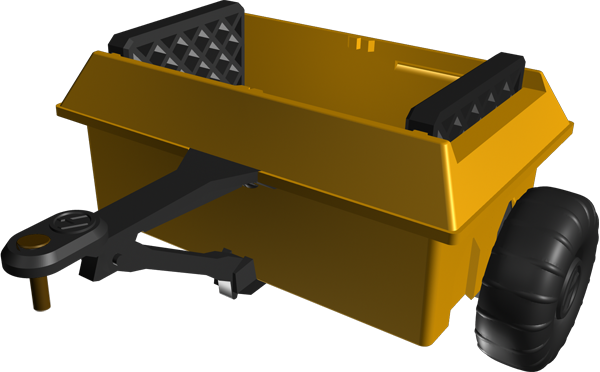
The ATV Trailer fits nicely onto the rear of the vintage GI Joe Adventure Team Vehicle, and the Trouble Shooter. It has a metal hook to fit into the brass eyelet on the original vehicles, and has a matching rear hitch so you can daisy-chain multiple trailers in a row.
It has a drop-down leg that works to stabilize the trailer when it’s not hooked up to the ATV.
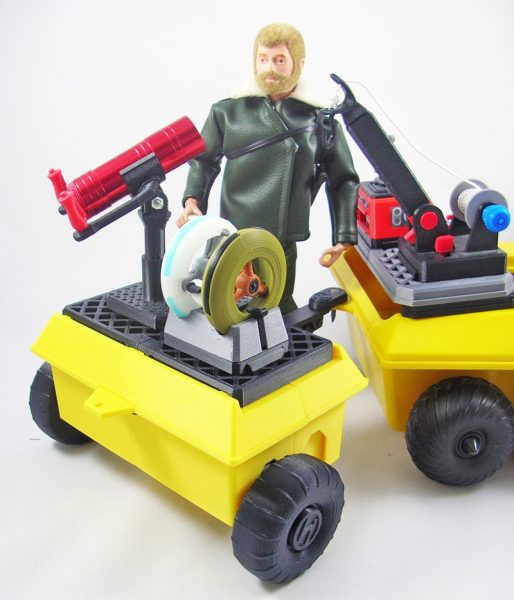
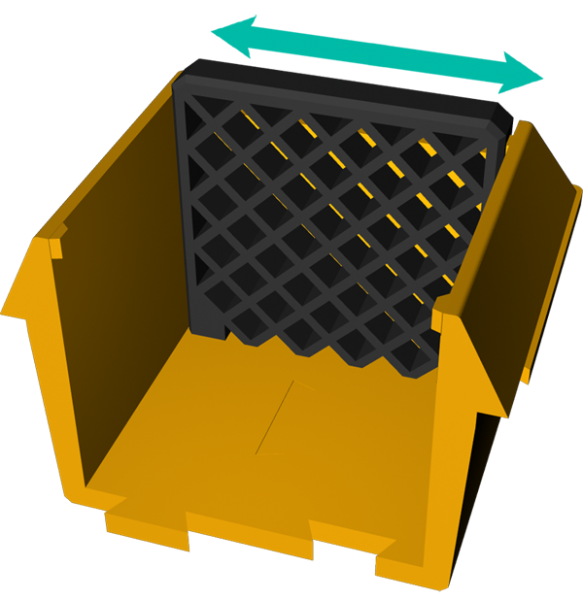
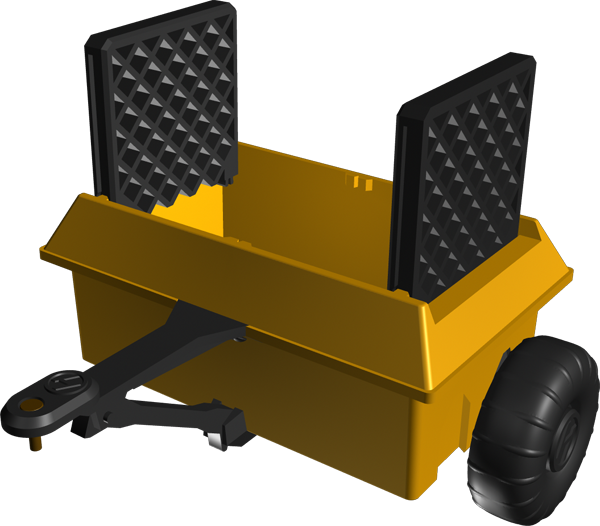
It also has a convenient (optional) RACCS Platform so you can carry any of the RACCS Modules Huxter Labs makes available. The RACCS is on a rail system that allows you to stow it neatly into the cargo bay, or raise it up and use it as wings to the side of the trailer, or snapped together to form a full platform.
You will need a standard Philips Screwdriver, and possibly some Super Glue. Super Glue forms a very strong bond with ABS plastic, which the Trailer is made of. You don’t need the glue, but if you want a stronger construction, you may use it. It may be helpful to use a tiny bit when installing the metal trailer hook.
GENERAL RULE: Do not overtighten screws. Layered ABS plastic will strip if overtightened. Tighten until snug.
STEP 1:
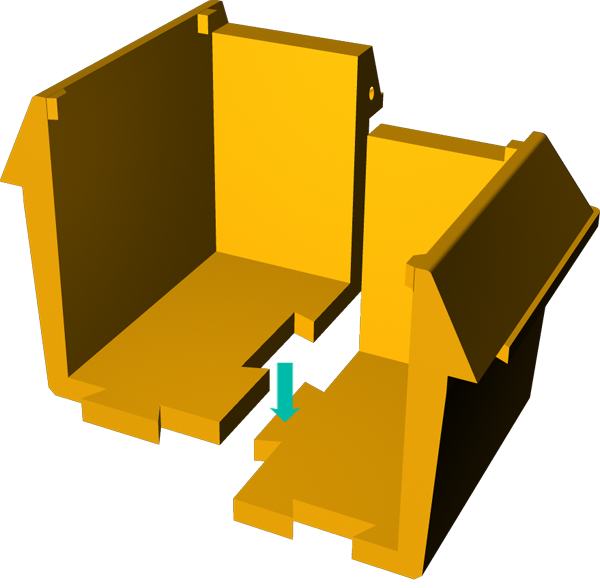
On a solid surface, take one corner body piece (Trailer A) and like two puzzle pieces, snap one to an opposite corner piece (Trailer B). It will be a very tight fit. Put the open slot piece above, and lower it onto the tab piece until the surfaces are flush.
STEP 2:
Repeat on the other half of the body:

STEP 3:
Spread the top a little and insert a RACCS Platform half so its tab fits into the slot in the floor, while the square pegs on the body fit into the round slotted ends of the RACCS slot:
STEP 4:
Screw the two halves together using the angled screwholes under the side rim:
STEP 5:
Snap the two body halves together in the same way as you snapped the corners together. The puzzle pieces will be tight. Keep pushing until the floor is flush.
STEP 6:
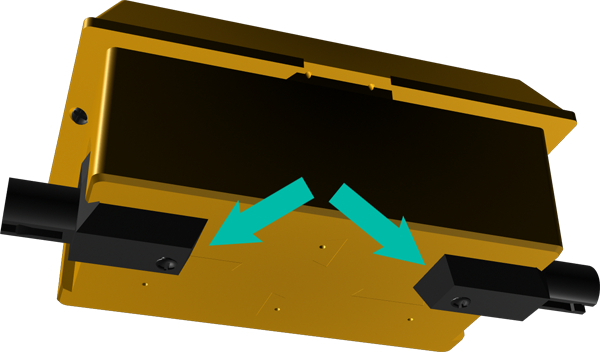
Insert an axle into one of the side slots. (Either will do. The body is symmetrical.)
STEP 7:
Screw axle bottom to body bottom:
STEP 8:
Repeat other side, making sure the axles are aligned into the correct slots.
STEP 9:
There is NO step 9
STEP 10:
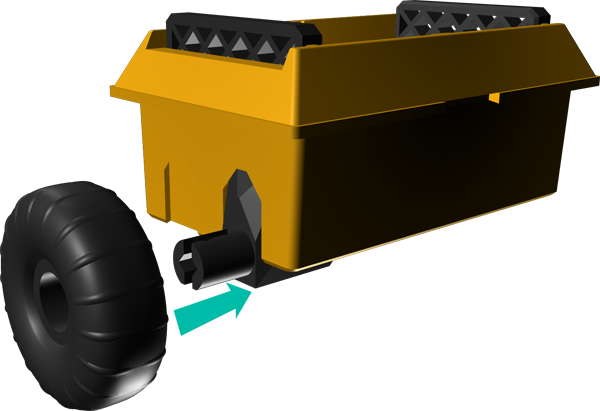
Slide a wheel onto an axle. (It should roll loosely.)
STEP 11:
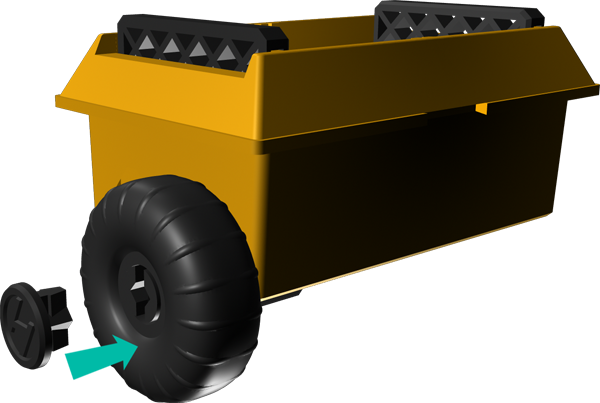
Snap one hub cap into the axle slot. Push until it snaps.
WARNING! This will not be possible to undo. Fortunately, it is very hard to get wrong as the pieces are symmetrical.
STEP 12:
Repeat other side:
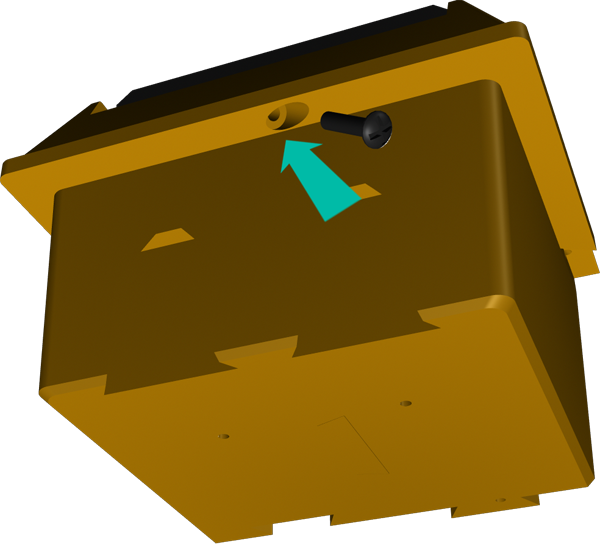
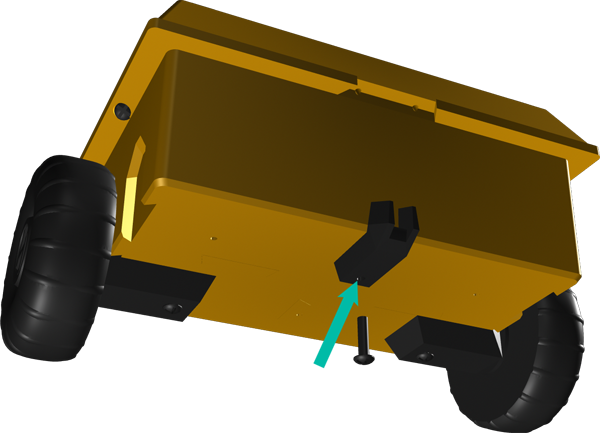
STEP 13:
Place the foot clip onto the underside of the body furthest from the axles, so the clip opening faces forward and the screw holes line up. Screw the clip to the body
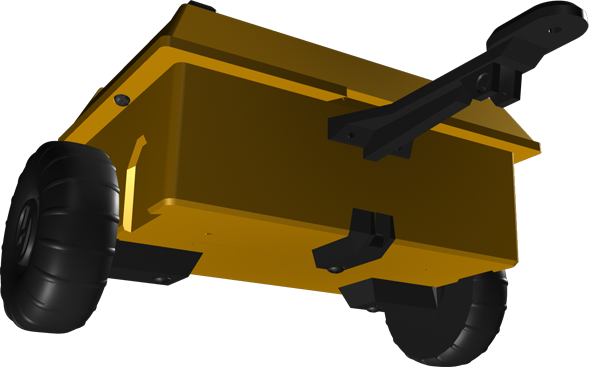
STEP 14:
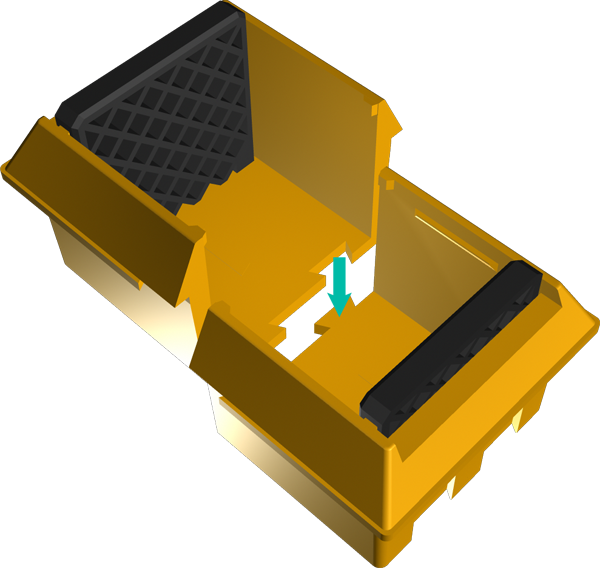
Align the tow arm into the slot in the rim of the body facing the same way as the leg clip.
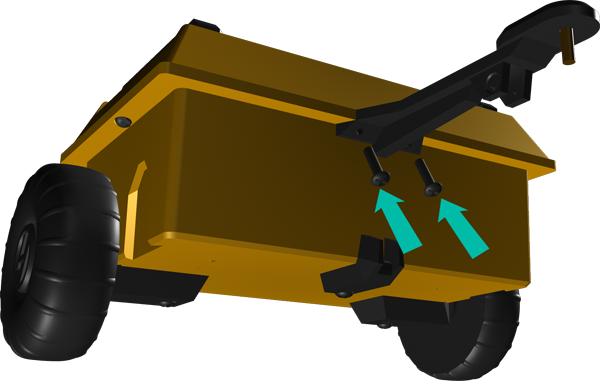
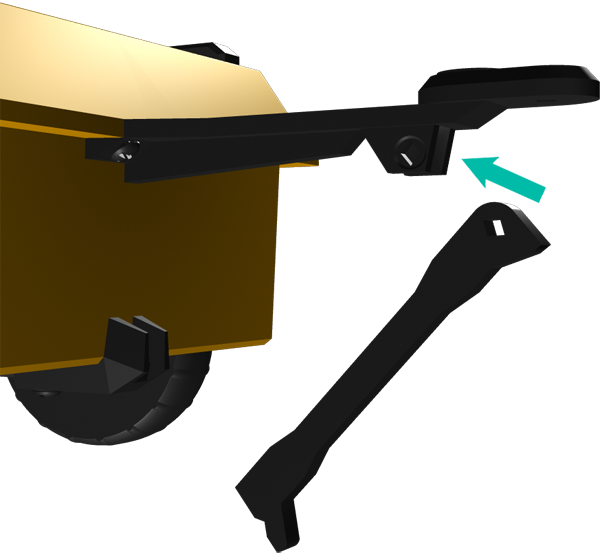
STEP 15:
Screw tow arm to the body with 2 screws:
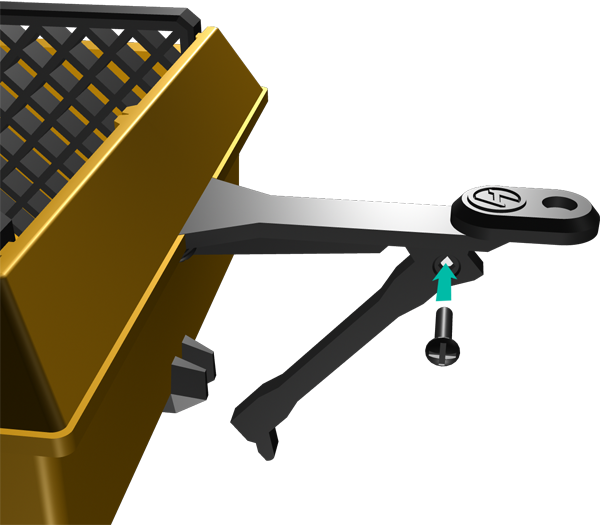
STEP 16:
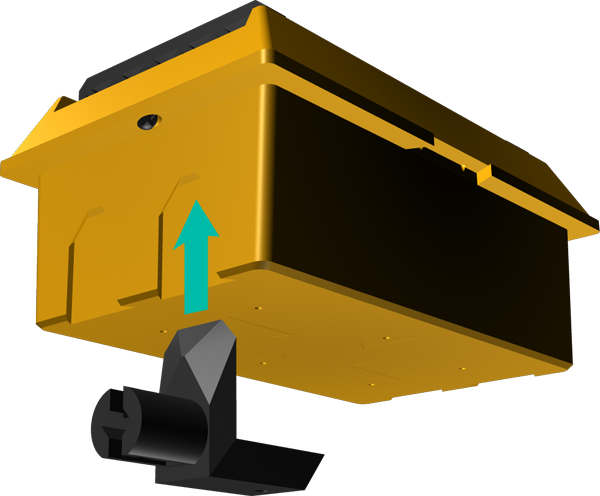
Slide the top of the leg into the gap towards the front of the two arm. Make sure the foot is aimed forward.
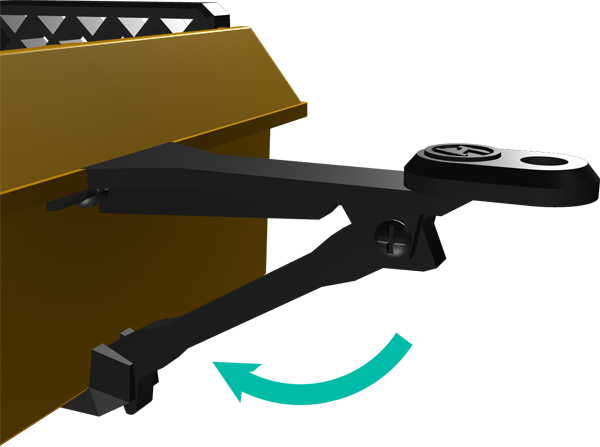
STEP 17:
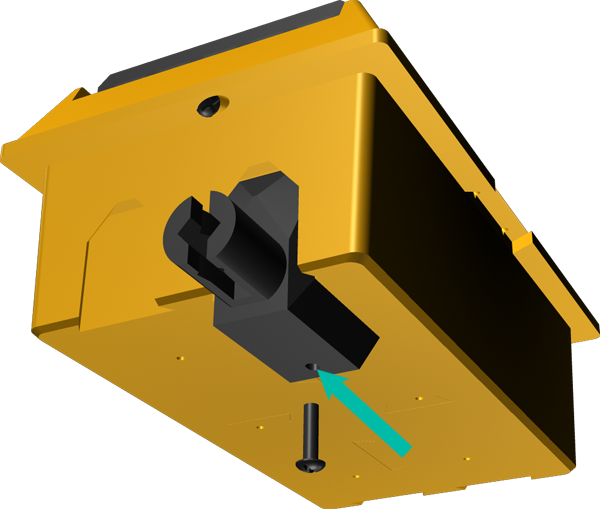
Screw the leg to the arm snugly, but ensure the leg can swing:
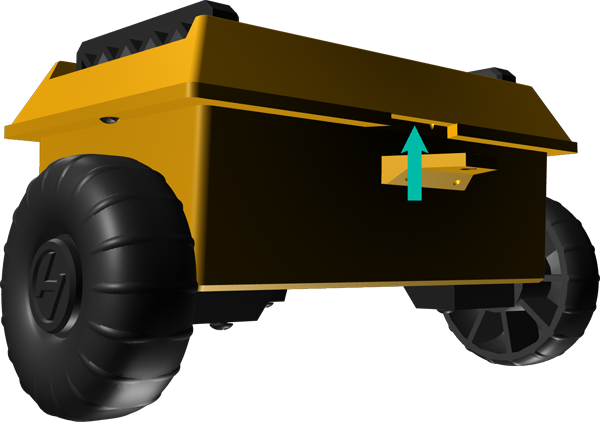
STEP 18:
Snap the leg to the leg claw when the trailer is being towed. Unhook it and let it drop, angled slightly forward, for when the trailer is unattached.
STEP 19:
Insert the metal tow bolt into the hole at the front of the two arm. A little Super Glue will secure it if it isn’t tight enough.

STEP 20:
Slide the rear tab into the slot under the body rims on the side opposite the tow arm (closest to the axles):
STEP 21:
Screw the tab to the body with 2 screws. This tab should have a brass eyelet already attached.

OPERATING THE RACCS PLATFORM:
The RACCS Platform is optional. If you wish to use it, follow the above instructions. If you wish to remove it, do not attach it to the body. To remove it, simply loosen the screws on each side of the body and remove the platform halves.
The RACCS (Ready Attachable Configurable Component System) Platform has a clip that allows you to stow it into the sides of the cargo bay, ready to use when needed.
To deploy, pull the platform sections up until it has reached the max distance upward.
Then swing the section down.
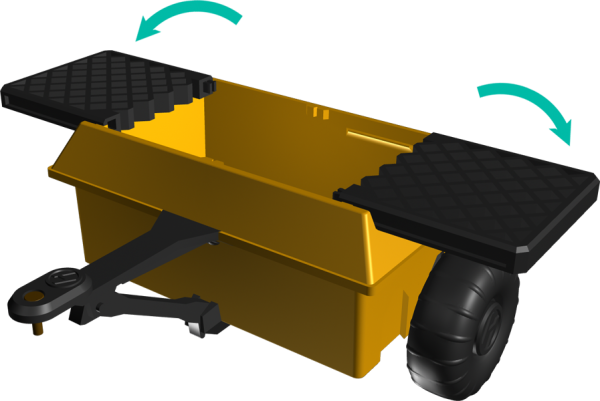
You may leave the section there if you want RACCS Modules deployed on these “wings”.
Otherwise slide the two halves together so the tabs and slots fit and snap together.