SPIDER – Surface-Penetrating Imaging and Dimensional Electromagnetic Radar

INTRODUCING – SPIDER

Surface-Penetrating Imaging and Dimensional Electromagnetic Radar


3D MODEL

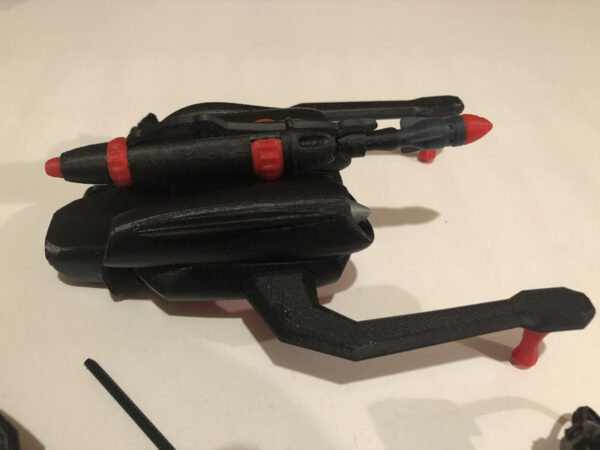
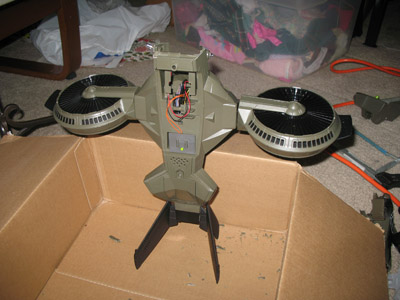
This is the second prototype I’ve created within a month. (See my Centrifuge) While the details will remain sketchy for the moment due to some supply issues and details I want to update, the basic idea is a Ground Penetrating Radar that the Adventure Team can use to locate buried objects. In crime, searching for bodies is often a use. But for an Adventure Team, searching for underground buried dinosaur skeletons or buried statues might be a good use.

This has been an idea I have had for years. A GPR normally is a box that you’d push around with handles, but every time I think about it all I see is a lawn mower.

I spent a fair amount of time trying to come up with a handle system that would fold down over the body, and I had it all figured out, then I realized that this is the Adventure Team we’re outfitting, not some amateur or government organization. Huxter Labs would create an Autonomous Ground Penetrating Radar. No need for handles, any more than you’d need one for a remote control car.

As a detail, I added a heat sink to the top, to imply that the energy source needed to power the powerful ground penetrating radar needs a set of cooling vanes. (My Atomic Charger also has vanes, an homage to the Trouble Shooter radio.)

And when I designed it it really looked a lot like a spider. So I decided to call it the SPIDER. And to add some realism to the concept, I added a red hour-glass-like black widow marking. (These will act as a send/receive radio pair.)


COMPLICATION!

Dollar Tree, once again.

Last year I bought a couple of head lamps that were readily available at Dollar Tree. (This is where I say again that I should buy up about 40 of anything I see that I even remotely suspect I can use.)

So I prototyped this SPIDER to fit these head lamps:

Now Dollar Tree has none. NONE.

And I’ve visited quite a few around me. So I went online and ordered 48 to come to my nearby store. A week later, the order was cancelled claiming the local distribution center didn’t have enough in stock to fulfill the whole order. However, they made no attempt to inform me of whether they had ANY in stock anywhere. I figured since I used the “deliver to my local store” option, that they were only looking in the local distribution center. So I re-ordered with a shipping to my house option. Still waiting to see if that got through.

So the whole prototype is done and works, for this head lamp I may never be able to get anymore.

However, in a weird twist, a new version of this head lamp is making the rounds. They are easily found online, and so I ordered a bunch.

And how weird is this? I drop into a local store, and there they are on the shelf! Packs of two. So I bought a pack to test. And they are quite a bit smaller than the first ones, and rounder, and the real sticky problem is that they moved the switch.

The switch of the originals was on the side, making it simplicity itself to push a button into the body of my SPIDER and it would push the button perfectly.

The new one – the button is on bottom.

So I have to make a lever that you can push down, and it pushes UP on the button. This is fine. I can deal with that. It’s not a deal breaker.

And since it is smaller, I can compact the design a little if I wish.


UPDATE: Aug 18, 2024

I got an e-mail from Dollar Tree with a tracking number. Apparently, my second order worked, as not having it delivered to the store meant they didn’t have to rely on a local distro center! Here’s hoping I get the whole order. Then production can begin in earnest.


FEATURES

The lamp itself has 3 settings. Bright. (I mean don’t look directly into it bright. It hurts.) Less bright. And flashing. (Not great if you have epilepsy or are triggered by flashing lights, but you can quickly cycle through that setting to off).

The hinged top secures with magnets.

The body hinges up from the front to allow you easily remove the light, and change batteries (3xAAA).

The wheels are free-rolling, and feature the Huxter Labs logo on the hubs.

It will come with a control tablet. I may make a little carrying slot on the body for it.

This is the screen. If you need a copy of the sticker, download this and print it.


Huxter Labs Centrifuge

For some time now, I have wanted to do some field medical equipment. Among others would eventually be an IV station, a portable X-Ray or mini MRI machine, and included in this was a centrifuge for separating out blood and other fluids. But it would also have uses in geology and other Adventure Team missions.

GOAL

My plan was to create a piece of equipment that definitely looked medical. I did a lot of web searching for medical centrifuges, and a surprising number were white and blue, and I had just gotten these lovely turquoise and teal filaments, and as the Huxter Labs logo is blue (though I lean towards turquoise sometimes) I thought I could make something quite lovely.

I wanted to spin these glass bottles I got for the Save the Endangered Rhino set I created in 2014, and recently revived as a whole new set with Cotswold Collectibles. I wanted the vials to fit into these buckets that would be hinged at the top to spin outward.

A centrifuge works by spinning very fast and causing centrifugal force to act as extra gravity that causes denser particles in a liquid to work their way to the outer part of the circle, while less dense particles are pushed towards the center. Just like gravity, but faster.

So I put the buckets on little hinges (clipped pieces of a paper clip) and they dutifully spun, and when the motor is turned off, they slowly spin and angle back down to rest.


POWER

Recently, Dollar Tree stocked some battery-operated mini-fans. These fans had a battery compartment for 2 AA batteries, a switch, and a quiet fast motor. For $1.25 per.

I bought a couple and started measuring out and planning. My first goal was to get the motor to fit into a chassis that would look fairly cool, be similar in theme to my previous Huxter Labs RACCS equipment, and still have room for the switch and battery leads, without having to rewire anything. I don’t like soldering, and if all of it is in place without alteration, that’s a huge win.

The first attempt used two AA batteries, but the bulk of the battery compartment I had to make (from scratch, to fit the metal spring, bump, and rear connector so two AAs can work together) and it worked fine after a fair amount of effort. Then I figured two AAAs would be smaller which would allow me to reduce the bulky base a bit.

And the battery would spin the motor for a while, but soon run out. So I thought of moving to a 9V battery, which should make the motor spin faster.

And that worked too, but for this centrifuge to actually (I mean for real) work, the spinning would have to be done over a fairly lengthy time, and batteries wear out too fast.


EUREKA! USB!

I could throw out the bulky batteries entirely if I could buy some USB-C sockets and allow people to power this thing by a USB-C cable.

USB-C? Why? Because the world is moving to USB-C. It doesn’t benefit me much here, as I am using only to get the power output, but the idea of not having to figure out which way up to plug in is quite attractive.

So I found some USB-C sockets and bought a few to test. And they work!

Connect wires to GND and VBUS and you get a consistent 5v power, and when I touched the motor wires to these, the thing spun very satisfyingly.

So I set out to refit the body to take these little USB-C circuit-boards.


To RACCS Or Not To RACCS?

RACCS is the Ready-Attachable-Configurable-Component-System, a rack I created to fit on the back of a GI Joe Adventure Team All-Terrain Vehicle so Joe can configure his own adventures using various modules I created. (Search this page for RACCS and you will see a bunch of them. But there are even more I haven’t take time to write about yet.)

When I was creating a prototype for a new Weather Tracker or Environmental Analyzer, I found a way to make RACCS pegs fold up so new units can act either as standalone equipment, or slot into the RACCS slots. So by folding down these hinged pins, you can attach this Centrifuge to a RACCS-equipped ATV.

(Oh, I also created a new version of RACCS that has legs, so it can also act as a table. In fact I made a set of legs that are also compatible with previous RACCS by slotting the legs into the pegs used to attach  the rack to an ATV (or Training Tower).

I will talk more about this project later but for now, I’ll just link these videos I created to show the prototypes in various stages of development.


Update – Aug 15

Well that kinda worked, but only kinda. I redesigned the chassis (shrinking it significantly) to accommodate the USB-C port and it worked. For a while. I got the motor spinning and it spun gorgeously.

However, on repeated tries, the motor began to judder and stop. And the USB Power Bank I had shut down every time I tried it after that, and my plug-in USB power block’s blue light went out. Something is reaching the USB charger controllers and saying “Uh, there’s nothing there dude.” or something like that.

I highly suspect I’m burning out the motors. I am not sure what amperage USB-C puts out, and what amperage the motors can handle, so I am pretty sure this isn’t going to work. But it could have been a fluke.

I soldered in another motor and the exact same thing happened. Worked for a while quite nicely, but shutting it off and restarting it a few times resulted in a dead motor.

Oh well.

This, as with most of my new products, is in a prototyping phase, which is when you go down dead ends and find out what works and what doesn’t. 9V works, but the power doesn’t last long. 2xAAA works, but same. I’m going back to my original idea of 2xAAs and recommend buying rechargeable batteries.

At least I learned a little something about USB powering.

And also I bought a bunch of these little USB powered hand-vacuums at Dollar Tree that are wired into a USB (standard) cable and so I may just revisit the USB version of this later, with its own cord, since that motor seems to work fine, probably has some regulator on the circuit board or something I do NOT have with my Centrifuge.

I’ll keep posting updates here.

Some Recent Call-Outs

A couple of months ago, I sent some of my GI Joe 3D printed toys to two people. A nice CARE package for each, including some of my various toys I knew they did not have.

Each of these guys have some of my toys, but not everything.

I sent a box to Paul Knapp, who hosts a podcast called “Live from the Man Cave”, and a box to Jeff Sherer who runs Skunk Works Studios and does weekly podcasts.

Paul and Jeff are two very devoted fans of the toy collecting hobby, spending a lot of time on podcasts, reviews, and engaging with other fans.

So I sent them some toys.

Here are two videos Jeff and Paul posted showing the boxes I sent:

Skunk Works, especially, has featured many of my toys in the past, and I’ll post some of the videos here:

READY.[ ]

As a lover of the Commodore 64 (where would I be without it? It gave me a career and a life) I have always wanted to do this:

If you know, you know.

If you don’t, this is the input prompt for the Commodore 64. The C64 prints “READY.” and on the next line a flashing square (rectangular in NTSC versions) cursor awaiting your command.

To make this, I grabbed a screenshot much like the above, then imported it into a vector graphics program and drew the letters and cursor in vector lines. This is then fed into my Cricut software as cut lines, and I used a nice sky blue Permanent Vinyl material.

I cut the shape, then culled out the plastic I didn’t need (this is known as weeding) and then pressed a sticky transfer sheet onto the design and took it to my car where I peeled off the plastic’s backing paper, applied the design with the transfer sheet, then carefully peeled up the transfer sheet leaving the design behind.

And lest anyone worry, this is a fairly permanent material. Several years ago I applied a similar material to a side window in the shape of the Perseverance Rover logo, and it’s still on the car.

It has a few heat cracks now, but they appeared long after I applied it.

I also placed a Huxter Labs logo on the opposite side window from the Rover logo.

For anyone who wants the vector file of the READY. C64 prompt, for some reason WordPress does not allow .svg vector files.

However, if you right-click on this link and SAVE AS, it will download the .SVG file:

http://huxter.org/files/Ready_For_Cricut_Import.svg

Clicking on it will view the vector line drawing, but right-click-SAVE AS will download the file for your use.

Huxter Labs (Huxter Industries) – Where did the Logo come from?

For some years now I have been creating toys under the Huxter Labs and Huxter Industries names. The back story is that Huxter Labs (or Huxter Laboratory Industries) now outfits the Adventure Team in an unofficial capacity. And for years I have been using this logo:

So where did this come from?

It is a simple evolution of the Adventure Team Logo.

The Adventure Team Logo is an A and a T in black on a red field. It has been in use since 1970. It has been revived in more recent years by Hasbro as a Classic Collection series of figures and accessories, and even used on a few Sigma Six figures.

Every GI Joe Adventure Team enthusiast knows and loves this logo. So I decided to make a logo that would evoke the original while being wholly my own.

First, I removed the upright that forms the vertical part of the letter T:

Then I split it down the middle:

Then I flipped the right vertically:

For the Huxter Labs Logo:

But I didn’t want it to look too much like the Adventure Team, so I removed the red field:

Then decided on a blue color.

But why this shape? Just a half-upside-down AT logo?

H for Huxter:

L for Labs:

And if I want the option to use the Industries part:

I hope that clears that up.

Mission to the Isle of Doom – A New GI Joe Set

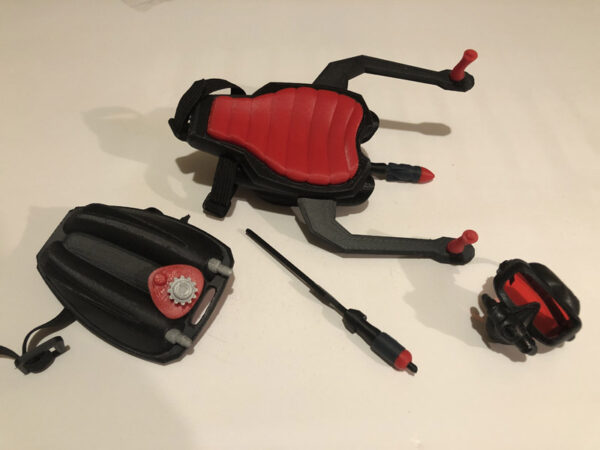
Earlier this year, Greg Brown of Cotswold Collectibles contacted me to put together a new set. The idea would be to make a new SCUBA set with a black neoprene suit, flippers, mask, air tank and sea sled. Greg would have the suit and flippers made, and wanted to use the backlog of orange SCUBA hoses he had in stock.

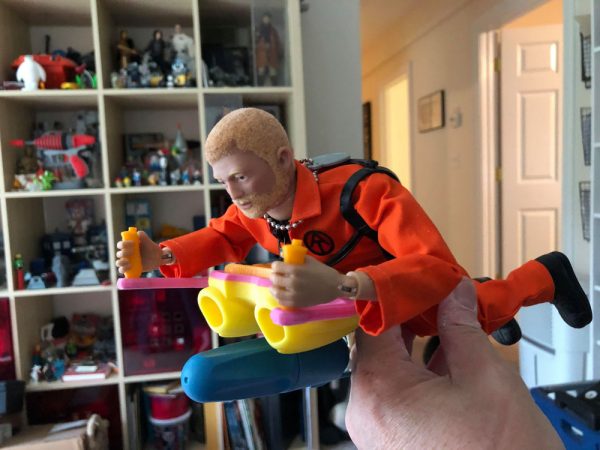
The ask was to reuse the Sea Sled from the Catastrophe in the Gulf set we had done in 2021. Reprint the Sea Sled in orange and black to complement the black suit and orange hoses.

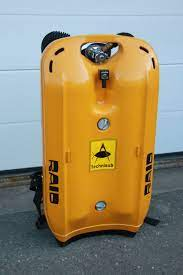
But he also wanted a new air tank, unlike the one I made for the Gulf set. And he sent me some images of existing high-tech SCUBA tanks to prod me.

I ended up making one that both fit the original ideas, as well as complemented the Sea Sled, so the two together looked like a cohesive set.

(Scout is helping)

The Catastrophe in the Gulf Sea Sled was using an existing third-part battery-operated motor, very similar to some original GI Joe gear. Back in the 1960s and 1970s many toy used motors much like this, attached to boats, submarines, and even GI Joe sets. So it was fitting.

However, for the new set, Greg didn’t want to add a blue motor, so I came up with the idea of a spear gun, slung in its place, fitting to the very same peg that was already modeled into the Sea Sled.

(Early version shown before I figured out the spring trigger.)

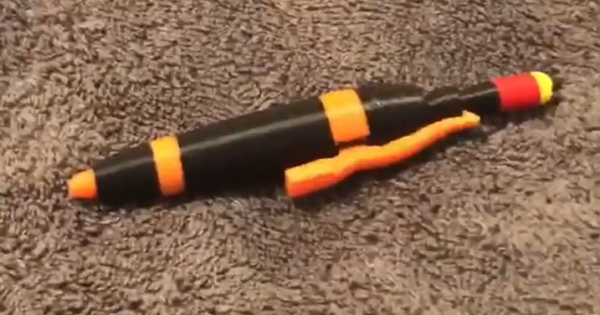
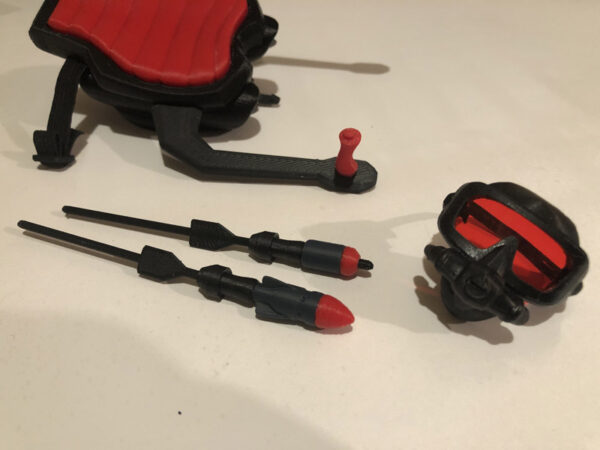
This Spear Gun would have to be large enough to house a spring, a firing mechanism, and to fit spears. I came up with a pretty cool design using the springs I had previously used for the detonator for the Spy Island set. To make that work I had to make side slots to fit the spear in so it would fire properly, and to do that I had to add fins to the sides of these spears. The fins are what the spring pushes against. Without them, it would not have been possible. But since fins would naturally help guide a missile through water, it seemed fitting. Unique design, probably not seen before.

I made two spear heads, one an explosive tip, and one a missile tip. I have a few other designs in the wings I can use for expansion sets or new sets if I want.

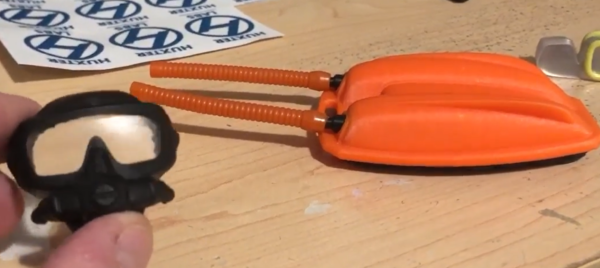
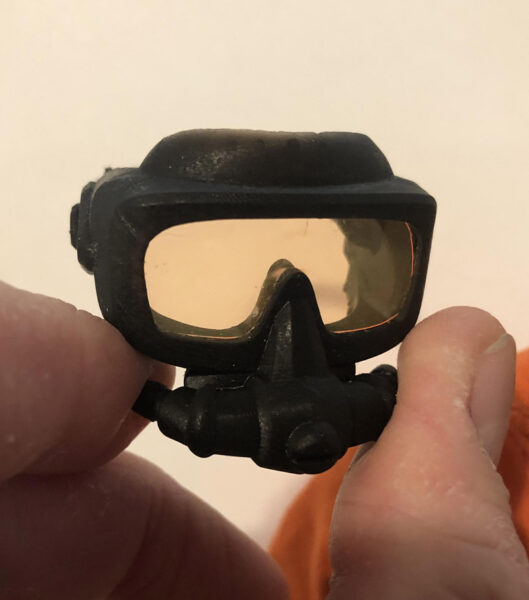
The mask was a challenge. I was going to go with the same mask I had used for the Gulf set but that one was an “innie”, it had holes to fit paracord. This one had to be an “outie” to fit into the existing hoses. And also, the original face breather had paddles on the side to fit into the thick blue head cover. It was clear early on that the new black suits were not as thick, and that would not work, so Greg asked for a full face mask, and it was a bit of a daunting task. It took a while to design and get working, and in that scale, it really should be printed in resin on my resin printers, which can only operate from May to October, as I have to print in an unheated garage.

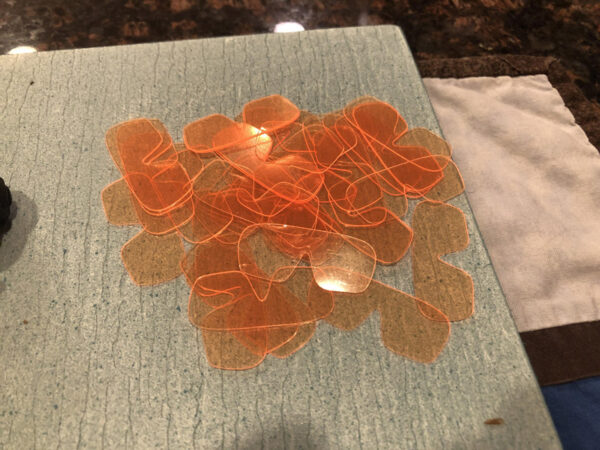
So it took a while, but I eventually designed a face mask that is quite modern and quite nice if I do say so myself. I modeled a slot all around the eye opening to fit a clear plastic visor. And since it was a 3D model, I was able to take the shape of that slot, separate it out, and straighten it (since it was modeled on a curve) and then use that line image to move to a vector program to create a file to cut on my Cricut desktop cutter. I bought some light filter plastic film and cut out the mask visors.

Snapping them in place was a bit challenging, but once they got into place they fit perfectly.

I found some small gauge elastic (harder than you’d think) and epoxy-cemented them into place for a nice fit.

I have to say it is a pretty impressive set as a whole. It came together perfectly and the elements all look like they belong.

Some have compared the set to James Bond or original Adventure Team, and I ain’t mad about that. Clearly Adventure Team is my main inspiration, but in this case Bond came to mind. And while the inspiration is visible, these are entirely my own design.

When I was done I created a version of the set in red and black (with red visor) and it will go with my Spy Island set as a further addition. A one-off for me.

Skunkworks YouTube channel reviewed this set. Check it out.


Seaside Chess Set – Revisited

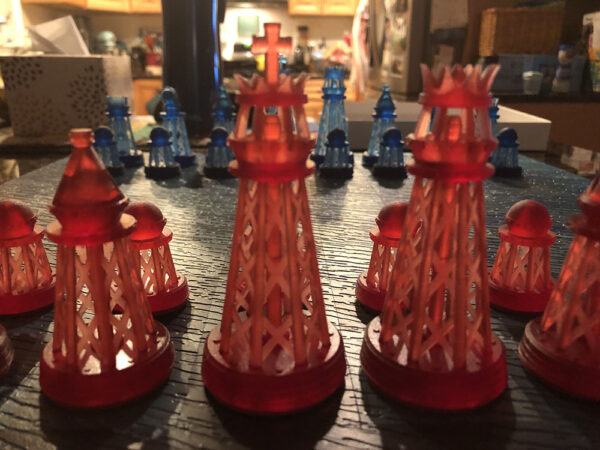
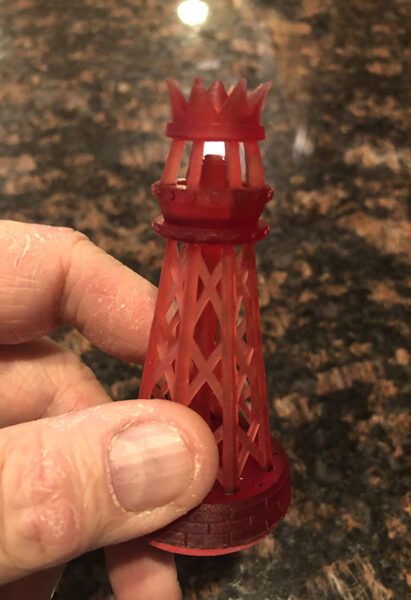
In 2013, not long after I got my first 3D printer, I immediately wanted to make a chess set, but not a typical chess set. Not the typical turned-on-a-lathe set of columns, but something unique. I think I must have recently been to a seaside and visited some lighthouses or something, because those structures were solidly in my head, and I had a great idea for a chess set.

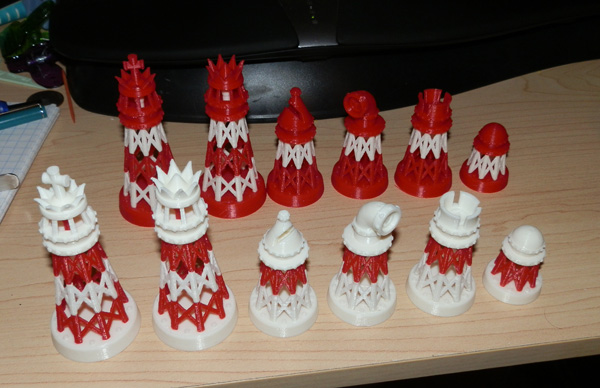
However the result was ultimately disappointing. While the concept of having two-colored structural beams as the body looked Ok, printing it with my 3D printer (an FDM Printer using reels of ABS filament) did not achieve quite the effect I wanted. I wanted heft, some weight, and these printers print very light. I could weigh down the bases with washers or nuts, but ultimately, the printer didn’t give me the resolution I wanted. So this set went unattended for many years.

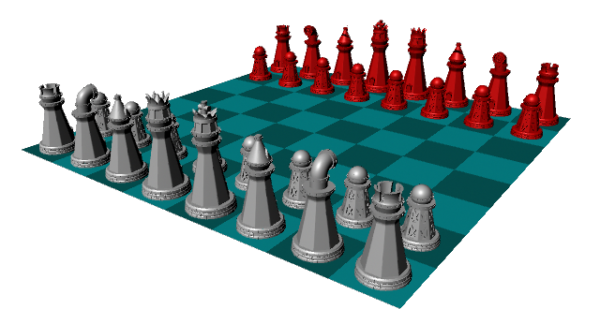
That said, I did do a solid set with solid walls for Afinia two years later, or for a competition or something. I forget why, but I did that, which was more or less an adaptation of this set, with a brick base now, and an octagonal solid building structure, but the heads were the same.

Even here from the render I took of the pieces laid out in the modeling program, you could see my intent for the board. This version was made in 2015.

When I got a resin printer, an Anycubic Photon, I finally had something that could not only print these pieces in a much higher resolution, and also solid resin is heavier than hollow plastic.

I did, however, have to remodel everything as solid, since they were originally made to be printed in multiple pieces and assembled. And unbenownst to me, there were some errors in the models.

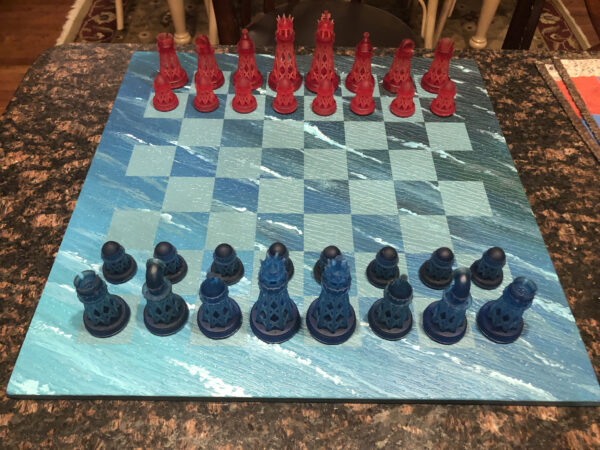
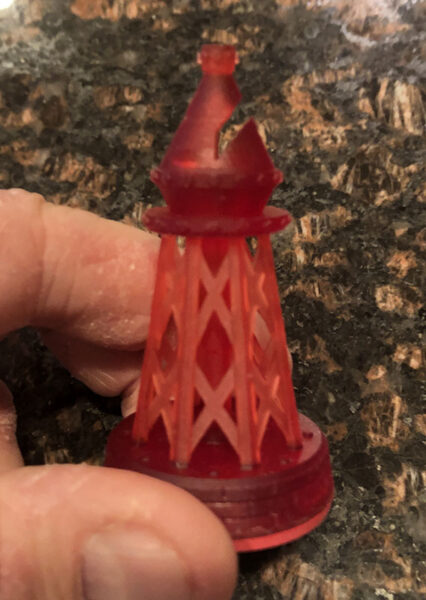
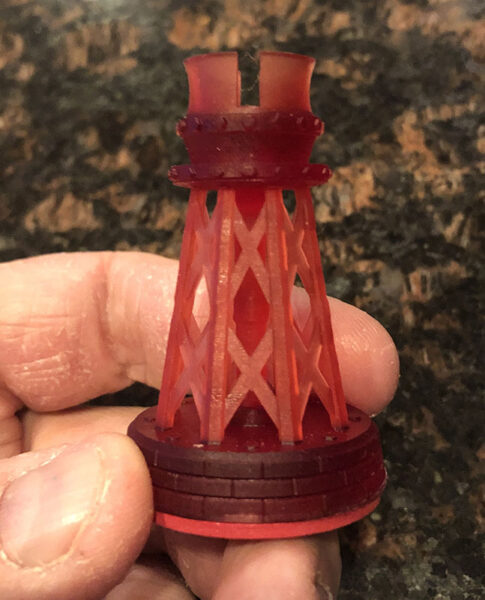
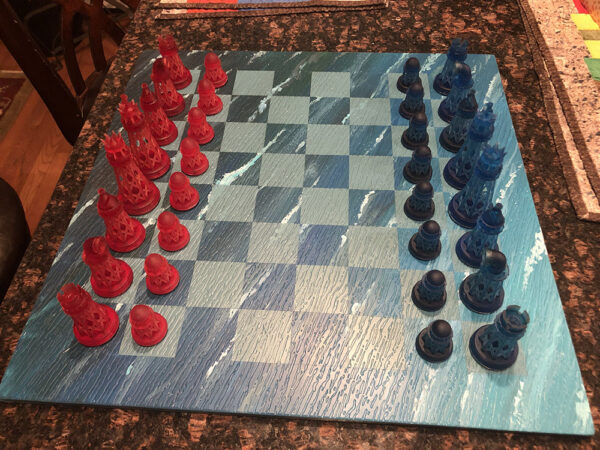
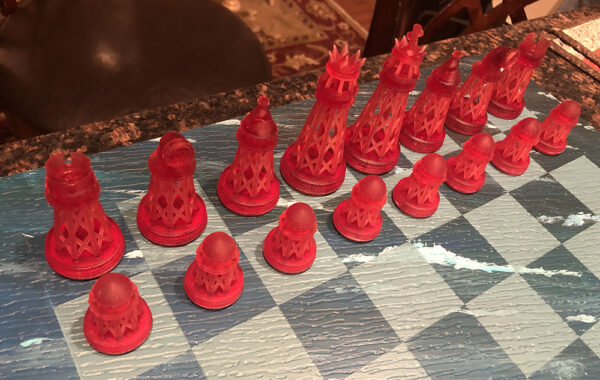
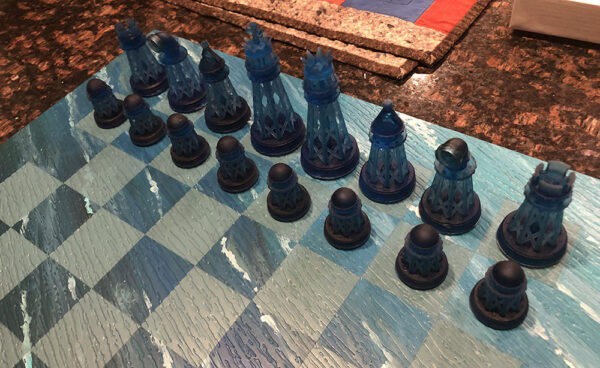
I printed them in a semi-transparent blue and red. And they came out far better than expected.

A blurry photo. Here you see the Bishop, King, Queen and Pawns.

Closer detail of some:

King and Queen

Eight pointed crown indicating she can move in 8 directions. Tall, pointed crown. The King has the same crown, but is smaller, and has the typical Cross on top.

Bishop

A diagonal cut in the head indicates the Bishop can move in diagonal directions.

Knight

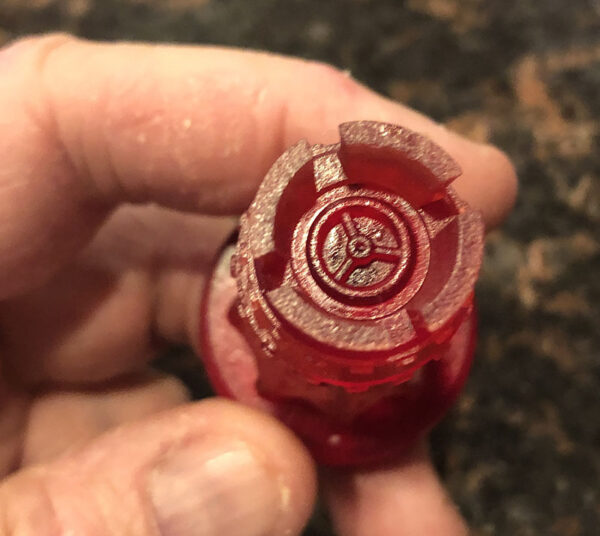
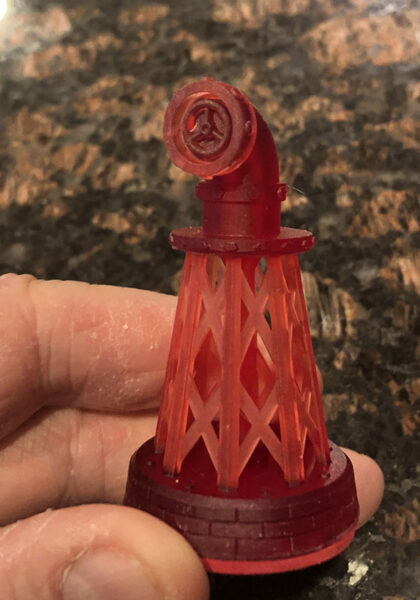
Bent pipe is intended to give a similar impression as the more standard horse head, indicating that this piece moves in an L shape direction. Note the valve wheel. This is a repeated theme. The Bishop and Rook also have this detail.

Rook

The Rook has a four-part parapet at the top. Also, as I said, the valve wheel sits atop the piece.

Note the slightly pebbled finish. This isn’t the resin printing, it was the satin clear-coat overspray.

The wheel is inside the mostly hollow head of the Bishop too. It is hard to see, but if you ever look closely in there, you will see the value wheel.

The Board

It took me a long time to consider how to make a chess board. This was going to be for my daughter-in-law, who, with my daughter, got into playing chess a while ago. They live in a small apartment and I didn’t want to burden them with a large heavy chess board. Sadly, it still had to be large, but didn’t have to be heavy.

I am not a wood-worker, so I didn’t really want to make one out of wood. Nor ABS plastic. That would look cheap. I went to my local hardware store and was seriously considering square wall tiles in two tones of blue, or blue and white, but man, those tiles are heavy.

Then I remembered a plastic wall sheet I had used last year to cover a hole in a wall put there by people repairing a crack in our basement. It was just less than 1cm thick, and plenty large to cut a board from, and it also had a grainy surface, I assume meant to look a bit like wood grain, but might also work well as water waves.

And in order to get a more natural wave idea across, I opted not to cut the board with the grain. Instead I angled the board to an angle that made for a natural flow of water on an angle across the surface. So I cut and sanded the edges smooth. The plastic cut rather easily with a carpet knife.

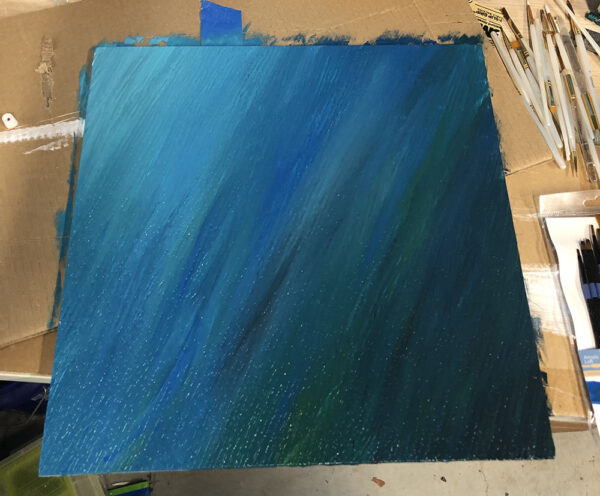
Then I used fine art acrylic paints, which I had used previously on some paintings I did for myself. I started with shallow water, a turquoise, and gradated it roughly out to a dark, deep water on the opposite corner.

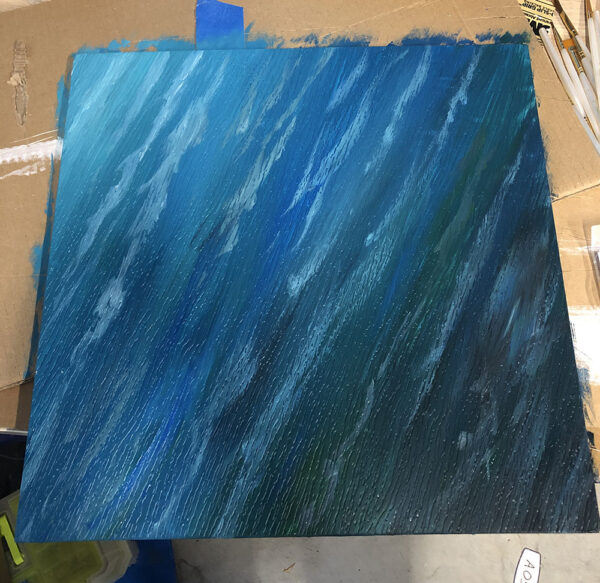
Then I painted some wave differentiation:

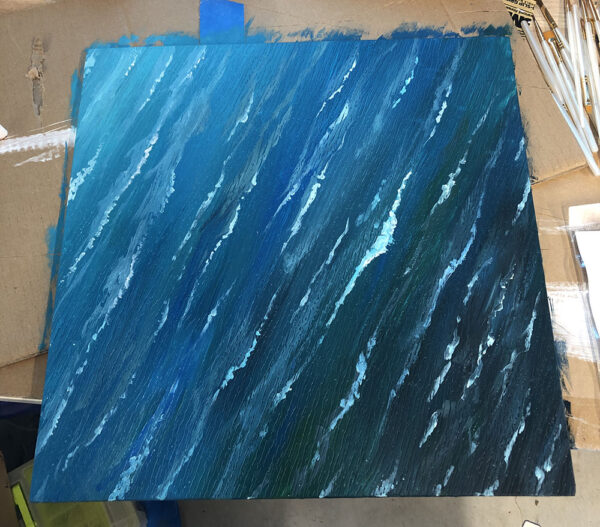
A bit rough for now, but more or less what I wanted. Then I painted in breakers:

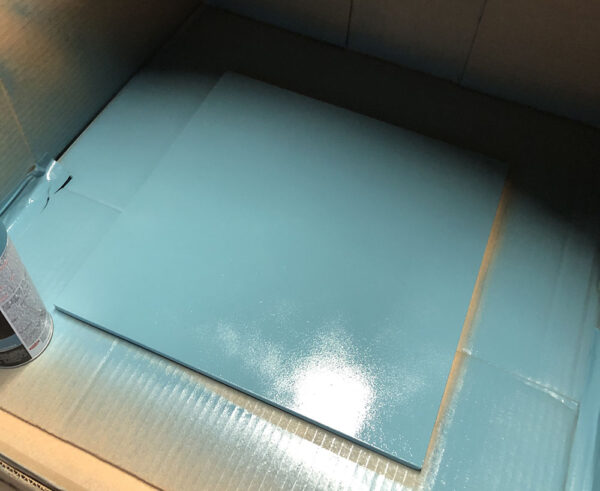
And I was done. Then I spray-painted the underside with a satin teal.

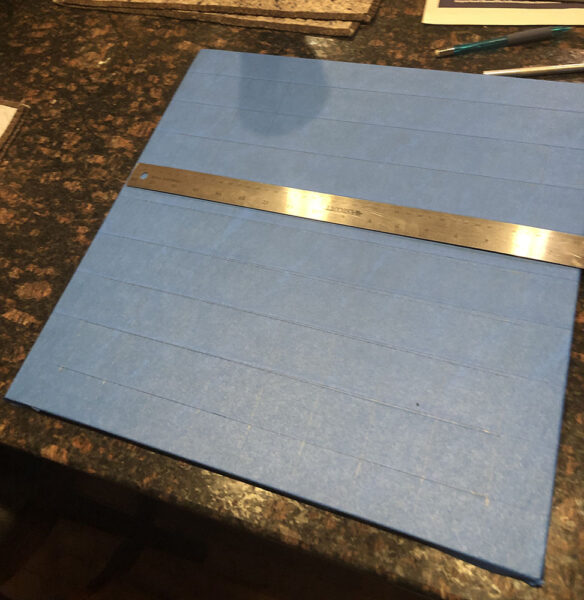
Once all this dried, I covered the entire board with blue masking tape, measured out the squares, and penciled them in.

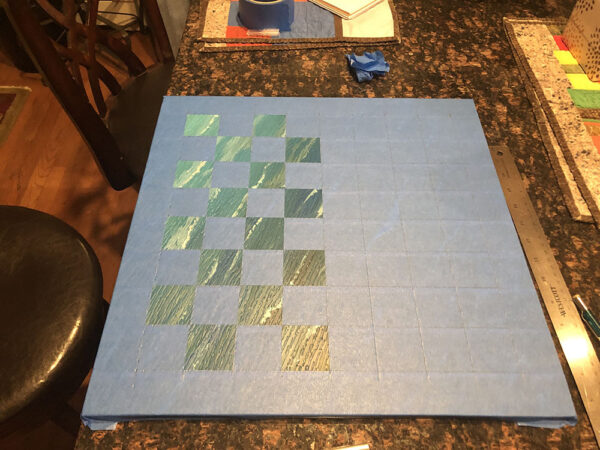
Then I cut those lines, and peeled alternating pieces of the tape:

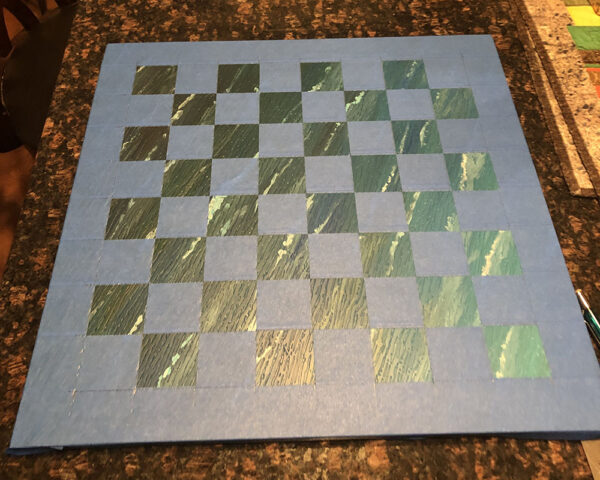
Once I had all the pieces peeled:

I sprayed the open pieces with a light spray of the same teal I used on the underside.

Overall, this came out exactly as I had hoped.

Kinda.

Yeah, I made a few OOPSIES here and there:

A Box

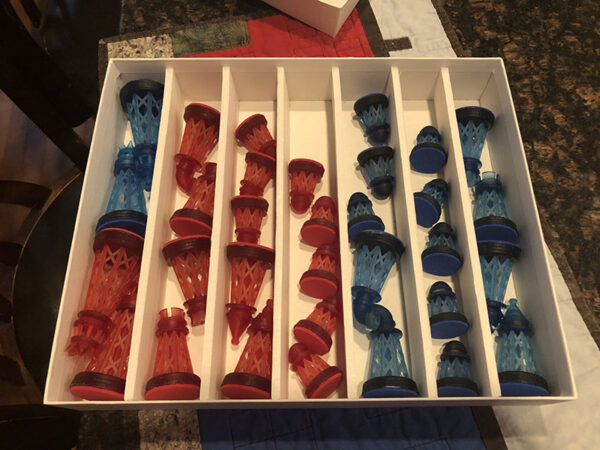
Then I needed a box to keep the pieces in. I found one at Michaels, and used foam-core and white glue to make dividers, to keep the pieces from bashing around inside. Resin doesn’t like that, even though, I had spray-painted all of the pieces with a satin clear-coat to prevent scraping and marking that happens with cured resin parts.

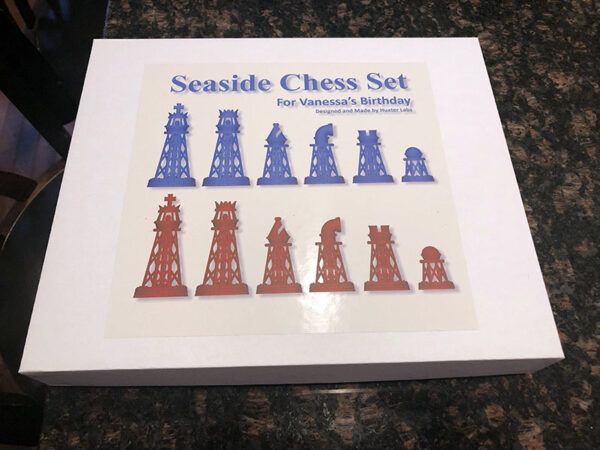
I just rendered a view of the pieces, and added text on a label and put it on the box lid.

And inside:

Result

Yeah, I was pretty happy with how this came out.


Some Random Thoughts on Interactive Fiction

… now that I’m writing IF again.

Interactive Fiction was invented in the 1970s and was not called that at the time. ADVENT, the short file name for Adventure, which later became Collosal Cave Adventure by Will Crowther started it all. A fan of spelunking, he converted his exploration experiences into a computer program that let you explore the very caves he did, only in text on a computer.

Don Woods later added to this program, adding some Tolkienesque fantasy elements. This would later be adapted by the good folks at INFOCOM as Zork, one of the most popular and beloved computer games of all time and spawned several sequels.

Aside: Recently I attended a dinner party for several hundred under a tent in Hudson, to celebrate art and support the Hudson Armory Project, and we sat with a couple older than us. The wife of the couple said she loved Zork. And she was in her seventies and talked fondly of the game. It was also the introduction into computer games for millions of people.

Generally, in a typical IF game from that era, you would be placed in a world of rooms, connected by directions, so you started in one room, and that room revealed exits to other rooms. Throughout the flow of the game, you would explore all of the rooms, and examine and pick up many objects, some of which were useful, some not. Some were vital to gameplay, and the goal was, early on, to simply collect these as trophies, but as the games got more sophisticated, these objects presented as parts of puzzles you had to figure out. Often a broken machine, or some other thing, you had to repair using these parts.

Story elements featured strongly, even early on, but as the years and decades went by, Adventure Games, or Text Adventures, evolved into Interactive Fiction, a term coined by INFOCOM. And story elements would almost take over from puzzles and mazes to become real works of literary art.

But at the very heart of any IF game or story, is an object-oriented computer program that allows you, through use of language, to manipulate variables. That’s it. That’s all it does. You change the state of objects, and you “win” or “finish” the game/story by putting the variables of a list of objects in a very specific state.

When these states line up, game is over.

Literally –  the game is just changing states of objects, then comparing those states to desired states, and proceeding or stopping based on those states.

I work for a computer game company. My first game was a Massively Multiplayer Online Role Playing Game. An MMORGP, often now shortened to an MMO. A 3D world, animated creatures, a fully mapped world that spanned 24km x 24km. And you could run across it seamlessly from one end to the other without any zoning, or loading of cordoned-off areas. It was a fully flowable world, and loaded landblock by landblock.

Even that RPG was a long set of objects with variable states, and all gameplay was geared to changing the states of these objects.

In its ultimately reduced state, any 3D RPG is just a graphical interface over a spreadsheet.

People play the game, but what they are actually doing is manipulating all of the cells in a spreadsheet, hoping to improve the variables, which relate directly to traits in the game.

An Interactive Fiction is a non-graphical text-based interface over a spreadsheet.

It is nothing more than that.

However, the objects and variables are dressed up in text, rooms, connections, puzzles, mood – story.

Anyone can write a game of manipulating variables. But it would be uninteresting.

No one who plays an RPG or IF game would do it if the graphical representation, or the textual representation, were not there.

It is how these objects are presented to the player that makes it a real game. Or story.

So let’s consider a hypothetical example of an Interactive Fiction game, or story:

Bottom line: You need to gather three items, combine them together into a single component part for a machine, then put that part into the machine, which, repaired, stops a disaster from happening that might kill millions of people.

What’s needed?

Obviously you need the parts. You need a machine. You need three separate parts that you combine together to repair the machine.

That’s literally it.

You may name the parts “PART_1”, “PART_2”, “PART_3” and “MACHINE”, and put them all in the same room, with commands that allow you to “>COMBINE PART_1 AND PART_2” (which then creates PART_4), and then “>COMBINE PART_3 AND PART_4”, which creates PART_5. Then you can “>PUT PART_5 INTO MACHINE” and it’s game over.

During each move, the computer is manipulating variables on these objects, and each turn, compares those variable states to a predetermined state pattern.

So only when “>PUT PART_5 INTO MACHINE” do the variables all line up, and the computer prints “YOU WIN”.

But that’s not a game. I mean… it could be a game. But it’s not that interesting, and it is certainly not much of a story.

So let’s first create some rooms.

Rooms are also just objects. Also the player is an object. Room objects are simply locations any object can be in because each object has a variable: Location which tells it which room it’s in. Rooms also have variables attached which tell it what other Rooms you can be transported to if you “>GO NORTH” or “>GO DOWN”, etc. Each room has a matrix of variables which determines which object the player’s location becomes when you make directional moves via text.

So when you are in ROOM_1, and you say “>GO NORTH”, the game checks what Room is pointed to by that direction, and sets the player’s location to that new Room object.

Similarly, an object has a location, and the location can be the player, which implies the player (you) is carrying the object now.

Objects have another property called Description, which is a text string that describes the object.

So PART_1 may have a Description: “A red cylinder with loose wires dangling from it.” Meanwhile PART_2 may have Description: “A blue box with holes for wires.”

This text is meaningless to the computer. It doesn’t care. The only thing it cares about is that when you “>COMBINE PART_1 AND PART_2” these are generally removed from play by setting their Locations to NULL and setting PART_4’s location as the player. PART_4’s Description might be “A long box with a cylinder in it, with wires now connected.”

See? So by combining parts together you give the player the illusion you are doing something real in the game world. You just partly repaired a machine’s component, when in reality you did no such thing. Now you have to continue until that part is fully repaired, then you use it to repair the machine.

But the only thing telling the player this is the text. Otherwise it’s changing the location of objects, the objects themselves, and nothing more.

What about Rooms? This can all happen in one room. But what would be the fun in that? (Notably, some very excellent games do take place in one room, but most happen in larger environments, some quite sprawling.)

So we make more rooms. We generally create a building or a complex, or an outside area, a forest, whatever. It doesn’t matter really. Inside the computer it’s still just a series of objects connected through variables.

Should each room have a purpose? For this game, should there be only four rooms? One holding the machine, and one holding each of the three parts you must combine together to repair the machine?

It would be more fun for sure. But is it fun enough? Why not create a dozen rooms and make the player hunt for the objects? Better.

Then you can hide the objects by putting them in Containers, which are simply objects that can hold other objects. And a property can say they are hidden when inside a Container object. So you may have to “>OPEN SAFE” to reveal what the SAFE object holds within it.

You can make it so that you must have an object to get another object. Like a key, which you may have to search for first, before you can >OPEN SAFE to find the item you really needed.

So it is important to have more rooms than you need, probably. You can get away with a minimalist approach, where every room holds something useful, or you can embellish the world by having intermediary rooms that have no purpose whatever except to provide the illusion of a more meaningful, fully fleshed-out world.

Perhaps to get from the Machine Room to the room that holds PART_1, you have to move through East Hallway, then Middle Hallway and finally West Hallway, before you can get to Dark Closet, where SAFE’s location is set to, and “>OPEN SAFE” which reveals the PART_1.

Some games do this to extremes, creating mazes you have to traverse before you can get to Dark Closet. Some mazes are so twisted that they can twist back on themselves, and can be completely non-linear and make no sense if you try to map it out on paper. These days, however, mazes are considered passe, or at the very least, unnecessary, and in many eyes, annoying.

It’s a fine balance to know how many rooms should have no purpose but to be an intervening space between rooms that do matter. 50 rooms when only 4 are important? Excessive! And highly frustrating. 50 rooms when 20 or 30 are important – may be a good balance.

Even if a room is unimportant, it is generous to give a player something to see or do in those rooms, both to distinguish them, to make a player remember them in a mental map, and just for world-building detail.

So you make a fully fleshed-out building with rooms with no purpose connecting rooms with purpose, within reason. (Reason being a highly arbitrary term.)

And objects? What if a game only had objects that finish the plot? Wouldn’t that also be less than ideal?

So we might create a number of pointless objects. Red Herrings that have no purpose other than to fill out the world. Some might even do cool things, even though they have no real effect on the outcome of the game.

Would you create a Kitchen without a Counter, Stove, Refrigerator, Sink? And would you not want plates, salt shakers, food, etc, to be present? Even if they do nothing?

But what of that? Should they do nothing?

At the very minimum they should have a description. “A half-full salt shaker.”

But what fun would that be if you couldn’t do things with these objects?

“>SHAKE SALT SHAKER” should give some kind of textual response, like maybe “You sprinkle some salt on the floor.”

“>TASTE SALT SHAKER”
“Mmmm, salty.”

Again the balance of useless but fun objects should be carefully weighed. When you encounter an object that matters, it should seem like just another thing, but in fact is actually important to the outcome of the game.

Ambient objects have variables that may mean nothing, but vital objects have variables that affect the outcome of the game when the game checks to see what variables line up with the desired end state.

So you want a series of rooms, only some of which are useful. And a list of objects that fill out the world’s story, but have no real purpose. And a list of objects that do have real purpose.

Debate rages on about unnecessary rooms. Some people think they are superfluous and no room should exist that has no purpose. But there are many reasons to have these rooms. Let’s say for example you have a hub room that leads to many rooms in the 8 cardinal directions, but each of the other rooms you may want to put a door. If you try to put 8 doors in the hub room, and you ask “>EXAMINE DOOR”, you will confuse the game. Which door? There are eight doors in this room.

A common solution is to make RED DOOR, BLUE DOOR, GREEN DOOR, YELLOW DOOR, etc, and since the parser can understand both words as the object, >OPEN DOOR will elicit a question “Which door, the Red Door, the Blue Door, The Green Door” etc. Or you can type >OPEN GREEN and it will just work.

Do you know many buildings whose doors in a common hallway are different colors? (I capitulate there may be a few…)

How about DOOR ONE, DOOR TWO, DOOR THREE, etc? More common in real world scenarios, sure, but it does tend to make you lose track in your mental map as you play. Without a physical map in front of you (most games would provide this, or you map as you go) then you would quickly lose track, I think.

To alleviate this, you can make an intervening room in each direction, each of which leads to the 8 vital rooms. Then, if you go NE towards the NE room, you can be in a hallway between the hub and the room. That hallway can have one door, and if you say “>EXAMINE DOOR” which now would have no problems disambiguating the door, since there is only one in the room.

So this is all pretty dry stuff. Objects, Variables, Manipulating variables via text, comparing variables to desired settings, and then printing out a “Win” message.


Then there’s STORY. The heart of the matter.

We can add People. Characters. Interactions. Hidden rooms. Hidden objects. Objects that do nothing until you “>SEARCH THEM” which may reveal more about them. Perhaps PART_3 has a screw hidden inside it that is vital to attach PART_5 to MACHINE, which is not obvious on “>EXAMINE PART_3” but is revealed on “>SEARCH PART_3”.

>EXAMINE can generally be thought of as a cursory glance, while >SEARCH means a detailed look, and may include peering closely at it, which may reveal details not noticeable on a cursory glance. This is of course contextual as chosen by the Implementer.

The story comes when you begin describing your Rooms, your Objects, and any text that is printed out when you make a move which changes the variables of these rooms or objects.

Imagine:

You have PART_4 (the result of combining 1 and 2) and PART_3. When you type “>COMBINE PART_4 WITH PART_3)”, the code checks that you have the two objects, but also interprets your command and can respond in text. It could simply remove PART_3 and PART_4 from play and make the location of PART_5 (the fully-repaired component) the player, and provide no feedback whatever. The internal state change would be the same.

But it is not smart in a game to do this silently. The output could simply say “Done.” and when you examine the object, you would maybe see “The fully repaired component.”

But where’s the story in that? Better, when you combine the objects, the response to the command can be:

“You push and twist, and finally the partly repaired part fits into the Spring-Loaded Box. Lights flash and the repaired component begins to get warm.”

This is what makes Interactive Fiction a game or story. Not just what’s going on underneath, what happens in the spreadsheet, but much more importantly, how the changing of the variables is presented in text to the player who does the manipulation.

Also adding non-game-important properties to an object can add to the story. Like let’s say each part can have IS COLD, IS WARM, IS HOT as properties, and as you combine parts, you set these properties in the same command statement.

So you could have:

>COMBINE PART_1 WITH PART_2
Done

>COMBINE PART_4 WITH PART_3
Done

>PUT PART_4 INTO MACHINE
You Win.

Fun right?

Not so much.

Instead try:

>COMBINE RED CYLINDER WITH BLUE BOX
You push the parts together and notice that they almost fit, but the wires are in the way. You twist the wires and push them through the holes in the blue box until they snap to connect, and you hear a high-pitched whine and a click. Lights on the partially repaired part begin to glow.

>EXAMINE PARTIALLY REPAIRED PART
The partially repaired part is getting warm.

>COMBINE THE PARTIALLY REPAIRED PART WITH THE GREEN TUBE
Though it doesn’t look like it should work, with enough effort and persistence, the parts mesh together and begin to glow brightly to form a fully repaired part. The heat is getting intense.

>EXAMINE REPAIRED PART
The fully repaired part is getting a bit hot to handle.

>PUT REPAIRED PART INTO MACHINE
Gently sliding the repaired part into the machine causes a series of sparks, a loud noise, until you hear gears meshing and a growing hum of what can only be described as engine efficiency. A loud hum begins to decrease, settling into a nice low-key sub-aural vibration. The lights around the complex begin to fire up, a few at first, but more and more until the whole place is lit like daylight.

Soon doors begin to open, and people, groggy at first, begin to walk out into the open space. They notice you and are confused, but slowly they come to understand that you are the hero they’ve been waiting for all this time. Suspended in cryo-sleep, these men and women may have never been revived if you had not come along and stumbled upon their plight.

They surround you and sway, cheers and cries of joy begin low and slow, but soon are a raucous noise of celebration as they begin to understand what happened, and how you must have been the one to free them.

They lift you onto their shoulders and carry you through the complex, telling everyone they encounter just what you did to save their entire civilization.

YOU WIN.

See?

It’s really that simple. You are no longer just manipulating variables on computer objects, but affecting a world.

Great, right?

But that’s not all there is either.

Oops.

What happens if you try to put PART_7 into PART_1? It should fail. But not silently. Generally in IF, when you do something to an object that has no in-game effect, you get a message telling you that it can’t be done. It might be pointless to put PART_7 into PART_1 because there is no game benefit. And if you did, it would not help win the game. So we’d need some kind of response that helps you figure out not only that it didn’t work, but provide some hint as to why.

>COMBINE PART_1 AND PART_7
You try to force the red cylinder into the coffee maker, but there just does not seem to be a way to do it.

This is a gentle way the game has of telling you this is not intended to do anything.

Error messages are intended to prod, not slam you with a sledgehammer. If you “>GO NORTH” in a place that has no North exit, you will see “You can’t go that way.” Fine. The computer has told you what you need to know. This is clearly a generic error response when you try to go in a direction that has no destination location.

(It would be an awful cheat, on a Douglas Adams level, to say “You can’t go that way.” only to find that if you >PUSH NORTH that it lets you go there Or if you >GO NORTH three times, and the third time lets you. Mis-use of a generic error message may be seen as cruel, or at the very least heartless.)

(NOTE TO SELF: Write that game! The game where every default response actually is hiding the fact that you CAN do the thing, if you do it in a special way.)

(NOTE TO SELF: Don’t. People would carry pitchforks and torches to your door.)

The same would go for any command that does nothing useful in the game.

>EAT PART_1
That’s not edible.

This command checks PART_1 for a property IS_EDIBLE and if it is not, it spits out the default error response message. If IS_EDIBLE is true, then it will do something meaningful, responding with a different message, one of success. But even that may have a default. If it is edible, it may simply say “You eat PART_1.” and removes it from play. Which may not be desirable either, so in a case where a game/story requires eating PART_1 to do somethin game-useful, then the Implmenter has to code that specifically.

An IF Parser is filled with these default responses for commands that could do something with the right objects, but fails to do something to the wrong objects. Sometimes these responses are very … uninteresting. But they are soon easily recognized as the game telling you that this is not something that could work in the course of play.

But perhaps you want PART_7 to fit into PART_9. So if you put it into PART_3, and you don’t want that to happen, it should not just respond with a default response, if at all possible, it should inform the player that putting PART_7 can fit into something, just not PART_3:

>COMBINE PART_7 WITH PART_3
The aperture in the yellow laptop is not the right shape for the Blue Box to fit in.

This is a way of saying this is not a generic error which might mean the very action of combining is not designed to work with any of these objects, but instead tell you that the action would work if you had the correct objects.

You might even get more direct with the message:

The aperture in the yellow laptop is not the right shape for the Blue Box to fit in. The aperture is too large.

Hinting that a smaller object might indeed fit.

So what is the point of all of these default responses? Don’t they, too, hint that perhaps the command would work in the right situation? Sometimes these default responses seem less than informative.

I mean at which point should an error response just reduce to:

No.

?

>GO NORTH
No.

Would you not get the point? Why add to that direct refusal?

I sometimes think one day I will write an IF story where I change all default responses to simply “No.” and then code my own specific responses for good tries, and efforts that could work with the right objects.

Wouldn’t that be fun?

No?

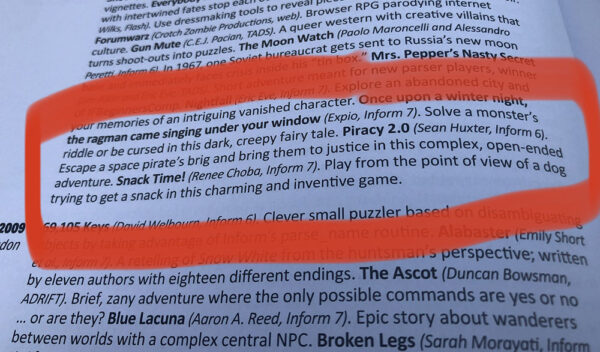
Piracy 2.0 – An Interactive Pirate Adventure (2008)

In 1983 I encountered my first INFOCOM game. A text adventure that changed my life. It was Infidel, by Michael Berlyn and Patricia Fogleman.

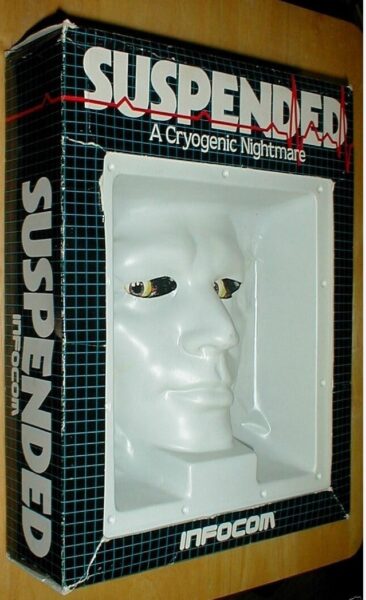
It was not the first INFOCOM game I played – that would be Suspended, also by Michael Berlyn.

While Suspended was a bit esoteric (you had to move five robots around, each with limited sense ability, but complementary to each other, so you might have to use multiple robots to fully understand a problem, and then figure out how to solve it.

While that game had the best packaging of any computer game ever, the game itself was… difficult. A friend of mine solved it on his own, and I, to this day, have no idea how.

However, I solved Infidel on my own, and still consider the atmosphere to be wonderful. It really immersed me into an ancient Egyptian pyramid, which I had to loot to win the game. And the end was… surprisingly delightful. And controversial to this day.

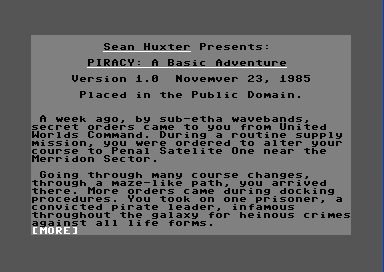
So in 1985 with my Commodore 64, I wrote a simple two-word parser game in BASIC, called Piracy, based around a captain of a space ship tasked with bringing an infamous space pirate to justice, only to have your secret course intercepted by his men, your ship boarded, your crew killed, and you tossed into the brig.

You wake up in the brig, have to escape, and get your ship and your prisoner back to headquarters for trial.

You can see my web page on this project here.

It was a fun exercise. While INFOCOM’s parser was quite robust, and could interpret full sentences, even multiple sentences, (“>put the glass onion inside the puzzle box, then twist the puzzle box to the right. get the umbrella. open it”), mine was literally two words, like some Scott Adams text adventures: >cut pipe; >insert battery.

Inform 6 opened up the possibility that I could re-write, or even re-invent that old 1985 story with a full, robust parser, and a much, much richer story, and a much, much richer game.

So I did.

In 2008, I entered the IF Comp, the big annual IF competition.

Who the heck was I? A newcomer to the field of indy Interactive Fiction stories, which had evolved beyond INFOCOM to some wonderful games (or more accurately in more modern times, stories), to think I could walk among the big IF writers like Emily Short or Andrew Plotkin?
But I entered, nonetheless. Arrogant me entered the contest with my 1985 game modernized with a new parser and a fully robust story and game that I was able to expand into a game I quite liked.

Don’t get me wrong, I liked my 1985 effort too, but it was a much more simplistic game.

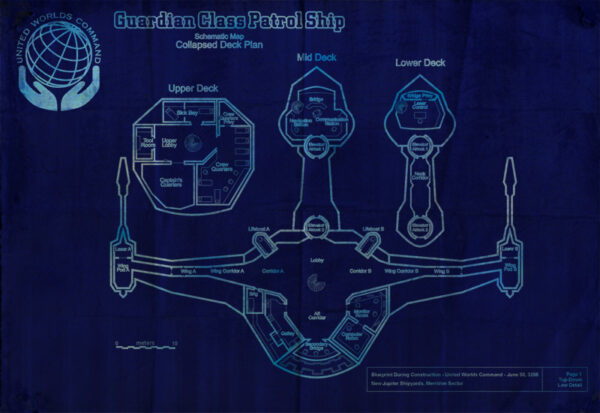
The 2008 version was so fully rounded, with details on the ship so thoroughly implemented that even the toilets worked – a rebuke of the idea that in Star Trek, we never saw toilets. (But if you had the blueprints of the Enterprise like I did, pinned to my wall for most of my teen years, you knew they existed, and exactly where.)

Hey. Guess what?

I came in fifth! Out of a field of 35!

Not bad!

Emily Short’s review was quite humbling. She really seemed to like it. Even if she couldn’t quite figure out how to finish it during the limited judging time for the competition. I read a later addendum that she wrote that she had figured it out and actually enjoyed playing it through multiple times.

This review by her at IFDB was also a good read.

Anyway, I often forget what achievements this game made.

Fifth Place in the 2008 Interactive Fiction competition (IF Comp 2008).

But it also got nominated for several categories in the 2008 XYZZY Awards:

Nominee, Best Game
Nominee, Best Setting
Nominee, Best Puzzles

I didn’t win any of those, but to be nominated, as they say… high praise indeed, for a first-timer among people who had been keeping Interactive Fiction alive and thriving for decades.

It got some good ratings, and a few good reviews at IFDB:

You can read the reviews here:

REVIEWS

But what really inspired me was reading so many people who, during the course of the competition wrote blog posts about the various games they played during the competition that compared my game to INFOCOM games. It seemed one of the prevalent feelings about Piracy 2.0 was that it was one of the most old-school INFOCOM-like games in the competition.

And you’d really have to know how much I adore INFOCOM games to fully appreciate how much of a compliment that was to me.

Even if sometimes that comparison was made by people who had moved on from the INFOCOM style of games, which might include insta-death, getting stuck if you made a bad move that left you with no win scenario, to things like having to eat, keep a light source fresh, mazes and things that today seem passe and out-dated. The idea that in 2008 I was compared to the games that I loved so much was beyond praise.

Hell, I didn’t even care I came in fifth, after finding out who many people thought my game was the most like an INFOCOM game.

That was my original goal in 1985, even though I was hamstrung by a two-word >verb noun parser.

Here are some categories my game was mentioned in in IFDB polls:

Games that most resemble an INFOCOM work.

Best Sci Fi Games.

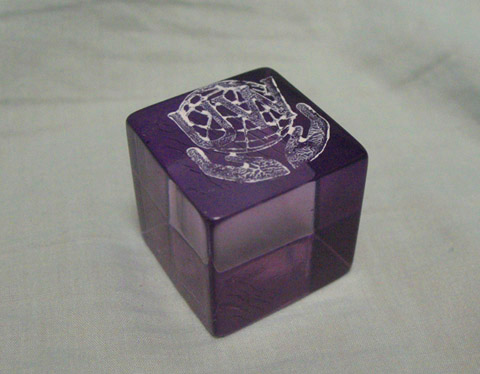
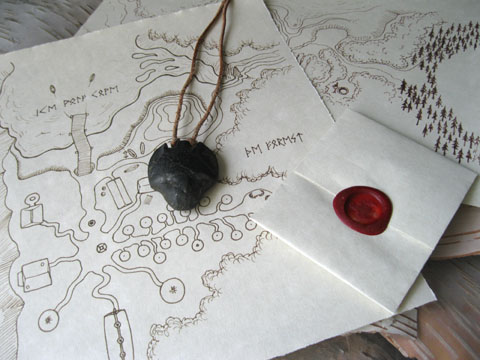
Once More, With Feelies. (This one based on the feelies I made for Piracy 2.0, which include a map, but also a hand-dyed purple data cube. I found a source online that made 1″ (roughly) acrylic cubes. I bought a couple dozen and used RIT Purple Dye, heated, in a bath I dropped the cubes in. They turned into a quite nice purple. I also bought a rubber stamp with my United Worlds logo on it that I hand-stamped on these cubes, and handed them out as Feelies. Data cubes turn out to be quite vital to the plot of my game/story.

I also made a nice map available to anyone who wanted one.

During a meetup I gave out these data cubes to people.

The coolest thing is that you can actually play Piracy 2.0 online in a browser!

IFWiki also had some things to say about Piracy 2.0:

Notable Features

  • Detailed, functioning space ship complete with computers you can control. (Yes, including toilets.)
  • Multiple, detailed endings, with varying degrees of success, including the perfect score ending.
  • Fairly faithful INFOCOM-like feel. Old-school gameplay.
  • Feelies available. Maps downloadable from web site. Purple Datacube available through author.

The reviews on this page can also make for good reading. A mixed bag, but some people clearly enjoyed my game.

I wrote another game in 2010 but while I wrote a sprawling epic game, it was not well-received.

But if you want to read about it: IFDB The Promise.

My web site about it is here: The Promise.

Thing is, my motto is Put Something Out There.

It is not Put Something Out There People Are Guaranteed To Love.

I put it out there. If people like it, lovely. If not, it’s still out there.

This year, because I listened to a podcast that mentioned a spooky Halloween-themed IF competition (EctoComp), I decided to write my third fully-featured IF game based around a silly game we played at my office some years ago:

Put-Peep(tm).

More on that later as things develop.