
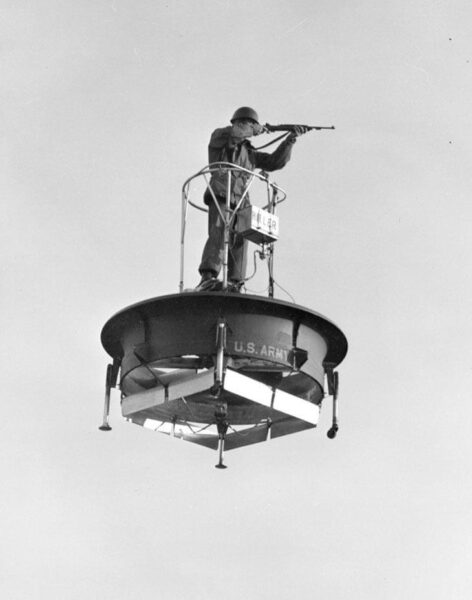
For 2022, my biggest project so far was a flying vehicle Greg Brown (of Cotswold Collectibles) and I have been discussing for years. He has been wanting a vehicle based on the Hiller Flying Platform, a prototype that actually got off the ground and flew rather well.
I had no particular plan for how to make this on my smaller printers. And I wasn’t sure fitting together a lot of pieces would look good enough. But undaunted, I finally decided to pursue the project.
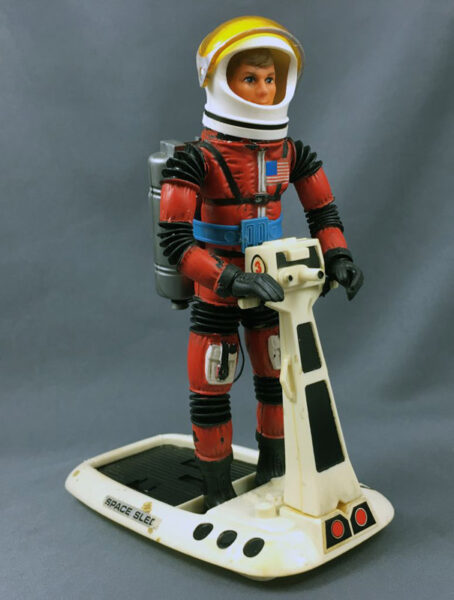
It just so happened that around fall of 2022, I was thinking of Major Matt Mason, since we had done the One Man Lunar Hopper in the previous year. I had the idea to extend my space designs into an homage to Major Matt Mason toys, which were another mainstay of my childhood.
I was going to start by making a 1:6 scale version of Mason’s Space Sled, accurate as I could, in white with black accents, just like the original.
I knew I couldn’t do the base in one piece, given the dimensions of my 3D printers, so I knew I would have to come up with ways to make it out of multiple pieces, but fit together as seamlessly as I could. Not an easy feat. There would be seams. Just where best to put them?
And then I realized I could do my original hover platform, based on the general idea of the Hiller Flyer, and I could do it by cutting the bell up into 8 pieces and fitting them together. Seams would be inevitable, but I could make it work.
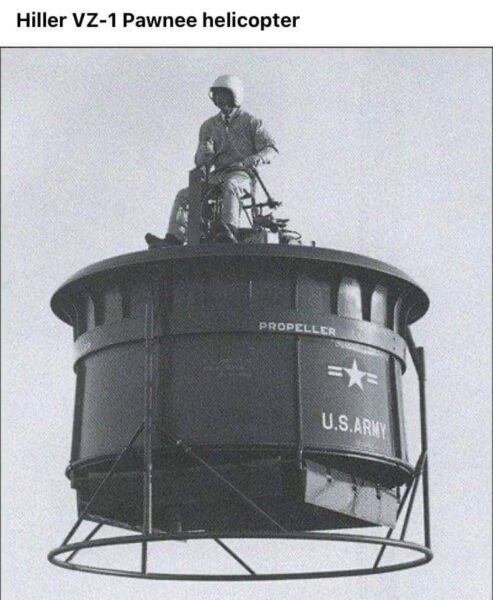
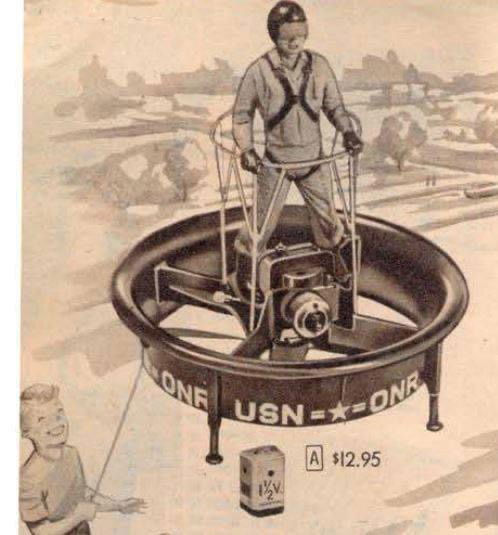
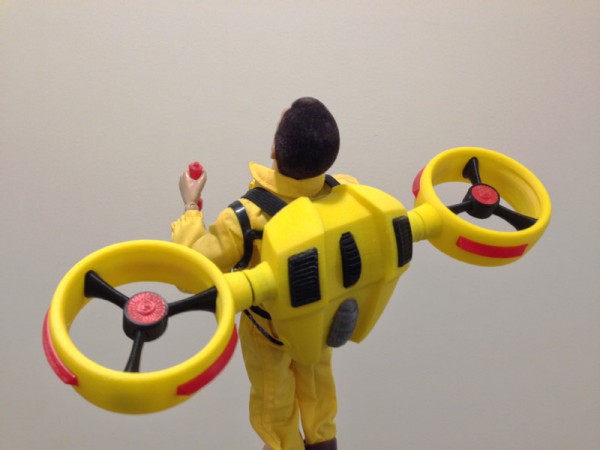
In November and December of 2022 I sat down to design a version of this that would evoke my own design aesthetic, as well as a call-back to the Adventure Team line. I knew I wanted it to be mainly yellow, with red, black or blue highlights, to evoke the AT theme. I knew that I was not going to go with the double-rotor blade of the original Hiller design, not since most of my flying vehicles rely on a system similar to a Dyson fan. That is, air forced into a hollow bell shape, with an opening at top to force air down in a stable column. My Helijet Pack uses this, as do my Drone models. So I literally took the 3D model of my Helijet Pack and cut it into a cross-section, and re-lathed it around a larger center, and that would be my lift body.
 Here you can see that the circular engine bell housings translated into a larger one for the Aerial Recon Platform:
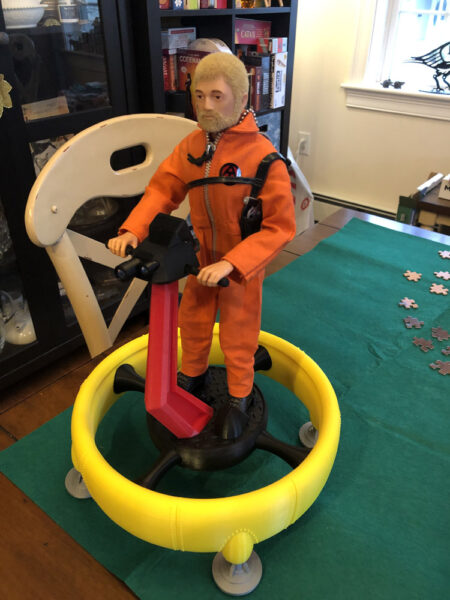
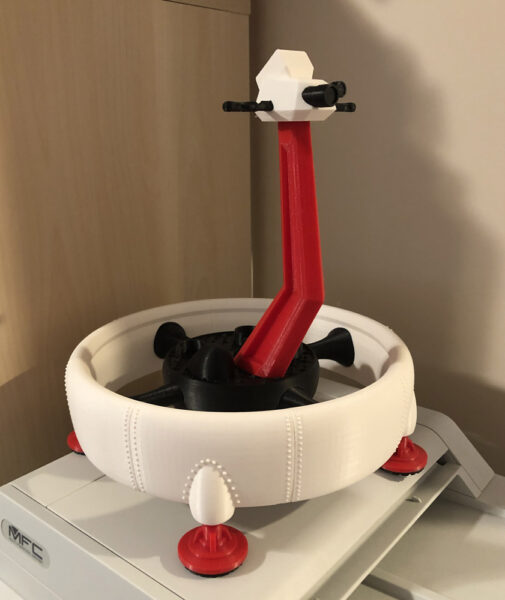
To better hide the seams, I put rivets along them, to make it look like a natural join, as you would clearly see on a real aircraft where plates join.
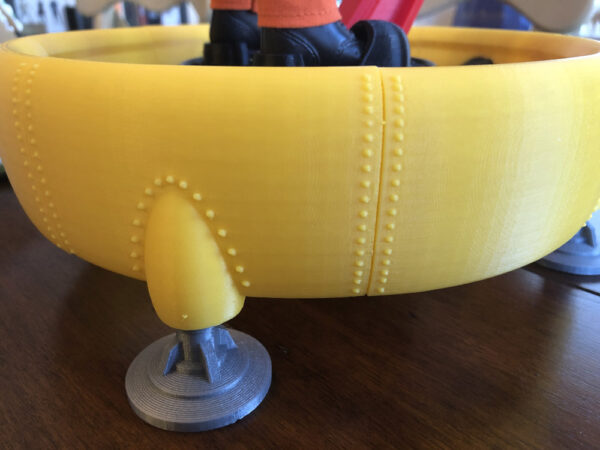
I had to add landing feet, so I extended out egg-shaped housings for rather utilitarian-looking landing feet. I used rivets to make those look like they were naturally attached too.
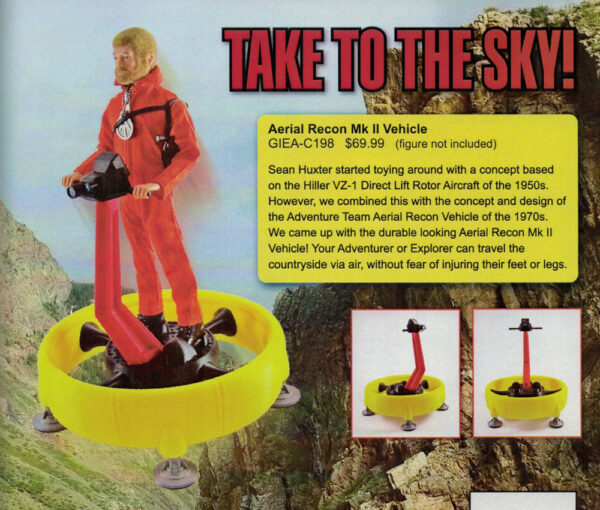
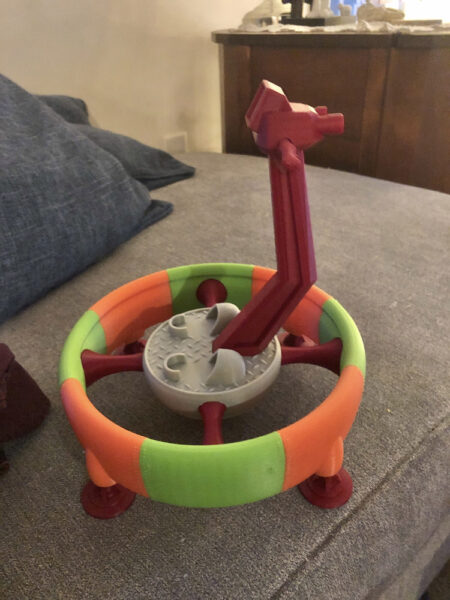
Now I had to design a steering column like the one from Major Matt Mason’s Space Sled. But I knew that taking that idea too closely from the original would not fit my own design aesthetic, so I showed Greg two options: A round, curvy pillar, and a hard straight pillar. He thought he saw a resemblance to the original GI Joe Adventure Team Aerial Recon Platform:
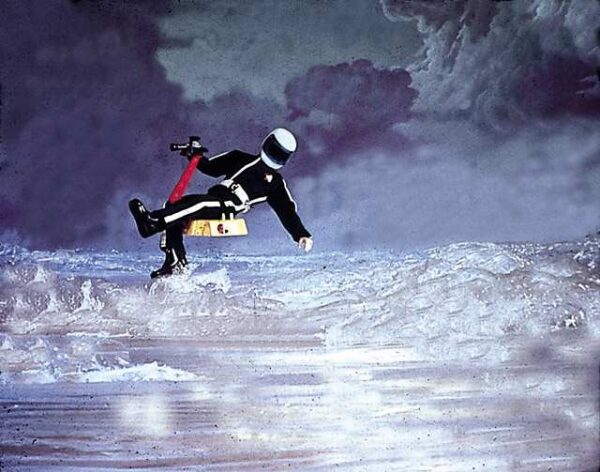
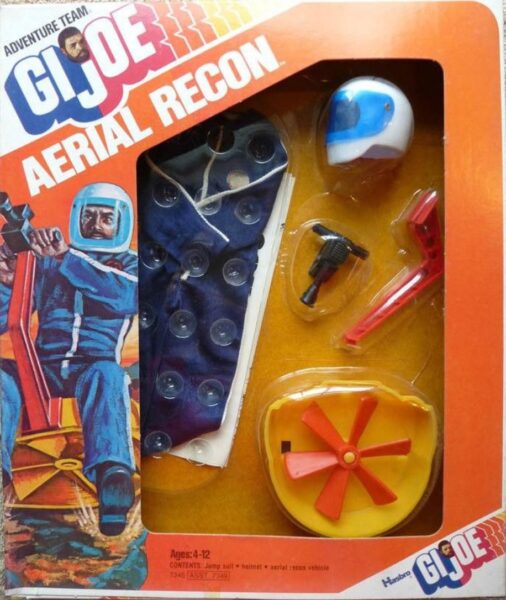
This is a bit of a silly design, but hey, it was for kids. Adult collectors today affectionately call it the “lawn mower”. You can see why.
Notice the control pillar, though. It is a hard-edged straight red pillar, with a sharp angle in the middle, topped by a control box with handles and a camera. Greg and I agreed that this would be the best way to go for this vehicle. And I wanted to retain the camera from this one, but to give some homage to Major Matt Mason’s Space Sled by using two cameras, each could serve its own unique purpose.
So I modeled the pillar, the control box, the handles are printed horizontally for strength.
The center standing section would fictionally house the powerful jet turbine that sucks air up from below, into four tubes that push the air into the hollow engine housings, forcing the air out an open ridge at top, forcing it down into a stable column of air, strong enough to cause lift.
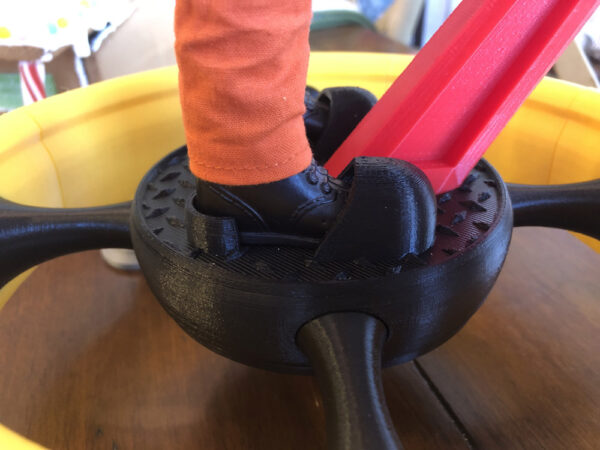
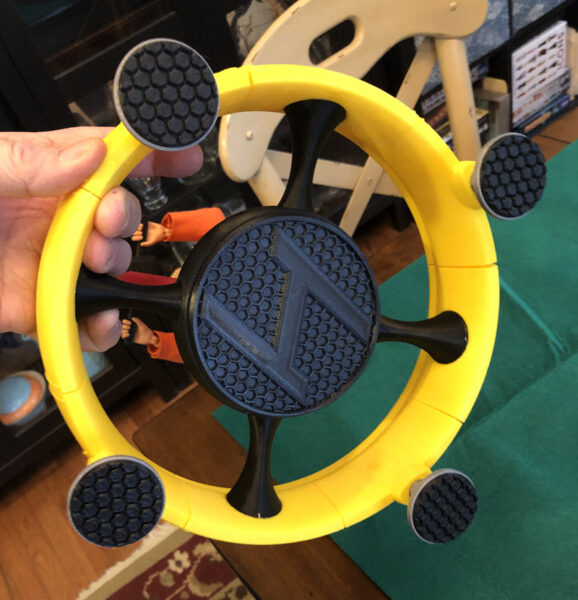
Which meant I needed a way for a figure to stand without falling off, and a grill to show the turbine’s intake.
Foot cups are used by many toys to keep a figure standing on a surface, and this would be a perfect way for a figure to be held in place. Note that I used a diamond plate for the surface, because a flat surface was just – boring:
And the grill is a hex pattern, a favorite of mine. I use it wherever I can:
While I was at it, I saw the perfect opportunity to add the Huxter Labs logo to the grill.
![]()
I also put hex-pads on the bottoms of the feet.
Then it was prototype time.
To start, I usually print a model in colors I have but don’t use much. Prototyping in black, red or silver is harmful, since I use so much of those colors in production work. But I have several colors I use only rarely, but I need from time to time, and as I have full spools of those colors, I use them to prototype.
I call this my “Sherbet Model”, because of the colors:

Construction went well:


Once a prototype was assembled, I could begin testing the flaws in fit, in design, in anything like how the feet fit into the cups using standard GI Joe boots, etc.
I soon found the pillar needed a way to stay in place that was not friction, and I did not want it to be glued into place. So I came up with a clip that snaps the pillar down to the base.
Construction proved to be a challenge. How to get 8 pieces on a round to glue together with a strong fit was not easy. I bought a band clamp, which is just a strip of strapping connected to a clamp. I could wrap the 8 rounded pieces in this, and twist the clamp, pulling the band tighter and tighter. But even then I had issues. First, I had to glue the four arms to the base, then the arms to four of the eight sections that had slots for them.
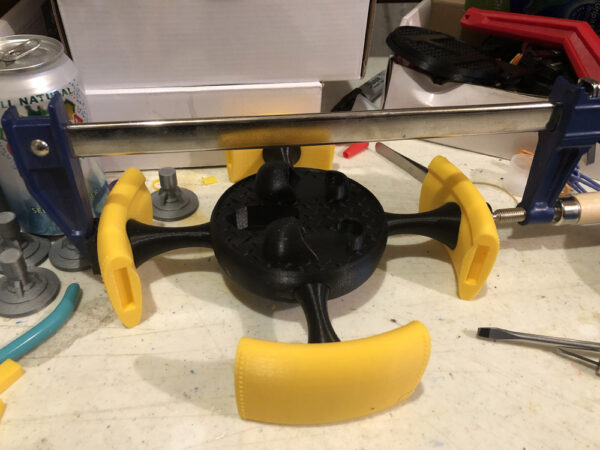
Much harder than it looks… trust me.
Once two opposite ones were glued, I was able to then glue one half of the rest of the circle, and clamp it together with the other half not glued, but held in place. Then when that dried, glue the other half.
And as the foot cups made it impossible to put the rounded bell down on a flat surface, I had to make a platform on which to assemble these. It had a hole drilled in it so I could overturn the assembly, and put it together, pushing to fit tightly and accurately. Between each two parts was a rectangular peg holding each piece into a correct position.
During construction phase, I had printed other colors as tests, and I put together a video on the entire process from start to finish:
Whew.
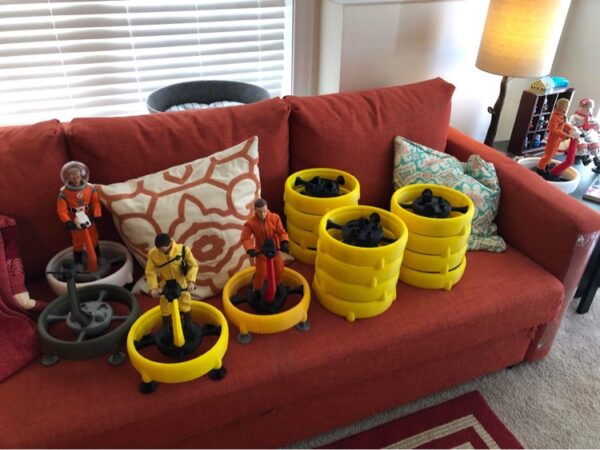
Here you see the platforms well into production:
Now on to details.
For the control box, I created a sticker for the control screen, and two “lens” stickers for the two individual cameras. To get these to stick to ABS plastic, I first had to spray paint them with a satin clear-coat spray paint. Then I could cut and apply them.

(Feel free to download these images and print them yourself if your sticker ever gets worn)
Note to self: Avoid round stickers in future!
But what about other colors?
Well for the first version, we were going with the homage to the original Adventure Team Aerial Recon Platform, and even called this one the Aerial Reconnaissance Platyform Mk II.
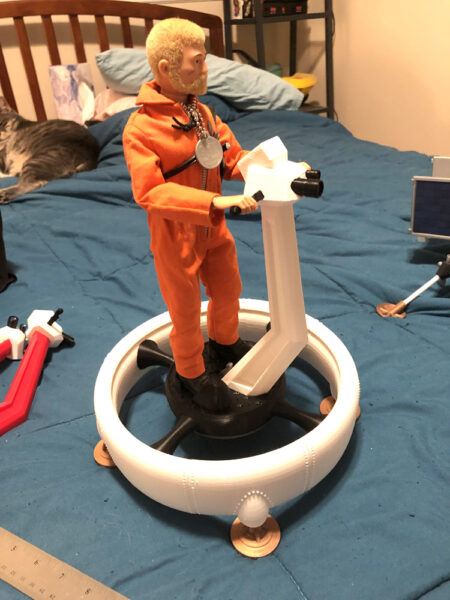
But I was also printing other versions already. A military version, several space-themed versions, and even brought a few to Toylanta in March of 2023 to auction off for charity.
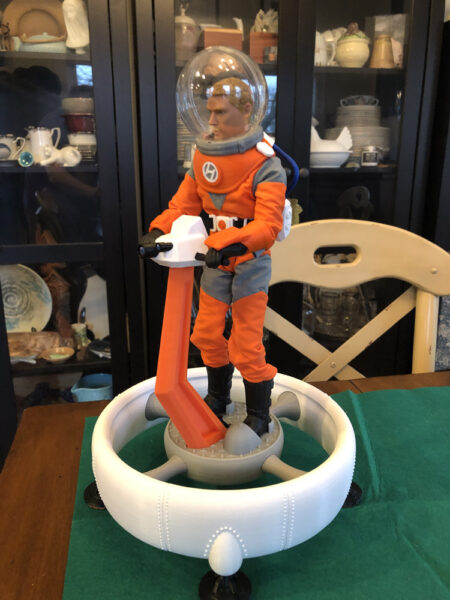
I printed a white/gray/orange version to go with a common space color scheme, but also this World Peacekeepers Astronaut that I got a couple of years ago. But also my idea of making one for a Major Matt Mason themed 1:6 scale figure was on my mind. So I made several variants:


Here, I took a failed print, and made the best of it. The Huxter Labs logo stopped printing part-way up because of a printer issue, so I created a yellow capper for it to fit over the almost-printed logo part.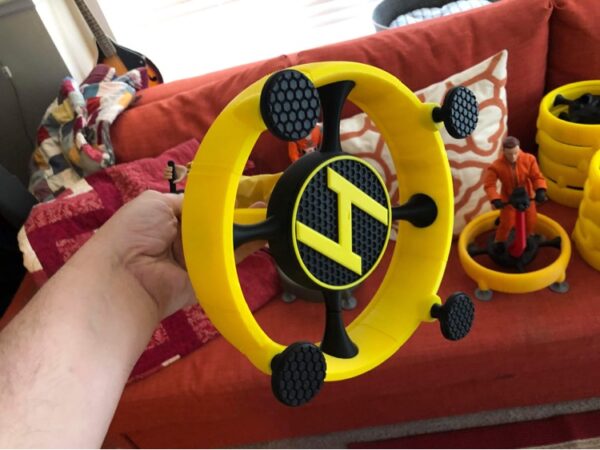
This marks the largest vehicle I’ve created to date, for GI Joes.
And I still intend to do the 1:6 scale Major Matt Mason Space Sled.