Huxter Labs FAQ: “Do You Do Custom Orders?”

I made his blog originally to talk about 3D printing. The truth about 3D printing. Here’s some brutal truth:

I do this for fun.

Ever since I was a kid breaking apart my cool toys to see how they worked, I was fascinated with toys and how they worked. I started out as most do, playing with Corgi, Husky, Dinky, Hot Wheels, Johnny West, GI Joes, View Master, Billy Blastoff, Major Matt Mason, Big Jim… anything really.


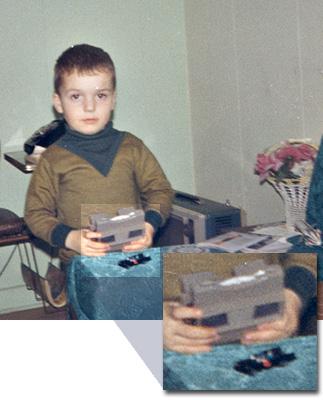
Me with my View Master and Corgi Batmobile


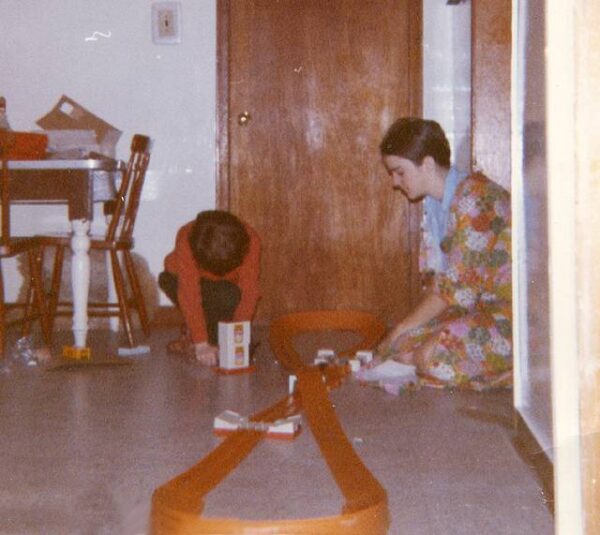
Here with my aunt Patricia playing with my cool Hot Wheels track set with the Sizzlers charging “gas” tank.


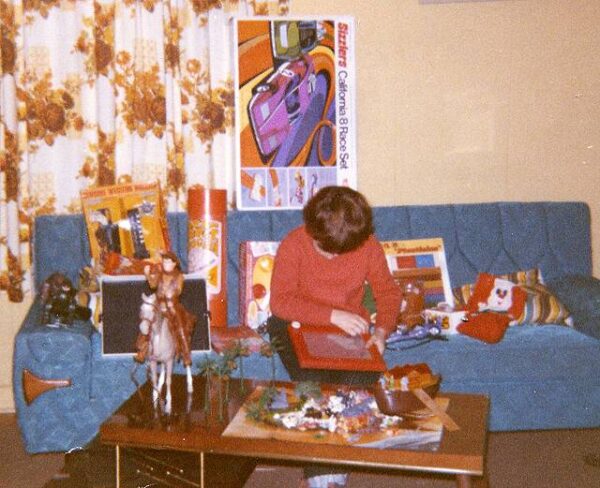
Here’s me with the toys I got for Christmas. Yup. Those were all mine. Two wire-remote walking and hissing light-up Dinosaurs that battled each other; A Western cap-gun pistol set (it was the 70s. Everything was about the Old West); My Lite Brite; Johnny West on his horse; a Crazy Carpet; Hot Wheels Sizzler set; Noah’s Ark set; Etch-a-Sketch; Plasticine modeling set; an SSP vehicle with rip-cord.


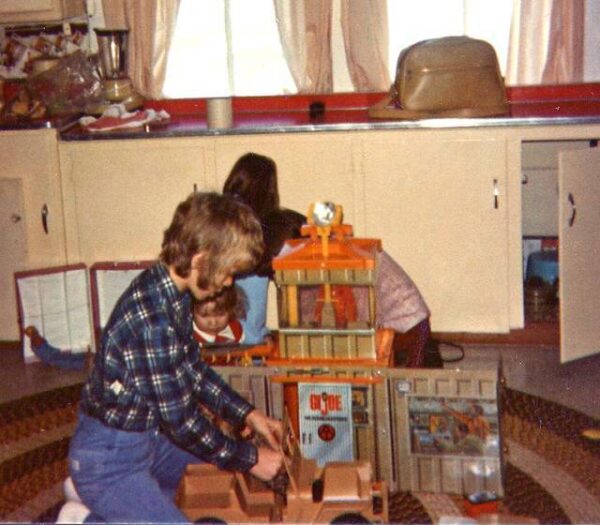
My cousin Mike, my sister Deidre, his sister Shean, and me playing with the GI Joe Adventure Team Headquarters and Desert Jeep.


Me playing with a wonderful toy that I wish I remembered the name of. My mother brought it back from Toronto for me.

Those are just some pics of me as a wee kiddie playing with my toys.

More of my history can be seen here.

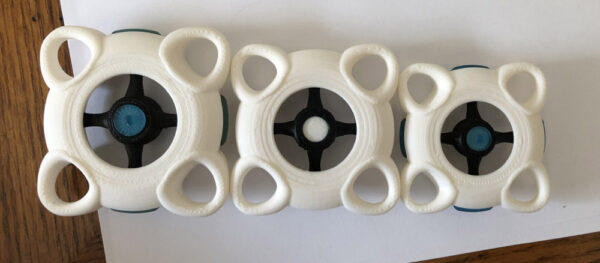
That last one shows an amphibious remote controlled vehicle that I have never been able to find any modern reference to at all. It was amazing. It had sealed hollow wheels so it could float on water. It had multi-arm suspension so it could travel over any terrain. It had a remote control handle with a squeeze trigger and a dial on it that moved as I squeezed, so I knew what I was trying to get it to do. And I wondered how this all worked, as the remote was not attached by a wire, but by a hollow hose like an aquarium tank hose.

So naturally I took it apart. Inside I found a small concertina-like air bladder that was also sealed. When I squeezed the remote, it filled this concertina bladder with air, moving its end, which was connected to a control lever which told the machine what to do inside the vehicle itself. So I would squeeze the handle and it would, by air pressure alone, physically move a lever inside to various positions on a switch plate. I was amazed. The batteries were inside the vehicle, and were solely for motor power.

And if I had had 3D printers back then, I would have been making toys back then.

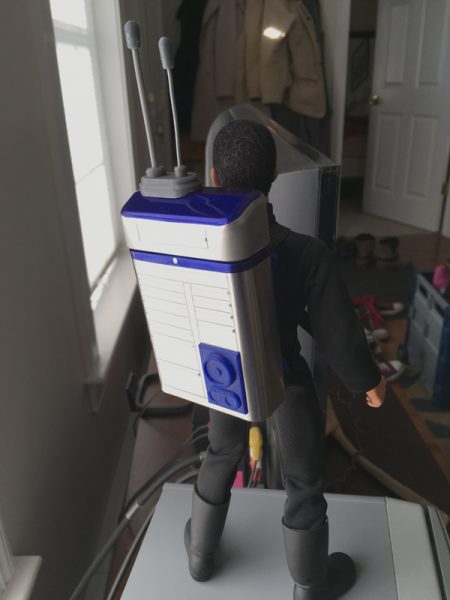
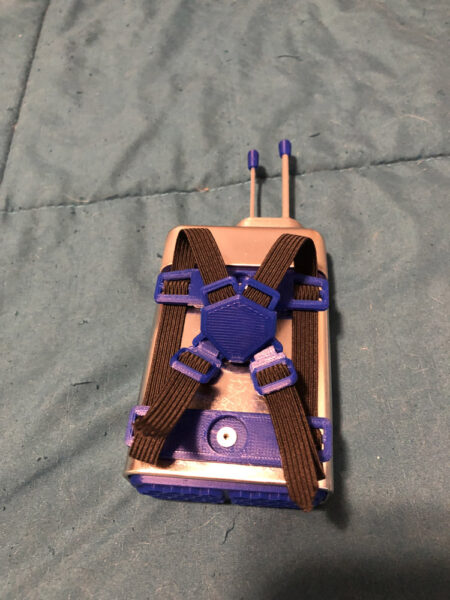
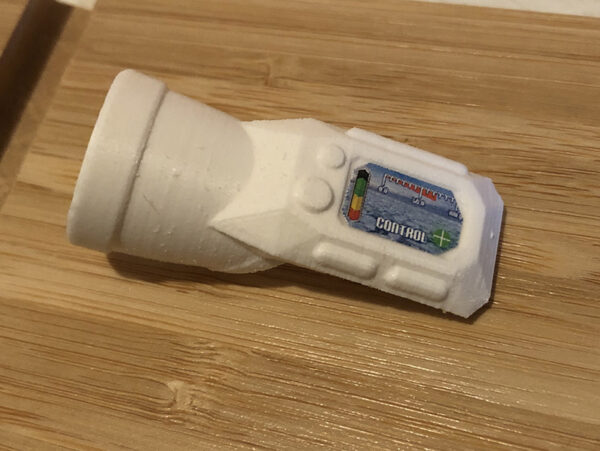
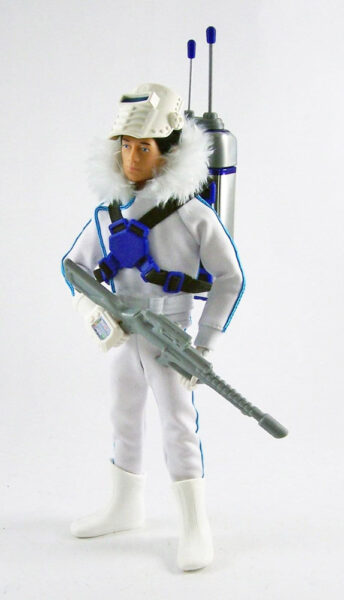
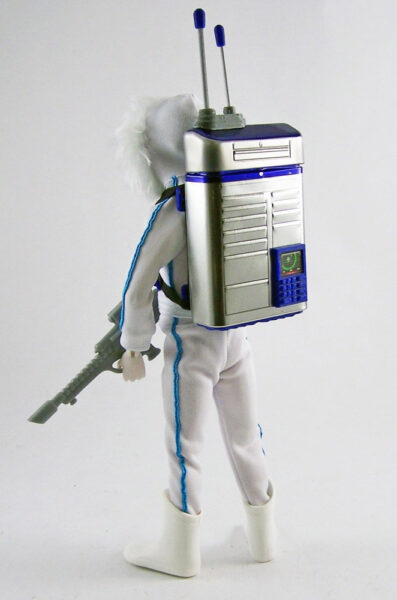
Not having a 3D printer didn’t stop me of course. I made toys, but I wasn’t much into carving. I certainly built more than my share of model kits. I would also make toys out of other toys. Not all that long ago, I had a project in mind where I took the beautiful Sigma Six DragonHawk Flying Vehicle and cut it up to make a 1:6 scale GI Joe Backpack Jetpack. Kinda criminal when I think about how beautiful this toy was, and I just hacked it to pieces. But huzzah! I bought a second one which is still in its box.

So making toys has been in me from the start.

And now I make much more elaborate toys for GI Joe, for Space: 1999 Dinky and Konami Eagles, and other toys that interest me. I make UFOs, Robots and Rockets. If you want to see more, just search around this blog by using the Search bar at top. I have now had 10 years experience making toys by 3D printing.

So back to the FAQ question:

Do You Do Custom Orders?

This is my hobby. This is fun. But it’s also a small personal business.

There are two huge lies people get told often:

1 – “If you do what you love, you never work a day in your life.”
2 – “If you are your own boss, no one gets to tell you what to do.”

Lies.

If you do what you love, you work every day of your life. If you let it get away from you.

If you are your own boss, you tell yourself what to do every day of your life. If you let yourself order you around. Which happens a lot.

So I do this for fun. Not for work. I have a job. A really nice one. A fun one. In which I make virtual toys. I work 5 days a week, with vacation days and days off more or less whenever I feel like it.

“But you want to make money, don’t you?”

I make what most people would consider a very good living. I don’t need the money I make from making 3D toys.

I do this for tun.

When it stop being fun, I stop doing it.

“But you make stuff for Costwold Collectibles right?”

Yes, I do. I approached Greg almost a decade ago now, with interest in selling toys to people who love them as much as I do. And I have made MANY toys for Cotswold Collectibles. Greg and I are a very effective team. We toss ideas at each other like spaghetti on a wall. Some stick, some don’t. But in the end we get something that we both like, and we get to produce toys that didn’t exist before. And that excites me. My motto (as seen etched on the back of the very first iPad I bought) is:

Always Remember: Put Something Out There.

Greg knows my limits, and knows what I am willing to do and not do. He takes care of marketing, selling, distributing. I just make toys in small batches (sometimes big batches) and send them to him. I make enough money to keep buying supplies, printers (to replace ones that sometimes refuse to cooperate) and other stuff to keep my interest up and to keep me having fun.

But I do it for fun.

If it stops being fun I stop doing it.

I once attended a Toylanta show several years ago. It was my first, and I was psyched!

I was hoping the show would invigorate me and spur me on to make more toys. However, instead, the show overwhelmed me and burned me out.

I stopped doing any 3D work for a year.

I still trickled out some stuff. Even though I had no inspiration to do so. This was the part where my boss ordered me to push on even if I didn’t want to. And it also had me working on days I didn’t want to.

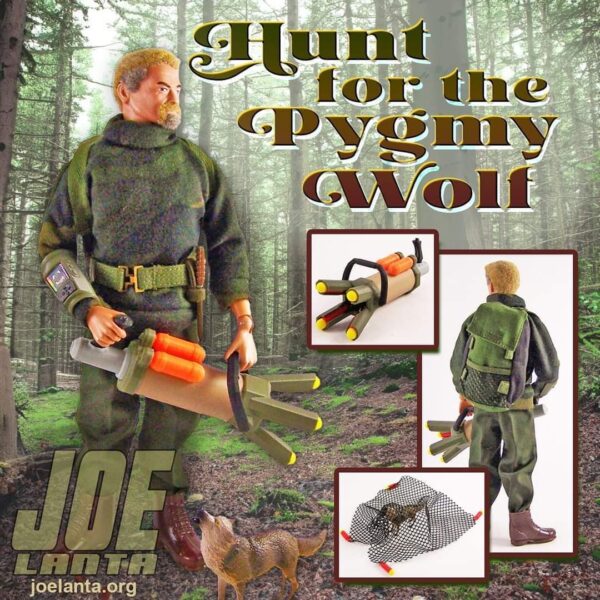
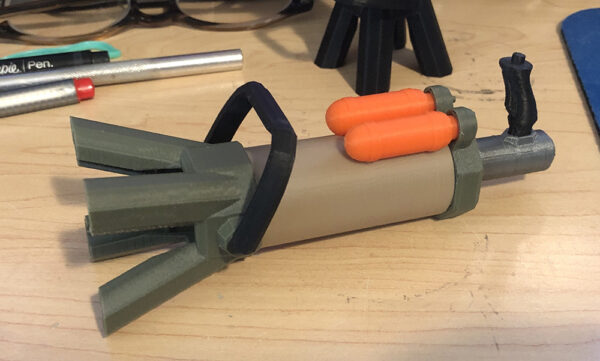
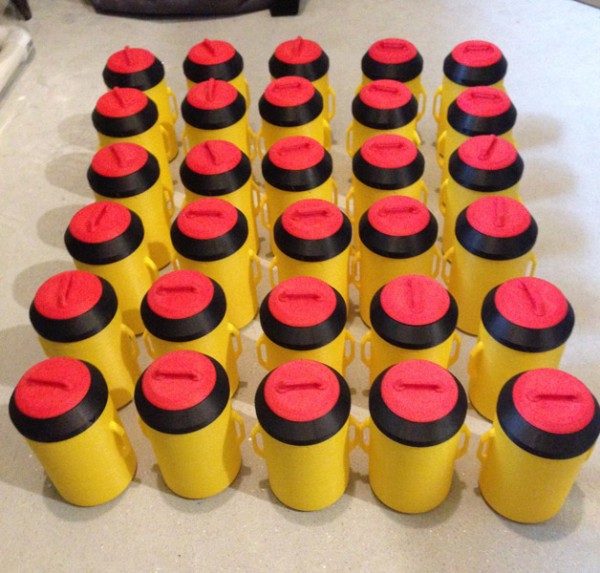
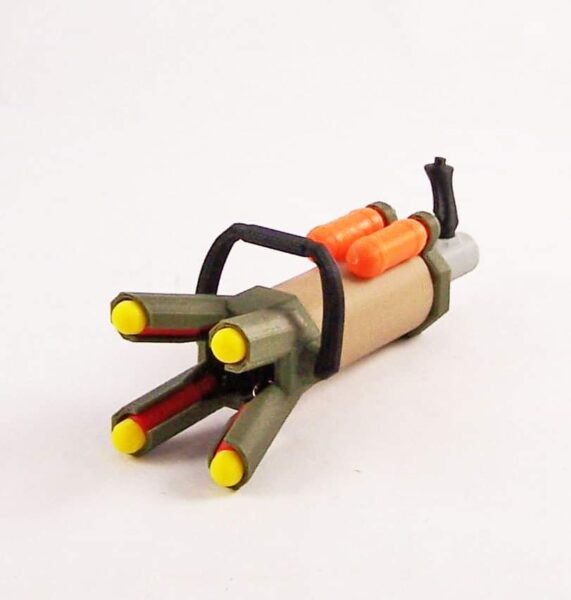
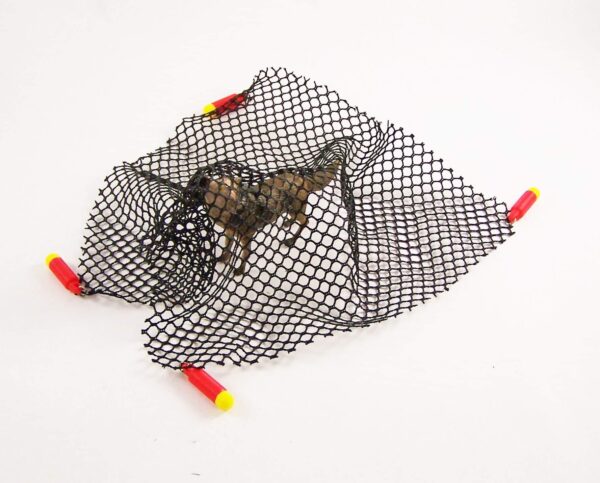
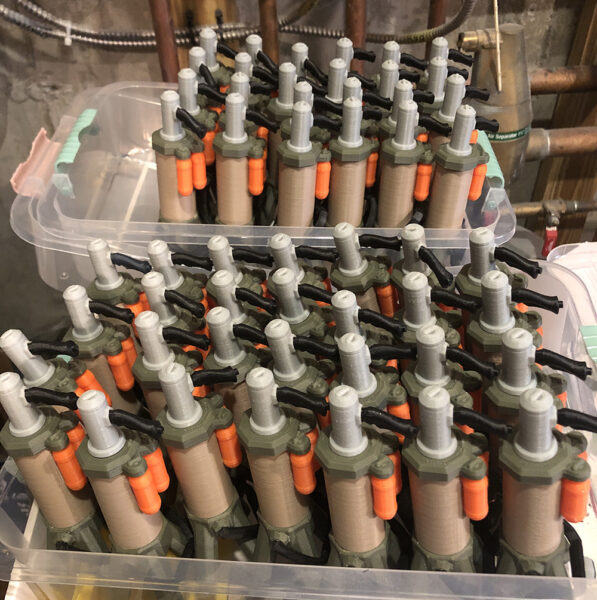
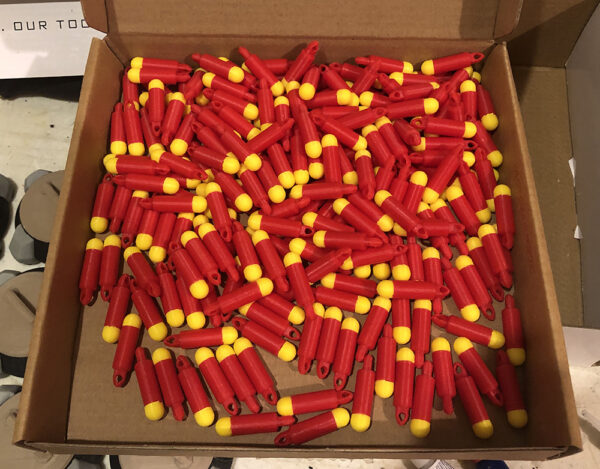
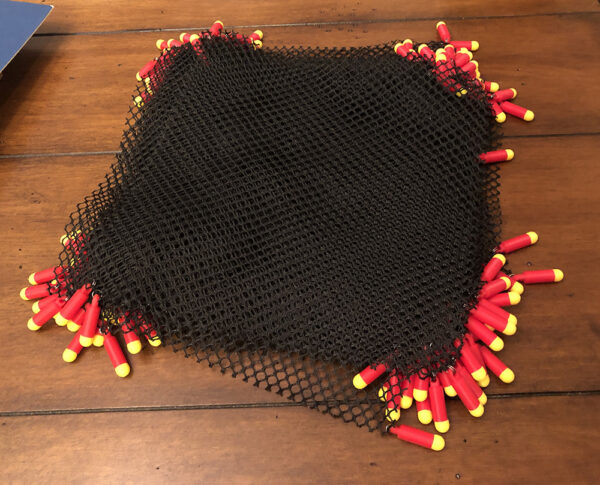
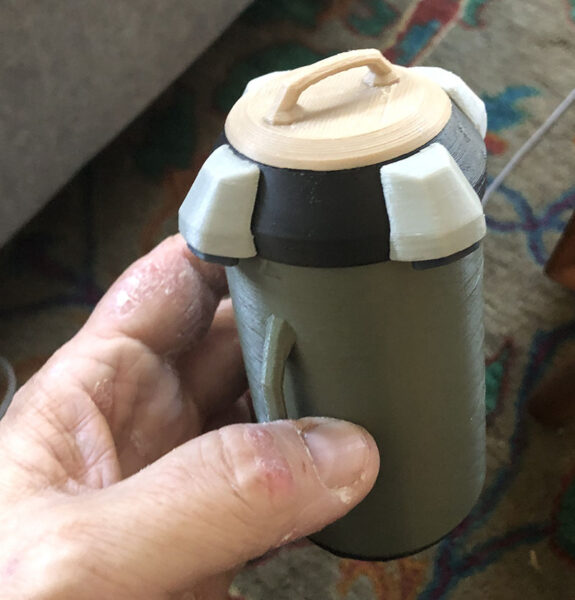
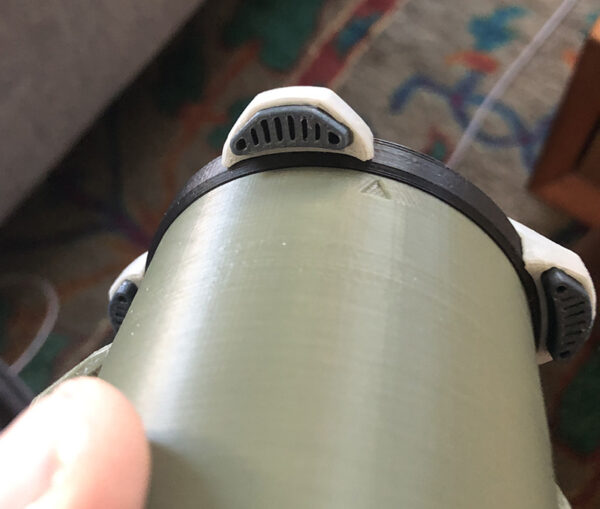
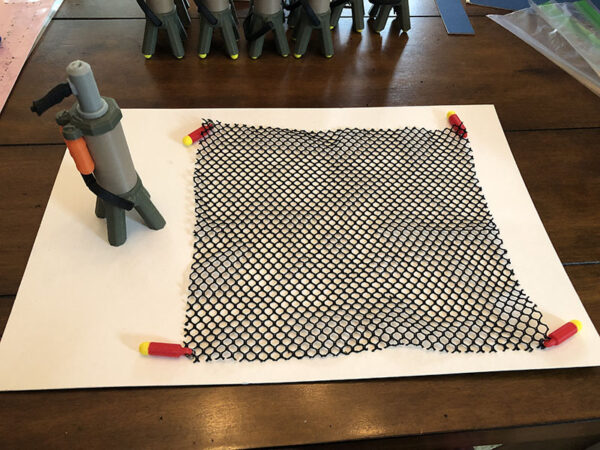
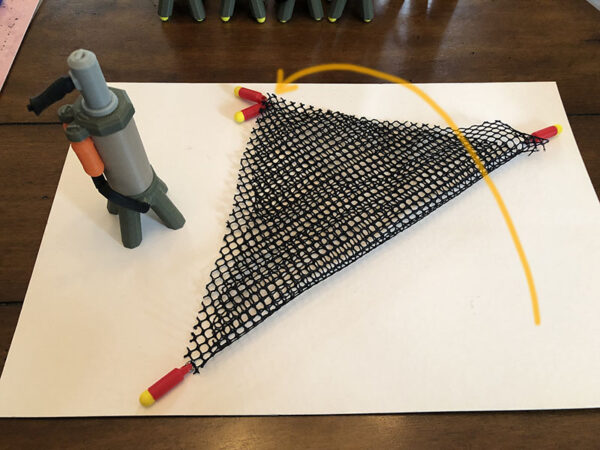
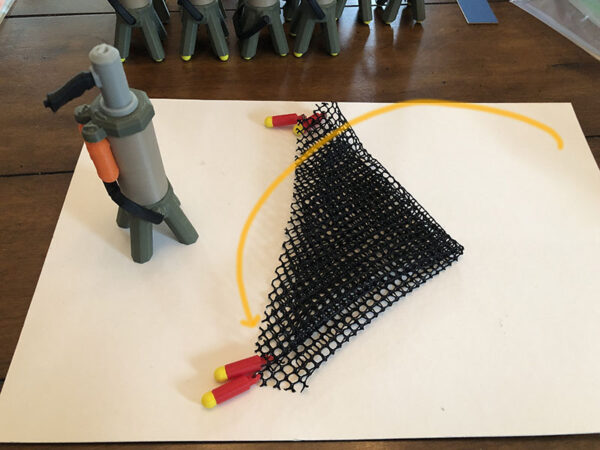
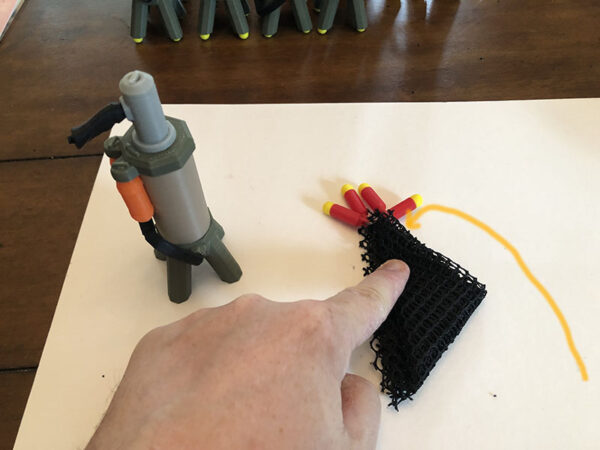
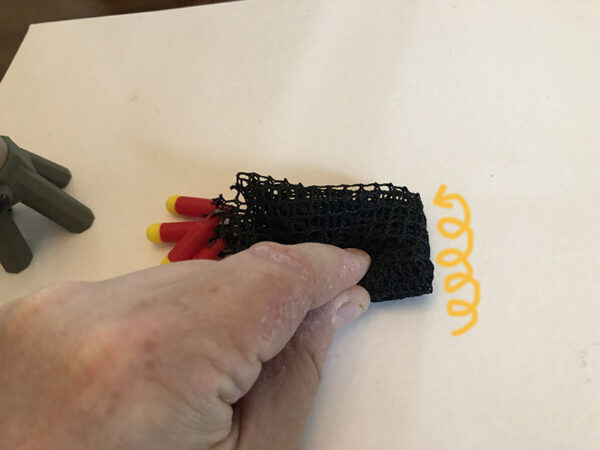
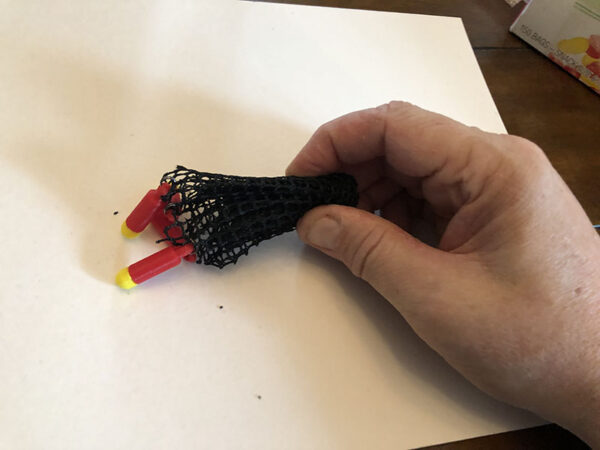
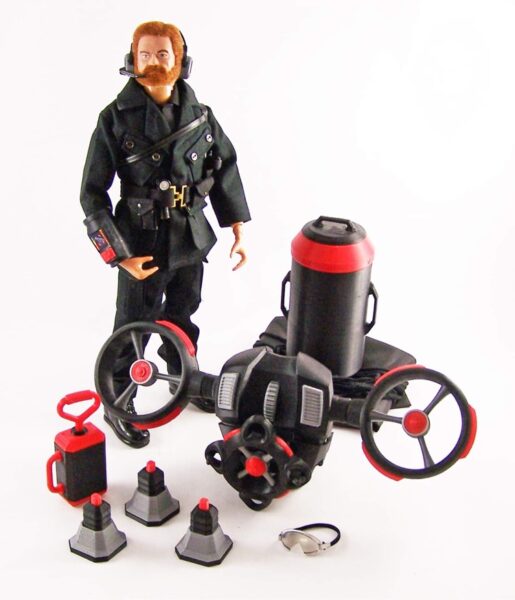
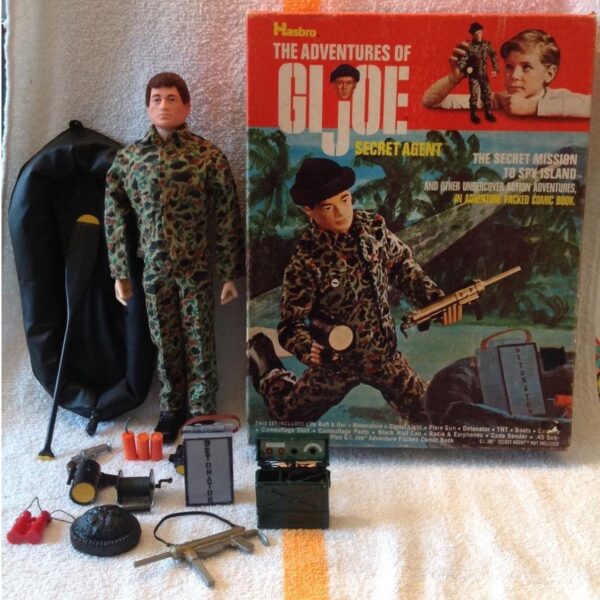
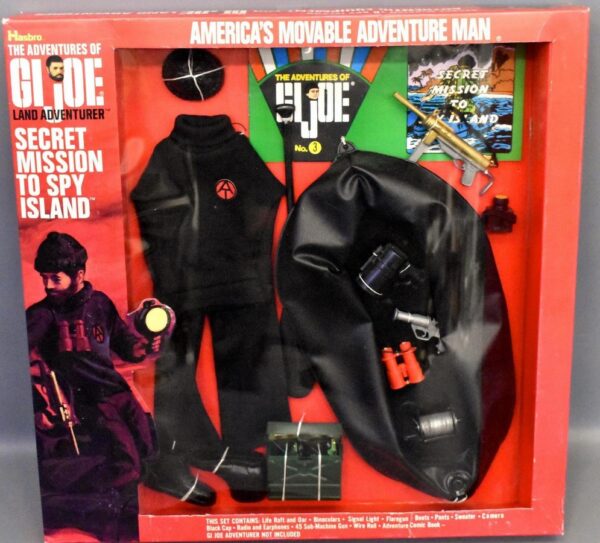
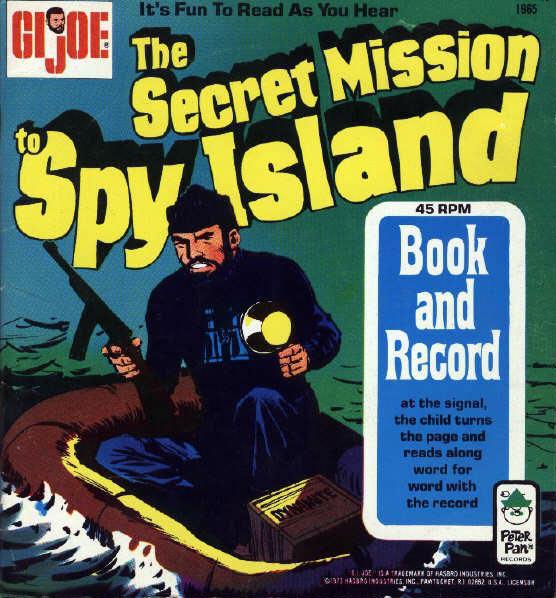
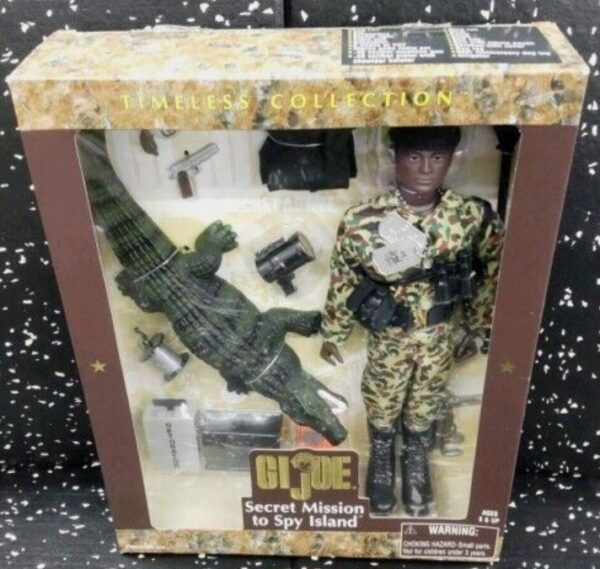
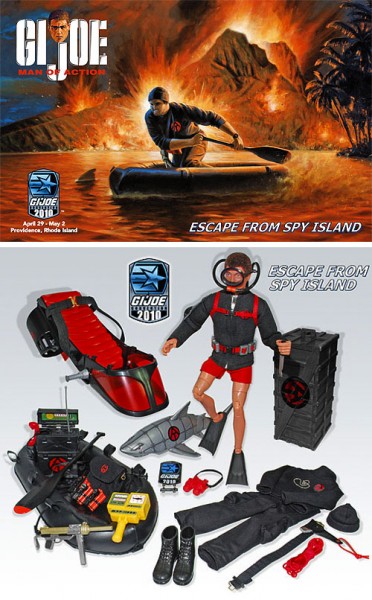
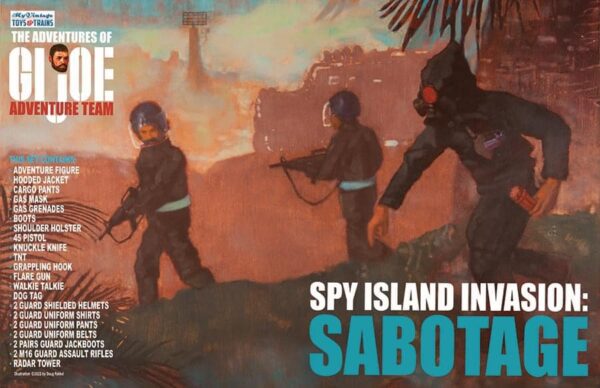
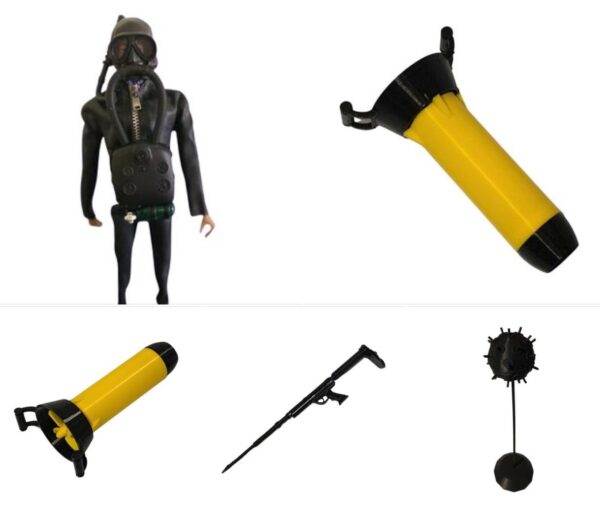
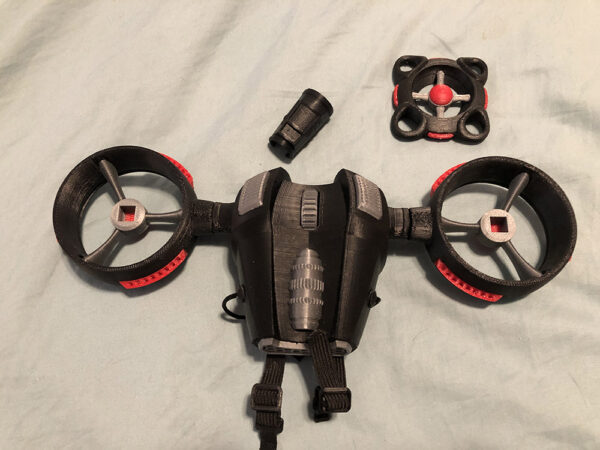
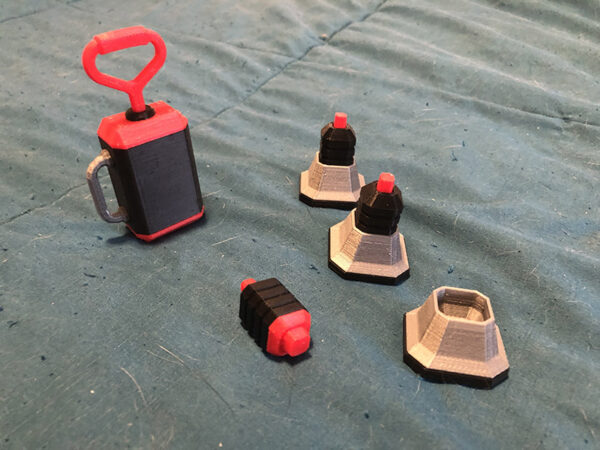
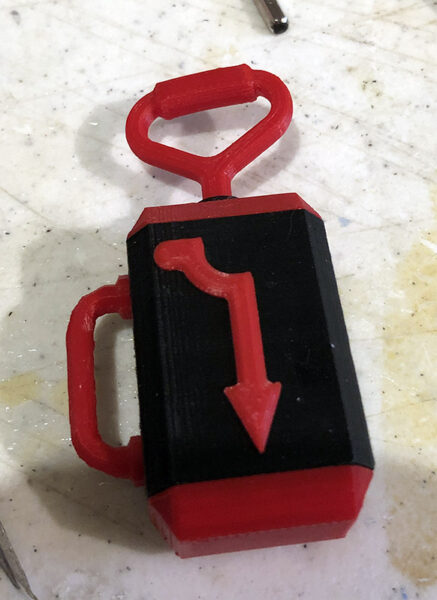
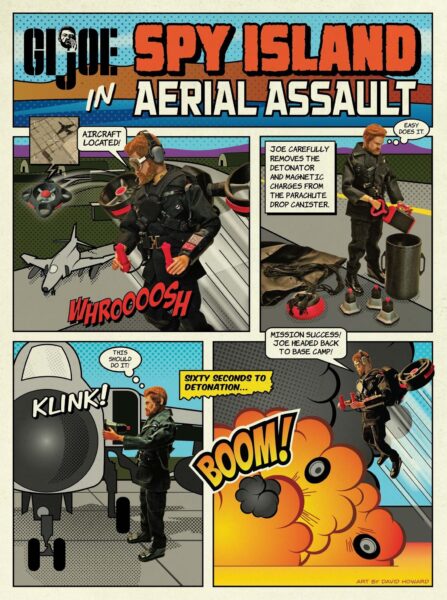
Then this past Toylanta in March (on my birthday) I came back fired up! I jumped in with both feet. I was designing, printing, assembling (the hard part) and I put together some very very cool stuff, like the Aerial Platform Mark II, and gear for for upcoming Cotswold sets, including Spy Island: Aerial Assault, and The Hunt for the Pygmy Wolf, which included a Net Blaster that I had designed a bunch of years ago and sat around because I didn’t want the hassle of making a net, as cloth products are not of much interst to me. (Until Greg found the perfect net material, and then we were on!)

Plus more gear and cool that you don’t yet know about. Things that have been in the works for years, waiting on the perfect thing to complete it, or just on hold because some scumbag decided to change the circuit board inside the Santa Noses I got at Dollar Tree, so it no longer fit inside a thing I needed it to fit inside, meaning I would have to compromise my design completely – and I really hate compromising when I created what I think is the perfect thing.

So I’ve been busy since March. Very busy. Too busy for any custom orders.

That doesn’t mean I won’t do custom orders. I sometimes do.

Usually I prefer to design stuff and let someone else take the reins on the rest.

Shapeways, for example, has a whole catalog of my toys and people are free to order those, and I don’t even have to know about it until the thin margin of profit (usually a buck or two on any item, or even less) comes my way. Shapeways does all the rest including manufacture, shipping, and profiting.

My Shapeways store is called fourthd and that’s meant to indicate that while the item is printed in 3 Dimensions, the fourth D is Time, or in this case – Play Time. YOU provide the 4th Dimension.

And I have some Etsy stores. Most were experimental, but one is active: Moonbase Beta.

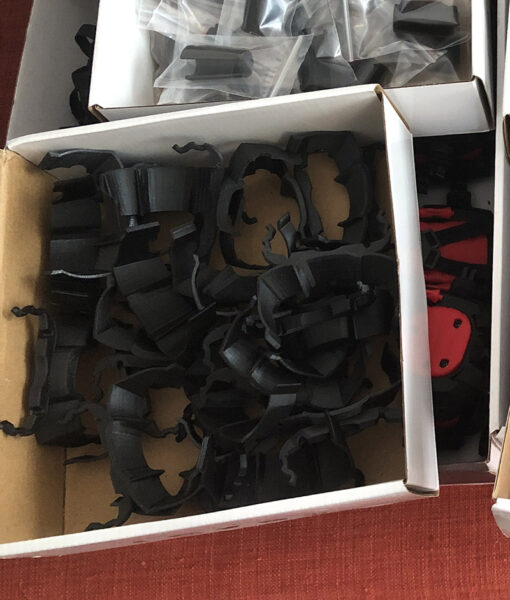
I was originally intending to provide a Print-On-Demand service for any of my designs, since the design work was done, I simply had to take orders, pump out some stuff on my 3D printers, and assemble them and ship them. Ah, there was the rub. Assembly is hard. And time-consuming. And it hurts. Physically. If you saw how many times I cut myself on the sharp plastic, and the sharp tools required… you’d wonder why I even bother.

So right now, my ETSY store is only selling things I pre-printed in a big batch last year. And when that backlog of stock runs out, I will either shut down my ETSY store or print another batch. But I am not open to doing on-demand orders like I originally started out doing. It’s too much for me to take.

“But do you still make things?”

Absolutely. I do. And I do it a lot.

Because it’s fun.

And when it stop being fun, I stop doing it.

But yes.

“So, Do You Do Custom Orders?” – (again)

I sometimes do Custom Orders. But only when I want to.

So if you ask me if I will do a custom order for you, please don’t take it personally when I say “I usually don’t. I work almost exclusively through Costwold, so keep your eye out for their announcements.” That’s my polite way of saying “Right now – RIGHT NOW – I don’t want the extra work. Tomorrow I may feel different. (But please don’t ask the same question tomorrow – that’s bound to get a no on principle.”

And if I say “Sure. What do you want?” it means I’m in the mood to do a custom order.

Please don’t take either response personally, because it’s never about you. It’s about me. Every time.

Do I want to? Am I up do it? Am I currently overwhelmed with the work I am already doing? Is it still fun? Am I in the middle of a few good books? Are my printers acting up and causing me problems? Do I want to take the time to figure out why and fix the issues? Do I want to sit in my cramped hot print room (in summer) hurting myself and making myself bleed? Do I want to take this Saturday and go to the Mystic Aquarium and Museum with my family? (Which is what I did yesterday instead of working on an order.) Do I want to sit and veg on the couch flipping through shows I don’t even care about for a few days? Am I just really really tired???

Sometimes I do want to do custom orders.

Sometimes it’s mercenary. Sometimes I think “Man, I’d love get that new New Wave’s Arcade 1:6 Replica. and if someone would pay me some cash, I could just do it without having to use my own money. And those things aren’t cheap.

So sometimes it’s about that. On rare occasions.

But it’s never about you. It’s not that I don’t like you, or I do like you, and if I like you I’ll make you some stuff. It’s about me. And how I feel in the moment.

I still like you. Don’t worry about that.

My interest in this hobby is to make things for the people who will truly appreciate them the way I do. Cool fun new GI Joe toys. Fun accessories for the Dinky Eagle they’ve had since they were kids but they don’t have the cool Freighter Pod as it appeared in Space: 1999, or the Lab Pod they never made, or the Jet Booster they never made for it. So I made it, and I made it available to people… when I feel like printing and assembling them.

I do it because I love toys. And I love that you love toys. And I want you to have the toys you love.

But I’m only one person, and I have only so much time. And the money is not why I do it.

So all this is the most long-winded way to answer the simple question:

Q: Do You Do Custom Orders?
A: Sometimes.

But don’t resent me when I don’t.


Huxter Labs Net Blaster – Hunt for the Pygmy Wolf

For Joelanta, August 11-13, 2023, Greg Brown of Cotswold Collectibles was creating a new set. It would feature a hunt for a Pygmy Wolf. This harkens back to the old Adventure Team days when Joe hunted the Pygmy Gorilla, which really was an excuse to use a hilariously small gorilla in a set back then. But that was pretty normal for GI Joe. He also hunted a White Tiger that was soooo small.

So Greg approached me for a Net Blaster to capture the wolf.


Net Blaster

Years ago, not long after I created a Spotlight that would fit Dollar Tree flashlights onto a pillar with swivel features for the RACCS system I created, Greg and I began discussing the idea of a net gun for trapping animals.

I immediately jumped at it, and made it to fit the same clip as the Dollar Tree flashlight, so we could reuse the Search Light RACCS set, shown here.

The RACCS Search Light connects to the RACCS platform with tabs, like all RACCS gear. But it also came with a cup mount to fit onto the Adventure Team Training Tower.

Here is the Search Light attached to the RACCS platform that came built-in to my ATV Trailer:

So I made a net gun with a barrel size equal to the flashlight’s width, so it would also fit into that pillar.

So I set out to model the Net Blaster. Seen here in an early form, with the gas propellant tanks forward instead of aft.

And so this project sat for years on my shelf, without a net. I did print the missiles I would use, but never did find netting good enough to make it real until this year.

Greg wanted a jungle or forest themed color palette, so instead of using the Adventure Team themes I had been using, I went with olive green, tan, black and silver. With orange propellant tanks.

Another requirement was that the gear be packable into one of my Drop Canisters.

So the Net Blaster had to come apart, given that it was a bit too tall, as it was, to fit into the Drop Canister comfortably.

So I decided to make the rear power cylinder and pistol grip removable. With 3D printing, it’s easy enough to make the fit tolerances work so you can friction-fit something into place, but it’s a delicate balance, and variations in printing and materials, and even which printer does the work, can make it inconsistent. So instead of just relying on that, I came up with a tab/slot system, with an arrow indicator.

The rear cylinder can only go in one way, and you rotate it to click into place, and the handle is pointing directly vertical.


Missiles

To fire the net, I came up with a four-barrel system, each of which would fire a gas-powered missile with the net attached, so the net would spread out and capture the target.

Easy enough. I just made a red and yellow missile that would connect to the net using jewelry hoop rings.

These fit into the barrels like so:


The Net

I had figured Greg would get someone to make the nets just like he gets someone to make the outfits. But nope.

And over the period of years, we tried many different net materials, and until June 2023 I really hated them all. Too flimsy, the wire rings on the missiles I was planning on attaching to the netting would tear the netting far too easily. Until Greg sent me the perfect material. Strong, looked good.

But it was a bit too bulky to fit into the original barrel so I enlarged it. (Oh well, there goes the re-use with the Search Light.)

After finally settling on a netting of suitable material that would not likely break when pulling hard-ish on the missiles, I cut one 8×8″ net and it seemed a bit small. So I increased it to 9×9″ and even though it was just one inch larger, it made a world of difference.

Let me say that we could easily have faked it and left the net out of the actual gun, and let the player imagine the firing of the net, but that’s just not me. It had to fit. So that’s why I increased the barrel diameter.

And when the first net was finished, with missiles attached, we tested it against the very small wolf figure that would come packed with the set:

Success!

But it was kinda bulky at 9×9″. I could jam it into the blaster, but that would not be a great idea. So I came up with a folding method that worked rather well.

See below for folding instructions.


Production

Often, I get orders for 12, or 20 of a thing. Sometimes 24. Once I think I did 60 drones. Let me tell you that prototyping a thing is easy. Making dozens of them is very hard, laborious work, and I cut my hands so often on the sharp plastic and chisel tools that I’m surprised I’m still alive. (I would not be doing this if I didn’t love it.)

Greg needed 50 sets. That’s 50 Net Blasters, 50 nets, 200 missiles, and 50 Wrist Control Cuffs. Oh, and 20 NEW Drop Canisters

Here are just over 50 Net Blasters, fully constructed:

This is what 200+ missiles look like:

Here are only about half of the 50+ nets I made:


Control Cuff

Of course the set would need a Control Cuff. We opted to go with the olive cuffs I had already been producing.

But I wanted it to be different, so I made a unique screen sticker for it that would evoke a jungle hunt with tracking information (dots)


Drop Canister

As mentioned earlier, the Net Blaster had to fit into a Drop Canister, so I made that happen. However, Greg did not have parachutes for this set. I knew just what to do. It would be incredibly easy to adapt the cover of the Drop Canister to have retro-rockets to guide the Drop Canister down to the ground and land it softly, even softer than a parachute would, if it was computer controlled.

So I set out to update the Drop Can. I added the quiet retro-jets to the can without the need to alter the lid much, other than cut slots in it so the engines would align properly.

Here you see the ducts under each engine:

And I could have left it at that, but I never liked the rather unfinished look of the Drop Canister bottom, so I added a retro-landing system:

These Drop Canisters would be sold as add-ons to the full set, so only 20 were made.

Net Folding Instructions

The netting we chose is fairly robust, so of course it takes up room. If I had known earlier exactly what the folded net would feel like and measure, I might have expanded the barrel just a bit more. But this folding system works, as long as you follow directions correctly.

Even though I mentioned that the netting we used was strong, it is still mesh made of thread, so it is not iron. Pulling on the missiles when the net is stowed inside the barrel should be done carefully, and folding the net and prodding it inside should also be done carefully.

So here is the best way I came up with to fold the net so it fits inside the barrel nicely:

1 – Lay net out flat, missiles to the corners


2 – Fold net over so two opposite missiles meet


3 – Fold net so one single missile meets the other single missile


4 – Fold net so all missiles meet in a corner


5 – Fold the far net corner over until it meets the missiles


6 – Starting with the netting corner, begin folding very tightly towards the straight edge


7 – Grip the wadded net by the end


8 – Gently push it into the body with a finger, until the four missiles are dangling outside the barrels


9 – Fit each missile into its closest barrel


10 – Very gently nudge the rest of the netting into the body until the missiles tighten, but do not over-push, or you my tear the netting where the metal rings connect!

To “fire” the Net Blaster, gently pull the netting out from the body. You can tug gently on the missiles, but be careful that they don’t tear the netting. It is best to hook out the netting with tweezers or pull on the netting itself in the middle of the body between the four barrels.


Huxter Labs Super Joe Unlimited – Arctic Danger

In 2021, Greg Brown of Cotswold Collectibles put together a new set for GI Joe – except this one held a bit of a twist. He had been working on ideas for Super Joe, a 9-inch figure that Hasbro produced after the 12″ GI Joe line petered out. Super Joe was not quite as world-popular as the original GI Joe line, but people did enjoy the figures and the wonderful gear sets that were produced at the time.

Greg’s idea was to continue the Super Joe idea, but in 12″ scale.

So he had planned an Arctic Set, partly surrounding a blue Arctic dragon-like monster creature from Safari Limited.


The Set

The set would include a figure with flocked hair, a white snow suit with blue striped accents and fur-lined parka hood, white Kung Fu Grip hands, white boots, a white mask against the sheer arctic cold, a futuristic rifle. The box art was by David Howard.

He also wanted a revival of my Communication Backpack, which was repurposed from a metal Lowe’s Gift Card holder, that I had done some time earlier. Only this time it would hold a drone. With it, he wanted the extended Wrist Cuffs I had made for a space set some time before.

I also provided a blue clear resin eye piece for the face mask, which had no visor, but was open, which for an arctic set, was less than ideal. I can’t fault that mask, though. I’m not sure who made it, but it was very nice.

Mattsquatch Customs made the rifle, and a clever twist was that each boxed set would come with a randomly packed futuristic rifle, from, I believe, 3 options.


The Drone

Greg wanted a drone to fit into a backpack, and he wanted the backpack to be a slight revision of the Lowe’s Gift Card pack Communications Backpack we had done a year or so earlier. He and I both had a small stock of those backpacks left, (and Lowe’s was no longer selling them) so we thought we would use the remaining stock in this set.

The original: This one came empty and was used only to store gear.

First, I needed a new drone. I wanted a new version that had fewer parts and was easier to assemble, as well as, I was kinda getting tired of the old one.

So I created this new drone and tried a few sizes:

It turned out that the biggest one was too large, the smallest one, but as is often the case with stories, the middle one was just right.

To make this fit into the backpack, I created an insert that would fit the drone, but also the two antennas that slot into the top of the backpack have slots for storage too.

I created a new cover for the Lowe’s logo at bottom right (here, covered by a widget), and made a screen for it.

A problem with the last batch of Communicator Backpacks always bothered me. I tried gluing the harness braces to the back of the aluminum pack, but I always worried it would not be strong enough to hold permanently. Experiments with Super Glue and Binary Epoxy both yielded iffy results. It may never be an issue, but I was able to pull them off with some force. Likely no one else ever has, but that’s just me.

So I went the extra step of updating those braces to hold a rivet. And I bought a rivet gun, rivets and rivet washers, to make damn sure these would never come off. In addition to the Super Glue (which was actually quite strong) I riveted the upper and lower braces onto the box.

The top one here is covered by the standard Huxter Labs harness, but you can see the rivet in the bottom brace. Both braces are identical parts, flipped.


Drone Control

Greg saw a cuff I had made previously for an Astronaut set I worked on. I extended the arm cuff to contain a screen that fits over the back of the hand. We used this for the Drone Control Cuff for this set, rather than going with the original.


With this equipment, the Arctic Danger set was complete.

Huxter Labs – Spy Island – Aerial Assault Superset

For Kentuckiana GI Joe Toy Expo in July, 2023, Greg Brown, owner and operator of Cotswold Collectibles wanted to put together a Spy Island-themed super-set that would have some very cool gear in it.

The History of Spy Island

Back in the original Hasbro GI Joe days, even before the Adventure Team, there was a GI Joe set called Secret Mission to Spy Island which featured a black suit, black stocking cap, a grease gun, flare gun, binoculars, spotlight, wrist flashlight, inflatable raft, a pack of dynamite and a detonator, and a box-radio, and more. It was a very popular set and exploited the 1960s Cold War spy themes, movies like James Bond, TV shows like Danger Man (Secret Agent) and others.

The set was revived during the Adventure Team era to include almost exactly the same gear, but with a black Adventure Team stealth suit.

Peter Pan Records did a story book and record of The Secret Mission to Spy Island, which you can see here, and even listen to the audio files I had converted from the original records long ago.

In the late 90s through the mid-2000s, Hasbro revived the GI Joe line in an excellent series of different era reproductions, and one was the Timeless Collection. It was during this time that they revived the Secret Mission to Spy Island theme with a set that, while it did not reproduce the original exactly, did reproduce several important pieces, and the general idea, and even threw in a Crocodile to add to the play value. It included a repro of the vintage hard-hands GI Joe, with camo outfit and all the gear needed to infiltrate Spy Island.

In 2010 at the Providence GI Joe Convention, the Convention Set was, in my opinion, the finest Convention set ever produced: Escape from Spy Island, and contained so much gear I can’t even imagine the creation process. Though much of the gear was recast from previous sets, including vintage items like the Underwater Explorer now done in black and red (wow!) the sensor from the Classic Collection Save the Tiger set cast in yellow, and a metallic robotic shark that was originally part of an unreleased Sigma Six set, this was an amazing set to own. Thankfully as of this writing, I still own it, (plus the add-on convention exclusive of the black version of the mechanical shark)

Note that in this set, the theme of red and black emerges quite emphatically. In the original set, due to its stealthy nature, of course, the overall theme was black, but with red binoculars and red dynamite, it already hinted at a black/red theme.

With the lamentable end of the GI Joe Collectors’ Club, the Spy Island story was officially dead…


Spy Island Revival

…until 2023.

When Greg approached me to help create a set based on the Spy Island theme, I jumped at the chance.

This would be for the Kentuckiana GI Joe Toy Expo in July, 2023, and it would feature three GI Joe Spy Island sets.

One that I know about is Spy Island Invasion – Sabotage:

This one will feature a lovely box with art by Doug Fakkel who is a friend I haven’t seen in many years. He used to be in a GI Joe collecting group with me long ago until he left the area. (Doug has made some of the finest repro GI Joe boxes and new boxes to fit modern era GI Joe sets.)

So far I have only seen this image of the third set: Invasion of Spy Island; Underwater Infiltration from Wetsuitman Exclusives.


Spy Island – Aerial Assault

For this set, Greg envisioned an aerial attack on Spy Island to take down an imminent threat. He liked something I had done years before, which was part of an incomplete set I had planned, called Cyber Counter-Attack, and wanted to carry this forward to his Aerial Assault on Spy Island.


Air Transport

First, we needed a way to fly to Spy Island.

It was an obvious idea to use my original Heli-Jet Pack but in a black/red theme. We had created a few black stealth versions of this before, but this would have red accents as well to fit the theme.


Aerial Drone and Controller

You will also note that in the photo is a wrist control cuff that I sell through Cotswold in a variety of colors, and also include in other sets where appropriate. Usually it is used to control a drone or some other equipment, as it is kind of like an arm-worn control tablet. Above, it is shown without sticker for the screen. Here is what it looks like complete:

Also, I repurposed my most recent drone which was originally created for an arctic themed set we worked on a couple of years ago, called Super Joe Unlimited – Arctic Danger. The original was in white and blue colors to fit the arctic set.

This is a departure from my previous drone which I had used in multiple sets. This one would be easier to assemble (in theory) and not have moving parts, but still be a cool, high-tech drone.

Using the idea of the Dyson-like propulsion that the Heli-Jet uses, it has four bladeless props, an intake vent and a camera lens underneath. I printed those intake vents and camera domes in transparent red resin on an Anycubic Photon resin printer. If you hold one up to the light, you can see through it.

At this point we had transport, we had an Aerial Drone for recon. Now we needed a weapon system.


Electromagnetic Mine/Grenade

This spy would carry no heavy weaponry, just a pistol. His mission is to disable a Cyber-terrorist server farm (or whatever the user dreams up. In the comic book image below, a mine is used to take out a jet), so he needed something to take down a bunch of computers.

The idea I had years before was for an Adventure Team Cyber Counter-Attack set that would feature an EMP Cannon for aiming at electronics and emitting a burst of magnetic energy to fry the equipment, as well as EMP Grenade and Mine to plant around the facility which would deliver a centralized EMP burst powerful enough to take out electrical equipment in the vicinity. It also had some stuff we would not use, such as a satellite uplink, a control pad (we now use a wrist cuff) and cybernetic VR goggles.

This set would be all about using Electromagnetic Pulse weaponry and monitoring to shut down a Cyber-Terrorist threat, and included an EMP Grenade/Mine.

This is something I modeled and prototyped nearly a decade ago. It contained 3 magnets per grenade/mine. One in the base cup to let the mine attach to a metal surface, and two in the grenade portion. The grenade comes out of the cup and can be thrown, hence grenade. But mainly it was intended to sit in the magnetic cup as a mine that could be planted. Inside the grenade are two magnets. One is dual-purpose: It attracts to the base, but is also used to repel a very small magnet in the trigger plunger, which made it behave like a spring without using an actual spring.

For Spy Island, Greg recalled that mine prototype and wanted to use it, and I thought now was the perfect time to resurrect it and theme the assault as a counter-attack to a Cyber threat.

To detonate the 3 included mines, I created a Detonator, in the general idea of the original Spy Island detonator plunger. In this case I did use a spring. I also created a locking mechanism inside so you can only push the plunger when the handle is turned perpendicular to the box.

At the last minute, I added an arrow indicator to show the Spy that they needed to turn the handle first:


Getting the Gear to the Mission Site

How would the Spy transport the drone? And how would he get the EMP Weapons to the site? Hold them in his hands as he flew in? NO. His hands would be filled with two joysticks for the journey.

We had used a Drop Canister for mission gear in the past. However, the Drop Canister would have to be redesigned to be made larger to fit the drone, if we wanted to include it. I thought that unnecessary.

We would definitely want to fit the mines and detonator in a Drop Canister, which would be sent on ahead by parachute drop to the Spy Island mission site.

So I thought of a way to snap the Drone to the Heli-Jet. A simple clip that would attach to the back of the Heli-Jet with clip tabs for the Drone, so the Drone can be carried without issue by air.

Thanks to 3D printing, I was able to use the actual body model for the Heli-Jet as a base to create a clip that would snap to it perfectly, contour-for-contour. To make it reusable, I created a slot, rather than adding the drone clip directly to it. This way, I could repurpose it for any gear I wanted, that would attach a second piece to the slot on the Heli-Jet portion of the clip.

Two tabs fit into two opposing propeller holes on the drone, for a very secure connection. Simply thumb the tabs together very slightly, and pop! The drone comes off easily.

See how it works in the image at thet top of this article.


Completing the Super Set

Greg would supply the figure, the outfit, boots, equipment belt, a wonderful headset, a great pair of goggles, a shoulder holster and pistol, as well as the parachute for the Drop Canister.

Prior to the show, Greg released an image to be used with the set:

And with that, Kentuckiana GI Joe Toy Expo will see quite a spirited revival of the Spy Island lore that dates back to the early days of GI Joe, all thanks to a group of very dedicated fans who love GI Joe and love what we do.