TRON – My Obsession

When I first saw the movie TRON in the 80s, when it first came out, I was in love.

When TRON Legacy came out, I was a huge fan. This was likely the second most beautiful movie I have ever seen. Blade Runner comes first.

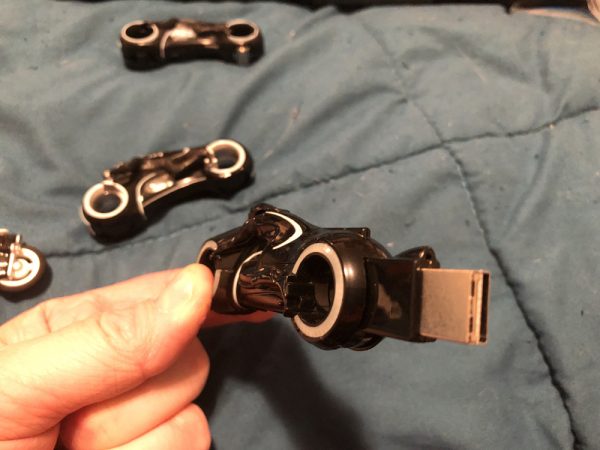
When the first TRON came out, I never had access to the toys. There weren’t many, but there were 3 Light Cycles with ripcord and heavy flywheel based on the concept of the SSP toys from the early 70s. And each could hold a figure. They made a few figures. But not many.

These exploded in value to the point that owning them was out of the question.

But when TRON Legacy came out, the toy stores were flooded with great toys, and man, I bought them.

I missed out on a few, but here’s a selection from my collection.

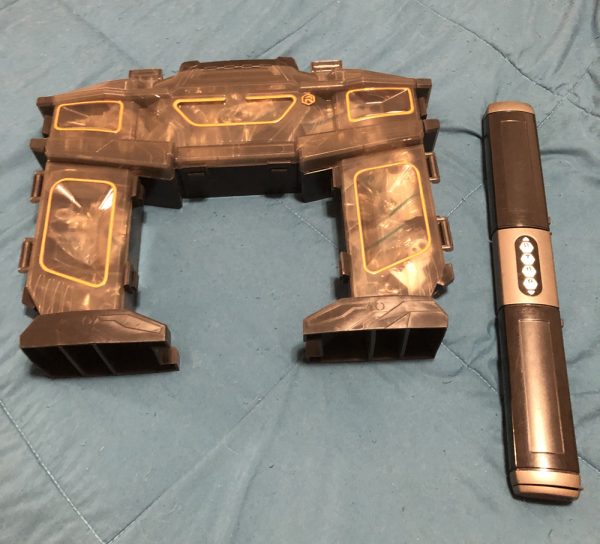
First is the Recognizer Carry Case for the die cast ships and cycles. Seen with the Baton.

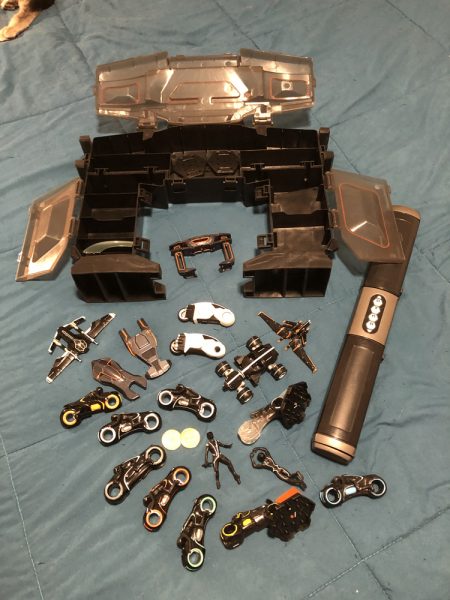
Open it up and spill the contents:

This is the set of die-cast ships and bikes from the film, stored lovingly in zip-loc bags to prevent damage, inside the Recognizer Carry Case.

There are a few interesting ones here. Included in this Cycle collection are a few exclusives. I’ll shoot better pics of them at some point.

One is a Walmart exclusive (a turquoise highlight bike) that came with a DVD set.

Two are from figure sets, one is sem-transparent, showing the transformation from bits to the fully-formed cycle. Another shows a streak from its back.

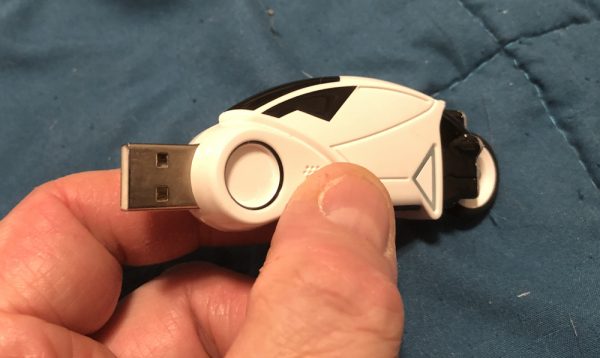
But the coolest: Two USB Thumb Drives. Each one has a swing-out USB connector, and when connected, they light up and make sounds from the film.

The Baton holds a spring-launched Light Cycle with little metal roller wheels. You pull open the baton which locks the spring, then close it to compress it and launch the cycle from one end, which is a hinged door. Pretty cool.

In a later post I will post pics of the larger Light Cycles that came with 4″ figures, and some of the figures I have, as well as the Light Jets, and even some larger figures, including two 12″ figures with light-up faces which switch expressions. Those come with die-cast metal accessories which are top-notch.

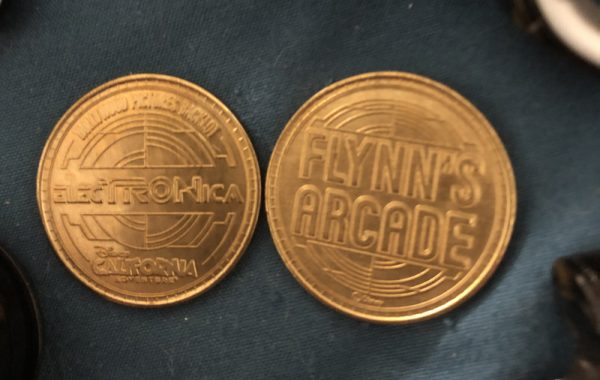
I also got two FLYNN’S ARCADE tokens from Disney, on eBay.

Over the years I stumbled upon a couple of interesting oddities.

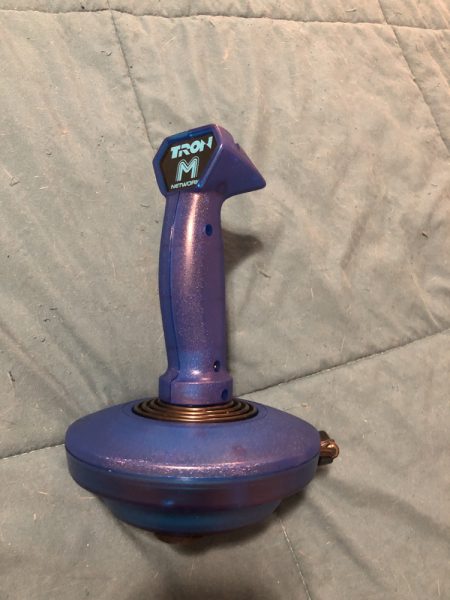
The first is an Atari joystick designed for the TRON game, and designed after the joystick from the TRON Arcade Game:

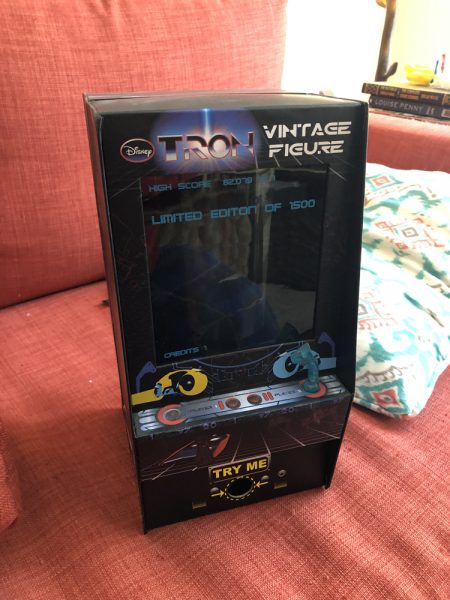
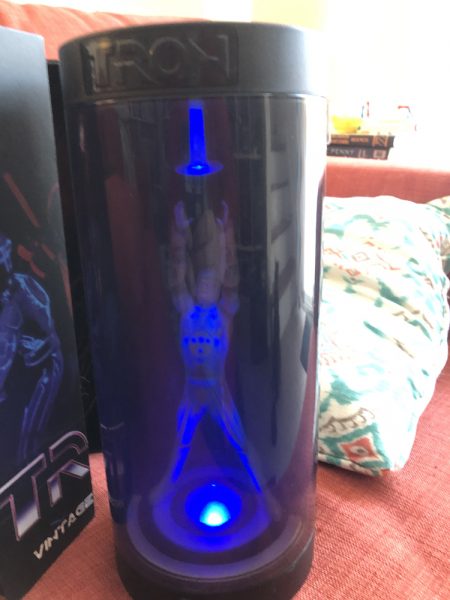
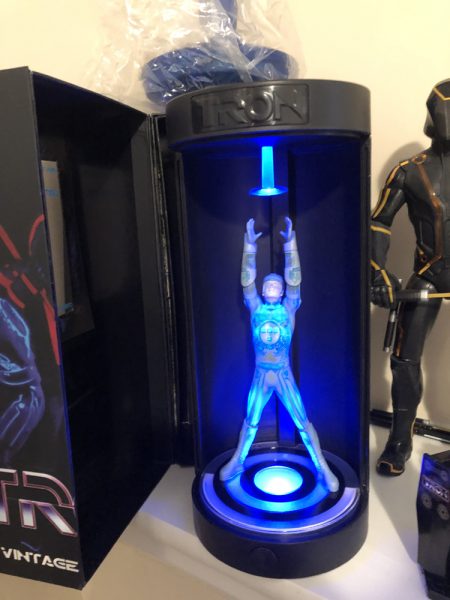
And here’s a figure from TRON put out in limited edition of 1600. Packaged in a fairly decent replica of an arcade cabinet, the figure inside lights up:

The dark cylinder cover also comes away, and you can see the figure much better without that heavy tinting.

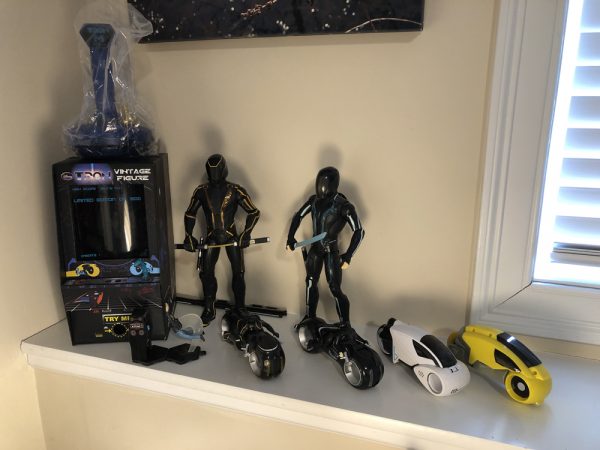
Here are the larger Light Cycles from TRON Legacy, along with one of the NECA Light Cycle Reproduction with figures that came out around the time of Legacy’s release. The ripcord is in a bin with the others.

Faithful reproductions of the original fly-wheel cycles.

Also, hard to see here is a small figure set of Sam Flynn flying into a TRON Arcade Cabinet.

Also, there you can see Sam Flynn and CLU as 12″ figures. Their accessories are metal, and the baton sticks to the thigh by magnet. No batteries right now, but their faces light up when activated, and we see the faces change through some kind of flip-projection tech. Not sure quite now, but it’s cool. Will replace batteries and shoot some video later.


My Paintings

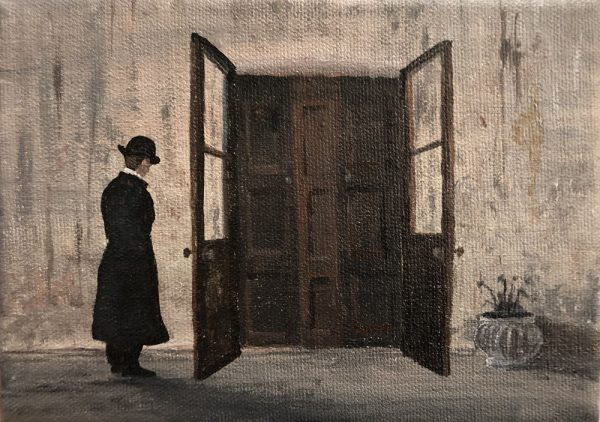
Until a year or two ago, I hadn’t picked up a brush to paint anything artistic since I was nineteen years old. True story.

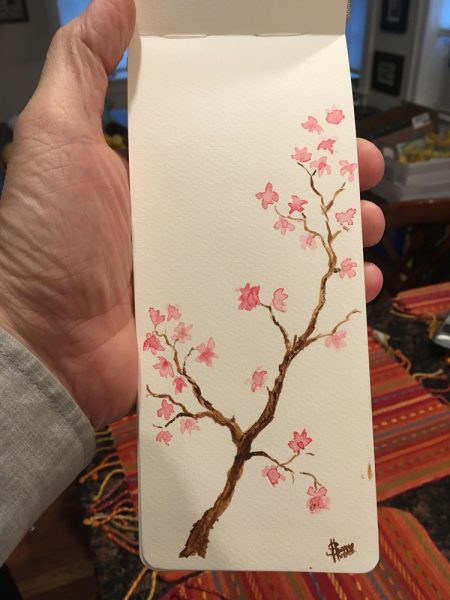
So in 2018 I bought some water colors and a watercolor book and did a couple of quick, ungood watercolors.

Then in 2019 I did some Acrylics.

The first was an image that stuck with me while watching Downton Abbey. I found this image so compelling, I took a shot of it from my TV and kept it. I had it on my phone for more than a year, probably much more, before I tried to put a similar image on canvas. 4×5″

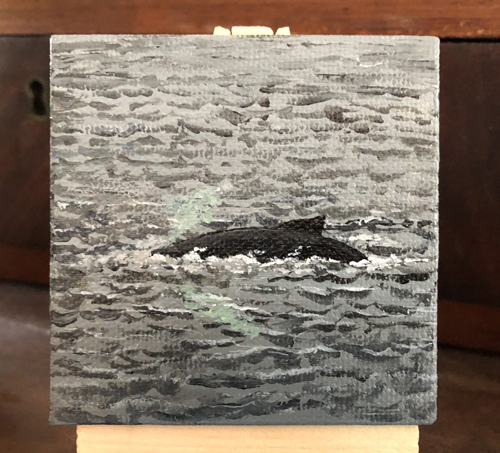
Then I did a 2×2″ of a humpback whale breaching:

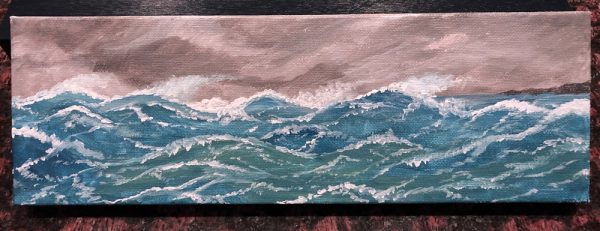
Then this 9×3″ of waves

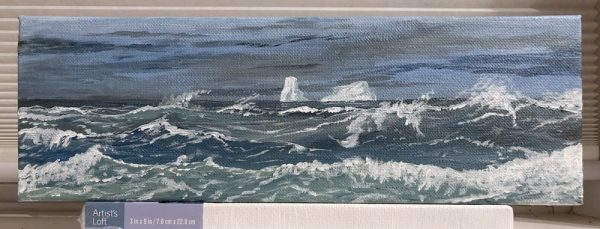
After this, I wanted to add some background.

Then I took up a tall format, and larger.

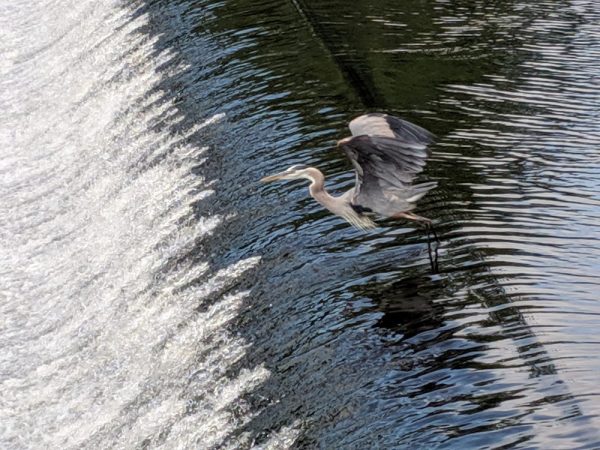
A friend took this amazing photo of a heron on a dam of some sort:

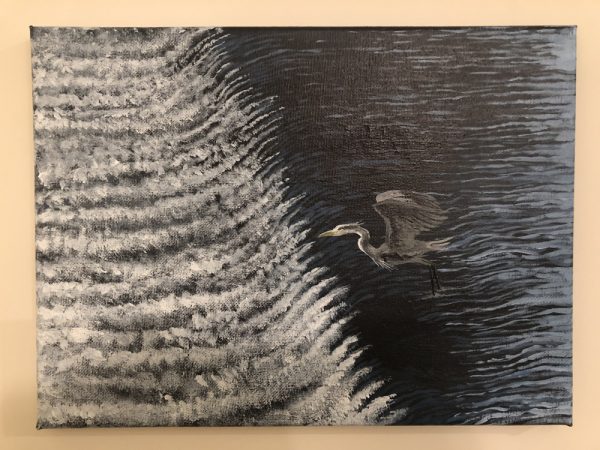
I loved this pic, so I wanted to do something to get it on canvas:

Then I saw a photo of something that looked a bit impossibly clean, but was clearly a photo. A very calm ocean, and a breaching Orca.

I did a 9×3 of it first:Three colors: Blue, white, black.

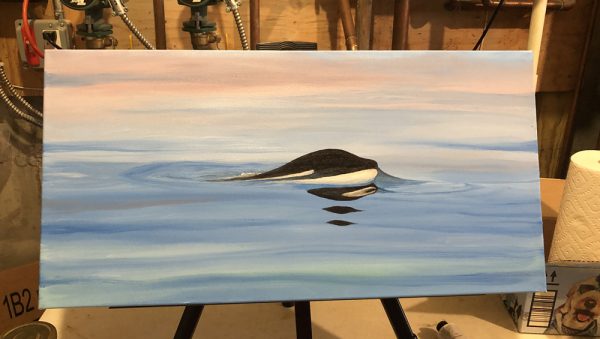
But the original image had some pink blush in the upper water, so I did a larger one.

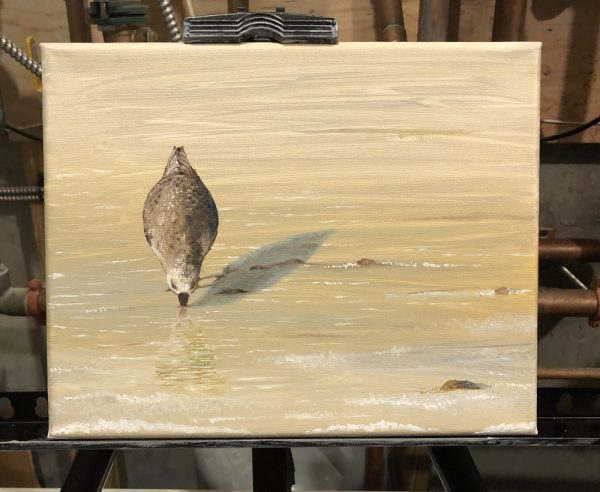
After this one I wanted to do an image of a shore bird, based on a photo I saw. 8×10″

And another water bird, a Gannet. This is meant to be a sketch for a larger one.

The last painting I’ve done since I just finished a few days ago:


Carol said she loved the clouds, and wants to see a large one like this on our wall, so I guess that’s going to happen soon.

Since Carol gave me two easels for Christmas, along with other paints and supplies, and Charlotte got me a HUGE set of oil colors (like 30 or more colors) I will be doing more painting. The larger easel is to set up in the garage for big pieces. The small one is a desktop and you can see it in several of these photos. They will both serve me well.

Impossible Mission – 3D Printed Robots

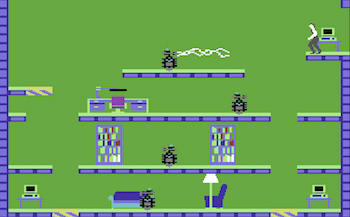
Recently I saw a 3D print of a robot and a runner from Impossible Mission, probably the best game ever written for the Commodore 64.

It is a marvel of perfection, that game.

And I have seen 3D prints before from these models. I found them on Thingiverse, by PixelPoldi.

They even appear in a book about the game and its sequel.

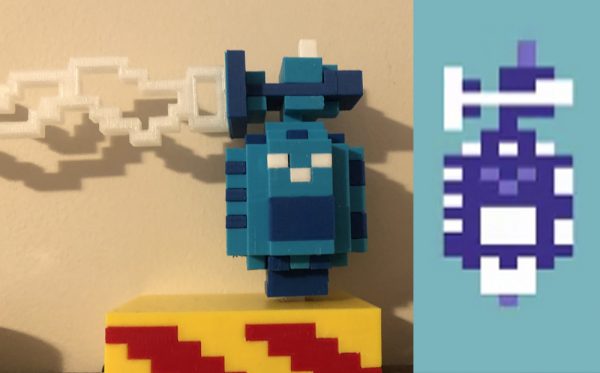
And so I downloaded the models and cut them up so they could be printed in multiple colors. The models on Thingiverse were single solids. Also, the models were designed to be pixel-square, which is not how a Commodore 64 screen works.

Pixels for a Commodore 64 screen in NTSC (where I lived and played) is 1 to .75, so they are a tad taller than they are wide. I scaled the models accordingly.

My results:

However, the more I looked at the robot, the less I liked it.

Comparing the pixel models from screenshots, I could see a couple of things that didn’t sit right with me.

First, the C64 Robot is created from a multi-colored sprite, which doubles the pixel width. So there are no single pixels, yet the model had several.

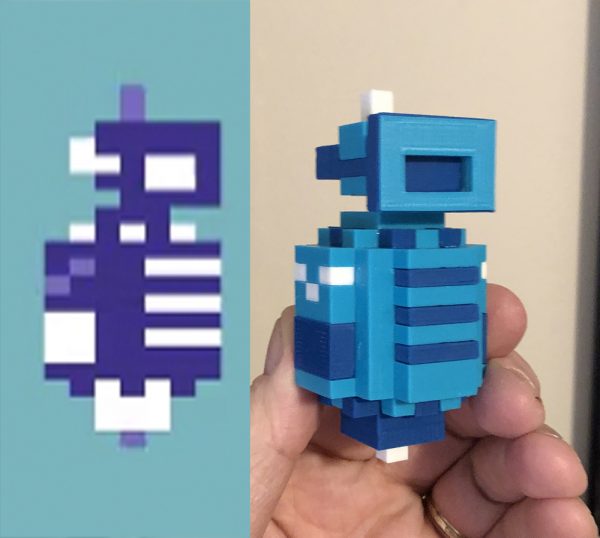
I printed out the actual sprite images, and used them to completely remodel a new, more accurate version of my Robot.

First thing I noticed was that instead of having a circular eye-piece, the sprite shows quite a wide rectangular eye-piece, much bigger than I remembered, when facing the camera.

(Note that the robots appear in-game in various colors, and I chose a different color scheme than the pixel images I found.)

I fixed some other things too, so that when facing the side, my new model was 100% pixel accurate. Sideways was a different issue, though.

The pixels were impossible. Modeled, the robot would have to have a painted face with no depth. But I managed even to make that work by making a front piece with 45 degree sides that fit into the eye-piece.

Here then is my final model, and you can even see that, while the rotating robot is intended to depict a cylinder, my version works pretty well.


Here they are, with floors modeled from the game, as display bases:

GI Joe Set – Naestor

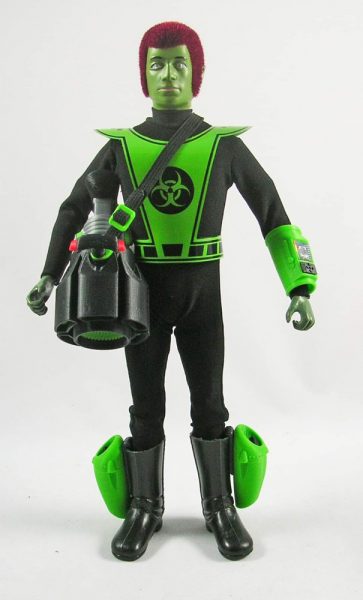
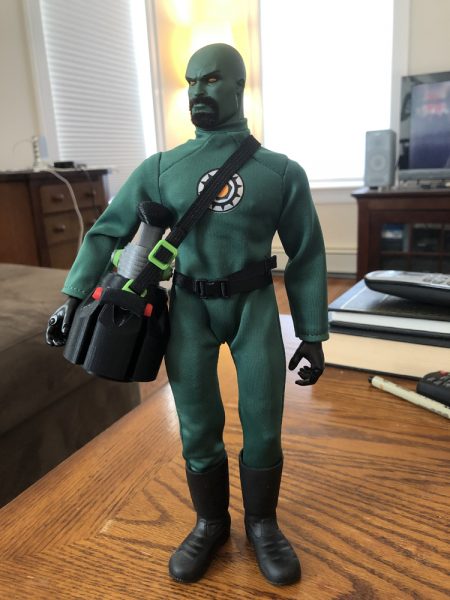
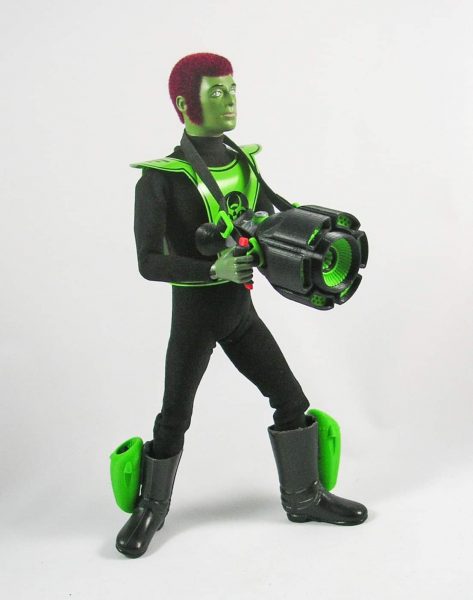
In 2019 Greg Brown and Cotswold Collectibles created Naestor.

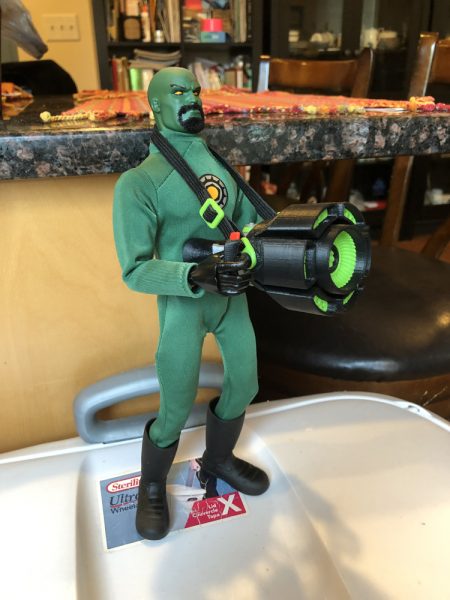
He created a green figure, (head and hands) with red flocked hair. He had an outfit and a chest piece made.

My job was to create his gear.

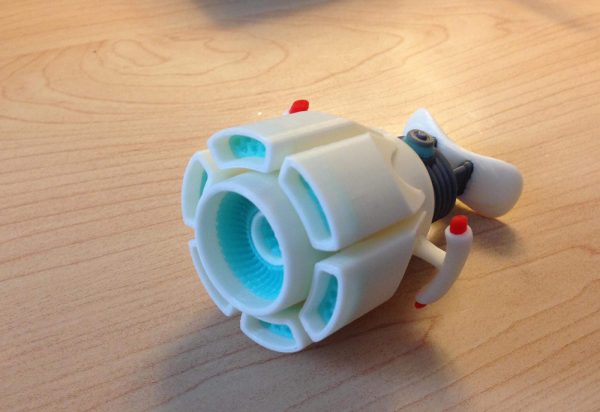
For some time now, I was hoping to find a use for my Arctic Blaster, a weapon I created as an intense heat ray used to melt through ice walls, for Arctic adventures.

The weapon was pretty cool, but the handles were weak. They couldn’t really be printed any stronger. So I had to redesign it just a tad to fit a screw along the shaft to the body. It worked well.

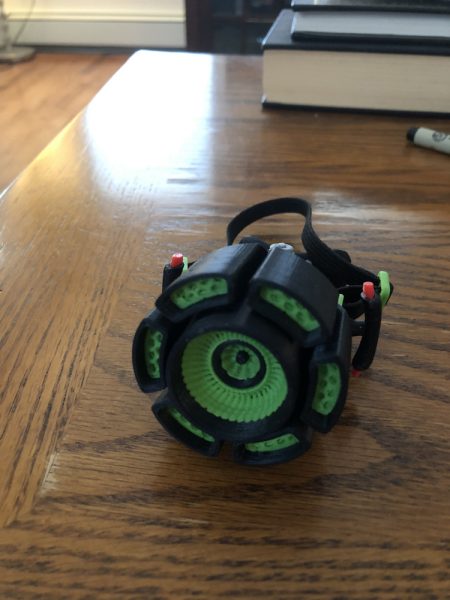
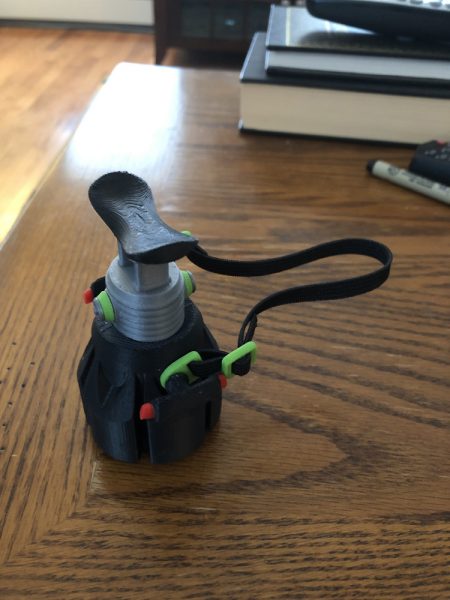
But of course for this set I had to make a black and green version:

Since it is a fairly heavy piece of plastic, I knew I couldn’t just let a 12″ figure hold it, the arms would fall. So I created a neck strap which solved that problem.

The weapon was intended to be held by the gut, with two hands, the body then being able to brace the kickback from a heavy energy beam.

I used the GI Joe Collector’s Club figure of Darkon as a test subject. (Don’t worry, he’s ok.)

But we wanted something to make it stand out.

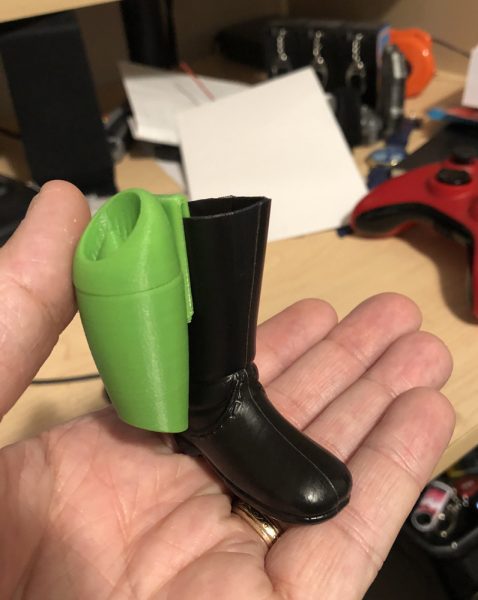
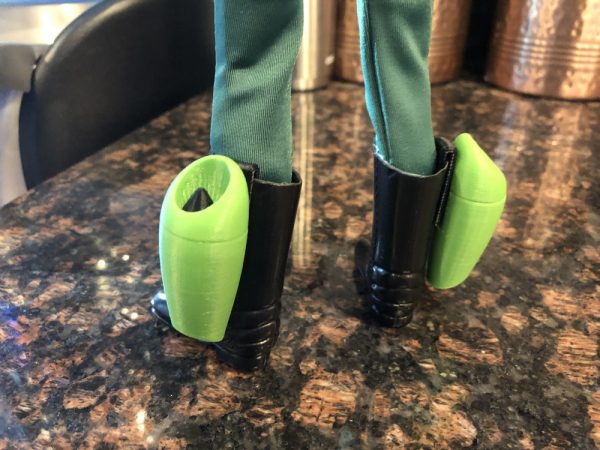
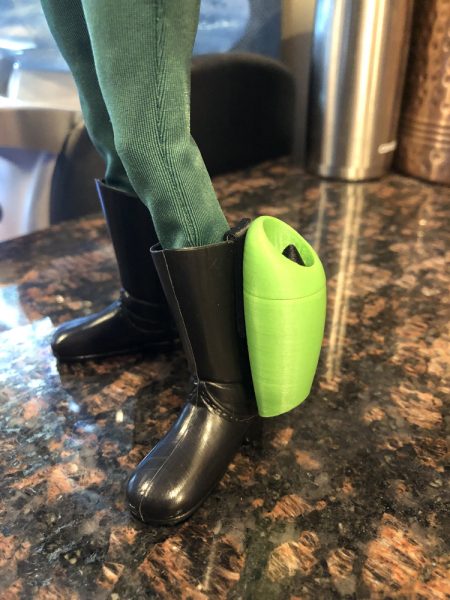
JET BOOTS!

Who wouldn’t want Jet Boots!?!?

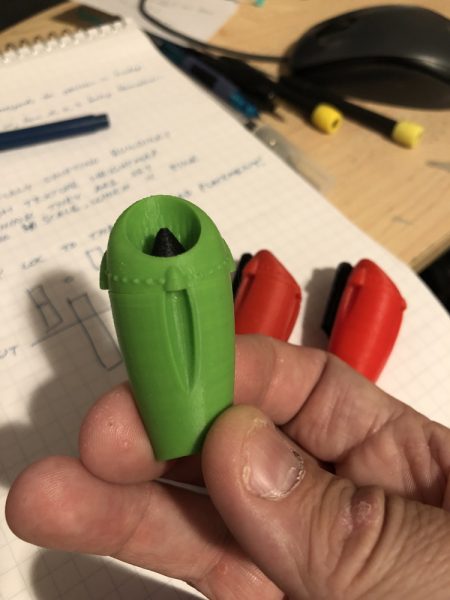
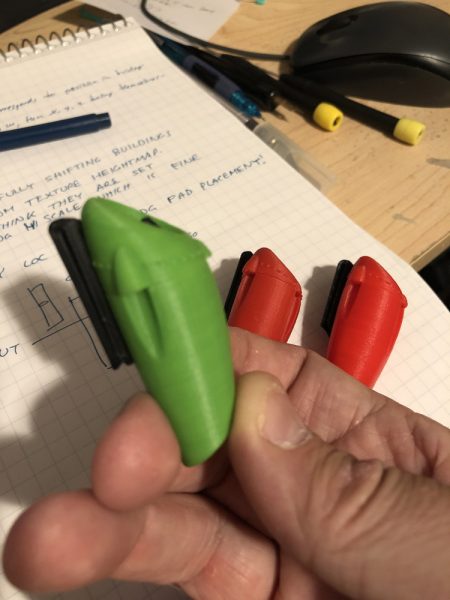
So I set out to make small jets that clip onto tall boots. Simple, really.

And that was Naestor.

And if anyone tries to convince you the name Naestor contains my name backwards… well that’s just silly…

GI Joe – New Set – Catastrophe In The Gulf

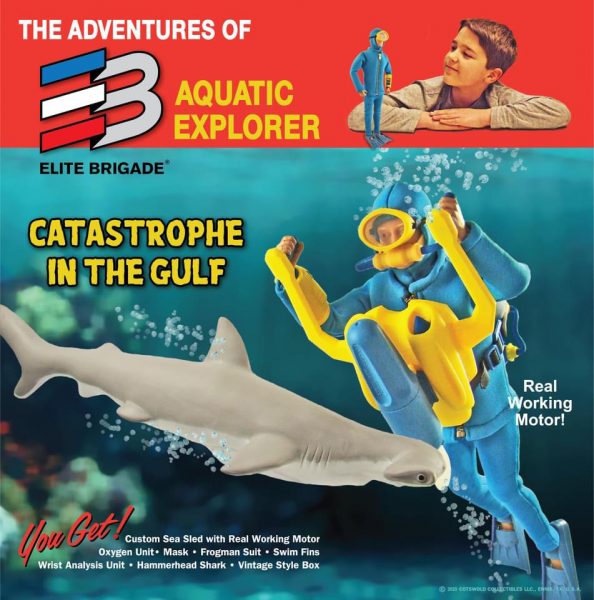
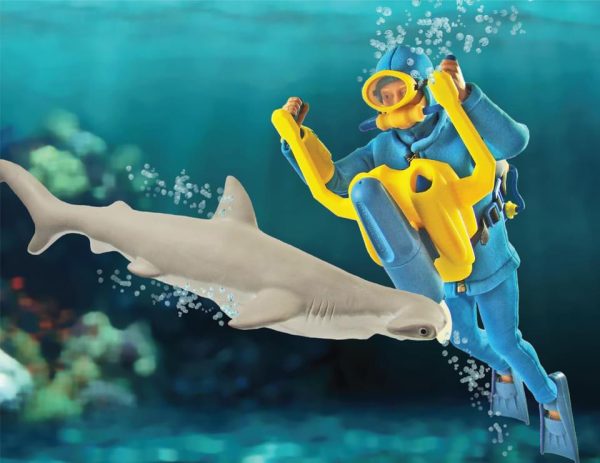
The second boxed set Greg Brown put together for Cotswold Collectibles this year was another set that nicely pays homage to original GI Joe Adventure Team sets – Catastrophe in the Gulf.

Based around a very nice Hammerhead Shark, Greg also sourced some great new Scuba gear, and a working motor!

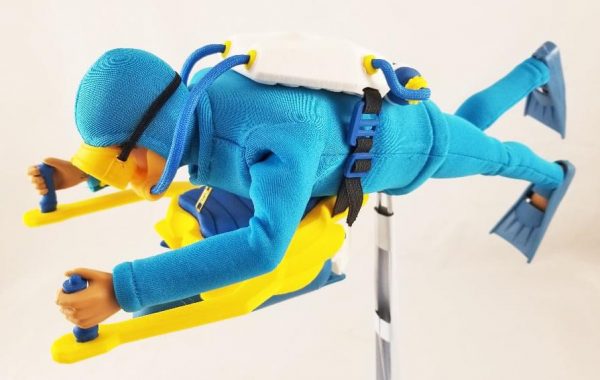
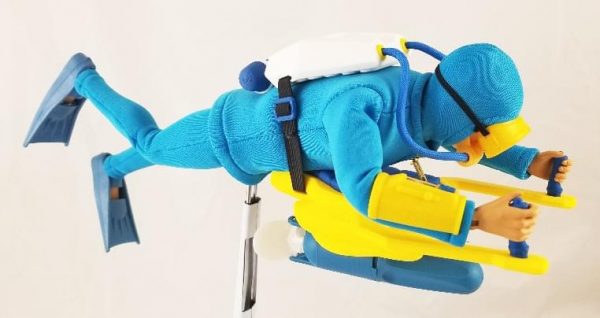
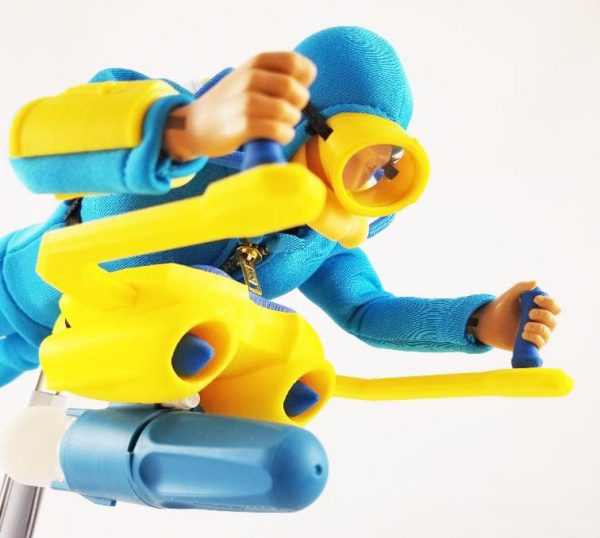
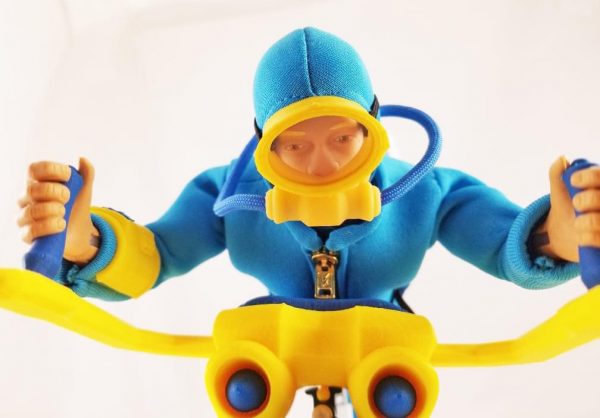
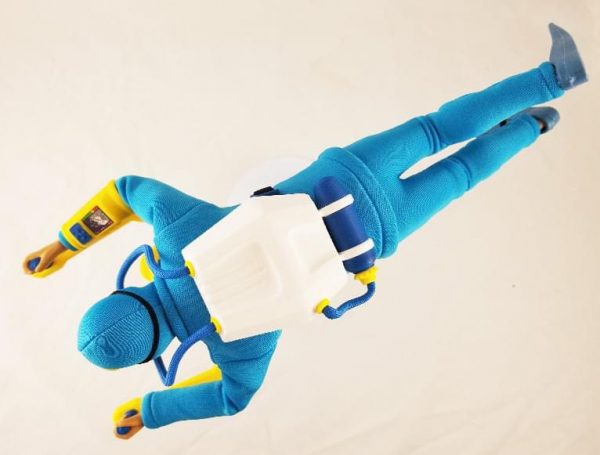
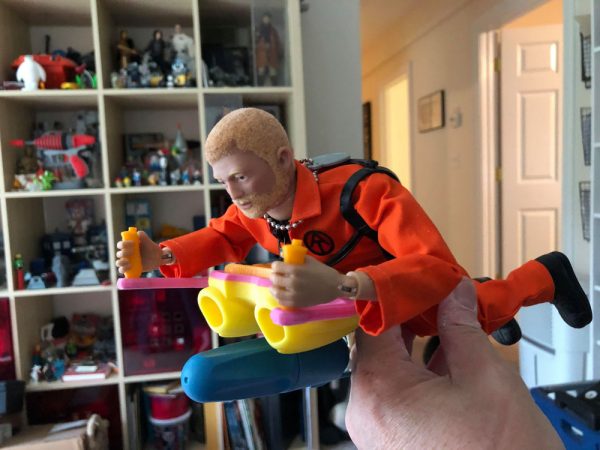
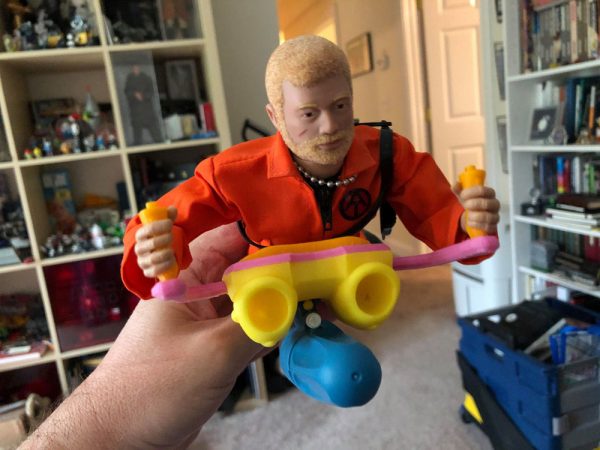
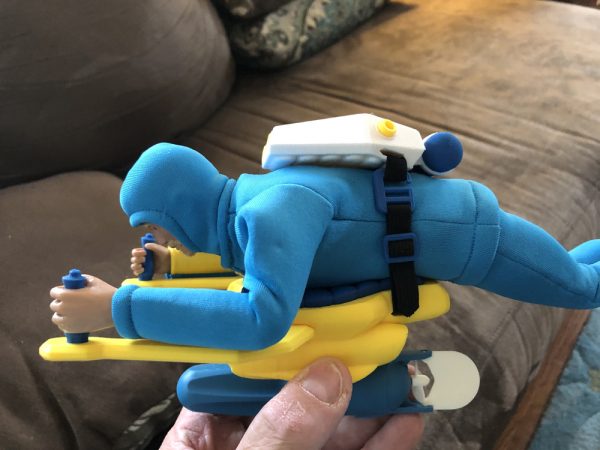
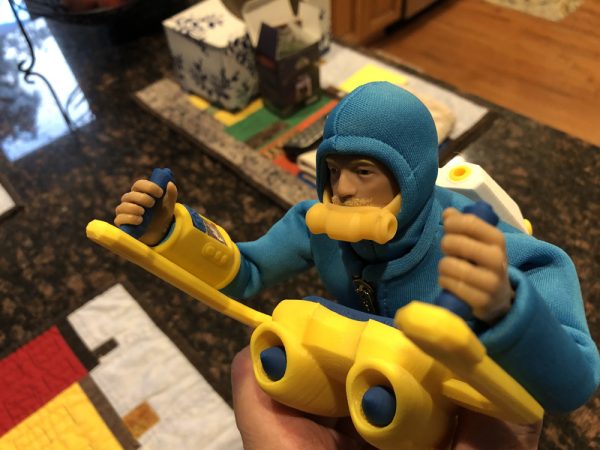
My part was to create an Undersea Sled which could fit the motor, and a Rebreather Oxygen System with Mask.

Undersea Sled

But first things first. I had to get started on the showpiece – the Undersea Sled.

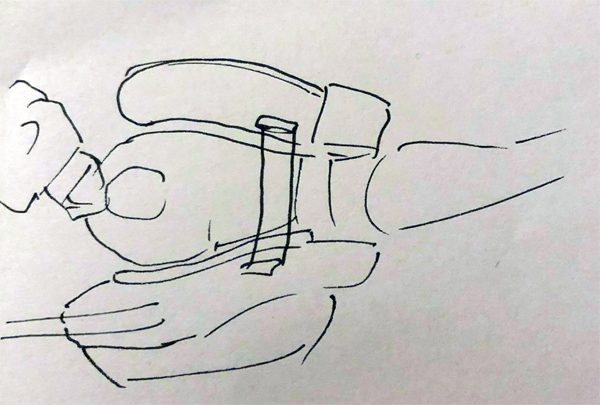
First, a rough sketch to get our heads in the same space.

Yep. This is how I start. With rough concepts that I don’t really elaborate on on paper. At least not always. The concept is a quick sketch to get an idea across. By that time, my mind already has the idea much more solid, and in full 3D. Sometimes I take time to draw them out more carefully and even add color, on paper, before starting. Not this time.

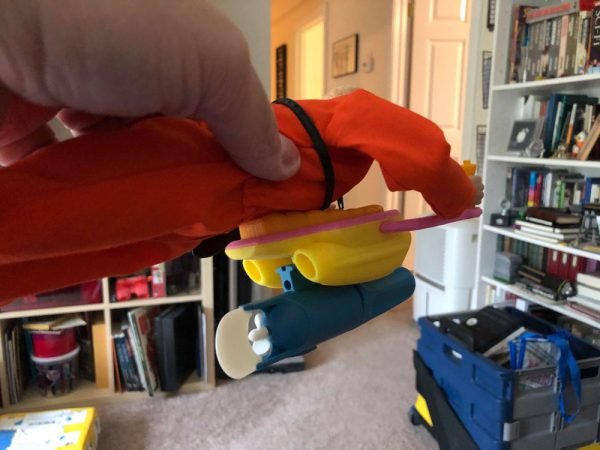
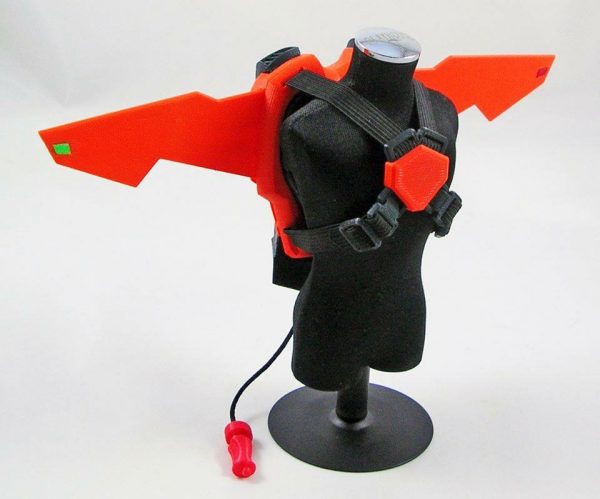
I wanted to start with a familiar base, something that looked like mine, so I used the main body of my Helijet Pack. The body was actually quite conducive to the Sea Sled design, with some alterations.

First, I wanted a water-jet system that could be used for propulsion, and not look dumb.

My first thought was a set of boot jets I had created previously.

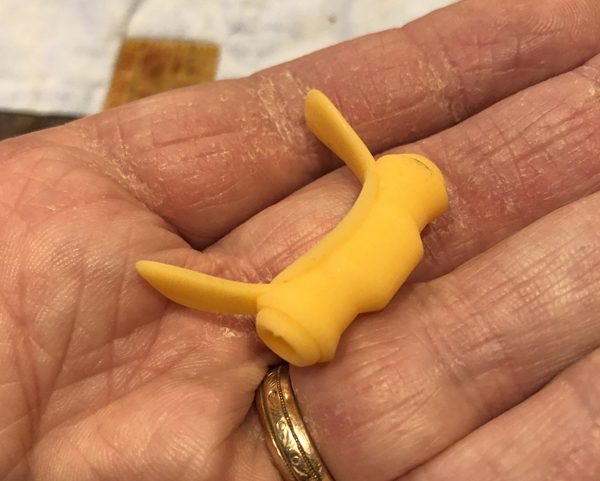
I incorporated those boot jets into the design of the Undersea Sled, enlarging and scaling them appropriately, until they fit the design.

Here is a screenshot I sent Greg of the model early on:

This 3D model is actually a little later in the process. I had already updated the arms.

But the early prints came out pretty well:

A sharp-eyed person may notice I’m using pink. I often use seldom-used colors to prototype, so I don’t waste the good stuff.

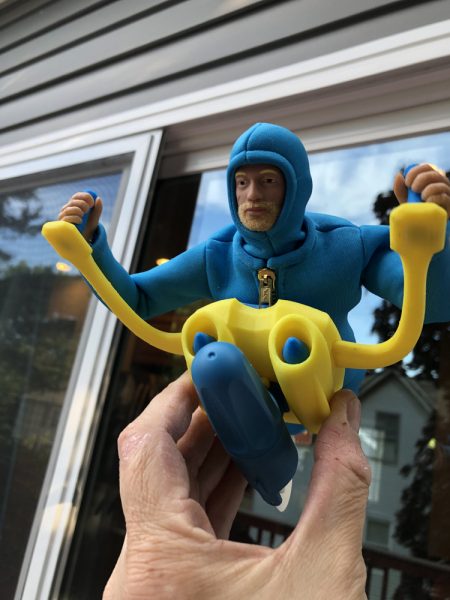
Then came prints in real colors.


Note that at this time, I thought a curved arm might work, but I opted against it, as it didn’t fit with my other designs, such as the Flight Pack, which uses a similar body, but has some vital angular parts.

Some images of the prototype as it was being developed:

I chose a blue that closely matched the Scuba Suit Greg had made.

Rebreather Tank And Mask

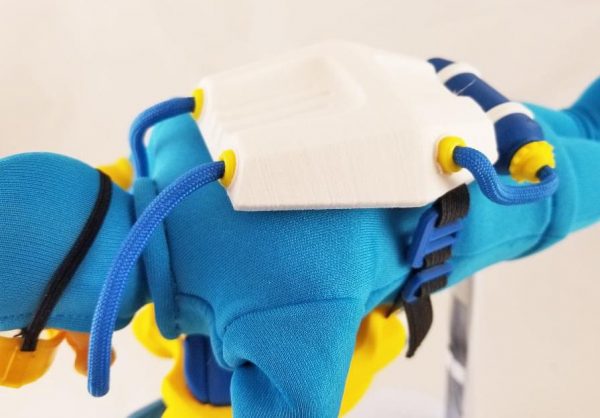
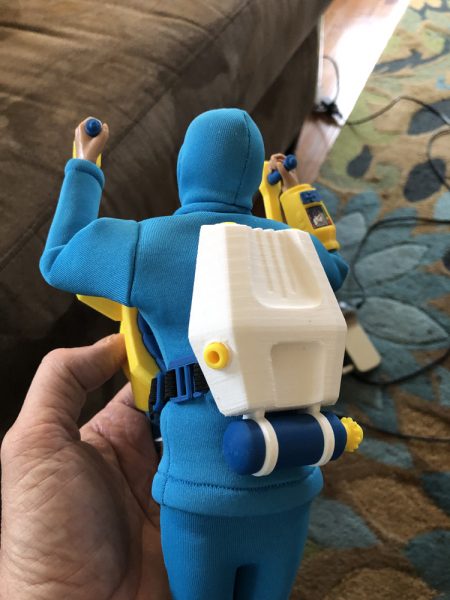
Once Greg liked what he saw, I started on the Rebreather. I had concepted out something like a futuristic SCUBA tank, with twin tanks, held at the bottom only, fitted to the body and strapped into place, with hoses to a mask.

Which I modeled up and sent Greg a screenshot:

First print:

Greg saw the prototype and thought it looked too much like the Rocketeer’s Jet Pack, and I have to say… I agreed. It hadn’t struck me before, but on looking at it in that light, I could see the problem.

And Greg had a bit of an idea of what he wanted for it, and soon enough, my sketches were looking more like what he had in mind.

So I switched gears completely, and went with a more modernistic, less future-retro approach.

I added a very obvious tank at the bottom, which gives it a functional feel, while also being completely recognizable as a SCUBA tank, which would feed a hose into the body, then two hoses would feed into the mask.

Mask

We settled on this, and then I began working on the hoses and mask.

My first issue was that a small part that should hold some detail (the Mask) could be printed with the FDM printers I use for most of my toys, but I felt for this one, I should use my new Resin printer, the Anycubic Photon.

Printing things for the Photon is a bit harder, and can fail easier, so I’m not all that eager to make whole large parts with it (with some exceptions) but for smaller things, I thought it was time to give it a try.

I modeled them so the paracord I would use as hoses would fit into the sides, and epoxy into place nicely.

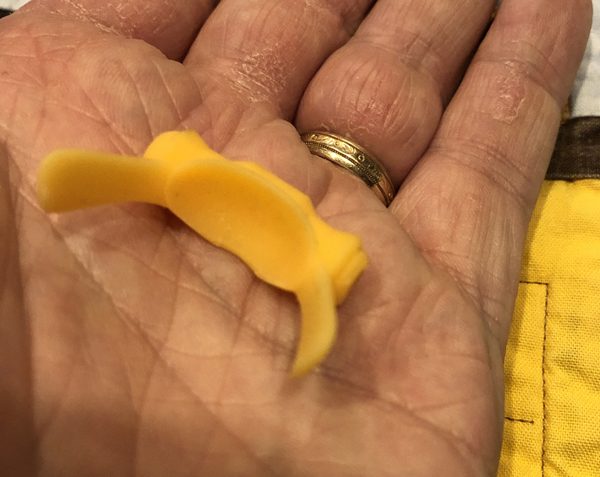
But the real quiz was – how the heck am I supposed to attach this to the head?

I didn’t want to add yet another piece of elastic, given that the Goggles had their own, which fitted onto the SCUBA hood.

So I thought – why not put the SCUBA hood to good use?

I figured if I made tabs that would fit along the cheeks of a head, inside the hood, it would hold rather nicely.

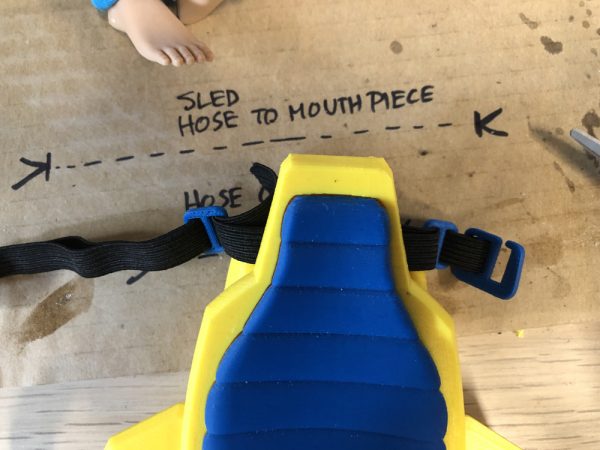
Really, the last thing to do was the hoses and elastic attachment which was a bit complicated, since I didn’t want an elastic for the Rebreather, and a different one for the Sea Sled.

I decided to loop them together. This way, you could use one, or the other, individually – or both as a single strap.

The last thing was how to hose it all together.

Blue paracord fits into the tank, connecting it to the body. Then two hoses go to the mask.

And after adding one of my very popular wrist Cuff Communicator/Controllers, with new sticker of a sea wreck, we called it done.

GI Joe – New Set – Polar Bear Attack

I make 3D printed toys for Cotswold Collectibles. For several years, Greg Brown and I worked on a nice series of toys for collectors to use with their 12″ action figures.

Greg has always wanted these adventure sets to include their own box and art. The original owner of Cotswold was very good to me, very supportive, but was a bit reluctant to make boxes and art for the sets.

This year Greg took over ownership of Cotswold Collectibles and has now put out two boxed Elite Brigade Adventure Sets.

The first is Polar Bear Attack.

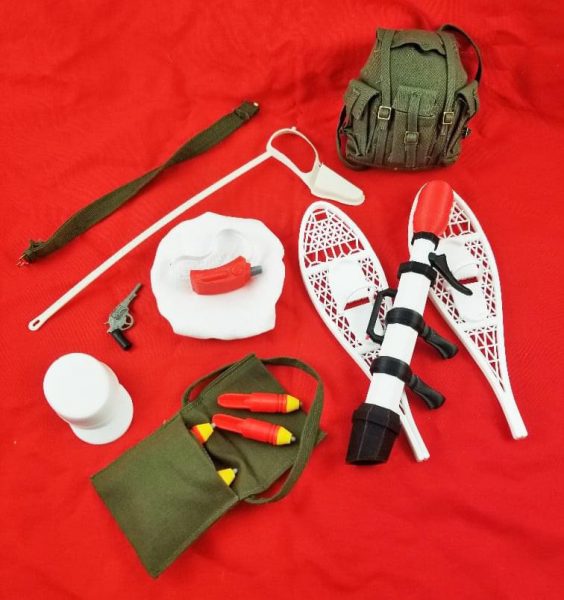
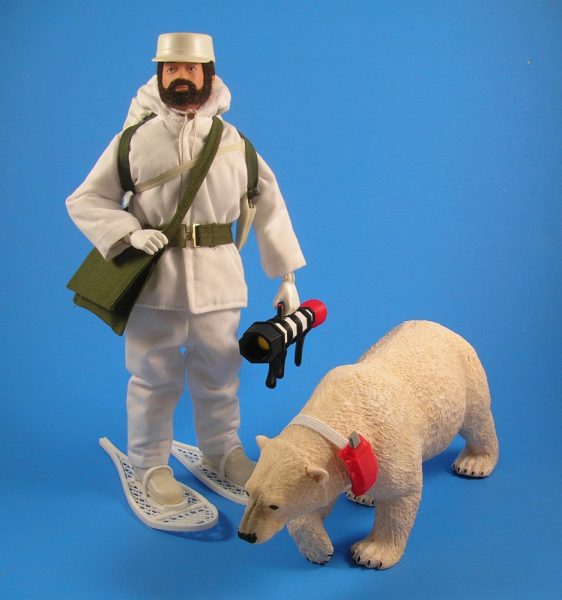
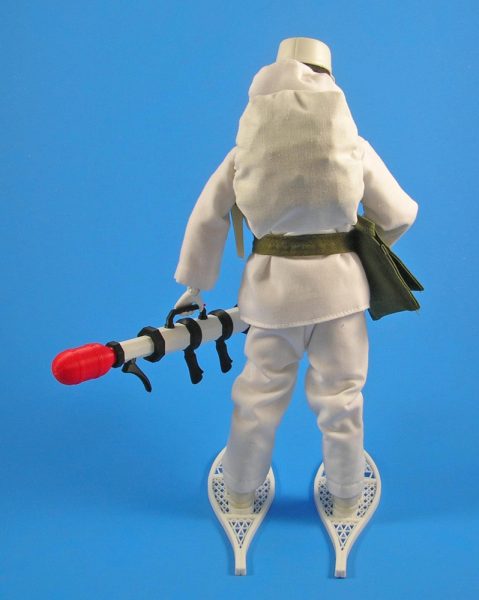
Using a Safari Ltd Polar Bear, Greg put together a figure with a great snow adventure outfit, with backpack, cover, satchel, snowshoes, boots, hat, etc.

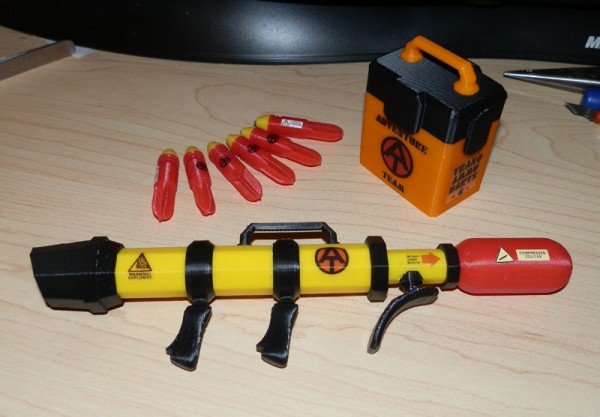
My part was to repurpose the Tranquilizing Zooka I created for my own Save The Endangered Pygmy Rhino set that I entered into the Dallas GI Joe Convention.

Cotswold has sold a few versions of this bazooka over the years, with ammo darts. I even created a special insert for a large cloth backpack, and for a satchel, to contain some of the darts.

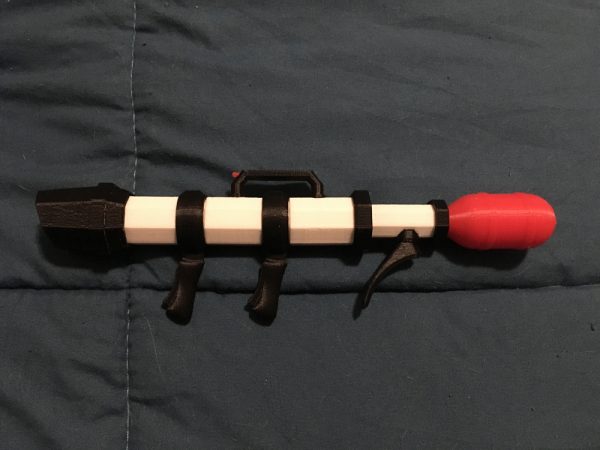
I was to make a white version of it, and use it in an Arctic Adventure scenario.

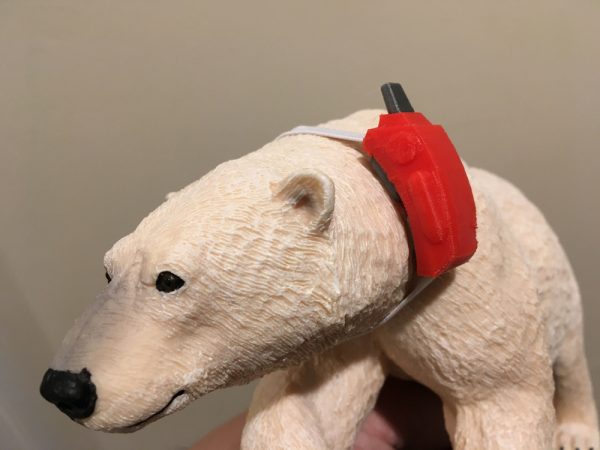
Also for this set, I created a tracking collar, with white elastic, you can fit around the Polar Bear’s neck.


Hero Cards

The game I work on as a Technical Artist currently is Game of Thrones: Conquest. It’s no secret.

This past summer we worked very hard to introduce a new feature called Hero Cards, which players can collect and build up to help them in gameplay.

https://cdn-prod.gotconquest.com/wp/uploads/2020/11/09113527/GoTCArtofHeroes_1920x1080-1024x576.jpg(Pic from contconquest.com)

Each hero card is based on a character from the show and game. The card case itself houses a card, and has a symbol in a hexagon at the upper left.

For this game feature, I mostly supported the artists through profiling and optimization efforts to gain as much memory and rendering efficiency as we could, while delivering a lot of content.

A great team worked on this, and our Art Lead wanted to give the art team a token of appreciation for what was, believe me, a long and intense effort, so he and I threw around a few ideas, and eventually figured out that with my new Resin 3D Printer (an Anycubic Photon) I could put together something tangible the whole art team could have as a reminder of their amazing work.

But it had to be a surprise.

Only artists directly involved in the making of these gifts could be told. The rest were kept in the dark until they began arriving at doorsteps.

The Idea

We hashed out the idea of doing a real solid hero card for each of the artists involved, with their name on the front, and a photo of them as a printed card that would be inserted into a slot in the body, and sit into the space provided by the frame.

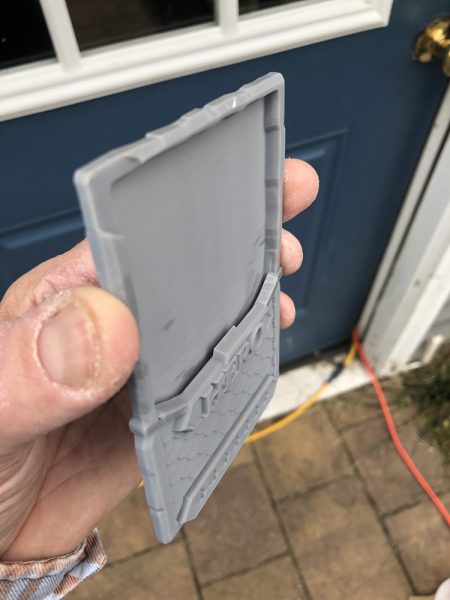
It started with an artist giving me a model of the card case itself in 3D that I could work with. I set it up as a solid 3D model I could print, and got to work. I had to make some alterations, and model some details that only existed in sprite art, like the scale mail lower front panel.

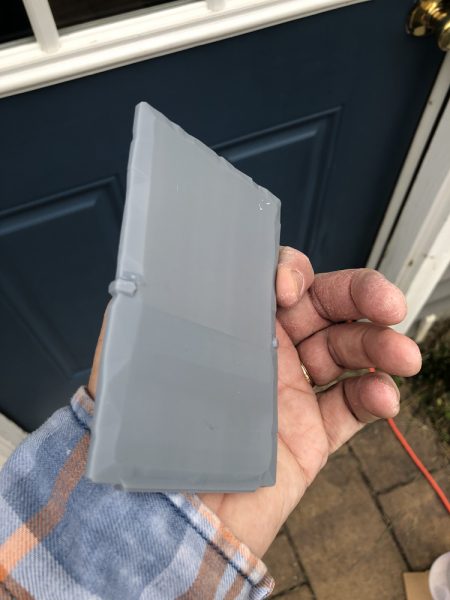
This is the 3D model of the back, but not necessarily the finished card, which was undergoing revisions throughout this time.

Here, you can see an early prototype 3D model, sitting on the print bed in my printer’s slicing software:

But I also was thinking a bit ahead. What else might a person want to use this card case for? I figured many people I work with play Magic: The Gathering, so I immediately made sure the card space could fit a Magic Card, or several, if needed. The gap is large enough to fit maybe four cards stacked.

The Prototype

So I started printing prototypes before I got the final backing, and printed up an early prototype to see if it was even feasible.

Here, I printed a short base, to test even how I should attach it to the print bed for a good print. I wasn’t yet ready to print a whole card, just to see if it was even possible. I printed a section to test a few things:

  • Could it print at all?
  • Could I print it without a ton of supports that would “bite into” the model?
  • Could I print a card gap that would work?

Though not visible in the art piece above, each card has a section for stars, to show their power and how much you have advanced them. For the artists on the project I decided they all deserved full 7 stars, and all filled out.

The early result:
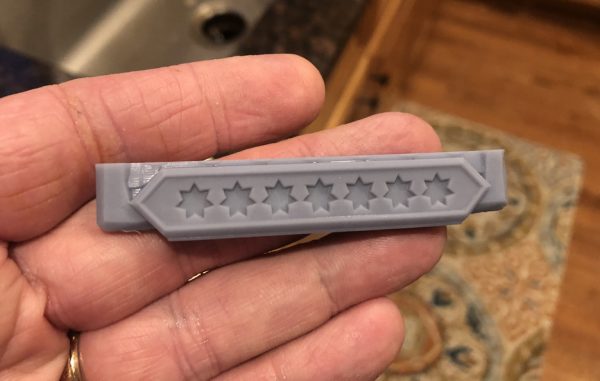
Seemed I was ok to go with the project. I could print a card (likely) without too much difficulty.

But it was early days.

Here is what happens when the raft and support pull away from the bed when printing. This print (painted – see below) shows what can happen. The entire bottom warped because of print raft cohesion. It is one of the main reasons 3D printing with resin DLP technology can fail. If you don’t have the exact right bed leveling, the bed can be warped against the print bed just a hair, and it will refuse to hold, and while the rest of the print may work, that base is forever warped.

Many tests had to happen before I was sure I could even complete the project.
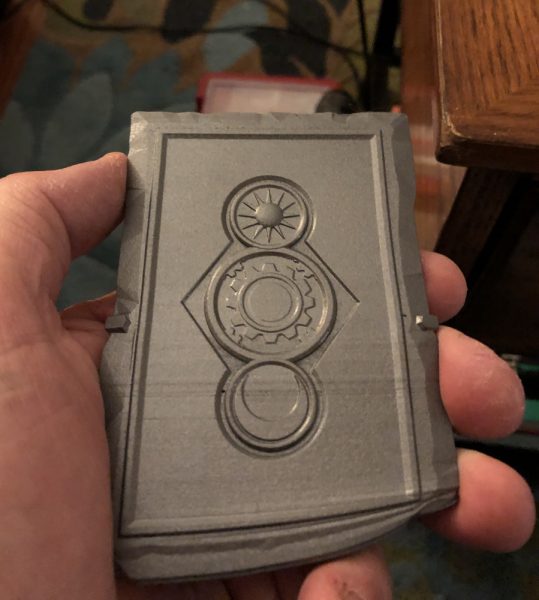
But it wasn’t long before I had a fully successful print:
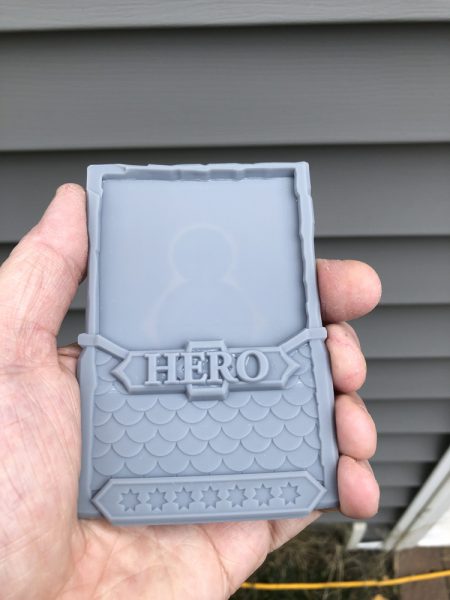
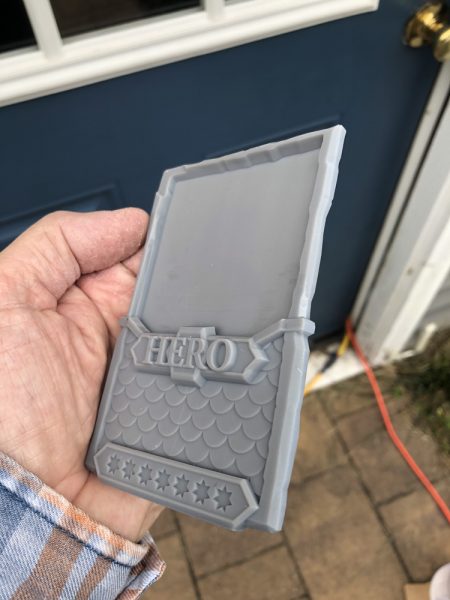
Early prototypes didn’t even have the back detail yet:
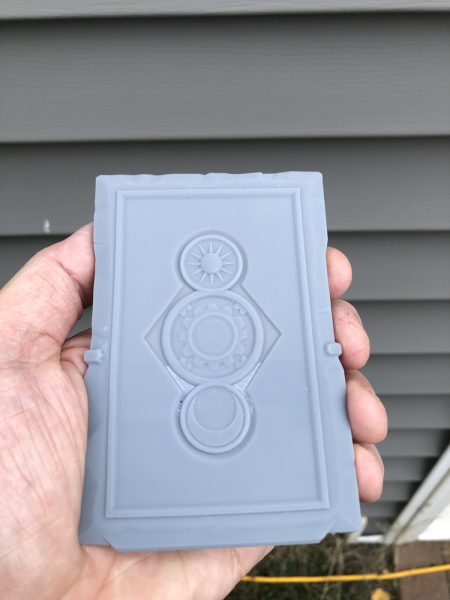
Early concept for the back: We changed it later.
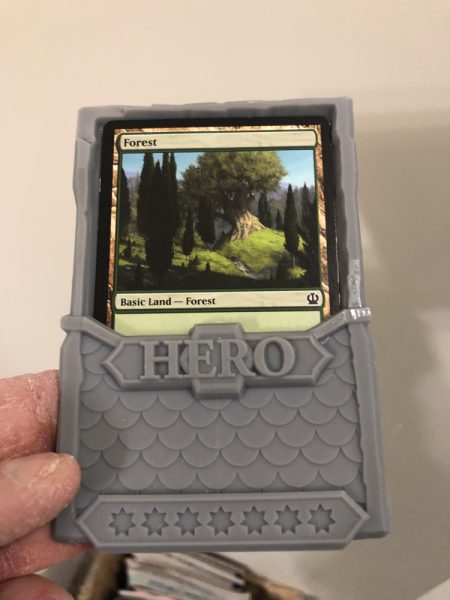
At this point I tried a Magic Card in the space:

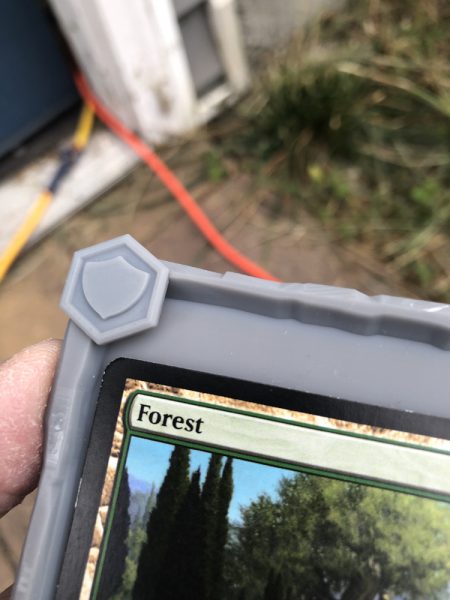
Oops. I did something wrong.

I did some adjustments to the card scaling, but the main problem was the card could slot too low into the case. I simply raised up the inner floor, and got a better result.
Painting

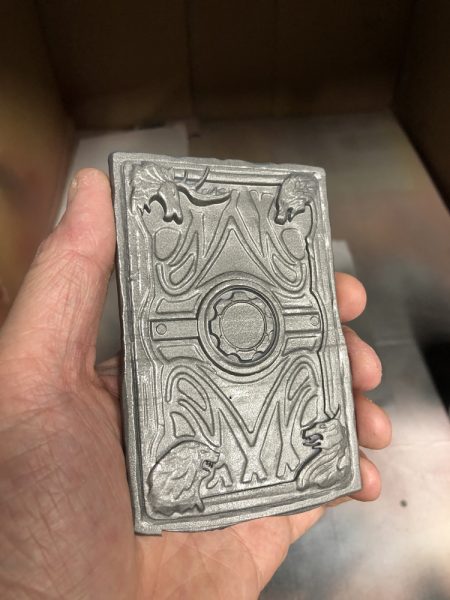
For the project the intent was to paint it like a metallic finish, but I wasn’t sure which color to use. While the final card ended up looking a bit more bronze, I went with a battered metal silver spray paint rattle can (Krylon?) and the result was not at all bad. Seen here in its more finished back:
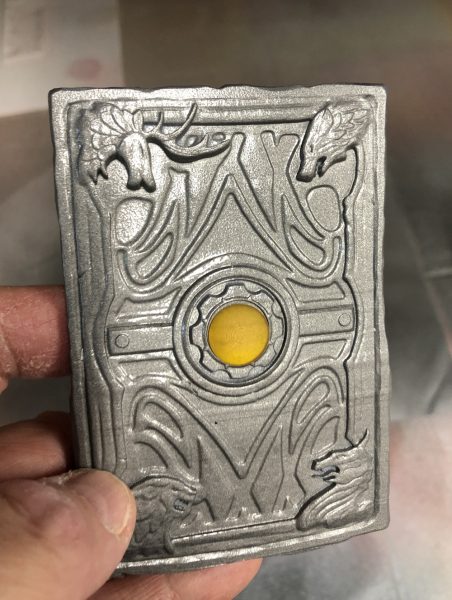
But since the card has a very nice amber inset in the middle, I was lucky enough to have some very nice amber resin, and printed the inserts too, and they turned out amazing!
Finished Prototype

I soon had a pretty good prototype finished, to show. Using my own surname. Each finished card would have each person’s full name extruding from the front.
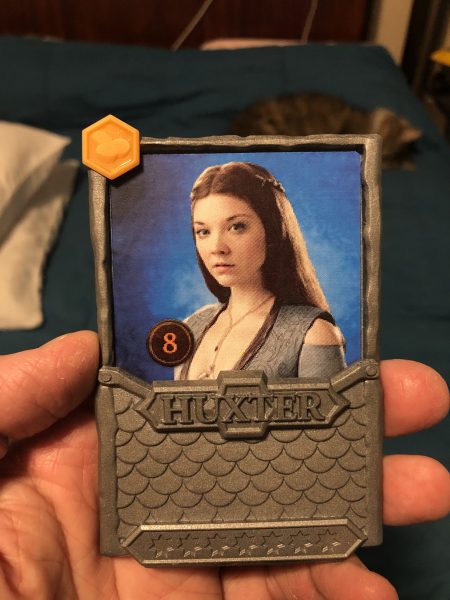
Then I had to figure out the best way to portray the stars. I played with simple yellow vinyl, cut out with my Cricut desktop cutter.
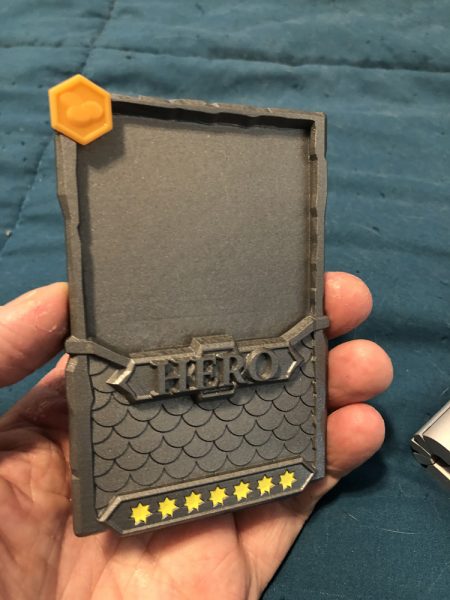
But while they were nice, the real stars are a gradation from orange to yellow, so I instead went with paper printed stickers, printed and cut with my Cricut.
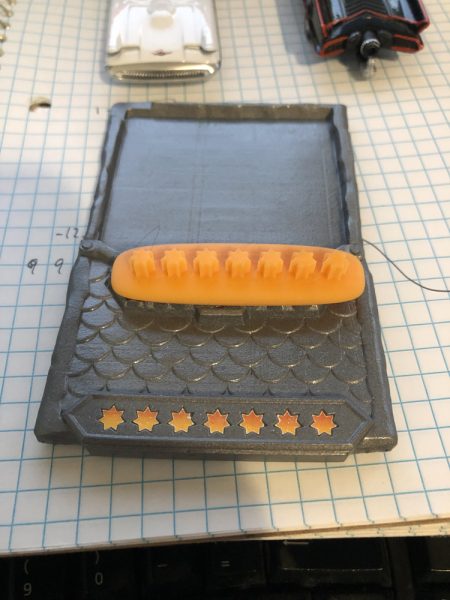
And since the stars were fitted into beveled spaces, I needed some way to press them in for a more permanent adhesion. I created a pressing tool that fits exactly into the star space, to ensure a solid stick.

Display Stand

During the prototyping period, it was suggested people might want a display stand, and I said “nothing could be easier”. Once you have a solid model, it is very easy to make a stand and use the original model as a boolean subtract to cut out the space needed for the card to fit into.

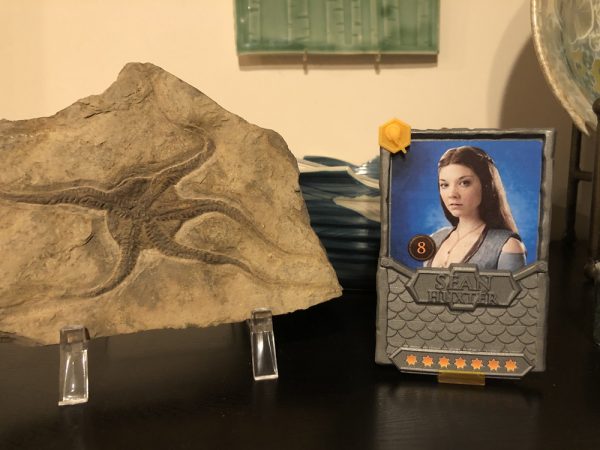
And here was another place we could use the theme of the art, gears, to make a great stand, and in the same amber color I made the back insert out of.
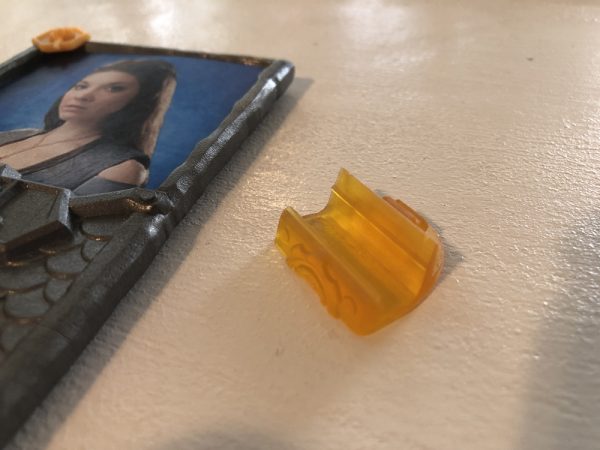
Here is a finished prototype, on display. Each card would feature a photo of the artist with their name.
The Package

But that wasn’t enough.

In the game, when you purchase Hero items, you see an envelope for a single purchase, or a pack for a larger one. It is sealed with a wax seal on parchment of different designs.

I was determined to deliver them in a pack with a wax seal.

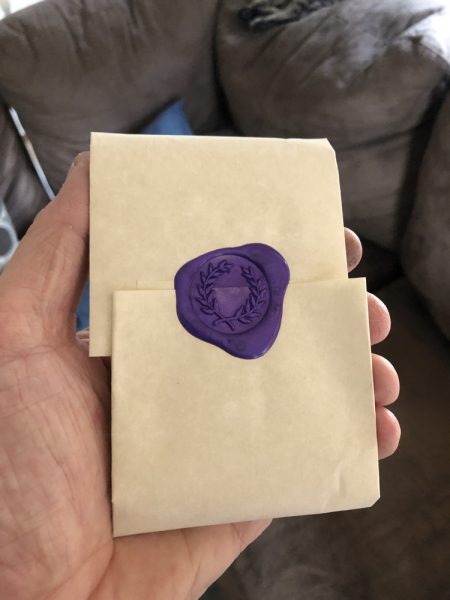
My Art Lead wrote a note of appreciation, which I printed on one side of parchment paper, which I then folded each card into and sealed it with hot wax using a wax seal I purchased.
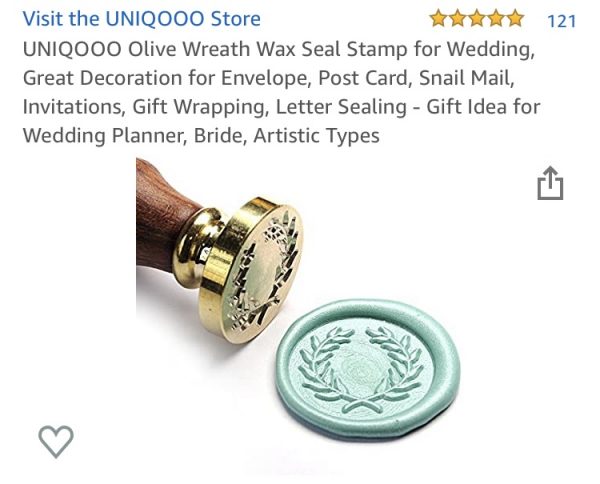
And sealed each card inside a parchment note of appreciation, in purple was, with a symbol that was very similar to the actual symbol used in the game, in a purple color that was also one of the colors used in Hero Card purchases:
Mailed them all out when they were done, and – duh… I forgot to mail out the stands with them, so I had to mail out a second mailing later!

But in the end, every artist working on Heroes got their own Hero Card.