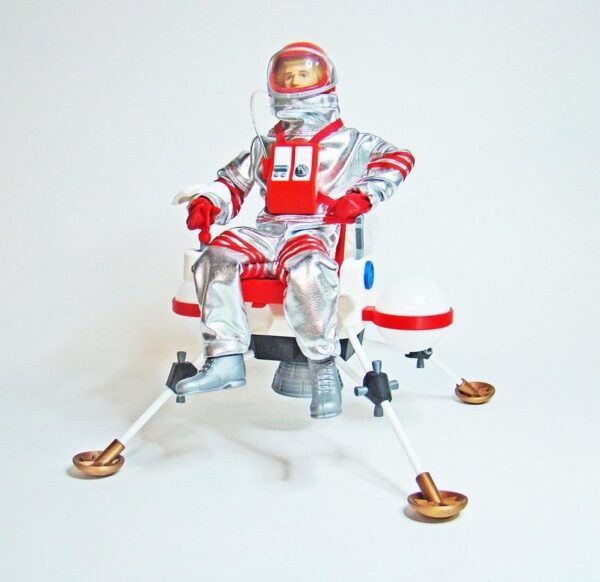
One of my most ambitious toy designs so far is the Lunar Hopper, based on NASA concepts that were never fully developed.
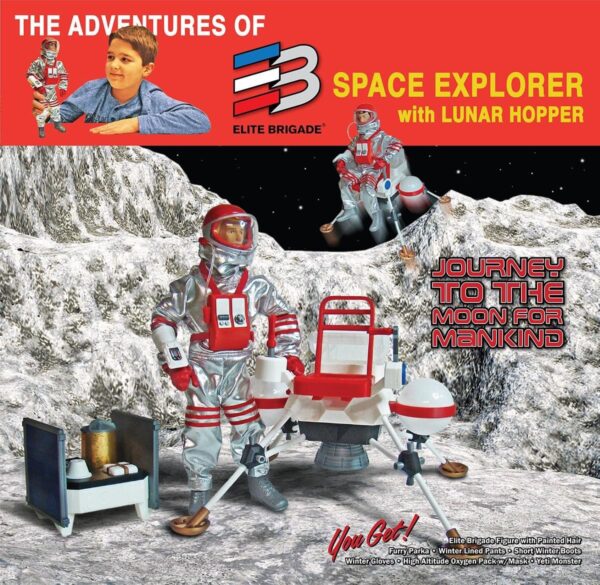
As often happens, this came from a years-long discussion between myself and Greg Brown of Cotswold Collectibles.
He wanted to make a boxed set around this lander, complete with a foil-cloth astronaut suit and helmet.
Concepts
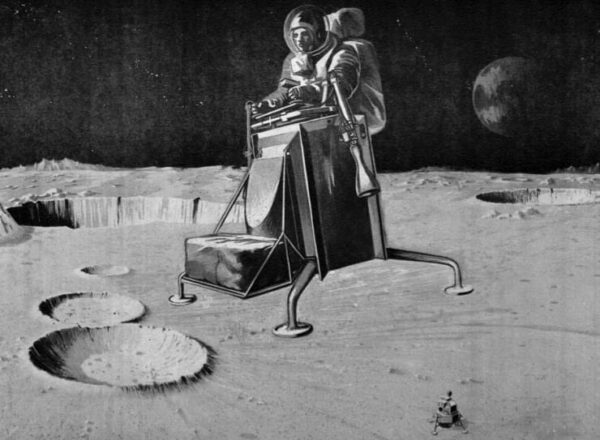
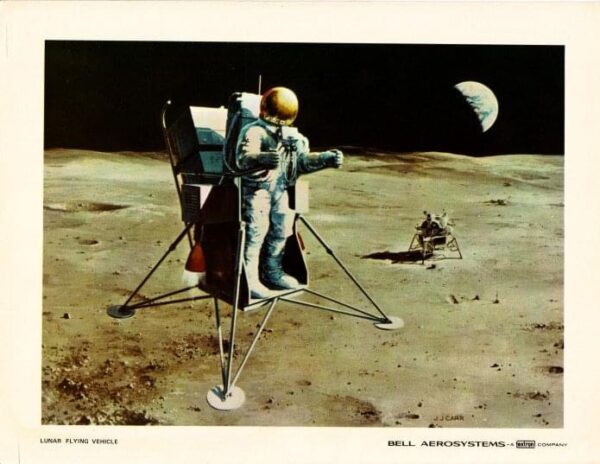
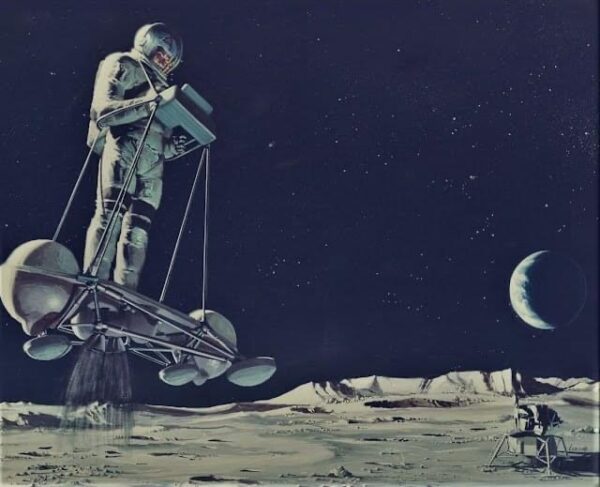
Based on concepts such as these:

(See more concepts at the bottom of this post.)
Design Challenges
The first thing I wanted to achieve was a basic core shape that would invoke the actual Eagle Lunar Lander used to land on the moon. So I used some sharp angles in the main platform body similar to the Eagle. 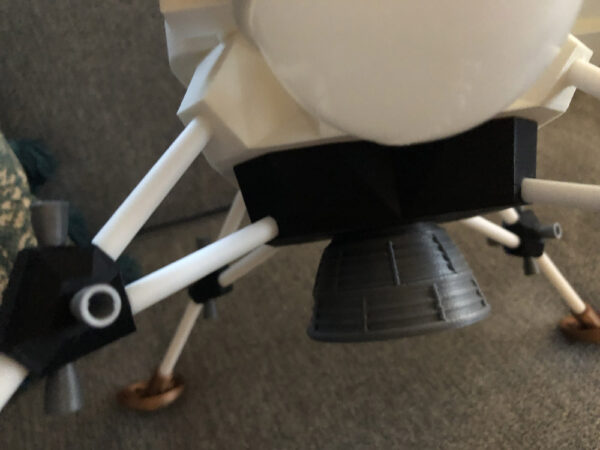
Note also that I used a main central thrust engine cone, and on each leg, attitude thrusters for steering. These small thrusters are on blocks that act as connectors for the spindly legs.
Speaking of legs, this was a big challenge as I could not really print thin cylinders (dowels) that would be both strong and look good. So I had to do some searching for materials.
I found plastic cake dowels. It was far too easy to find compressed rolled paper cake dowels, but as they were paper, they would be useless. It was much harder to find plastic dowels, but I did.
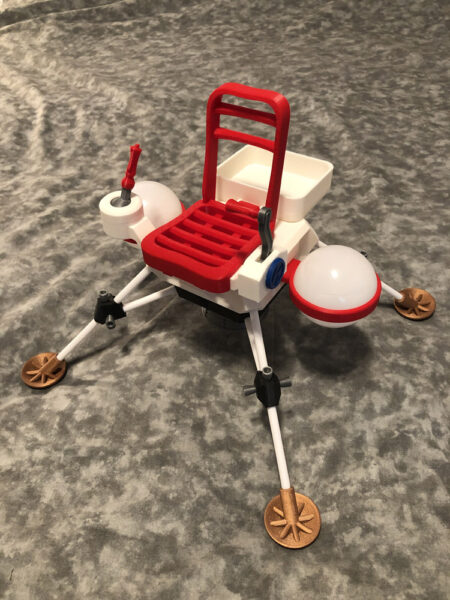
The Seat
The next challenge would be how to fit a 12″ GI Joe onto the lander and not look dumb. Clearly he needed a seat, and I used a seat design that was not far from the idea of the Adventure Team Escape Car, but also might actually work on a one-man real lunar hopper, which meant a lot of empty space, not a solid block of material, for weight, but also for strength. (Theoretical weight on an actual space vehicle – I was not worried about toy weight.)
So I modeled a seat that had a back that slots into the base.
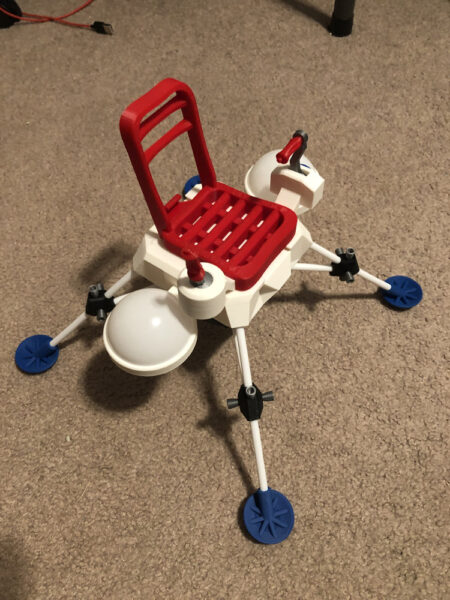
I first printed it in white, but Greg and I decided to go with a theme of red/white/black to suit the astronaut suits he was having made for this set.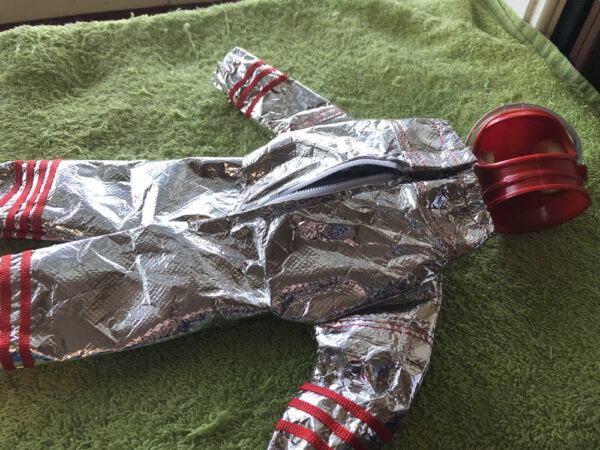
I wanted the seat to slide, but not freely. I needed it to lock in place, so the bottom of the seat has notches, and I created a sliding seat lock on the main base, to slip into these notches and hold the seat at various positions without slipping.
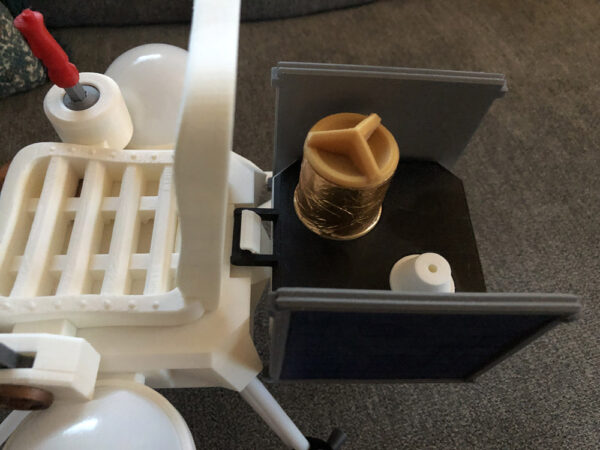
Flight Controls
It also needed reasonable controls. So I thought of a helicopter control, as well as looked into real Lunar Lander controls. To me, a human on a chair can use two controls, and it made sense that one be for main thrust (up/down) and the other a joystick for attitude control.
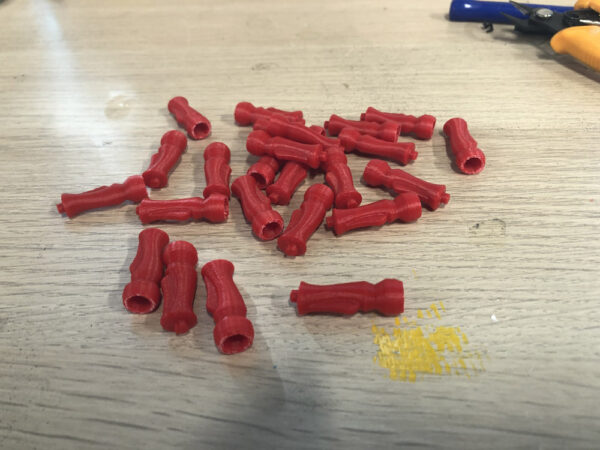
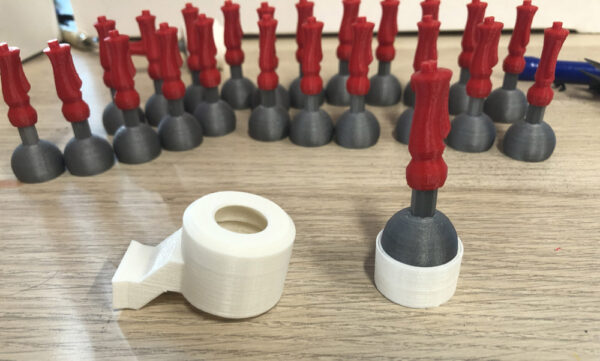
So I created a ball-jointed joystick with my 3D printers that I was actually surprised worked really rather well.

The joystick sat in a bottom cup, with rounded interior, and that fitted up into an exterior housing which completed the spherical space. When assembled, the joystick rotates very nicely.
I used my standard control handle for both controls, each slightly modified for the purpose.
The altitude control was a single lever with a horizontal control. The inner cylinder needed a cap so I added my Huxter Labs logo to it.
For toy flexibility, I wanted the seat to slide back and forth on the base platform. There was a reason for this other than just adjustability.
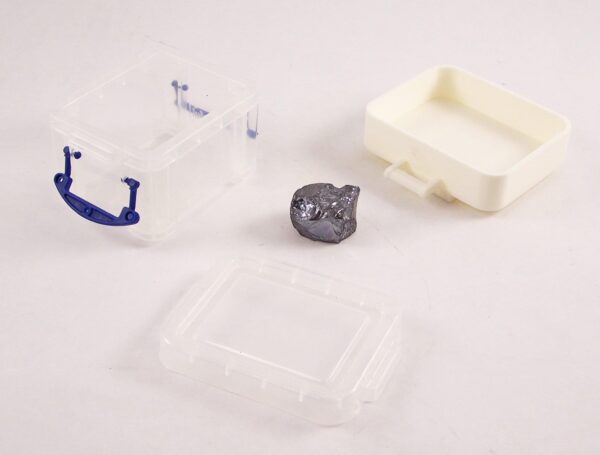
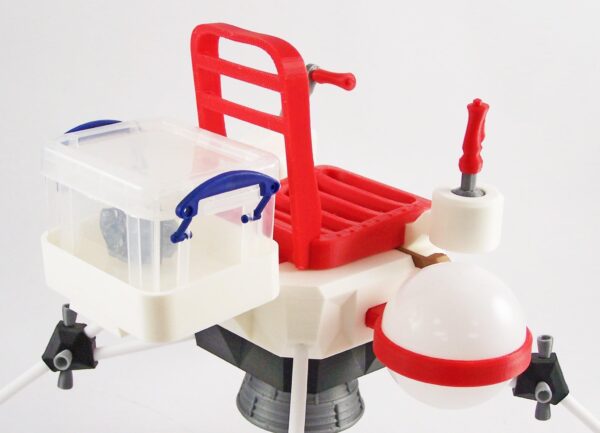
Cargo
We wanted to carry cargo. And to do that, I needed a way to attach a tray that could carry a specific small third-party storage container that Greg had purchased for this set.
Here is the tray attached to the hook at the back of the seat bottom, that holds the cargo tray in place. The cargo tray slips along the same grooves as the seat, so both the seat and cargo can slide backwards and forwards.
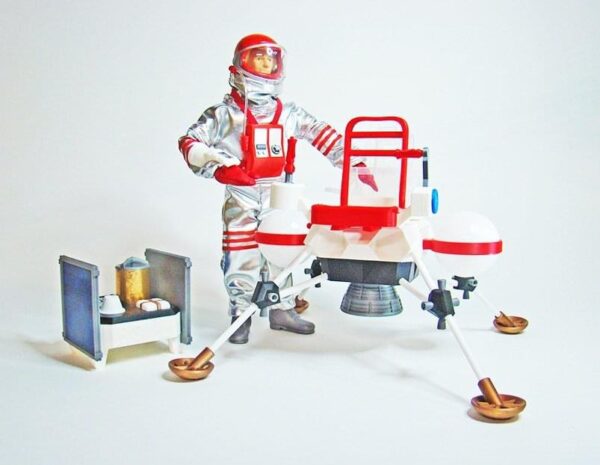
Lunar Seismic Experiment Module
But also, I had already created a set that another person asked me to create for a convention set that never panned out. But I had done a lot of work on it, and I thought it perfect to include it in this set, and Greg agreed.
In investigating what equipment the Apollo astronauts brought to the moon, one stood out, not only because there were good pics of it, but a toy set I had of the Apollo Landing included a small version of it, and I thought it was cool. It was the Lunar Seismic Experiment package, meant to detect lunar tremors.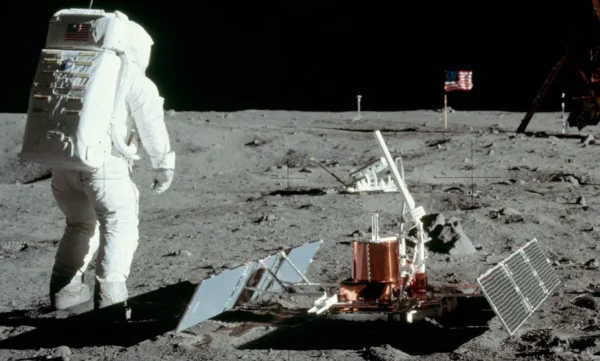
The clever thing about this is that it all folded up into a small package for space, and ease of use for astronauts to deploy. So I created mine to have the solar panels angle outward on rails, but also collapse back in on the carry-case-sized payload. Hence:
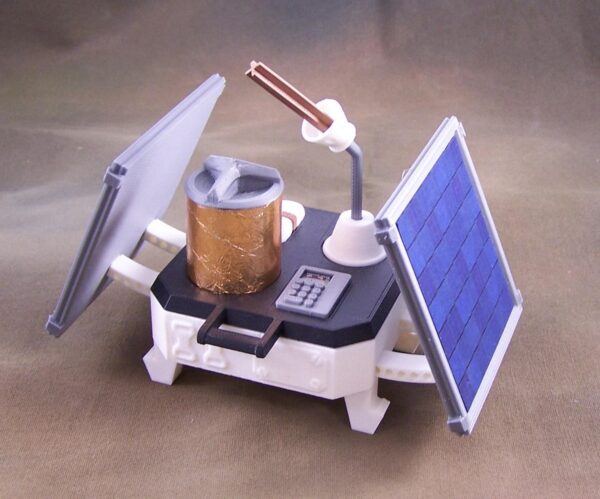
For the solar panels I bought shiny blue card stock and printed blocks of varying gray scales over it. The black handle is identical to the handle on the cargo tray. I added a control panel and the cylinder actually stores the antenna in two separate pieces, and the lid screws back on. To add verisimilitude, I wanted the cylinder to be covered in the same kind of reflective foil used on a lot of space gear. The foil is chocolate Rolo foil:
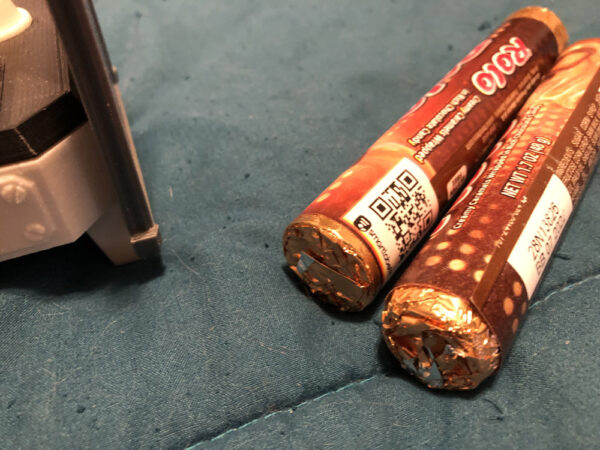
Which meant buying a bunch of these, just to get the foil. But did I mind?
I did not. (yum)
The Seismic Experiment package fits into the hook at the back of the chair, and is designed to touch the rear of the platform with the seat pushed back a bit.
Of course this opens up possibilities for future cargo modules as well.
Fuel Cells
Next thing to tackle was fuel cells. I originally used ping-pong balls, but we both considered them to be a bit silly looking. Too small.
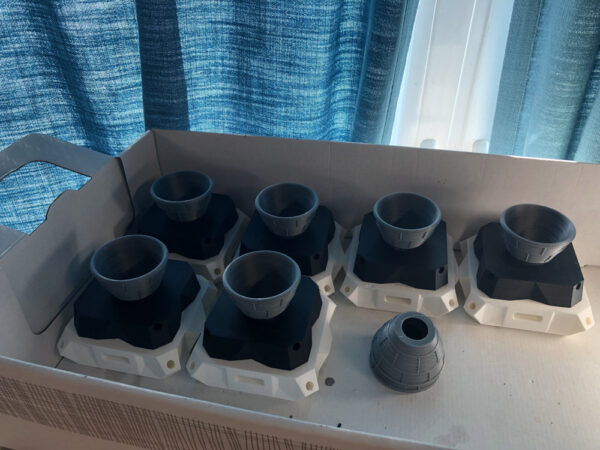
So I began a search for spherical things that I could use. Yes, of course, I could print some, but printing rounded spheres is not a strength of 3D FDM printers. As you approach the top of the sphere, the layers get very visible.
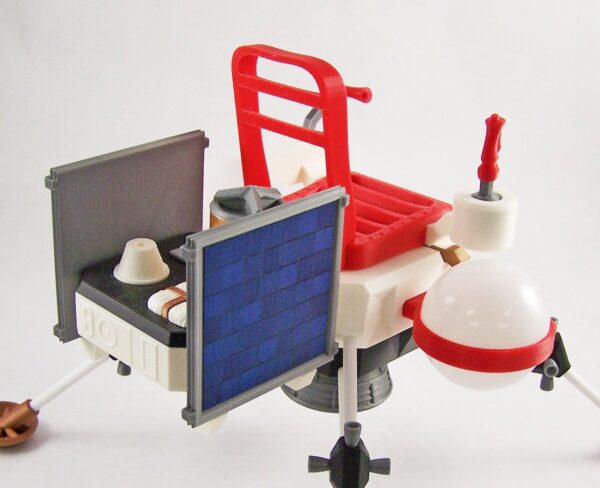
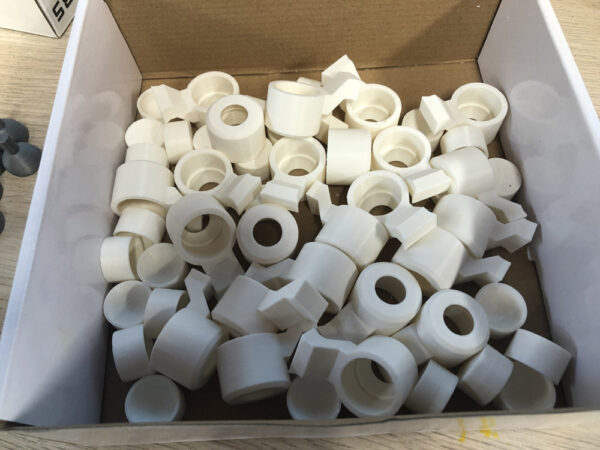
And an ingenious thought hit me: Ball Pit Balls. I knew they existed in a myriad of colors, as anyone who’s ever been to a McDonald’s knows… but I wanted them in White. Amazon to the rescue.
Then I made rings to attach to the side of the main platform, and originally those were white too, but in an homage to the Adventure Team Escape Car, I was trying to put as much red on as possible without getting obnoxious about it. So I made them in red. (I still have a lot of white ones printed, which sit in a box… oh well… Red is better for this version.)
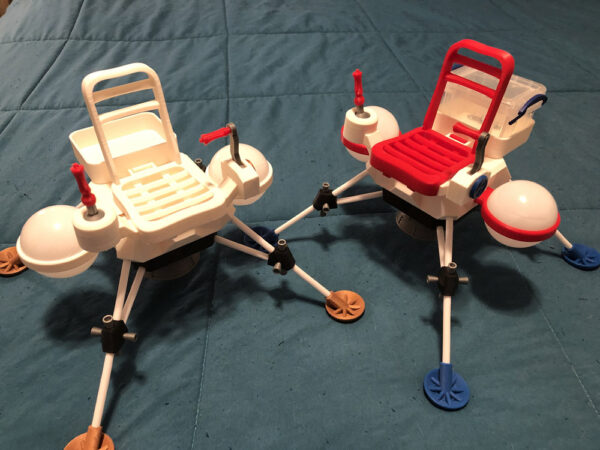
Here, you see my mostly white version with copper feet, and my “Escape Car” version with blue feet.
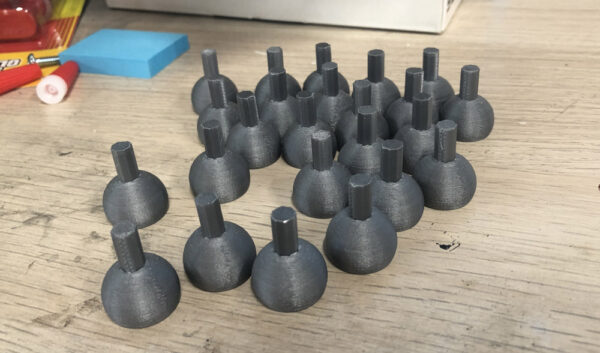
Feet
I modeled the feet to loosely resemble the Eagle’s landing feet. These could be printed in any color I had, but for this model, we chose copper. My first prototype, in homage to the Adventure Team Escape Car, were blue, as the Escape Car’s wheels were blue.
Our Astronaut Needs To Breathe
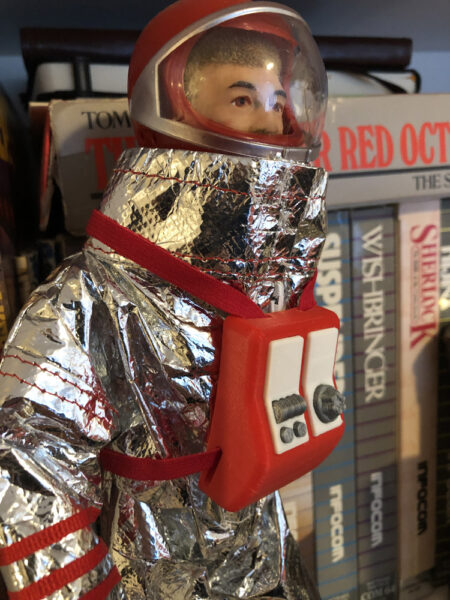
We were going to use these beautiful red helmets for the Astronaut figure, but we needed a breathing apparatus. Given that we were seating the astronaut on a chair with a back, it made less sense to put a big oxygen pack on his back. Rather, we opted for a chest piece that was reminiscent of Space: 1999 Alpha Astronaut suits.
But rather than mimic that design, I looked through other Adventure Team sets for inspiration, and it hit me:
This is the chest piece of the Adventure Team Sonic Rock Blaster.
And here is my Lunar Hopper Chest Ox Pack:
But the problem solving didn’t end there either. We needed a coupling mechanism for the helmets. Greg said he didn’t mind gluing a piece to the red helmets, so I designed an add-on for the helmet, but since I had already printed all of the chest ox packs, I had to make an add-on for that too, where normally I would just add it to the model and print it as one thing.
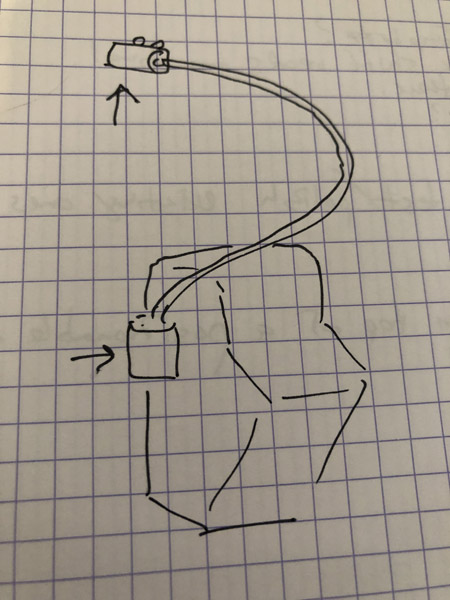
So I made a coupler for the chest pack and the helmet, and needed a hose to connect them.
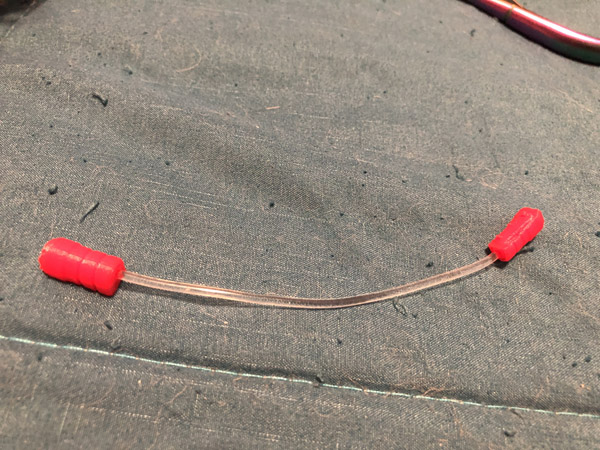
Luckily I had this amazingly flexible clear plastic filament.
![]()
So I connected the chest oxygen pack to the helmet using this clear hose, seen here in the overall shot of the completed astronaut:
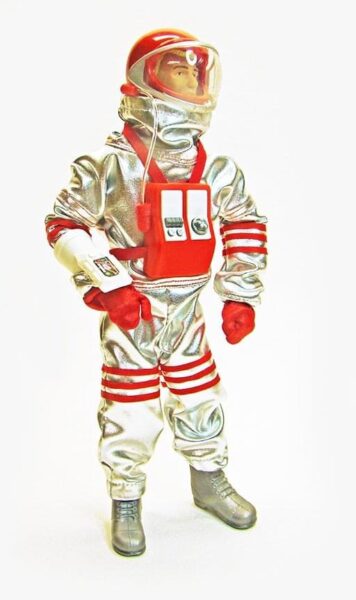
I think it worked rather well.
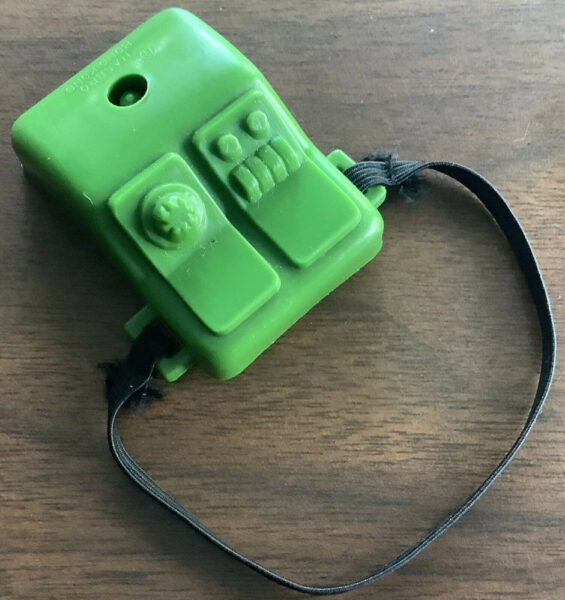
Wrist Communicator/Controller
Wait, what’s that on his wrist?
My communication cuffs have been very popular at Cotswold. Cheap, available in a variety of colors, it’s the one thing I see most when people post images of their figures on forums. But for this, we needed something a little different.
I extended the screen section over the hand itself.
Construction and Assembly
So man, this was a lot of printing. But whoever thinks the printing part of a 3D printed project is hard, they are wrong. The printing is done by machines while I sleep (usually).
No, the hard part is cleaning up the parts, removing raft, supports, using a heat gun to clean up the discolored plastic fatigue where supports are ripped from viable part. And then a lot of gluing and clamping.
And let me tell you that printing, cleaning up, assembling a single prototype is easy.
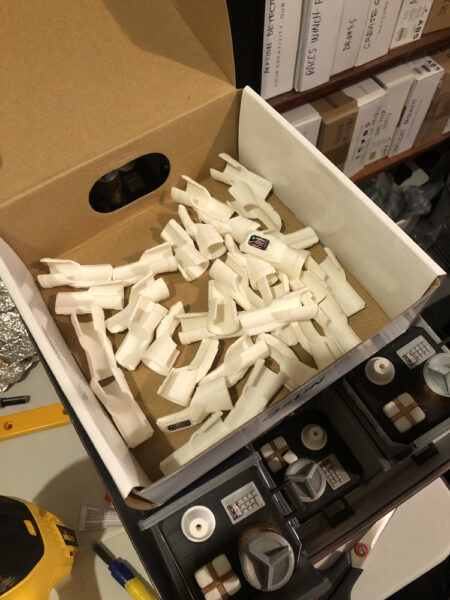
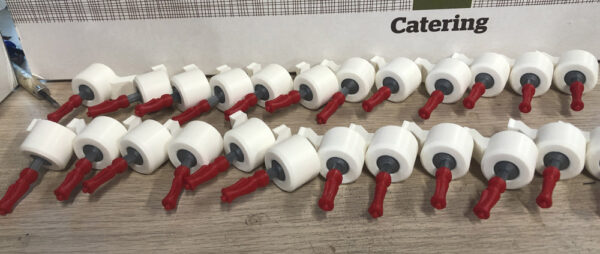
Printing, cleaning up and assembling 24 of anything is hard, hard work. Tedious hard work. And I don’t have any assistants or assistance.
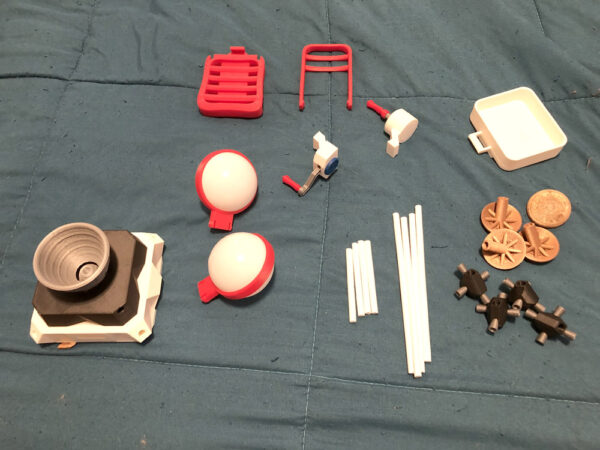
Here are only a small number of parts in partial assembly: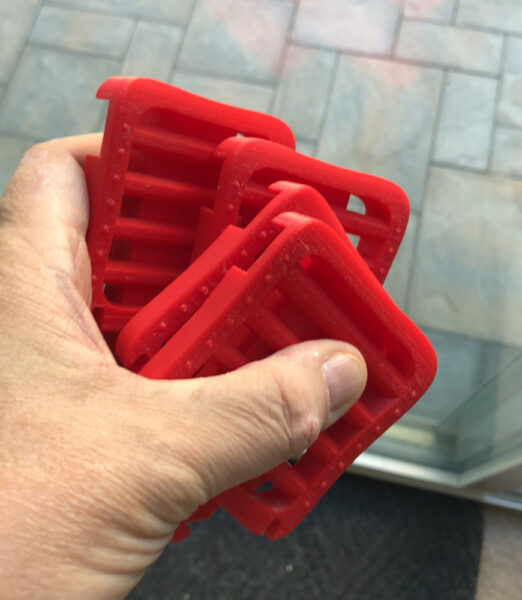
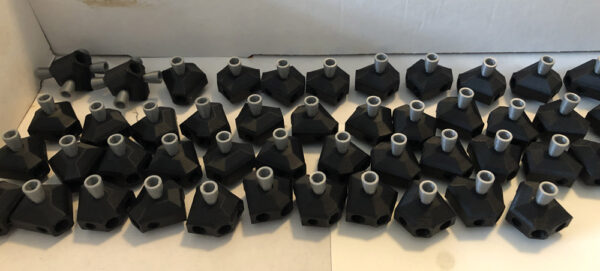
^ I had to make 96 of these!!!


Instructions
Understandably, this had to ship as a kind of kit. So I created instructions.
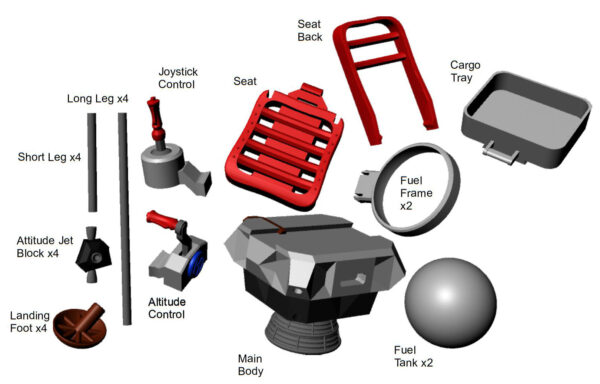
And a parts sheet:
And I even put together a YouTube video to explain to anyone who needed help constructing their Lunar Hopper:
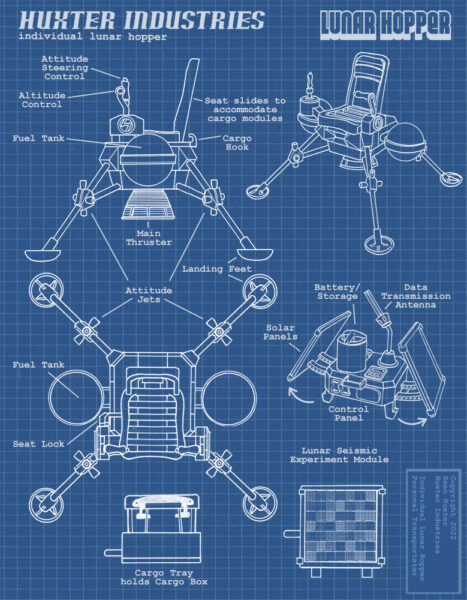
Blueprint
And of course what Huxter Labs major project would be complete without a blueprint:
More Concepts That Inspired Me
More concept images that I looked at when trying to create a workable version of my own.