GI Joe Adventure Team Action Pack Jetpack – ATV Carrying Rack

A recent photo story I put together quite quickly shows my 3D printed GI Joe Adventure Team Action Pack Jetpack. It sits in the back of a GI Joe Trouble Shooter.

Part of the plan was to build a rack for the Trouble Shooter (also the Adventure Team Vehicle or ATV, which is a yellow wheeled version. Or rather the Trouble Shooter is a variant on the original ATV.)

Here’s the rack in all its glory.

IMG_0632[1]

The rack is made up of two unique pieces cleverly modeled to be 100% symmetrical.

IMG_0636[1]

The rack mount is the same on both sides. Each one is supported by two legs. However, since the back of the ATV slopes, the leg is taller at the front than at the back. Just flipping one leg around makes it fit perfectly, supporting the weight of the jetpack.

IMG_0633[1]

There are two pins in the center of each rack frame which fit into the jetpack engines when they are slotted to the sides of the jetpack body. This pin is the same one that is on the jetpack itself, so it fits tightly to secure the vehicle in the rack. The rack is then shaped to perfectly fit the engine housings.

IMG_0630[1]

The jetpack can fit in the rack facing the front or the back, however, the harness arms have more room if they face the rear

Here you see the black stealth version of the jetpack.

IMG_0629[1]

And now, befitting of the original, I thought I would introduce the Stealth version of the Jetpack, and the ATV Mounting Rack, in an appropriate but very very short Photo Story. Don’t look for a complex plot, though.

OLYMPUS DIGITAL CAMERA

OLYMPUS DIGITAL CAMERA

OLYMPUS DIGITAL CAMERA

OLYMPUS DIGITAL CAMERA


GI Joe Collectors Club Exclusives

I want to take a break for a moment from posting about 3D printing.

For a long time I owned a spot on www.adventureteam.com. I still do in a way. That is, the space is hosted for me for free by its owner. But I lost the ability to update it. I have tried contacting the owner, but have gotten no response. I’d just like FTP access again so I can make some necessary updates.

The GI Joe Collectors’ Club has been a stalwart champion for the past couple of decades of the GI Joe collector. Not just a club, it produces a newsletter magazine each month, now with full-color comics with stories from both the 3.5″ Real American Hero line, as well as the 12″ Adventure Team line.

With membership each year, costing $44.00 per anum (US Domestic – more in other countries) we get 12 issues of the newsletter each year, plus they put together a free bare-bones figure (either 12″ or 3.5″ depending on your preference.)

Then for an extra cost (not cheap, but these are custom items in a low-production-number run, so costs can’t be what you’d expect to find at Toys R Us) you can purchase an accessory set for the free figure which usually consists of an outfit and a collection of gear.

This year the figure is special because it’s the 50th anniversary of GI Joe. And the club has put together this free figure:

gi-joe-collectors-club-2014-figure

He’s a Man of Action with hard hands, celebrating the 50th anniversary of GI Joe.

Later, you will be able to purchase this accessory set:

gi-joe-collectors-club-50th-accessory-set

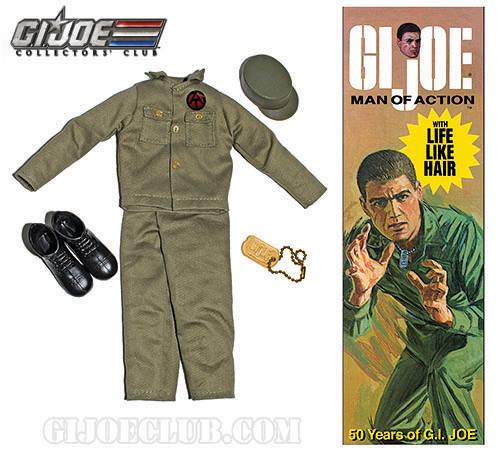
It’s a fairly pared-down set, featuring a Man of Action outfit with a special gold dog-tag and a “coffin box”. No price has been announced.

I wanted to post this because this figure has met with some criticism in online forums. Mostly because this set is not as elaborate as some have been over the past few years.

But when people make the claim that the club is mainly interested in 3.5″ collectors (and they certainly do some great things for that group) I’m a bit annoyed.

Look at this photo I took this morning: (Please ignore the bad lighting. I was in a hurry. I’ll reshoot it later.)

OLYMPUS DIGITAL CAMERA

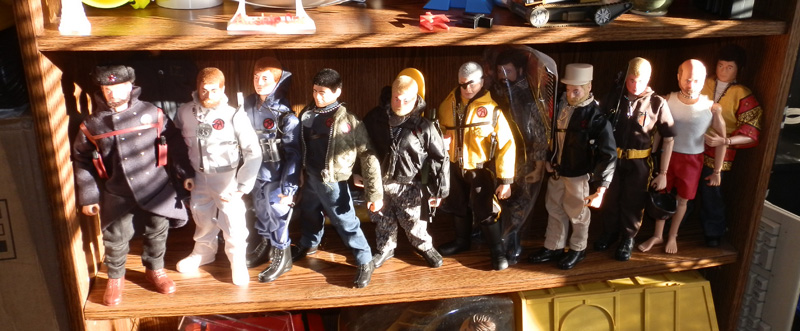
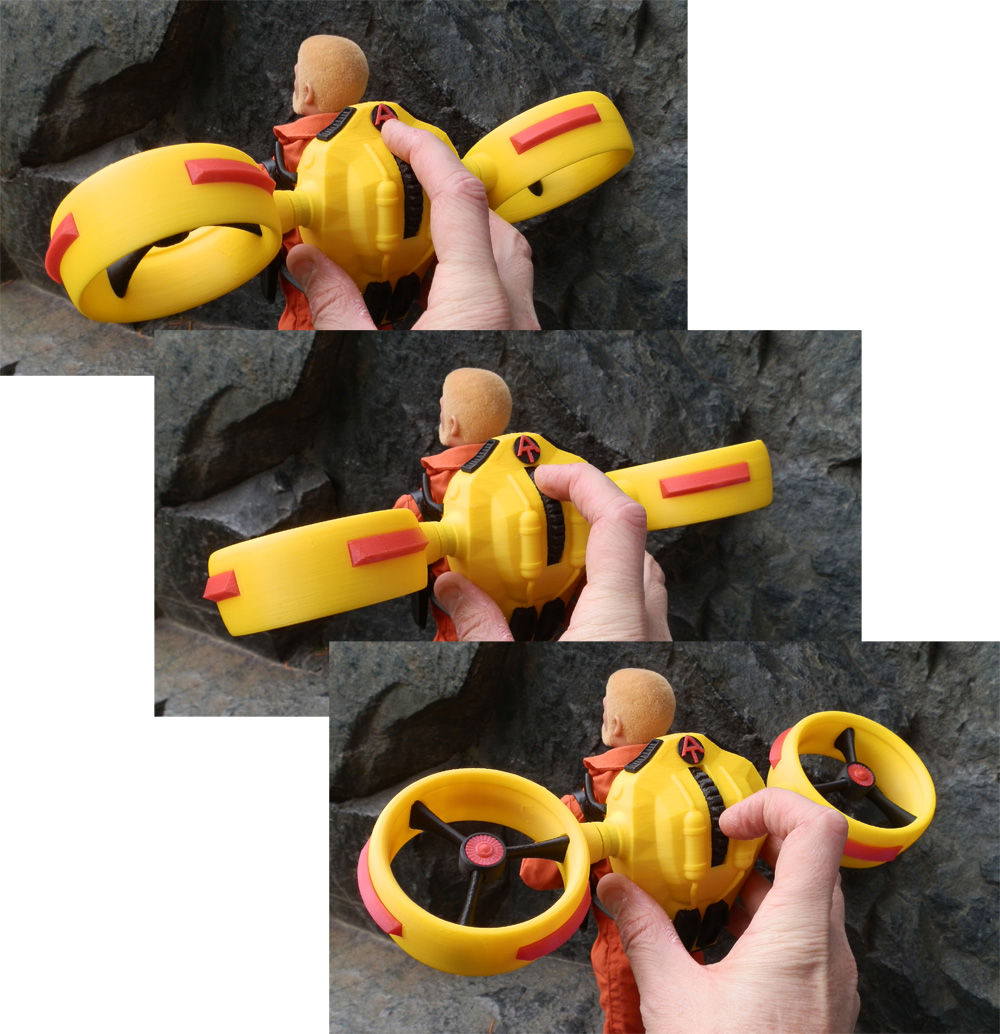
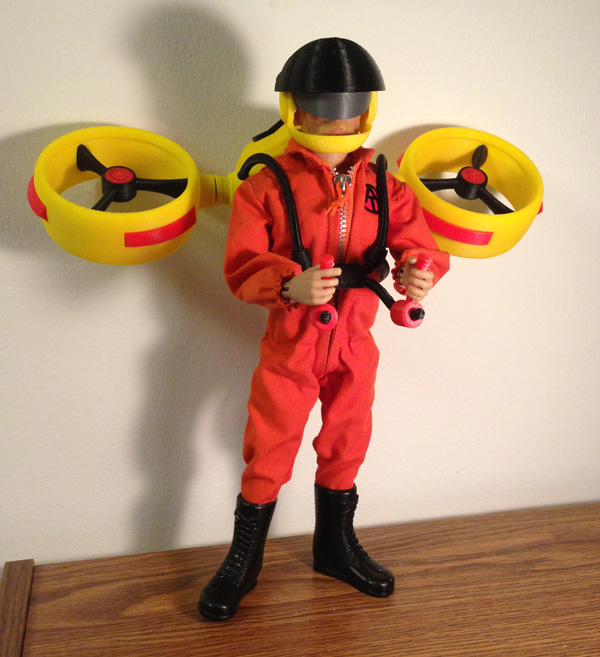
This is, from left to right (by my memory… will fix errors later) the 2013 Comerade of Action (with his beautiful outfit), the 2007 Arctic Adventurer (with his gear),j the 2011 Man of the Sea (with his accessory set), the 2008 Man of Asia (with gear), the 2010 Urban Adventurer (with gear including a skateboard, yo!), the brilliant 2012 Man of Evil (with mask and disguise outfit making him the Lost Adventurer), a very small-run exclusive 2011 Stealth Infiltration Figure (still wrapped so far), another short-run figure (I forget the details on this one, if someone can help me out, I’d appreciate it.), then comes the MARS Henchman (a figure available to conference attendees) from the Spy Island 2010 Escape From Spy Island (which itself is a work of absolute genius!), then the 2004 exclusive Aged Adventurer (the gear set is hidden behind the group) and finally the 2003 Counter-Culture Adventurer. (Not shows is the Foreign Adventurer who is currently busy posing for my new Jetpack.)

Not shown are all of the coffin-box figures they created such as the Land Adventurer, the Sea Adventurer, Air Adventurer, Talking Commander, AA Adventurer, AA Talking Commander, because they are currently in storage. But you can see them here:

http://sean.adventureteam.com/gijoe/new-at/new-at.htm

Also not shown here is this: (the only Convention set I own because I attended in 2010):

eightlegslogo

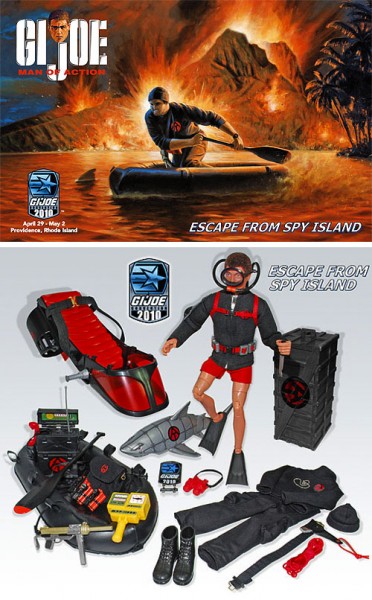
(Let me just say that if no other AT sets were created after this, I’d be fine with that because this was the pinnacle!)

Add to this the Convention exclusives (not cheap, but amazing) that they create every year, which also usually come with an attending exclusive you can’t get elsewhere, I really don’t see how anyone can say this club doesn’t cater to its 12″ fan base.

Really!


GI Joe Adventure Team Action Pack – Airborne Surveillance

As my second GI Joe Adventure Team Action Pack, I decided to make a set that will again give the ATV a purpose. This set will snap to the back of an ATV or Trouble Shooter. This time, a rack will carry two remove aerial surveillance drones.

(The first Action Pack, a Jetpack, will also have an ATV component, but that isn’t printed yet. It will be a rack to store the collapsed jetpack for ground transport.)

Also in the set will be a computer tablet touch-screen video mapping and drone control system on a flexible armature which will attach to the back of the ATV or Trouble Shooter, most likely slipping over the back ledge and onto the tow hook for support.

Here are some of my first images, from Maya:

This is the top of the drone featuring a smooth ring-like body with a central hub and three bracers. You may be reminded a bit of the Jetpack design. This is on purpose. i want to have a consistent design aesthetic for these sets, and this is not an unfamiliar concept for science fiction aerial drones.
at-surveillance-prototype-1

The three central struts connect to the hub, but the bottoms also swivel down to form a tripod of legs for landing.
at-surveillance-prototype-2

Since the surveillance camera dips a bit below the ring (for a full panoramic video image) the legs are necessary for a landing that won’t damage the camera.
at-surveillance-prototype-3

While the legs will swivel down on hinge pegs, the cuts to make this necessary are not yet made to the model above, so bear that in mind.

I will probably print the body in white with black detail, much as you see here, but I may put some color on them, perhaps make the central hub red. Not sure.

On the ATV itself will be a rack that snaps into the slots (like ATV rails or the winch does) and the drones will snap into two harnesses there. No concept yet of what that will look like.

Stay tuned. More to come.

So here is the first prototype print. I think I will be changing the black insets to red, as well as putting a bit of red on the center of the hub.

OLYMPUS DIGITAL CAMERA

I have some refitting to do, the legs are a bit loose, and the camera is a bit small, but I think it’s actually 90% complete, and I just started it a couple of days ago.

The armature will be mounted on the back of the ATV, and two harness racks will also mount there that the drones will snap onto.

A sticker will go on the screen, with a printed map and control interface on it.

Here is the sticker, which should be set to print at actual needed size:

AT-Surveillance-Touch-Screen-print

It prints so that when you cut away the black edging you are left with a 6cm x 4cm image. The black is printed just to give you some leeway so the edge you cut (which is always so hard to cut exactly) is black instead of white, looking like paper. You can print this on sticker paper to make it easier, or you can glue it to the screen. Glossy paper recommended because it’s supposed to be a glass touch-screen.

GI Joe Adventure Team Action Pack Jetpack – First Complete Print

After the prototype of my Jetpack was finished, I spent some time adding detail to the back of the jetpack and refining other aspects, such as how the jet arms attached, how much access you had to the thumbwheel, I was ready to print the final version.

I was approached by Afinia (the manufacturers of my printer) and asked if I had anything I wanted to show at their CES 2014 show coming up. I showed them the video of the prototype and they thought it would be very fitting for their show. I am readying this final print now to send to them for the show (along with a GI Joe to pose it with.)

At around the same time, I saw a posting by 3DAGOGO, a web site startup whose intent is to provide a market for designers to sell their 3D print designs. I signed up and noticed several contests, one of which is for Household Item and that includes toys, so when I showed them some of my designs, including the prototype video, they thought it would be a perfect candidate for the Household Items category, and encouraged me to enter their contest.

This weekend I shot the Jetpack in a sort of short photo story, intended to show off the various features, and I will be preparing the files for print so I can upload it to their contest, and perhaps to sell as a design there.

I also shot a second video, this time of the first finished print.

So here it is, the first photo story I’ve done in years, and I did it just to show off the awesomeness that is the new GI Joe Adventure Team Action Pack Jetpack!


OLYMPUS DIGITAL CAMERA OLYMPUS DIGITAL CAMERAOLYMPUS DIGITAL CAMERA OLYMPUS DIGITAL CAMERA OLYMPUS DIGITAL CAMERA OLYMPUS DIGITAL CAMERA OLYMPUS DIGITAL CAMERA OLYMPUS DIGITAL CAMERA OLYMPUS DIGITAL CAMERA OLYMPUS DIGITAL CAMERA OLYMPUS DIGITAL CAMERA OLYMPUS DIGITAL CAMERA OLYMPUS DIGITAL CAMERA OLYMPUS DIGITAL CAMERA


And to show off the thumbwheel, (which I do in the video) I took a series of three photos showing the thumbwheel in action:

thumbwheel


Update – Nov 19, 2013

The helmet I designed to go with this jetpack was fun to model. I made a highly-tesselated sphere and used a lattice grid to shape it until I got a fairly pleasant shape. I hollowed it out using measurements of a GI Joe head, and did a test print. It didn’t fit. It also printed fairly badly because it’s completely round. I want it to look its best, so I printed it with the back of the helmet as the floor of the model.

With current 3D printing technology, the floor of the model is supported by a raft and scaffolding material to lay the base of the model on. On a rounded model, this causes some very ugly ringing, so I figured it would be fine at the back, and it is. But I still want to improve it.

Here is the first test-print. (The ringing on the back is not visible.)

at-jetpack-helmet-first-print-yellow

Then I modeled a visor cap and a “virtual vision” visor – (the thing is not see-through, but uses enhanced virtual 3D imaging to see), and printed a version in red (because my printer wouldn’t extrude the yellow due to a head clog which I fixed by replacing the head.)

at-jetpack-helmet-prototype-red

Then I printed a yellow version with black visor cap and silver visor:

at-jetpack-helmet-finished

And here is how it looks worn with the jetpack.

at-jetpack-with-helmet