Konami Eagle Pods – Improvements

I was sure, due to some quick test prints, that the Freighter and Winch pods I modeled for the 4″ Konami Eagle would not sustain printing the superstructure at either end of the pods.

After tests with the Dinky version (which is almost twice as large) worked rather well, but I expected that. Here is a pure white version, next to the Product Enterprise pod that inspired it:

dinky-eagle-winch-pod-comparison-pe

So I decided to adapt that model for the 4″ Konami model, meaning the pod itself would be about 4cm long, and those struts would be tiny.

But here is the result:

konami-eagle-pods-front

I was very impressed that this actually worked on my printer. It turned out very nicely.

konami-eagle-pods-side

I even printed very very tiny Alpha Moonbase badges for the winch barrel caps.

I glued the Nuclear Waste containers down using Elmer’s white glue, so they would be easily removable.


NOTE: For anyone who buys these models from me at my shop (Fourth D) on Shapeways, you may want to print the decal sheet I created. The two links below are to PDF files you can print.

Pod-Decals-Better-Layout

Pod-Decals-Instructions

You can print them on white waterslide paper either in laser or inkjet (make sure you have the right paper and follow instructions that come with the paper) or you can print them on simple white paper and use simple glue if you like. The decal sheet has both the Konami and Dinky scaled decals. Also, the instructions for the decals (for waterslide) are available here.


Space: 1999 Moon Buggy – First Full-Sized Print

Even before I got my Afinia H479 printer, I was modeling a Moon Buggy from Space: 1999. It was one of the first things I wanted to print.

Here it is, in a publicity shot from the TV show. (It’s clearly a publicity shot… they’re on the moon without helmets!)
moon-buggy

So as a test, I sent a file to them to print. It was not my model. I found it on the internet, and it was not optimized for 3D printing. It had its problems, not the least of which being that it was not correctly proportioned, and was not overly accurate. Here it is:

afinia-atv

I spent weeks modeling this, refining it, and it was indeed one of the very first things I printed on my Afinia. As a smaller sample, just to see what it would print like:

OLYMPUS DIGITAL CAMERA OLYMPUS DIGITAL CAMERA

Then I printed it a little larger, with the rest of the parts, in neon yellow and black:

OLYMPUS DIGITAL CAMERA

I let this project sit for a while as I was working on many GI Joe toys and other things.

But this last couple of weeks I have been modeling pods for my Dinky and Konami Eagles, and I finally got up the urge to print the whole Moon Buggy. One reason for my delay is that it would take about 13 hours to print the body, if I wanted the highest resolution. Since I had never printed it fully before, I decided to do a test print at .2mm, rather than at .15mm. It took 8.5 hours to print. The result was not bad. It had some issues with oxidization on the print nozzle which dropped carbon deposits into the print at inopportune places, but hey, it’s dirt. Moon Buggies get dirty.

moonbuggy-just-printed

Here is a close-up of the sloped front, which was always an area of concern for me, because a layered printing method will inherently add stepping, which could be unsightly.

moonbuggy-front-stepping

But it wasn’t as bad as I had expected, and I’m sure it will be better when I embark on my later, highest-resolution print. But for now, I completed this version:

moonbuggy-bumper-masked

I printed the black parts (there are six wheels. Only four are pictured here.)

moonbuggy-black-parts

Then I printed some white parts (not pictured: Mirrors and headlights)

I masked off the yellow bumper every .5cm and then painted it black. I snapped it to the body.

Then I glued on the wheels, using a cardboard spacer to ensure they weren’t too tight against the body:

moonbuggy-gluing-wheels

moonbuggy-finished-01
Here is the completed model, with black gas cap, white mirrors and headlights, wheels with coat hanger lengths for axles, the seats are in place, and the control rods (paper clips) glued in place with handles.

moonbuggy-finished-09 moonbuggy-finished-scale moonbuggy-finished-06 moonbuggy-finished-05 moonbuggy-finished-02

Update: June 5, 2014

Since I posted pics of this on the facebook Space 1999 fan pages, I was commissioned to create two 1:30 scale versions, without the engine hub, just a flat rear bed. So I printed a 1:30 version as a test, or close enough. Probably more like 1:36 or so… a bit smaller than 1:30. Here you see it next to this larger one, and a tiny one I had printed at Shapeways to scale with my Product Enterprise Eagle:

OLYMPUS DIGITAL CAMERA

I haven’t yet painted the black banding on the medium one, or the small one, though I intend to. And then I have to do decals for them.


Dinky Eagle – Winch Pod

After making the Winch Pod for the 4″ Eagles made in Japan by Konami, I decided that next I would tackle adapting it for the Dinky Eagle.

The Dinky Eagle is approximately 9″ in length and has a strong metal spine for support, but that gets in the way of having an open pod.

The tiny size of the Konami meant I had to cut corners on the design of the superstructure at either end of the Winch Pod. I made it solid rather than of interlaced piping, for scale and convenience. It would never print on my printer that small.

But the Dinky Eagle had to have it.

I had to first make a holding system that would work with that spine while not getting in the way, and working with the double-claw mechanism that the Dinky Eagle uses to hold onto its pods.
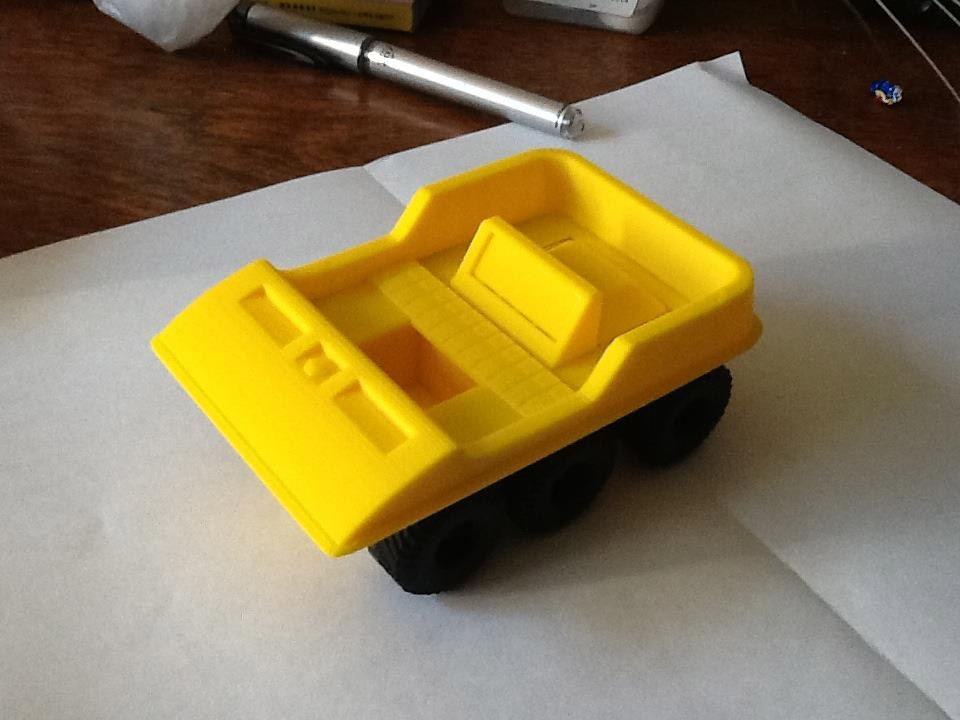
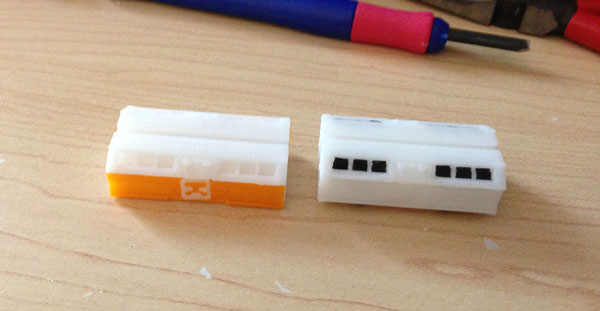
The Prototype

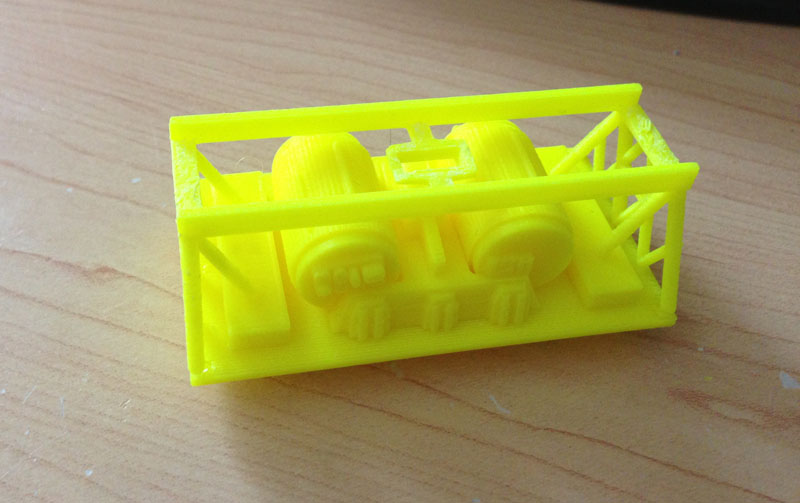
(I print in neon yellow to ensure the model is working, and so I don’t waste colored filament, and so I can always know it was a test print.)

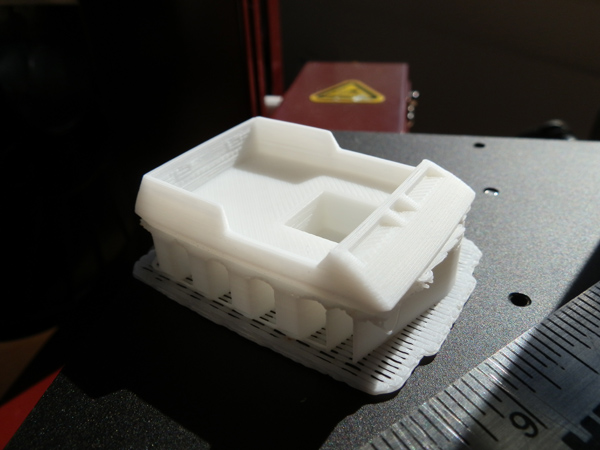
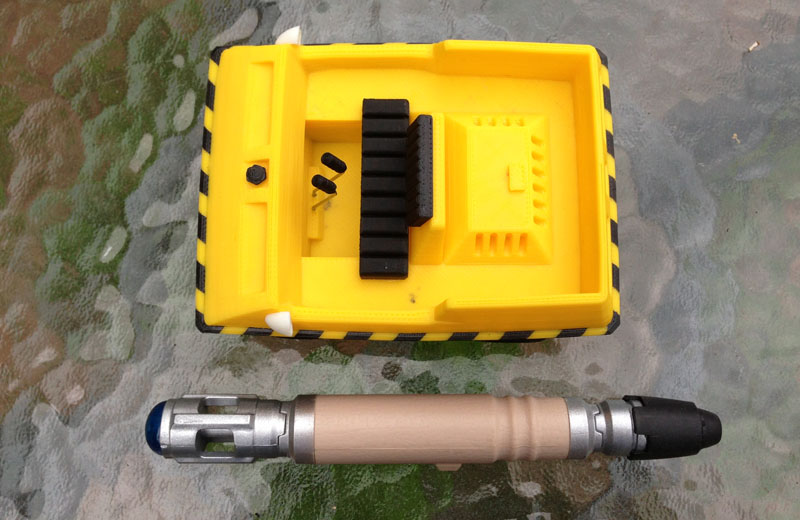
So here is the holding rack, with hole for the grasping claws, attached to the floor of the pod:

dinky-eagle-winch-pod-frame-01

But you can’t see the hole from here.

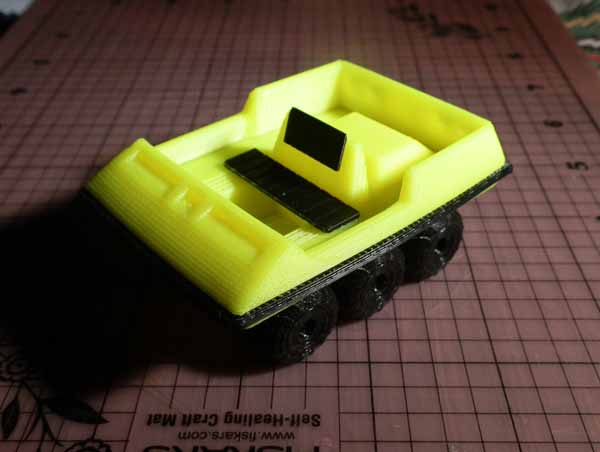
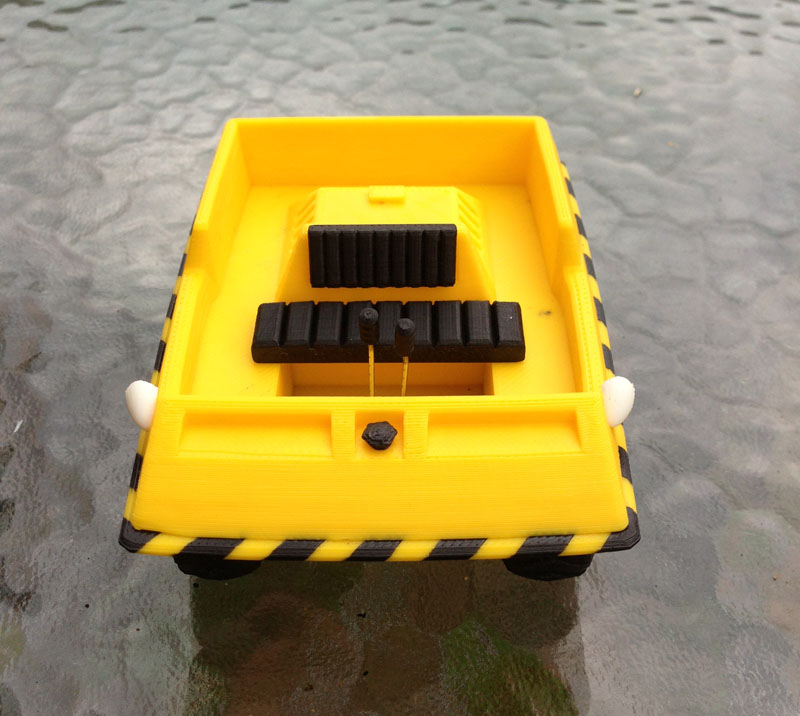
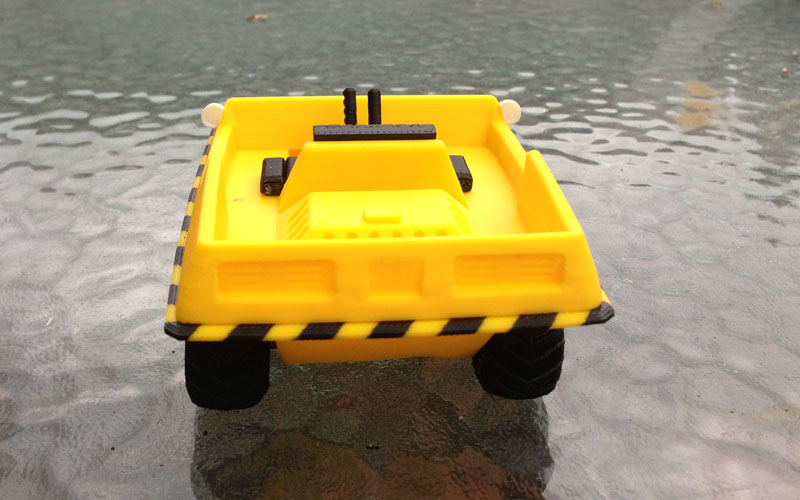
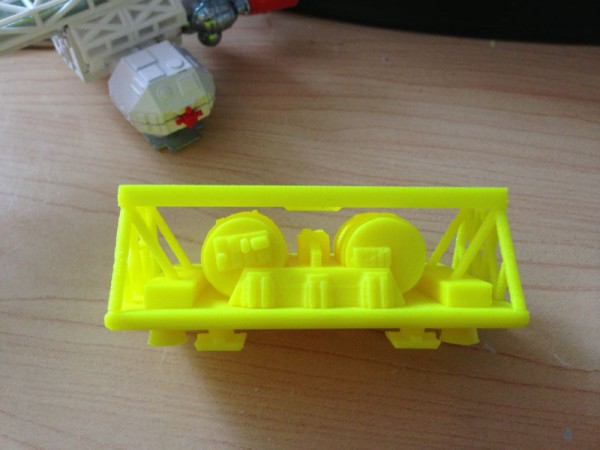
Here is the fully assembled test print, from above, showing the claw hole:

dinky-eagle-winch-pod-top-01

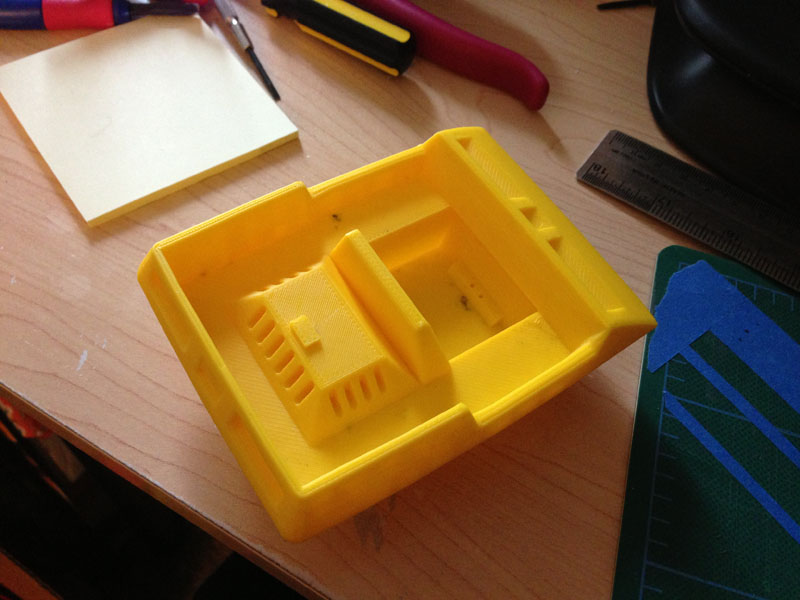
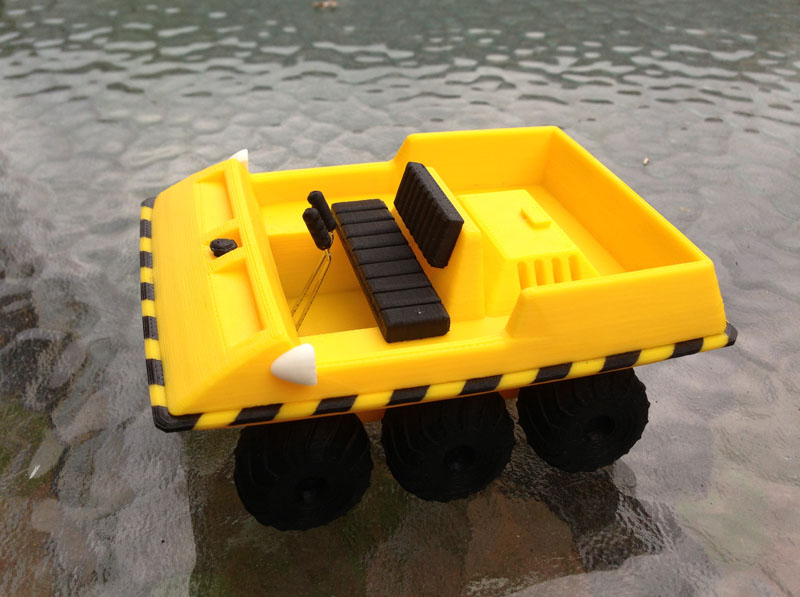
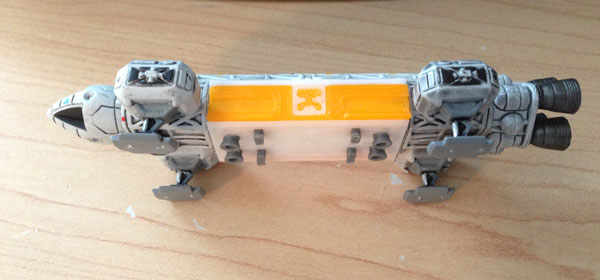
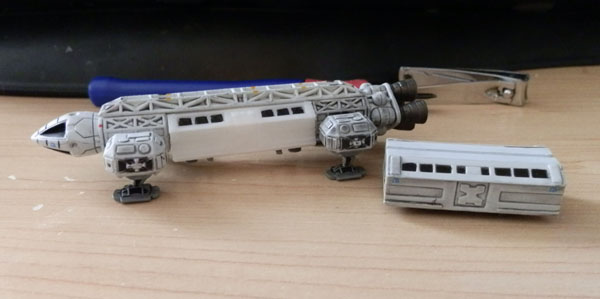
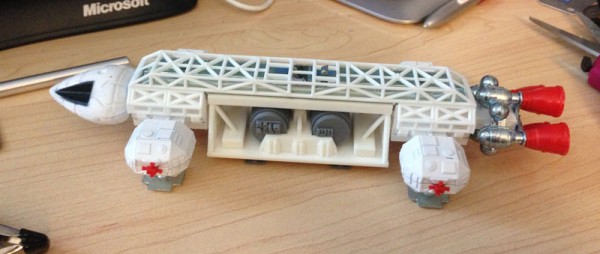
Here is the same model from the side, showing all of the detail of the Winch Pod:

dinky-eagle-winch-pod-side-01

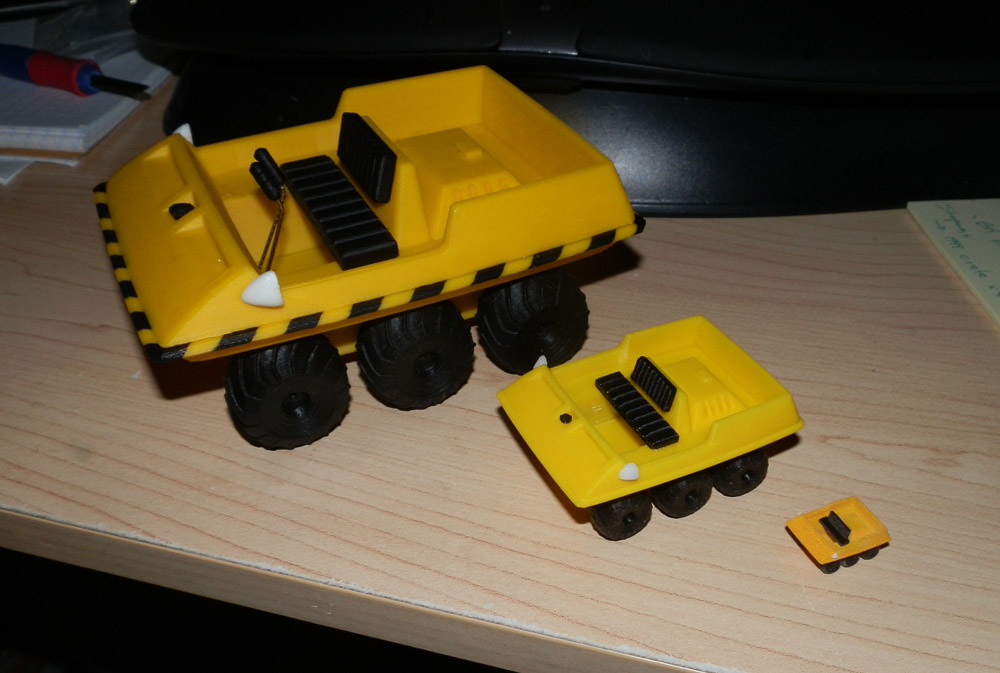
Here it stands next to the Dinky Passenger Pod:

dinky-eagle-winch-pod-comparison

The yellow doesn’t photograph terribly well due to its slight translucency in bright light.

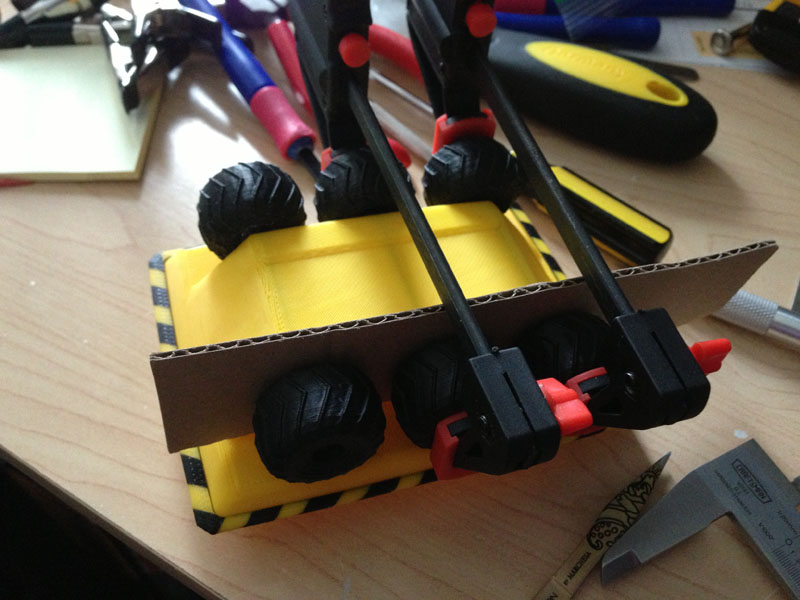
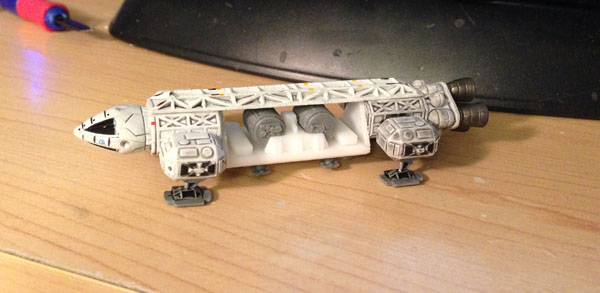
Here it is, snapped to an Eagle:

dinky-eagle-winch-pod-test-print-01

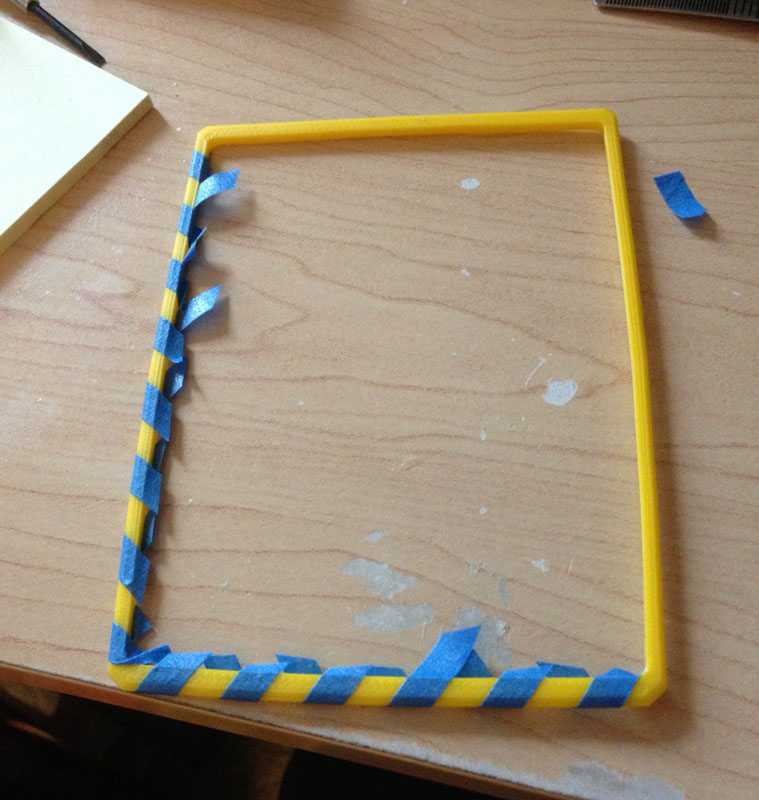
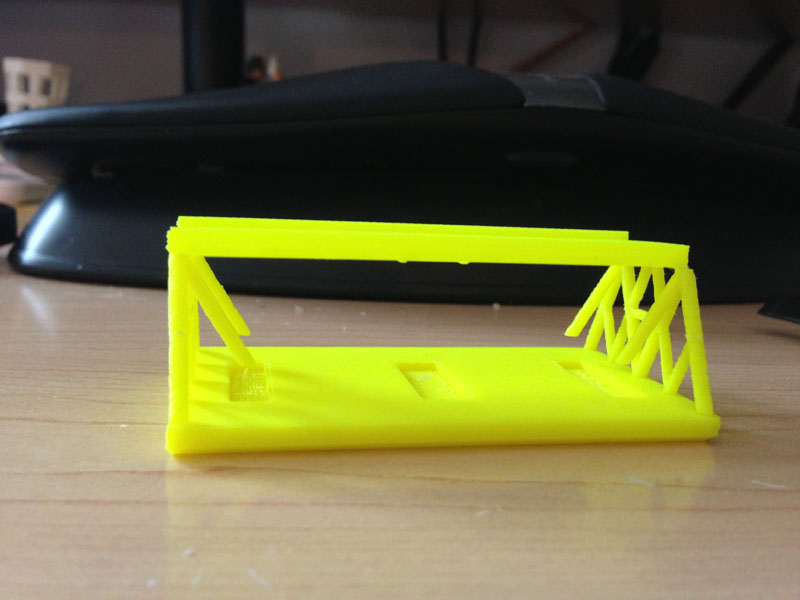
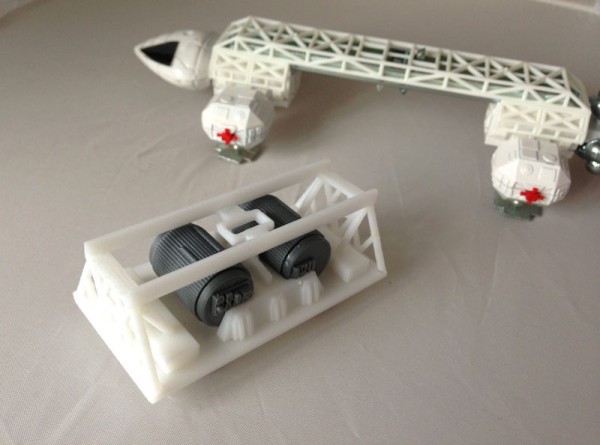
When I looked at the finished pod, I realized that the holding rack did not have to be fully closed. I remodeled it to open it up, thusly:

dinky-eagle-winch-pod-open-top-01

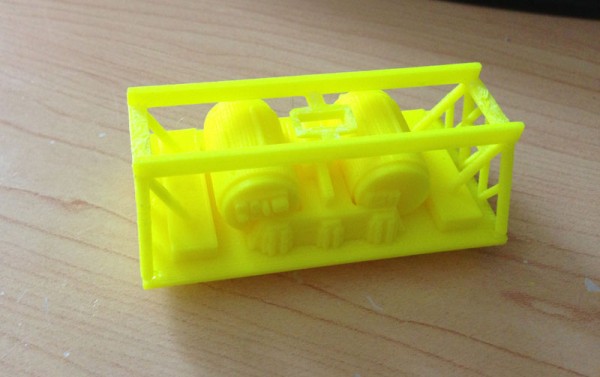
Note: This made cleanup of the piece harder, so I may have to strengthen it a bit by making it just a tad less open. But the concept worked well.

Production Model

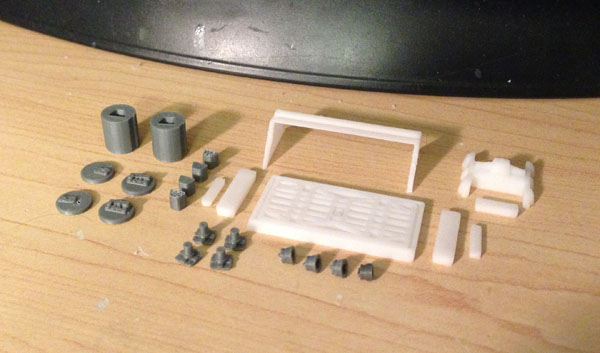
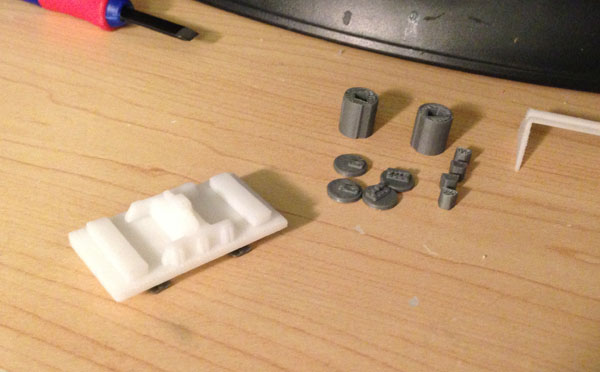
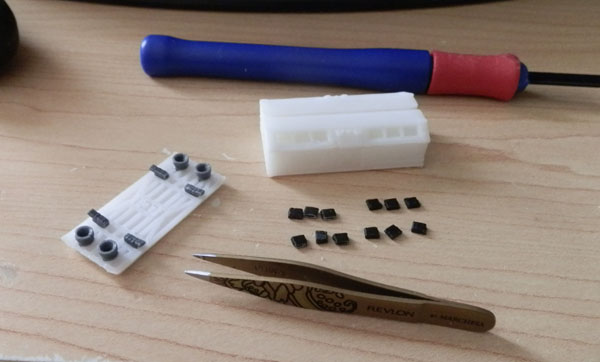
First, I printed the barrels, legs and engine cones in silver:

dinky-eagle-winch-pod-silver-pargs

I started printing final production pieces at .15mm slices in Slow mode, for the best possible print my Afinia H479 can do, using Premium White for the body and Silver (which is really just a shiny grey) for the winches, legs and engine cones.

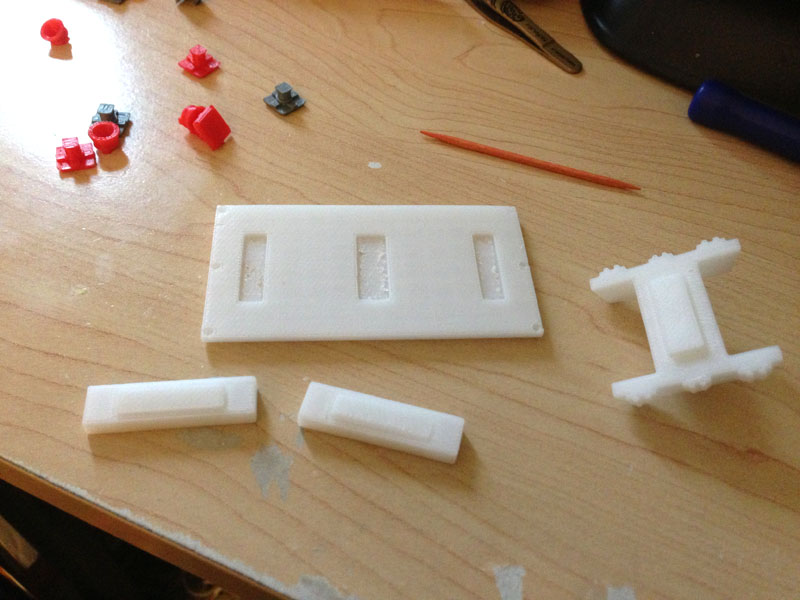
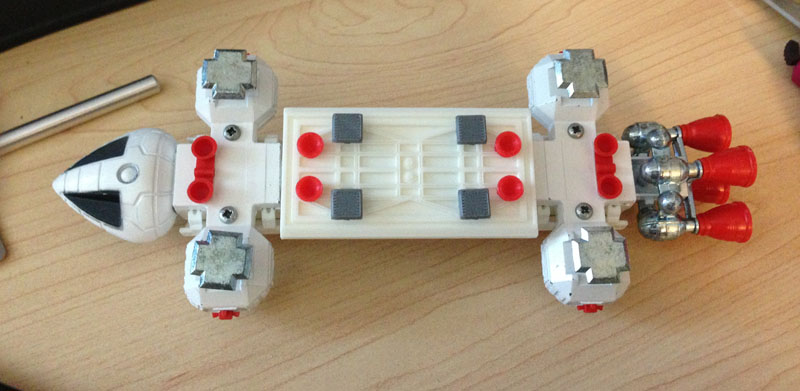
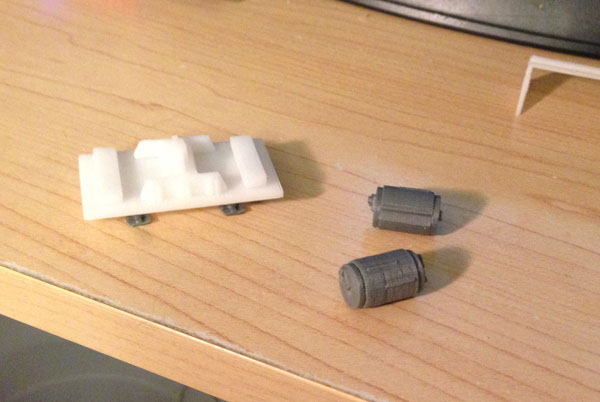
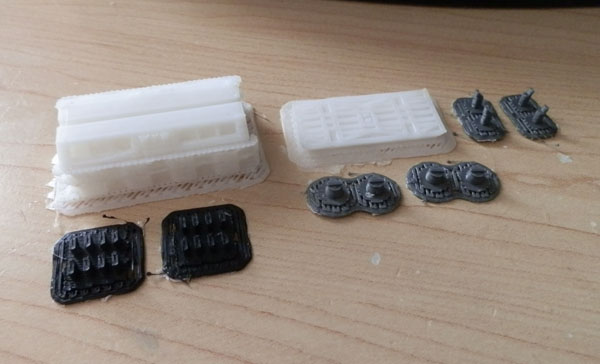
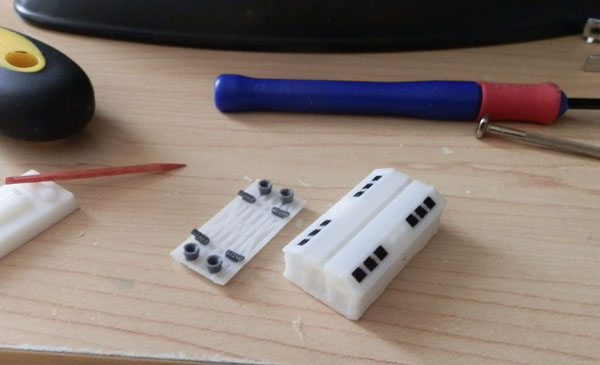
Here is the floor, the two pieces on either side of the floor, and the winch base, with the rectangles I printed to align them:dinky-eagle-winch-pod-floor-parts

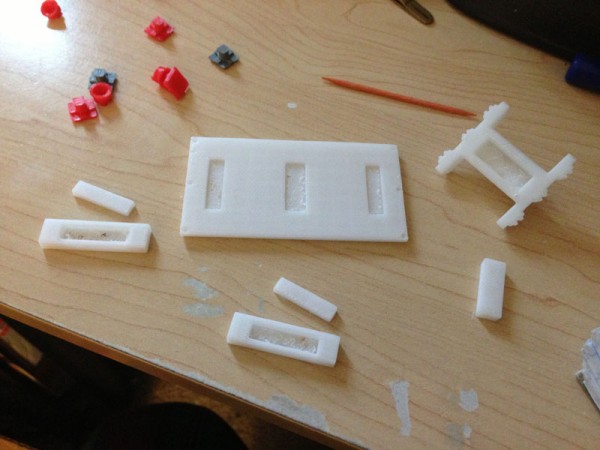
A word about those pieces. Why not just make holes in the platform? When you 3D print something, it prints the underside on a raft. It’s fairly easy to peel up a flat surface. But it gets harder the more detail you have underneath, and having an underneath with “floors” at different levels makes cleanup much harder. So I printed these “plugs” to just work better. You may notice some messy plastic in the holes in the larger pieces. That’s ok because these parts are hidden, and I only needed enough vertical room in these places for the plug to align them. It looks a bit more complicated than it had to be, but for 3D printing, this is actually just easier.

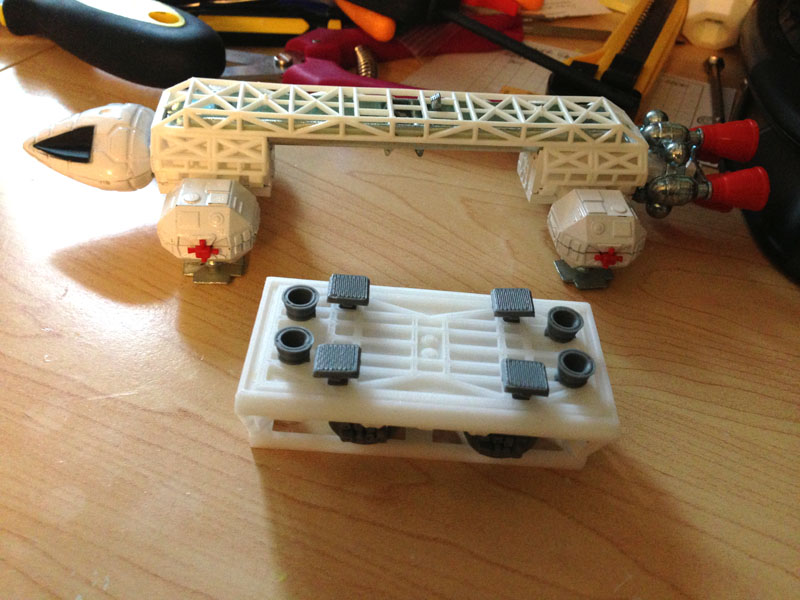
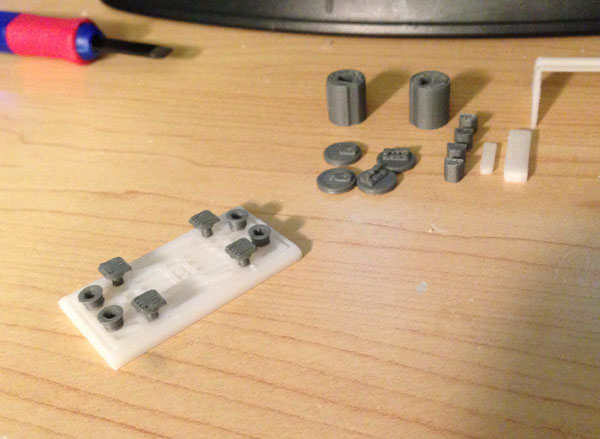
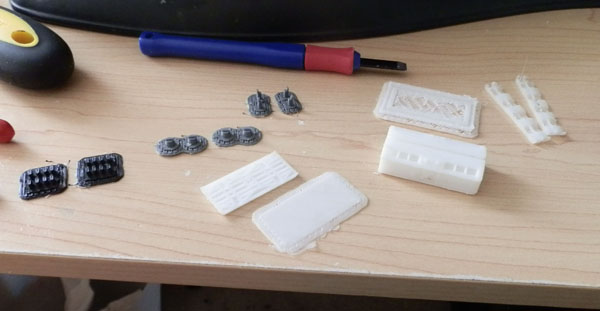
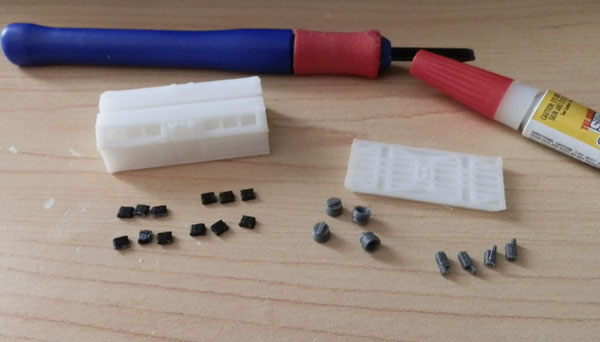
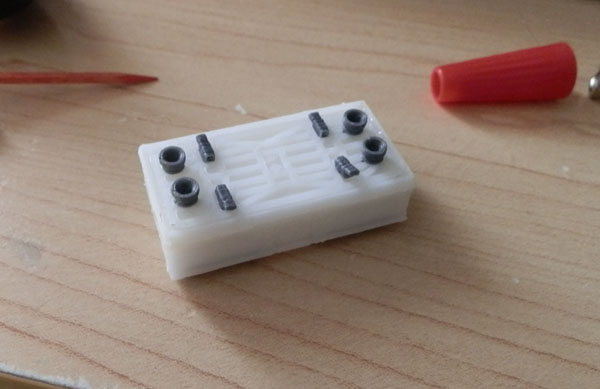
Here, I have placed the “plugs” into the holes on the three pieces, and now they will be a breeze to align to the floor:dinky-eagle-winch-pod-floor-assembly

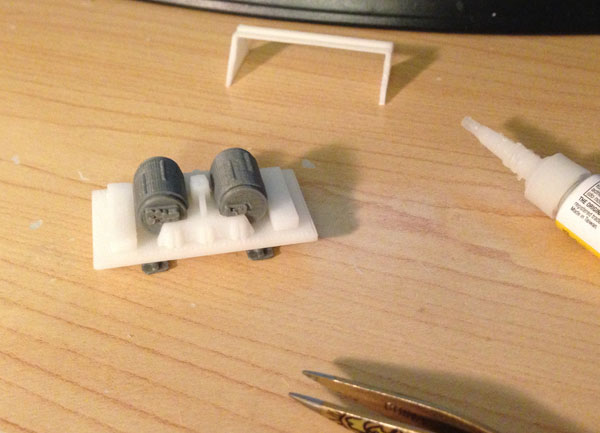
Ouch. Lighting! Shooting these shots on my table means sometimes the detail gets lost. Anyway, here is the floor assembled:dinky-eagle-winch-pod-floor-assembled

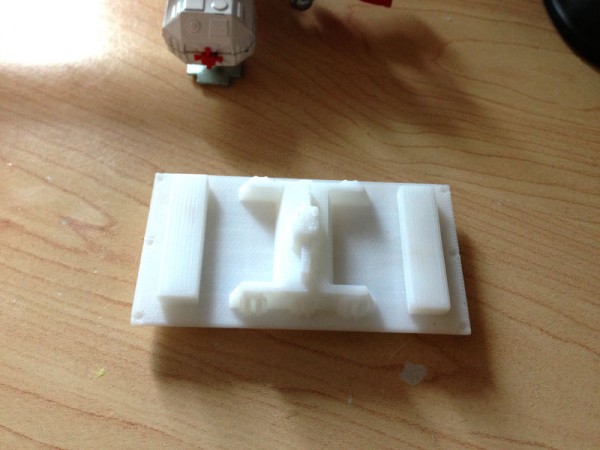
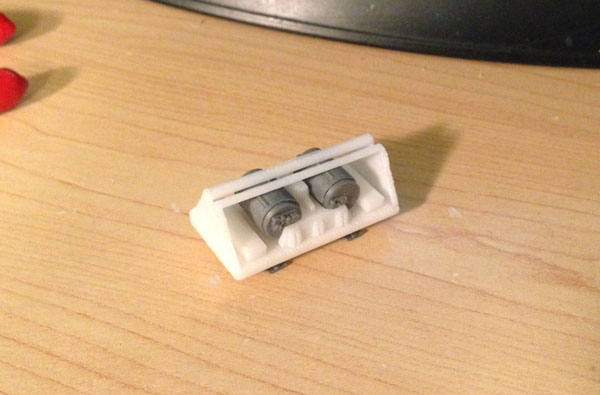
Here is the Winch Pod basically assembled:dinky-eagle-winch-pod-silver-side
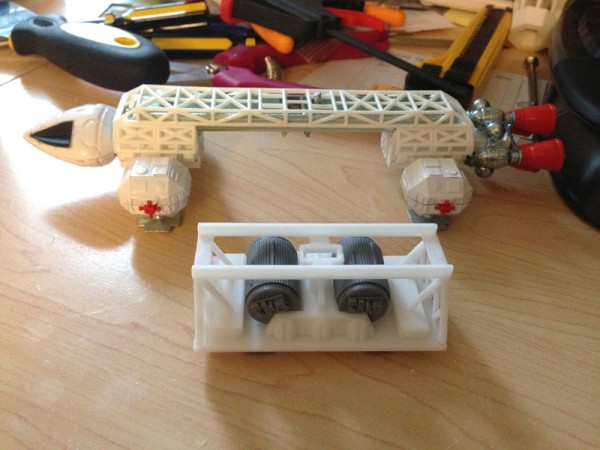
At this angle you can’t see the legs and engine cones, but more or less this is finished. Note, however, that I messed up and the barrel on the right has the wrong cap on the front end. I figured it wouldn’t matter since the barrel is just a barrel, but I was wrong. The barrel is not just a barrel. It has a slice taken out of it to fit it into the winch housing.

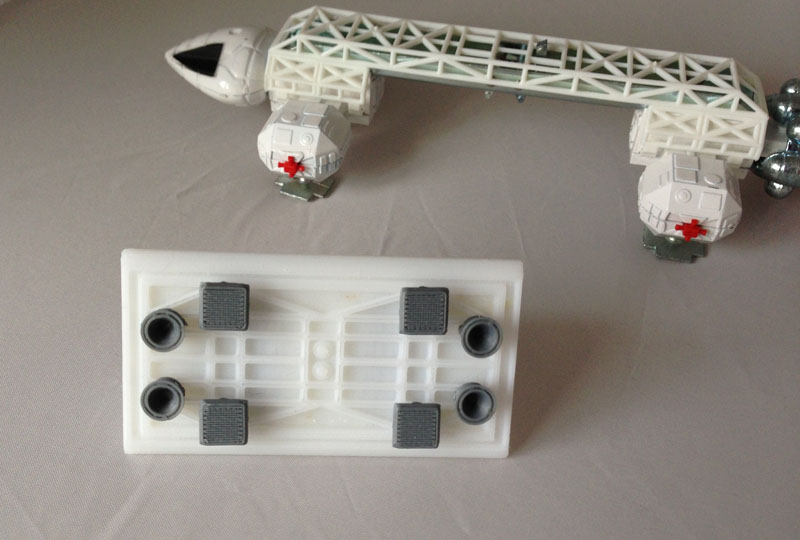
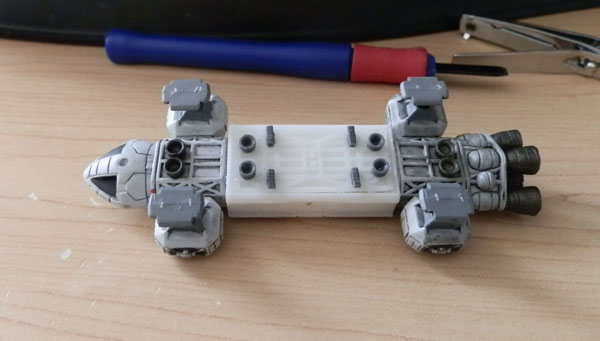
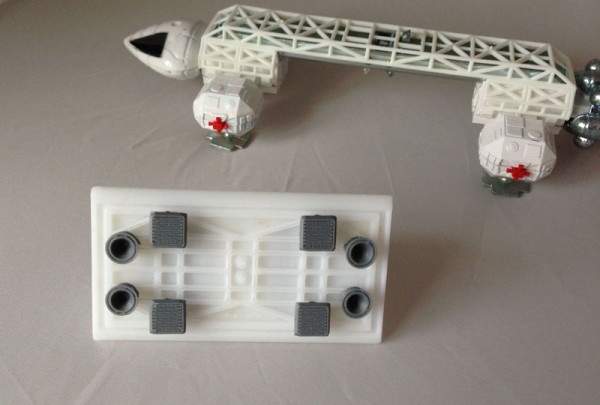
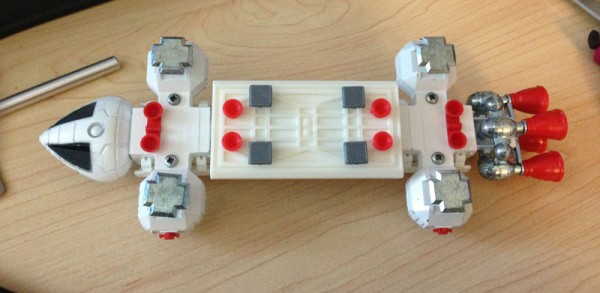
Here is the bottom. Feet and engines in place:dinky-eagle-winch-pod-silver-bottom

The Toy Version

Since the original Dinky Passenger Pod has red legs and rocket engines (mine does anyway) I decided to make a more toy-like version as Dinky itself might have made it (without the metallic green and/or blue parts.)

Here is the assembled toy version:dinky-eagle-winch-pod-toy-version

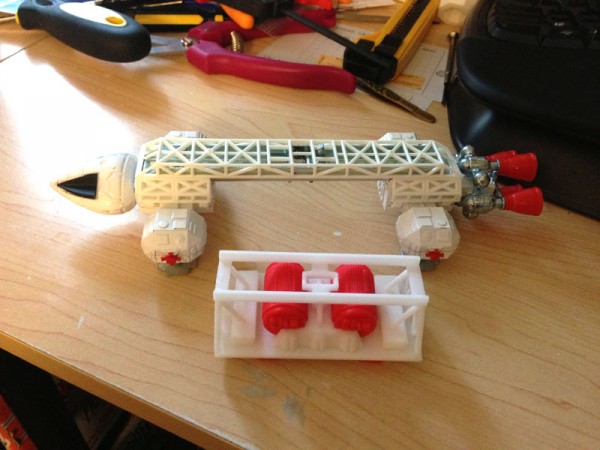
And here is the bottom:dinky-eagle-winch-pod-toy-version-bottom

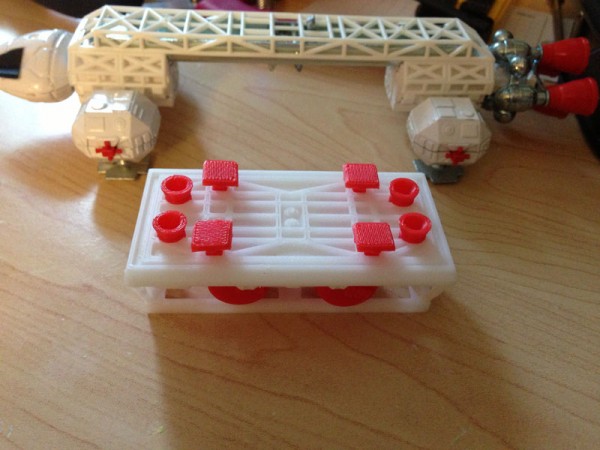
I think for my own interests, I’d prefer to have (for my white Eagle with red jets) a version with the silver/gray winch barrels, but with red engines and silver feet.

I also decided to experiment with a more ivory-toned white, which I think closer matches the original Eagle.

I put a finished pure-white/silver version up on eBay with a starting bid of $19.99 (shipped free US).

dinky-eagle-winch-pod-detached dinky-eagle-winch-pod-side-detail dinky-eagle-winch-pod-with-passenger-pod dinky-eagle-winch-pod-bottom

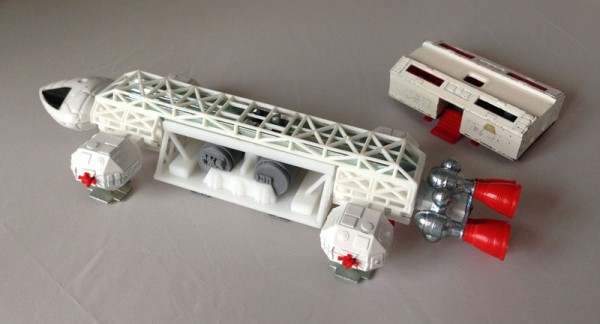
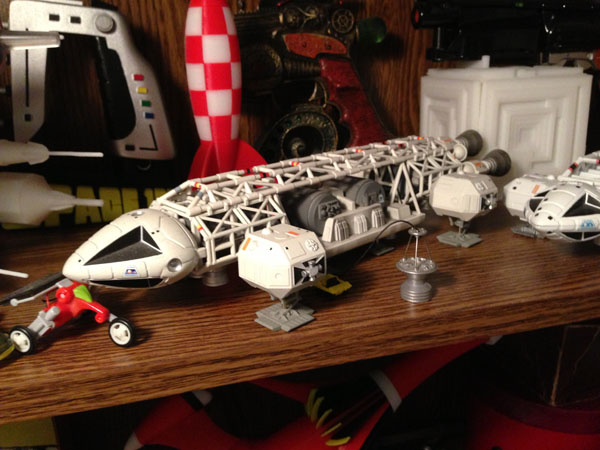
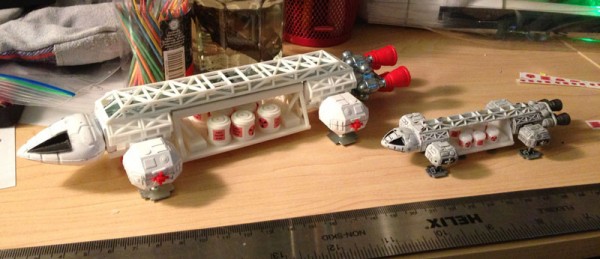
Here it is next to the Product Enterprise version which I used as a reference in modeling this.

dinky-eagle-winch-pod-detached dinky-eagle-winch-pod-comparison-pe

Of course proportions and other features had to be changed to make it work well with the Dinky Eagle, but the result is strong and plays well. You can drop the Eagle down onto the pod and pick it up with ease, and then drop it off using the clamp trigger. Very fun.
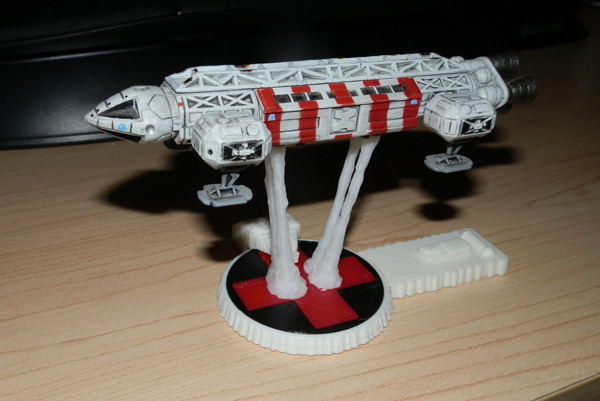
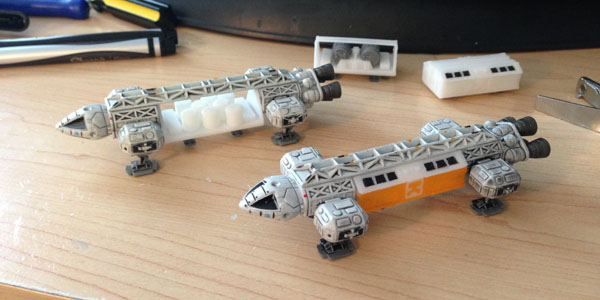
My Favorite Version

Since the white Dinky Eagle (usually shipped as a Freighter with a red cargo bay to carry nuclear waste containers) had red underjets, I printed a new version of this pod with two changes:

– It’s printed in a less pure white. This is more of an ivory color and has no translucency. It seems to fit the Eagle a bit better.
– I printed the feet in gray/silver, but the underjets in red, to match the Eagle itself.

I think it looks very nice:

dinky-eagle-winch-pod-ifory-red-engines-side dinky-eagle-winch-pod-ivory-red-engines-underneath

One Last Change

I have to say I am very satisfied with this project. I was able to make two pods with quick revisions. The Winch Pod was modeled for the 4″ Konami, scaled up, superstructure ends added, structural functionality put in for attachment/detachment, and with minor changes (removing the central winch) I was able to make a true Freighter Pod, sometimes called a Pallet Pod, used to carry the Nuclear Waste Containers around.

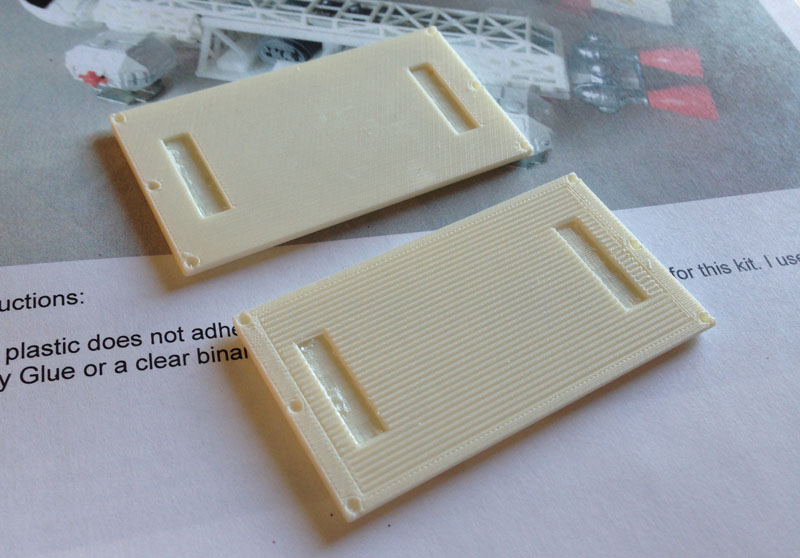
But I wondered if I could make this just a tad more accurate by adding longitudinal ridges to the floor. I wasn’t sure this would print well, since that floor has to be on the raft. I print these upside down, and cleanup with this color is harder.

However, it printed rather nicely, and I was also concerned the ridges would be too small to resolve on my printer. I needn’t have worried. The result is rather nice:

dinky-eagle-freighter-pod-with-ridges

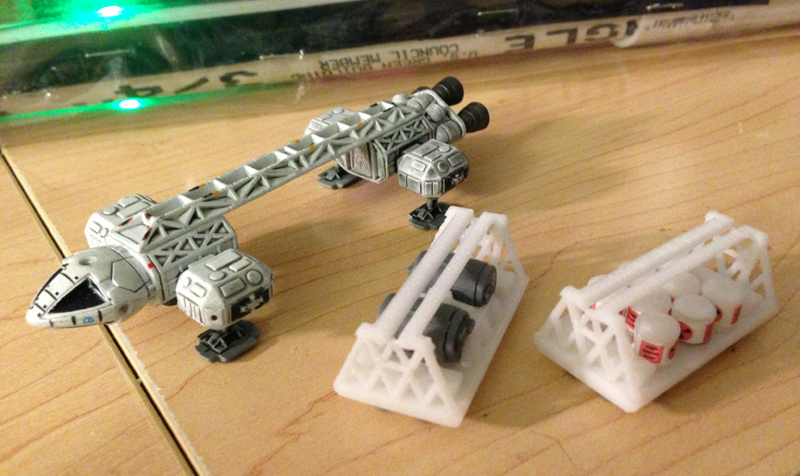
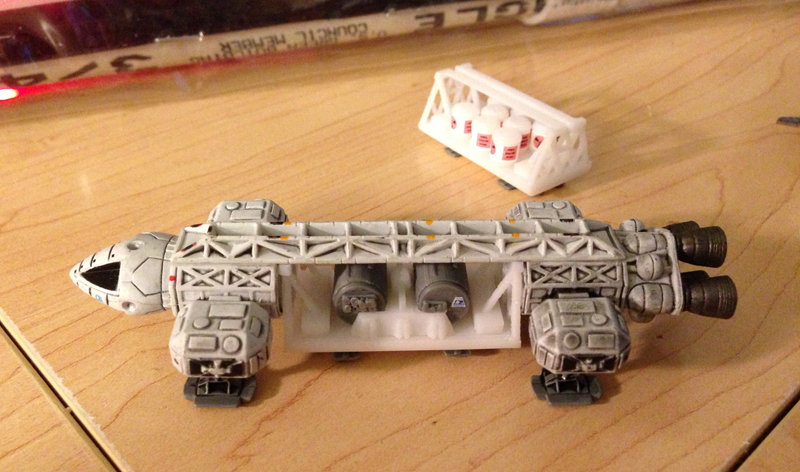
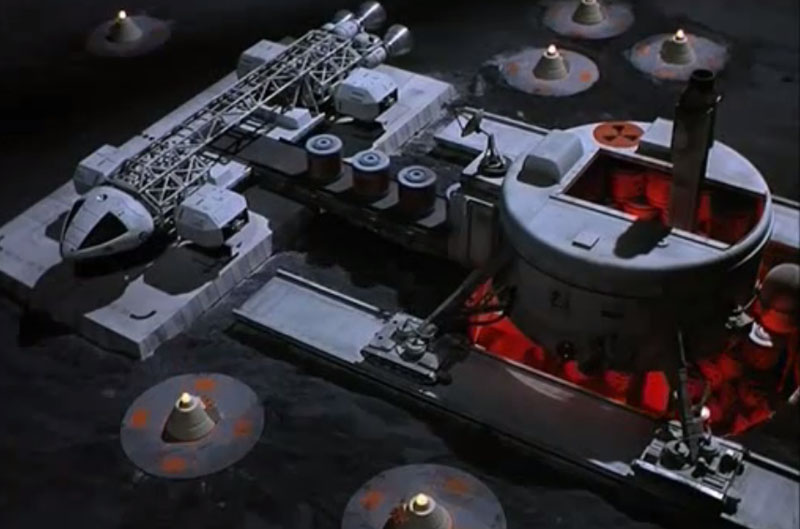
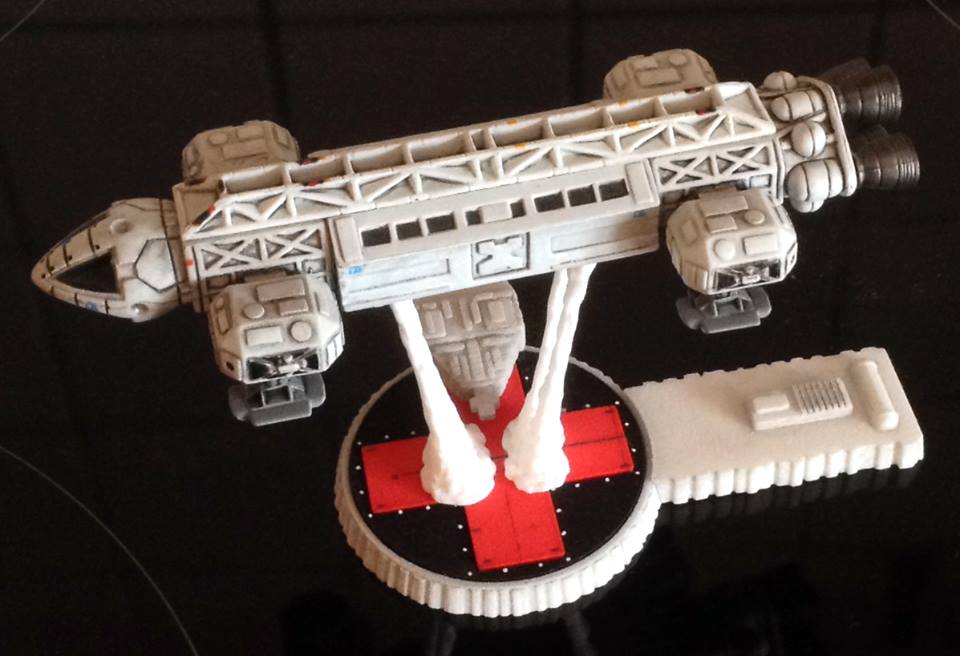
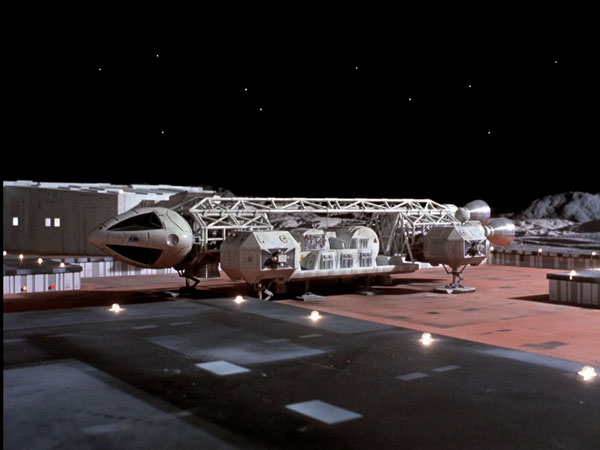
Freighter Pod (Pallet Pod)

Also featured on the TV show was a pod that was essentially a flat-bed. It held containers of nuclear waste which was off-loaded into storage on the moon.

eagle-unloading

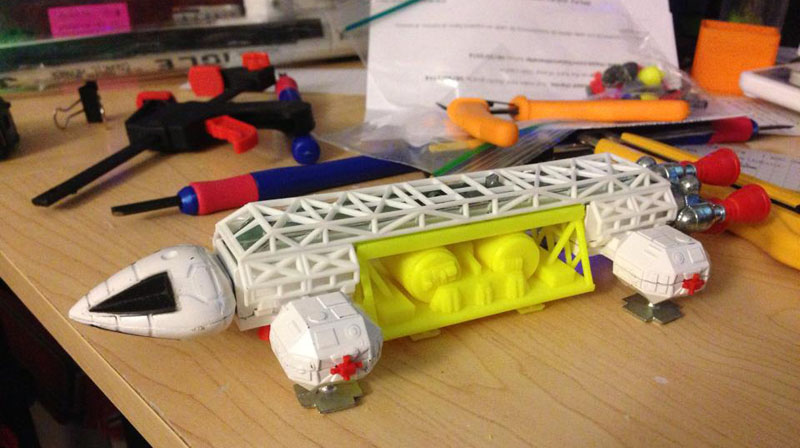
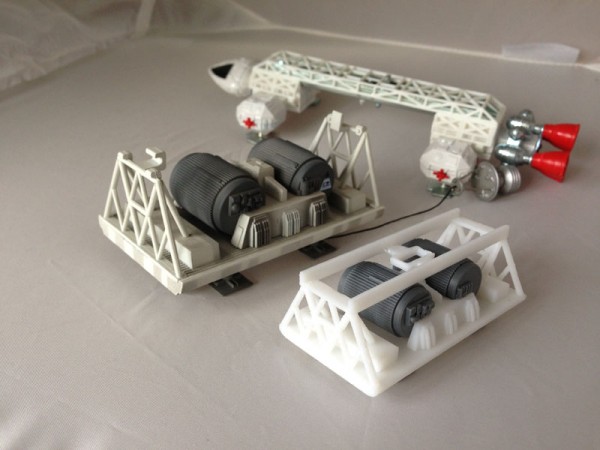
I made a minor adaptation to my Winch Pod, removing the central winch pieces, and then I modeled some Nuclear Waste Containers. Here they are for my Dinky and my Konami Eagles:

eagle-freighter-pods-dinky-konami-alone eagle-freighter-pods-dinky-konami-attached

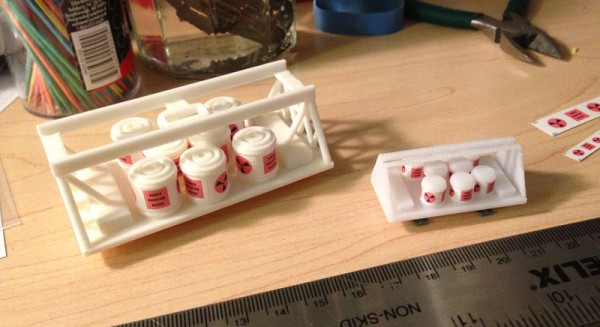
I have to say, putting those decals on the Konami-scaled barrels was difficult. Each decal is less than an inch long, wrapped fully around a barrel about the size of half a Tylenol.


NOTE: For anyone who buys these models from me at my shop (Fourth D) on Shapeways, you may want to print the decal sheet I created. The two links below are to PDF files you can print.

Pod-Decals-Better-Layout

Pod-Decals-Instructions

You can print them on white waterslide paper either in laser or inkjet (make sure you have the right paper and follow instructions that come with the paper) or you can print them on simple white paper and use simple glue if you like. The decal sheet has both the Konami and Dinky scaled decals. Also, the instructions for the decals (for waterslide) are available here.


Shapeways-Printed Konami Eagle Launch Pad Diorama Base

Some time ago now I modeled a forced-perspective display base for the 4″ Konami Eagles, for printing on my Afinia H479 3D printer.

Here is a sample, printed on my printer:

OLYMPUS DIGITAL CAMERA

It’s hard to see the detail because the sub-surface light scattering on this particular plastic hides the ambient light and detail.

I made my model available on Thingiverse, a repository of free downloadable models.

Marco Scheloske, a member of Space: 1999 Merchandise facebook group, sent my model to Shapeways for printing. He had it printed in the various colors, but then added paint detail (including the landing lights that I completely left off my original model – but intend to add in) and here was his result:

konami-eagle-landing-pad-marco-scheloske-shapeways

Now I have to do this myself! I must send this away to Shapeways, and though it was a bit expensive – he says about 40 Euros for him – I must have one, to see what the quality is like.

For that matter, maybe it’s time I opened up a Shapeways shop…

Komani Eagle Pods – VIP Pod

In “Breakaway”, Space 1999’s first episode, the moon’s nuclear waste storage facilities are proving unstable, and an investigation begins to determine why. At one point, Commissioner Simmonds flies to Moonbase Alpha to oversee operations. He travels in a VIP pod attached to an Eagle:

space1999-eagle-vip-pod-landing

As you can see it is a standard Passenger Pod with distinctive orange side panels and door.

So this should be a fairly easy job, now that I already had my own Passenger Pod already completed.

I wanted to print it in its native colors, since I do have orange filament. I cut away the side detail on the passenger pod, separating it out into its own thin strip, and leaving a space on the main body to snap it in place when it was printed in its own color.

Here, you can see it in progress:

vip-eagle-pod-in-progress

The door panel was the biggest problem. At these tiny scales, printing can be quite iffy. The orange panel had to be fairly thin, and I would have to print it flat. In these photos, due to the semi-translucent nature of the plastic, it’s hard to see the details, but they’re there.

The door panel was going to be a problem. I wanted to make sure the orange door was its own color, and so I had two choices. I could print the orange panel with a hole for the door space, and then indent the door, and print an orange door insert.

I chose instead to print the whole side strip and indent the white door space, extruding the orange door out a bit. Then the white part of the doorway would become its own piece and snap over the door.

Thusly:

vip-eagle-pod-side-panels

At this tiny detail, flat, filled surfaces sometimes get left somewhat open by my printer. It’s a problem for making small text letters or any filled areas that have a very small surface area. But I soldiered on.

And here is the final result, showing first the underside, and second loaded in an Eagle, with the other pods I created:

vip-eagle-pod-underneath

vip-pallet-pods-complete

Oh. Right. Behind it is my Pallet pod, which is used to transport containers of radioactive waste.

What I have not done yet is print water slide decals for the containers, which should have a radioactive warning sign and a text sign on them. That’s coming.

I won’t do a page on the Pallet pod because it’s really just the Winch pod with the winch removed, and cylinders added.

Konami Eagle Pods – Winch Pod

Moonbase Alpha exists as a colony on the moon partly in order to maintain a nuclear waste dump. Earth, by 1999, was powered almost exclusively by nuclear energy plants, and getting rid of the dangerous toxic waste became a problem. Why not just store it on the moon? Well why not?

In “Breakaway”, the first episode of Space 1999, Eagles are seen transporting and managing containers of radioactive waste. This waste builds up in energy and explodes in a massive nuclear blast that knocks the moon out of Earth’s orbit.

The Eagles used to transport these hold winches on a cargo flatbed with a magnetic winch head that picks up and deposits nuclear waste cannisters.

eagle-winch-pod

Konami, makers of a quite nice and sought-after 4″ Eagle model, made two pods for their model: A passenger pod and a Rescue pod. These are essentially the same pod with the exception that the Rescue pod has red stripes.

But they did not make any of the other pods the Eagle could be seen carrying in the TV show.

So I set out to make a Winch (often called Freighter) pod for this Konami Eagle.

I started by making a copy of the original pod (for scale and fit) so I could then use those dimensions to make further pods.

I decided to model my small Konami Freighter (Winch) pod after Product Enterprise’s 12″ Eagle model from a few years back, a gorgeously detailed model. They painted the winch barrels grey, so I made mine grey, though they appear to be white in the TV series.

Here is the Product Enterprise Eagle with Winch Pod (Product Enterprise called this the Eagle Freighter)

product-enterprise-eagle-freighter

Here, then, is the progress I made in the past two days on my Winch Pod:

fp-parts
Here are all the parts: Winch Barrel bodies, Winch Barrel heads (two different per barrel), plugs to make the heads fit on the bodies, four Legs, four Engine Cones, two Rectangles (no idea what purpose they serve) for the pod flatbed, the Pod Flatbed itself, and the Winch Holding mechanism, and finally at the top, the superstructure holding it all together.

(Note: The superstructure is not shaped like this, but for this small Eagle, this made more sense. The front and rear baffle walls are completely open in the real deal, with piping acting like a scaffold for strength. My printer would not print those with any consistency or neatness, so I abandoned that idea for this one, which works, and looks pretty good when the pod is installed in the Eagle, as you will see.)

fp-bottom-assembled
Here, the four engine cones and four legs are installed on the underneath of the flat bed.

fp-floor-partly-assembled
The two rectangles are placed, with small plugs underneath for alignment. The winch holding mechanism is placed in the center, with a similar plug to align it to the flat bed.

fp-winch-barrels-assembled
Here I put the caps on the winch barrels. These are two identical barrels, which are turned at 180 degrees to each other when on the Eagle.

The caps are printed separately because the barrel is printed vertically, and the cap detail would disappear if it had to be printed on the bottom of a single-piece barrel.

Four plugs are used to align the parts.

fp-pod-mostly-assembled
Here the winch barrels are glued in place.

fp-pod-assembledAnd the superstructure is glued in place, which allows the pod to attach to the Konami Eagle:

fp-pod-in-eagle

NOTE: For anyone who buys these models from me at my shop (Fourth D) on Shapeways, you may want to print the decal sheet I created. The two links below are to PDF files you can print.

Pod-Decals-Better-Layout

Pod-Decals-Instructions

You can print them on white waterslide paper either in laser or inkjet (make sure you have the right paper and follow instructions that come with the paper) or you can print them on simple white paper and use simple glue if you like. The decal sheet has both the Konami and Dinky scaled decals. Also, the instructions for the decals (for waterslide) are available here.

Konami Eagle Pods – Passenger Pod

Konami, a Japanese company, has made an amazing collection of vehicles and figures from Gerry Anderson’s body of work. These are small models, about 4 inches or less, and gorgeously detailed.

I have had the Eagle with Rescue Pod from Space 1999 for some time now, seen here, mounted on a display base I created in my 3D printer some time ago:OLYMPUS DIGITAL CAMERA

This one came in a two-set box along with the SID satellite from the TV show UFO.

Last week I happened upon the rarer white version (no stripes on the pod). It hit me then that these are the only two Eagles Konami made, but there are others Eagles in the Moonbase Alpha fleet.

Well, first, the Eagle itself (the lifting body) is standard, but can be made to carry different pods. The red striped one is a Rescue Pod, the white one is a standard passenger mission pod. There are also a VIP pod (essentially the same pod with orange detail), a Laboratory Pod, which has extensions to either side and extra attitude jets, and a Freighter pod, used to carry nuclear waste around the moon.

So I set out to create extra pods for my Eagles. First up, a replica of the passenger pod.

I iterated through many variations of the model, tweaking it for fit and detail. At this size (4cm long) the tiny detail tends to get lost with my printer. But I made some adjustments to accentuate the details. It’s still not perfect, but here is the result, which isn’t bad, if I must say so myself.

Here, I assemble the “model kit” I created.

OLYMPUS DIGITAL CAMERAHere are the various parts as they came off the printer. There is extra “rafting” material underneath all of the parts. Here you see the pod upper body, the pod bottom (printed separately to retain detail), four legs, four engine cones, and a bunch of window inlays.

OLYMPUS DIGITAL CAMERA
Here, the rafting material and support scaffolding (supporting the roof overhangs) are pulled away.

OLYMPUS DIGITAL CAMERA
Here you see all of the parts, cleaned up and separated from their rafting bases.

OLYMPUS DIGITAL CAMERA
Here, the four engine cones and four support legs are glued in place. The windows are all pieces designed to fit into deep holes in the pod’s upper part.

OLYMPUS DIGITAL CAMERA
And here the 12 windows are glued in place.

OLYMPUS DIGITAL CAMERAThe assembled bottom, glued to the assembled top.

OLYMPUS DIGITAL CAMERA
And here it is docked with the Eagle. The white is not a match, but I intend on priming and painting later versions of these.

OLYMPUS DIGITAL CAMERA
Et voila! The Eagle, with my pod in place, next to the original white pod.