
Moonbase Alpha exists as a colony on the moon partly in order to maintain a nuclear waste dump. Earth, by 1999, was powered almost exclusively by nuclear energy plants, and getting rid of the dangerous toxic waste became a problem. Why not just store it on the moon? Well why not?
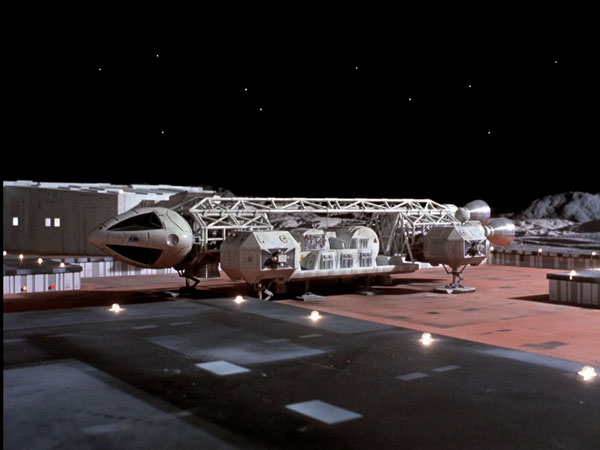
In “Breakaway”, the first episode of Space 1999, Eagles are seen transporting and managing containers of radioactive waste. This waste builds up in energy and explodes in a massive nuclear blast that knocks the moon out of Earth’s orbit.
The Eagles used to transport these hold winches on a cargo flatbed with a magnetic winch head that picks up and deposits nuclear waste cannisters.
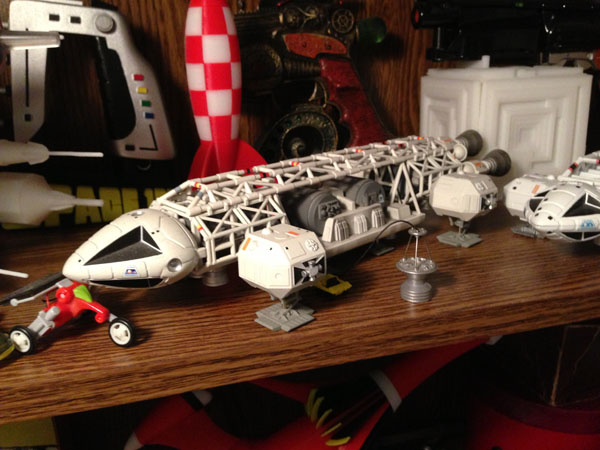
Konami, makers of a quite nice and sought-after 4″ Eagle model, made two pods for their model: A passenger pod and a Rescue pod. These are essentially the same pod with the exception that the Rescue pod has red stripes.
But they did not make any of the other pods the Eagle could be seen carrying in the TV show.
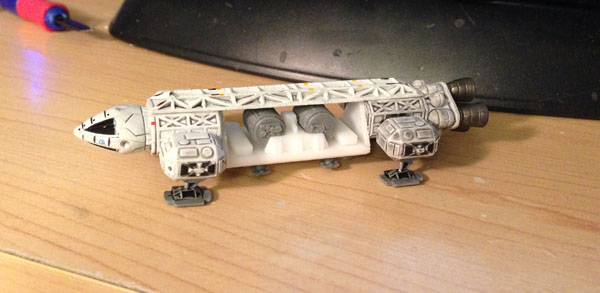
So I set out to make a Winch (often called Freighter) pod for this Konami Eagle.
I started by making a copy of the original pod (for scale and fit) so I could then use those dimensions to make further pods.
I decided to model my small Konami Freighter (Winch) pod after Product Enterprise’s 12″ Eagle model from a few years back, a gorgeously detailed model. They painted the winch barrels grey, so I made mine grey, though they appear to be white in the TV series.
Here is the Product Enterprise Eagle with Winch Pod (Product Enterprise called this the Eagle Freighter)
Here, then, is the progress I made in the past two days on my Winch Pod:
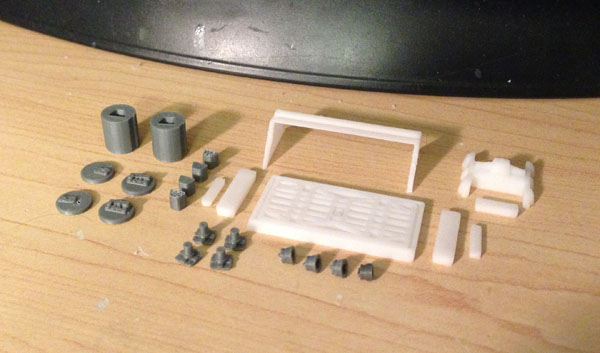
Here are all the parts: Winch Barrel bodies, Winch Barrel heads (two different per barrel), plugs to make the heads fit on the bodies, four Legs, four Engine Cones, two Rectangles (no idea what purpose they serve) for the pod flatbed, the Pod Flatbed itself, and the Winch Holding mechanism, and finally at the top, the superstructure holding it all together.
(Note: The superstructure is not shaped like this, but for this small Eagle, this made more sense. The front and rear baffle walls are completely open in the real deal, with piping acting like a scaffold for strength. My printer would not print those with any consistency or neatness, so I abandoned that idea for this one, which works, and looks pretty good when the pod is installed in the Eagle, as you will see.)
Here, the four engine cones and four legs are installed on the underneath of the flat bed.
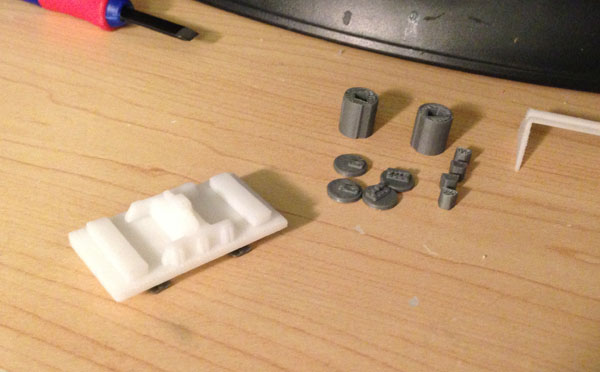
The two rectangles are placed, with small plugs underneath for alignment. The winch holding mechanism is placed in the center, with a similar plug to align it to the flat bed.
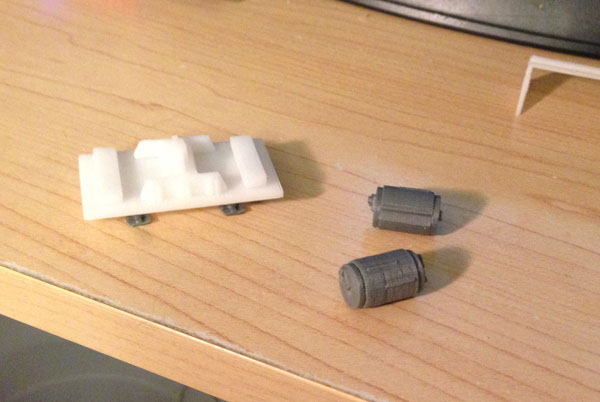
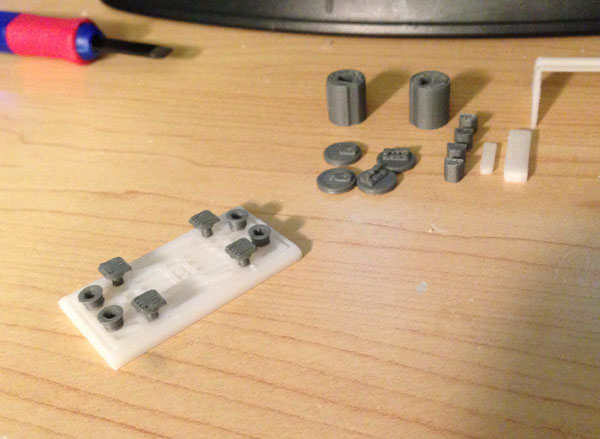
Here I put the caps on the winch barrels. These are two identical barrels, which are turned at 180 degrees to each other when on the Eagle.
The caps are printed separately because the barrel is printed vertically, and the cap detail would disappear if it had to be printed on the bottom of a single-piece barrel.
Four plugs are used to align the parts.
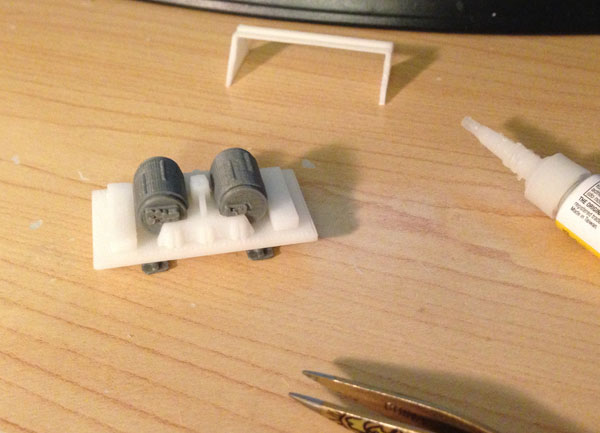
Here the winch barrels are glued in place.
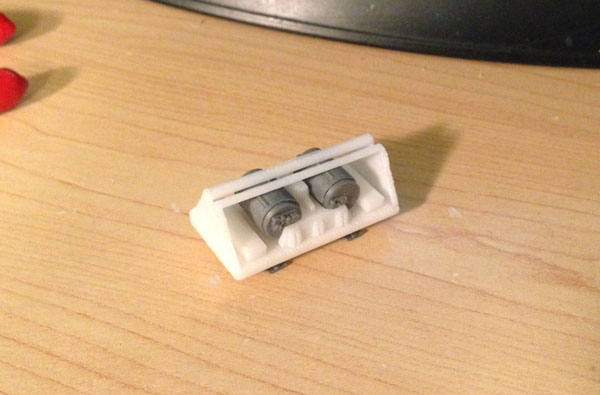 And the superstructure is glued in place, which allows the pod to attach to the Konami Eagle:
NOTE: For anyone who buys these models from me at my shop (Fourth D) on Shapeways, you may want to print the decal sheet I created. The two links below are to PDF files you can print.
You can print them on white waterslide paper either in laser or inkjet (make sure you have the right paper and follow instructions that come with the paper) or you can print them on simple white paper and use simple glue if you like. The decal sheet has both the Konami and Dinky scaled decals. Also, the instructions for the decals (for waterslide) are available here.