Today’s Projects – Portable Hard Drive Stands, iPhone 5 Earbud Wraps

Portable Drive Stands

I was at the Apple Store today and I saw a stand intended for holding a Mac notebook upright on its end. I thought I was seeing a stand for a hard drive. In fact, it looked a bit like a stand I have for my ioMagic (Iomega) drive. It made me realize that I have a growing collection of portable hard drives connected to my main computer, and they are all lying flat on the top of my computer.

So I decided to model a stand for each individual drive. I have four main ones to fit:

Western Digital Passport 1TB drive
Western Digital Passport 250gB drive (this is a bit slimmer)
Western Digital Passport 320gB drive (this is the older Passports, with the trapezoidal profile.)
Seagate Free Agent 500gB drive

So I started out with a common arch design, and cut the volume of each drive (measured by calipers and modeled roughly) out of the stand and printed them.

OLYMPUS DIGITAL CAMERA

I was going to cut the four slots into a single, wider stand, but alas, until my Afinia H479 printer gets its bed heating element replaced or fixed, that’s out of the question. With a cold printing bed, I can print small things, but something that takes up that much surface area inevitably warps off the perf-board, and tonight it actually caused a fault in my printer by springing up and stopping the print head from moving. This caused the printer to just stop.

But the idea is solid. When I get the bed heater fixed, I’ll print a four-in-one stand, and I can increase that as I add more drives.

But for now, here are all four, individually printed and working nicely.

OLYMPUS DIGITAL CAMERA

iPhone 5 Earbud Wraps

I bought an earbud wrap at Target last week, but it’s not sized smartly for the iPhone 5 earbuds, with the volume control and the slightly oblong buds. So tonight I took a piece of paper card stock and bent and cut it to see what size would be a good starting size to model my own earbud wrap. Turns out, if I’m right, a 5cm height will accommodate the volume switch and allow for a good wrap. This is the starting point:

iphone5-bud-wrap-test-01

The indents are for the bud ears themselves. The two cords will be on the inner sides, and then you wrap it around the back, and when it comes over the top, it should fit the switch along the groove, and you can continue to wind it after that. Then, as a nice touch, I hope to put in a small indent to grab the jack itself to secure it.

Update:

I had to make some changes to length, curved the bottom, widened the inside to better accommodate the earbud stalks, curving the interior to grip them better, and then added a jack clip to one side.

It works very nicely now:

OLYMPUS DIGITAL CAMERA

A bit of support material stayed on the jack clip. Must clean that up. Perhaps remodel it a bit. Nice for now, and fully functional!

Today’s Work – Chess, Royal Mail, Adventure Team, Fume Hood, Organization

Whew. Busy day.

I photographed and moved into storage six large bins containing mostly my toys, and some of Charlotte’s to make the office’s closet usable again.

[No Photo Available]

I printed all parts needed to complete one piece each of the red Nautical Chess set:

OLYMPUS DIGITAL CAMERA

I made some adjustments to the Bishop to conform to the standard Staunton rule of height order. King, Queen, Bishop, Knight, Rook, Pawn. I still have to print a second Bishop, Knight and Rook for each color, and seven more Pawns for each.

The good news about this set is if you want to forgo the base and body, you could use just the heads and you’d have a very damn-decent travel chess set!

Then I glanced to my right and saw my TARDIS Diorama, with the TARDIS on a street corner, and realized it was missing something: A Royal Mail box:

romford14_mid

So I quickly modeled one and printed it in two sizes. First, to conform to the scale of the TARDIS diorama, and second, because I have this plan to make a very nice “The Saint” diorama using the Matchbox Volvo P1800 I have, in a display base from Dragon (which used to hold a very realistic but tiny tank) with a railroad figure I’m going to customize and paint up as Simon Templar. More on that later. But for now, here’s the Mail Box in the TARDIS Diorama:

OLYMPUS DIGITAL CAMERA

Then I printed an Adventure Team Logo, because I got all nostalgic photographing so many of my 12″ GI Joes. I printed a couple before, but they were smaller and thinner. This one feels much better:

OLYMPUS DIGITAL CAMERA

And to top it all off, my fume hood is now complete, with some minor adjustments to make a tighter seal around some parts. But it’s working, and here’s the latest image of it. It is currently printing, with the hose blowing air out the window.The flow is not strong, but I have no reason to believe it has to be.

OLYMPUS DIGITAL CAMERA

Whew. Big day.

Today’s Print Project: A Display Base for my Space 1999 Konami Eagle

Konami has made some of the most beautiful small-scale models of the Gerry Anderson vehicles, including an amazingly comprehensive set of Thunderbirds rescue craft, pod vehicles, and dioramas including a gorgeous line of Pod Vehicles in their bays, under the depths of Tracy Island.

But their Space 1999 Eagle is one of the nicest.

A while ago I posted a pic of a Space 1999 Moonbase Eagle Launch pad, scaled to the tiny ERTL eagle that came with the Moonbase Alpha model kit done in the 1970s by AMT and re-released by ERTL in the 1990s. Here it is again:

OLYMPUS DIGITAL CAMERA

But this was kind of a serendipitous item. I had never really intended to make a shadow-box diorama like this, it just worked out that way, and I’m glad.

But the base you see here was originally intended to serve as a diorama display base for my Konami Eagle. The Eagle measures just over 11cm in length, and to create a launch pad to scale would mean it had to be about 15-18 inches in diameter, which isn’t going to happen.

So I thought “What if I made it a forced-perspective take-off scene, with the Eagle hovering above the pad as if it had just launched, from a camera angle above, meaning the base would look smaller.

So today I’m printing just that. I spent an hour or so modeling a template piece that fits into the underjets of the Eagle (the thing some people may object to is that the jets are those under the passenger pod, not the main Eagle lift jets. But there are a couple of good reasons to use those and not the main ones, the most practical being that if I suspend the Eagle by the main lift thrusters, the pod will not stay in place. It sits there by friction, and it’s not very tight.

So heck with it. That’s how it is.

First I scanned the underneath of the Eagle and brought the image into Maya to scale, and used that image to place four pegs that would fit perfectly into the underjets of the pod.

Then I used the Sculpt tool in Maya with some lattices to shape the exhaust trails, and made four unique smoke trails, printing them in test yellow. (I really dislike this yellow, so it serves a great purpose as a test color.)

Here’s the trail printing:

OLYMPUS DIGITAL CAMERA

They get rather thin, so I was worried the print wouldn’t work. I had no reason to worry. It worked out fine.

Here is an image of the test print with the Eagle looking down, and looking from the side. The yellow rectangle is the test template for the pegs.

OLYMPUS DIGITAL CAMERA

OLYMPUS DIGITAL CAMERA

I then modeled peg holes in the bases, and pegs in the Landing Pad base, with holes in the red landing pad cross. It should all just snap together.

I am currently printing all the white parts. Updates later.

My hope is that by scaling this whole process up by two, (for the base at least) I can make a forced-perspective display for both my 12″ ERTL Model Kit as well as my 12″ Product Enterprise Eagle Freighter. That remains to be seen, as the Freighter is rather heavy. Perhaps I’ll model the display for the Freighter to be the Lunar Nuclear Waste facility instead. For that, you will have to stay tuned, it’s not on my top priority list right now.

Update:

Here are all of the parts needed for the display stand.

OLYMPUS DIGITAL CAMERA

The Afinia printer tends to do flat surfaces on the diagonal. This is not terribly good for this particular application. I’m going to re-print the black and red deck sections on a 45 degree angle to make the striations in the surfacing align with the angles of those pieces which will help.

I am also designing a second plume of smoke that angles the Eagle slightly upward. That’s not done yet. For now, here is the Konami Eagle on its display stand:

OLYMPUS DIGITAL CAMERA

And here it is with the tilted jet plume:

OLYMPUS DIGITAL CAMERA


Robo-Rally Tread Bot 01 – An Experiment

This little robot stands just over 3cm in height.

OLYMPUS DIGITAL CAMERA

His arms will glue on, but were printed in two pieces each. The head, neck and body were separate pieces. And the two treads were printed separately and snapped over the wheel shafts.

Pretty nice detail for such a small thing.

This is a prototype for creating my own robots for Robo Rally, a fun game I love.

Here he is, with arms glued in place:

OLYMPUS DIGITAL CAMERA

Update:

I decided to cut TreadBot up into more pieces so I could give him a better color treatment. Man, I went crazy. While I haven’t yet cut the hands off so they can be printed in silver, I did cut the eye lenses off. Those pieces are tiny!

I also added detail to the base, and made the main torso a separate piece so the base could be black.

Here are all the parts:OLYMPUS DIGITAL CAMERA

And here is Treadbot 1 standing next to Treadbot V2.0:

OLYMPUS DIGITAL CAMERA

Helping Equipment – Finding, Designing and Building

Fume Hood

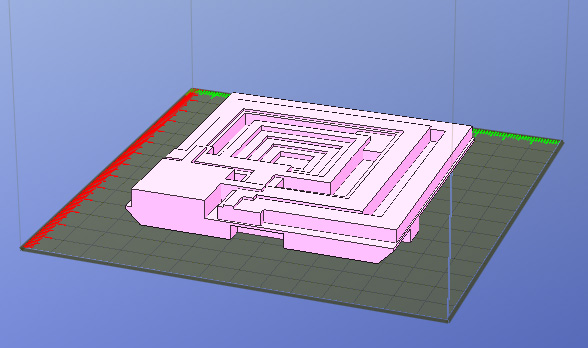
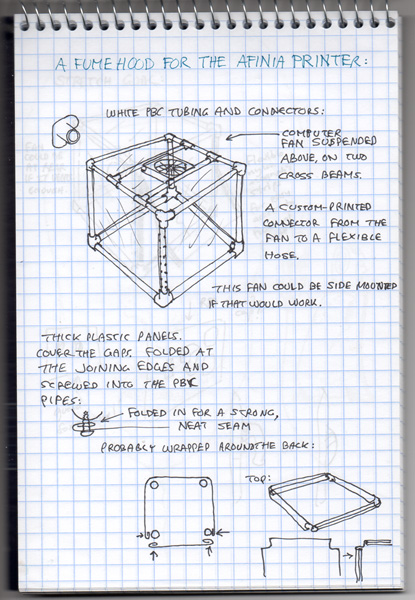
The first apparatus I wanted to make for my Afinia printer was a fume hood. I designed one early on, even before I bought the printer, as you can see by this plan:

fume-hood-design

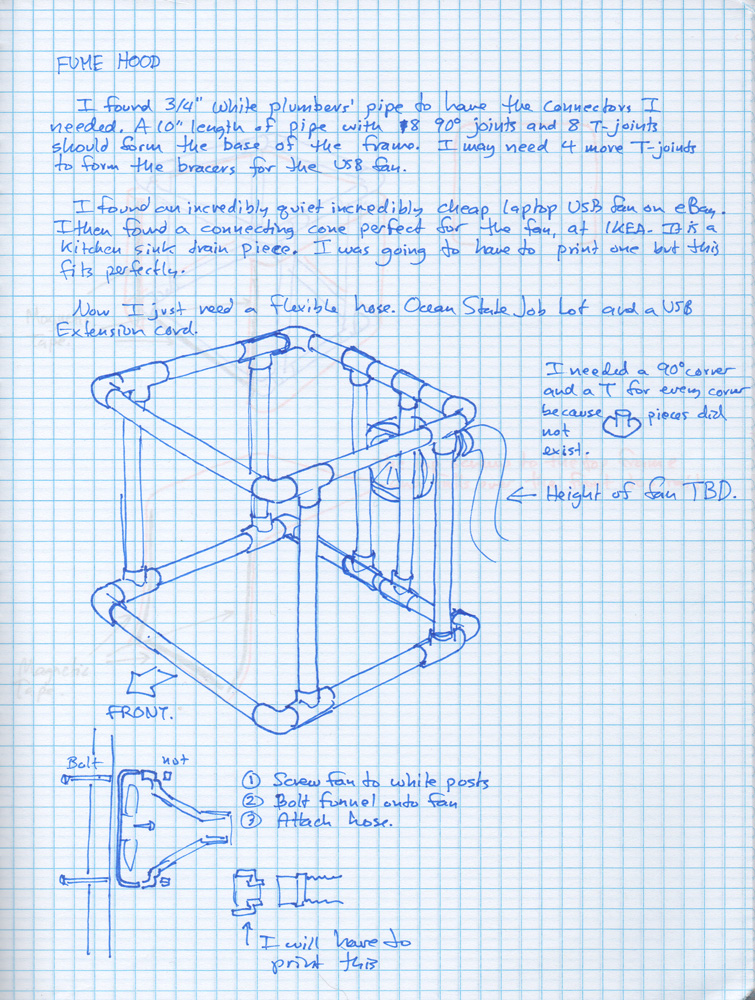
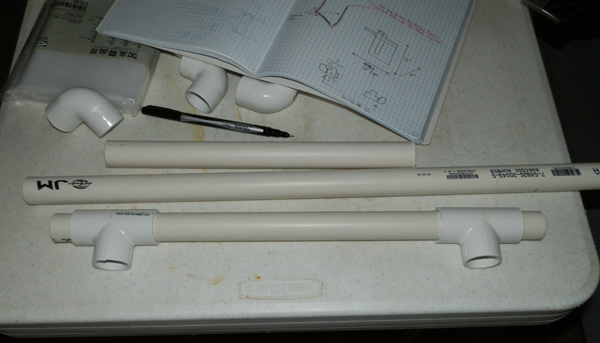
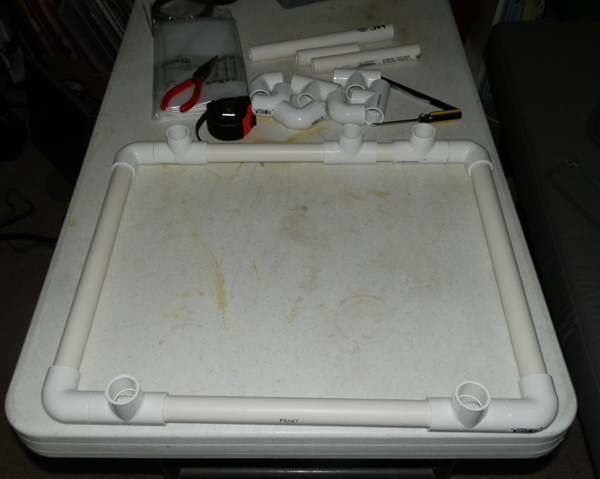
Today I bought a 3/4″ PVC plumbing pipe, about 10 feet long, and 8 90 degree joints and 8 T-joints. Since there were no three-way “corner” joints (as pictured in this diagram) I had to redesign a bit, but not too much.

Here’s the new design:

fume-hood-plan-2

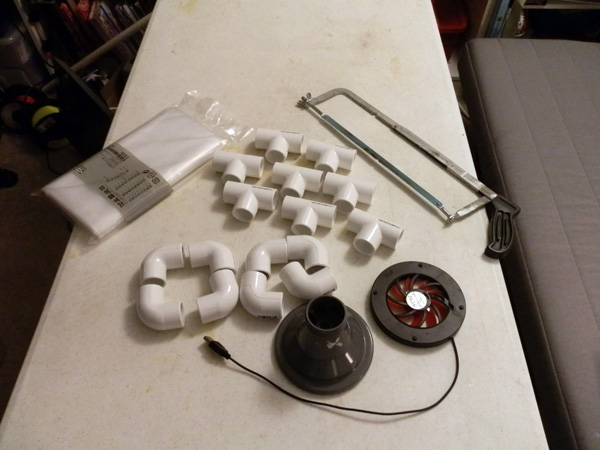
Here are the parts. (The pipe is not in the picture.)

OLYMPUS DIGITAL CAMERA

I need four more T-joints for the frame in the back that the fan will be screwed to.

The plan is to put a clear shower curtain all the way around the frame’s 3 sides, leaving the front open. Then another piece of clear shower curtain will cover the top and drape down over the front top rail. Adhesive magnetic tape will be applied to the edges of the side plastic and bottom front rail, and on the inside of the top/front piece of plastic, so they will adhere together for a seal, but easy access to the printer when needed.

The back two bracers will be used to screw the fan assembly.
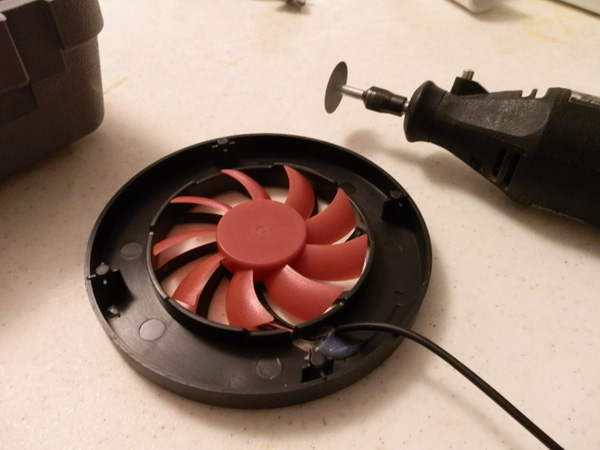
The fan:

This is cool. I bought this fan on eBay.

usb-fan

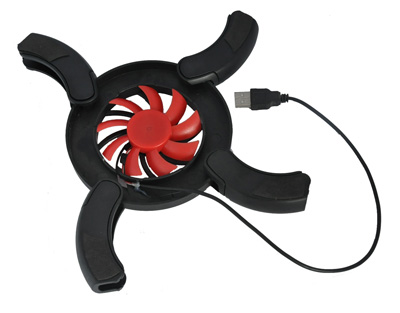
It was cheap, and when I got it, the construction was a bit shoddy, with the wire just hot-glued in place, but it is deadly quiet and runs off my USB power.

OLYMPUS DIGITAL CAMERA

And as luck would have it, I was at IKEA today and in the sale/junk room I found a sink drain plug system for $2.00, and it fit like a charm!

OLYMPUS DIGITAL CAMERA

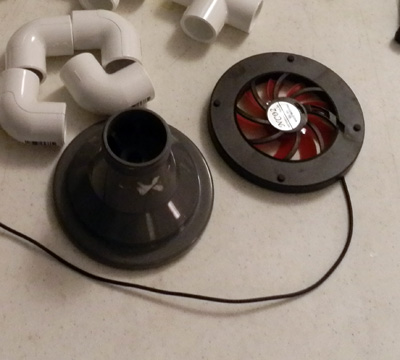
I will bolt the funnel onto the fan, and screw the fan into the two upright supports at the back of the printer. Then a flexible hose will attach to the funnel. (I likely will have to model an adapter to make it fit.)

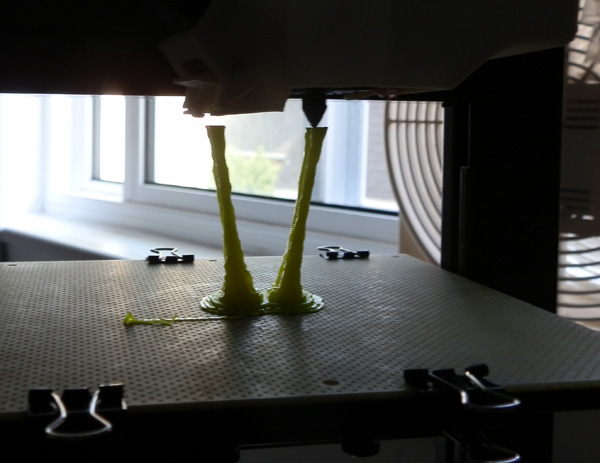
I began construction on Aug 20 on a day off.

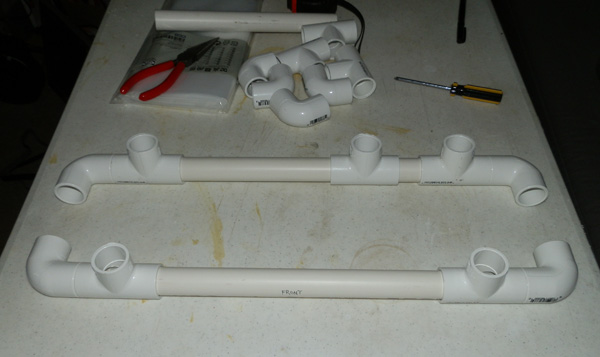
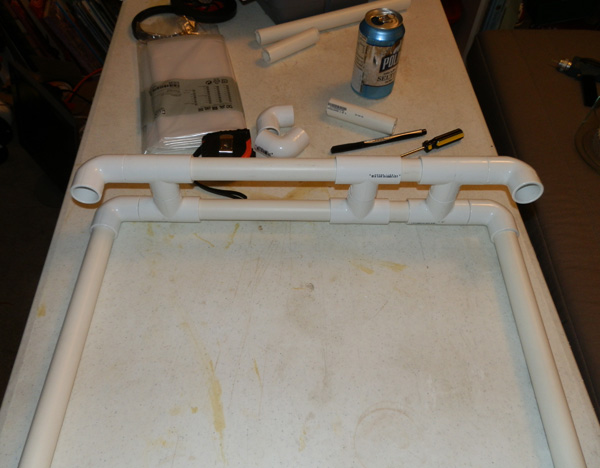
Here is the bottom frame front coming together:

OLYMPUS DIGITAL CAMERA

I decided to rotate the way the frame worked, with the T-bar in front and back instead of on the sides. This should help wraparound of the plastic and the door flap to work a bit better.

OLYMPUS DIGITAL CAMERA

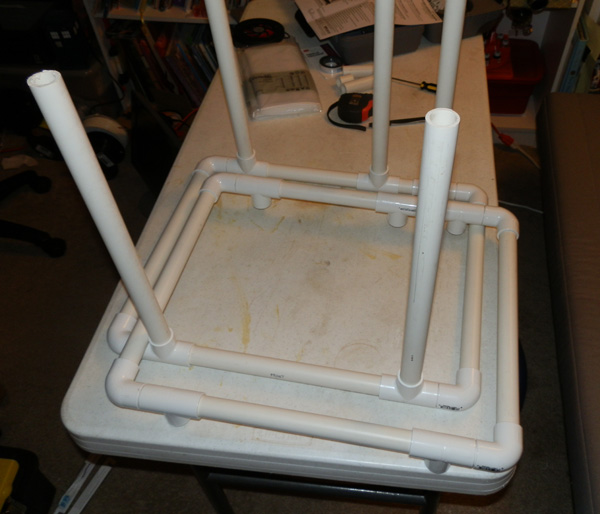
I decided that the plan had one upright too many in the back. I didn’t have to have two in the middle. I just needed one, as long as I used one of the existing uprights as the second upright to screw the fan into.

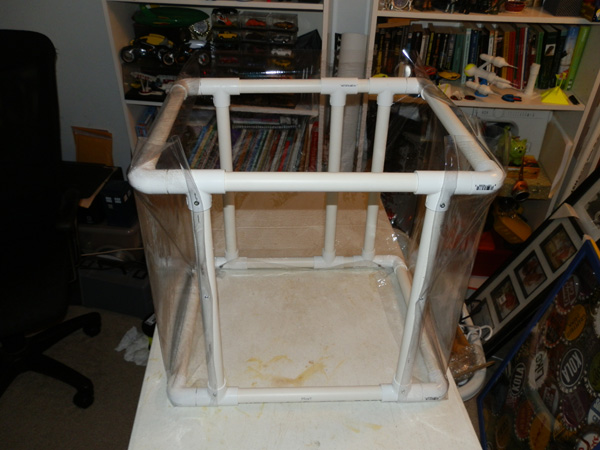
Here is the bottom frame completed:

OLYMPUS DIGITAL CAMERA

Here I begin the top frame, ensuring the T-joints would line up ok:

OLYMPUS DIGITAL CAMERA

Then in go the uprights:

OLYMPUS DIGITAL CAMERA

And the top gets put on:

OLYMPUS DIGITAL CAMERA

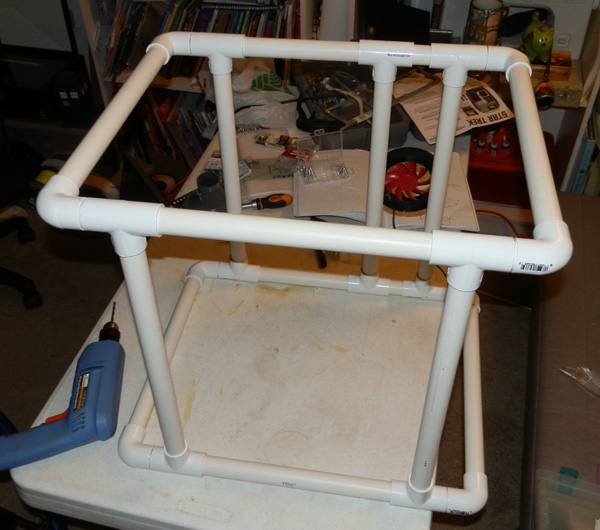
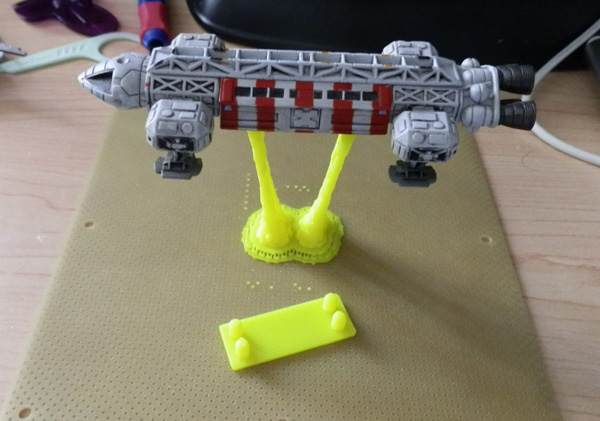
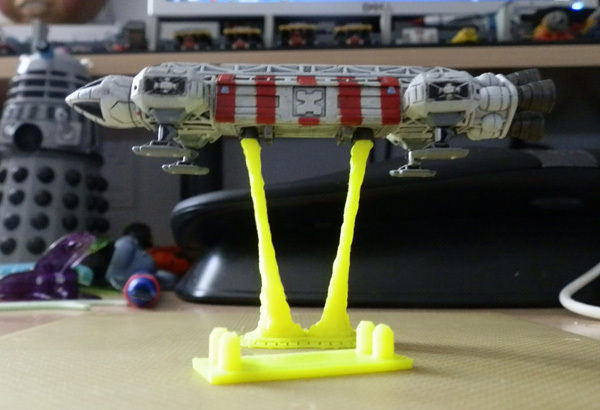
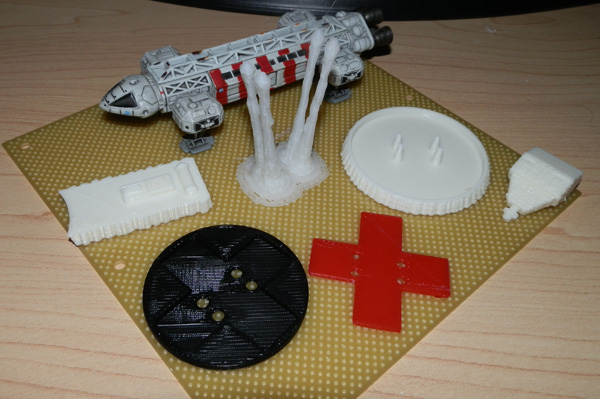
The fan is screwed into place. Before the night was out, I had the fan funnel bolted on as well, and the fan tested. The funnel had some flanges inside that had to be removed, but once it was, the hose fit in for a test of air flow.

It works.

Now I have to model a connector for the hose to the funnel, as, while it did fit for a test, it was loose, and I had to hold it in place. A simple gasket or connector and it will be in nice and tight. Then I have to model the other end, where I will connect the hose to a strip of foam-core to slip into my window while it’s open, so I can close the window on the foam-core strip, as if the window was closed. Winter printing won’t be as kind as summer printing. I can’t leave a window open with a large fan running.

Here’s the fume hood with clear plastic covering the sides:

OLYMPUS DIGITAL CAMERA

And here it is, in its rightful place, fan (blue LEDs in the back) is blowing air out the hose to the window.

OLYMPUS DIGITAL CAMERA

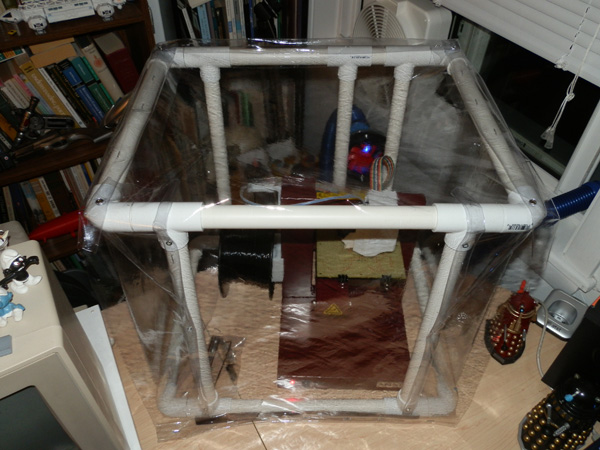
There are a couple of minor things I need to fix, like the adhesive magnetic tape sticks nicely to the sheet plastic, but not the rails, so I have to screw them into the bottom rail. But otherwise it’s nice. Works, and has the added unexpected bonus of dampening some of the sound. The printer is not terribly noisy, but still, it does buffer some of the sound. Nice.

Acetone Bath

The second piece of apparatus I wanted to make was an acetone bath. Suspending a print on a rack above a thin layer of acetone or nail polish remover is supposed to smooth out the print and make it shine, depending on how long you leave it exposed to the vapor.

At IKEA I bought three decorative glass containers as a set. The tall one was just the right size for my needs. It has to fit a 5″ x 5″ x 5″ maximum print size. It’s 7″ in diameter, so it should work.

The taller glass (inverted) can fit into a shallower wider glass bottom, which means all I needed was a metal rack and a handle for the glass cover.

I bought a simple plastic cabinet handle, and was going to epoxy-cement it to the top (bottom really) of the glass cover container, but it would be a tenuous grip. So I modeled a flange that I could screw the handle into to give the epoxy a much larger surface area to hold fast to the glass. I now have a working cover.

A wire basket makes for a nice holding rack, but it is also covered in plastic, so I’ll have to remove that with an acetone bath of its own before I can use it.
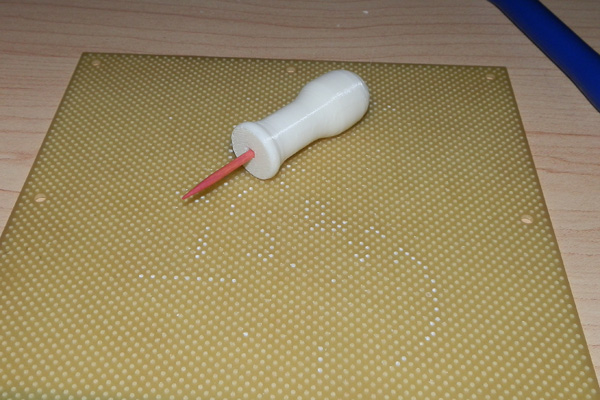
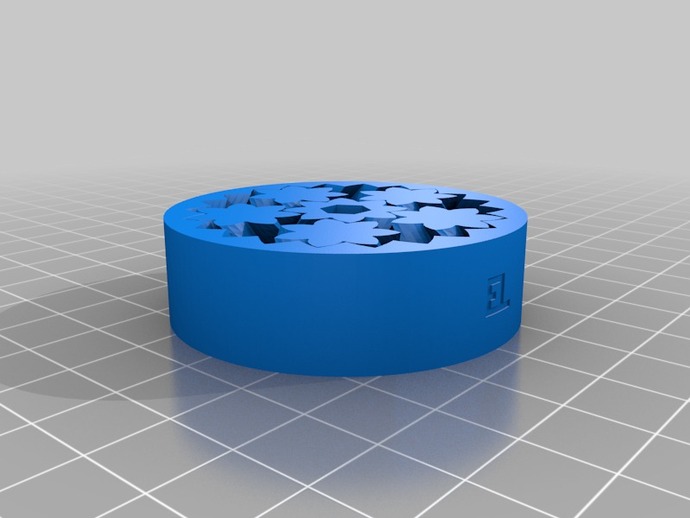
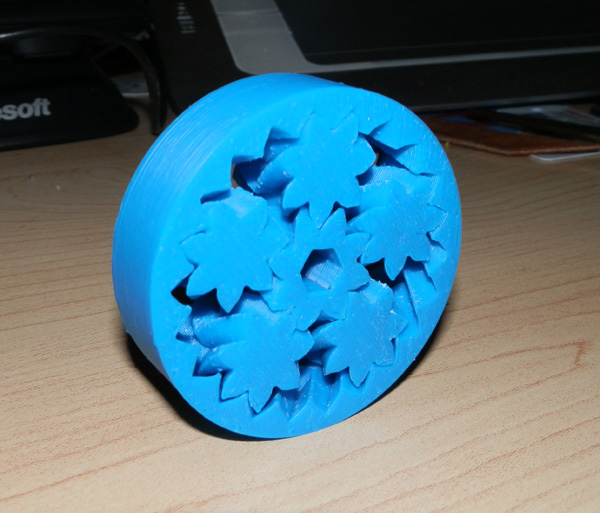
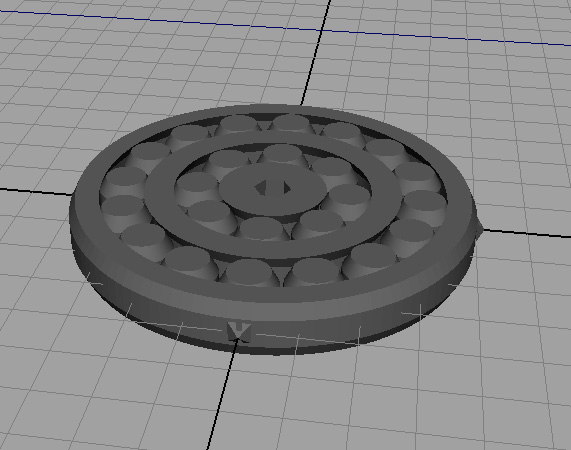
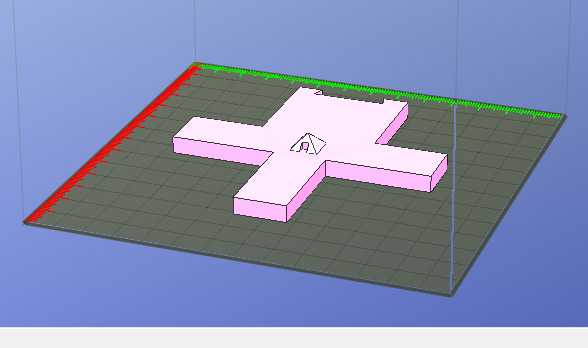
Toothpick Handle

The first lesson you learn with an ABS layer printer that uses a perf-board as a print bed is how to push the plastic bits out of the holes when you’re done. It’s a tedious, repetitive job, and I’ve tried various tools to help.

Paper clips are too weak, and bend too easily.

There are very few metal tools that are small but strong enough for the job.

So I tried these square-bodied toothpicks (tapered ends) that I use for modeling, gluing and painting.

Work perfectly. They are hardwood and you can clear several boards before having to replace a toothpick.

But it’s hard to hold the toothpick with the strength needed.

So I designed a handle for the toothpick.

The handle will allow me to cut a toothpick in half and use a half at a time until the tip is ruined, and then I can chuck the half and use the other half. This handle should prevent wear and tear on my hands.

OLYMPUS DIGITAL CAMERA


Today’s Project – A Nautical Themed Chess Set

I’m printing something right now that I designed over the past few weeks. I’m not sure this is the final detail, and it’s certainly not the final print, since connectivity isn’t well thought-out yet. It’s a test print.

Can you guess what it is?

nautical-first-test-print

And here’s the first test print:

OLYMPUS DIGITAL CAMERA

This is a nautical-themed chess set. I wanted a chess set that was reminiscent of harbour buoys, or super-structure lighthouses, or even, given my fandom of airships, an airship docking tower, such as this one:

r-101-docked-small

So I began by sketching various shapes that could be made from plated metal with bolts. First test-prints did not include bolts, but this next test-print does. (The red base is not yet the new version.)

OLYMPUS DIGITAL CAMERA

This is a white King, whose head is a light-house with pipes as the cross. The queen has the exact same head with a slightly taller spiked crown. The pawn is simply a sphere with a central band with bolts.

I will later post scans of my sketches with updates to these pieces, plus prints of the Knight, Bishop and Rook, which aren’t yet modeled.

Also I will post a photo of the gluing jig I created in order to make the three body sections line up for gluing. (They are so thin that there is no good way to make a solid connection without glue.)

I use a clear binary epoxy cement, which works very well.

Update:

Not every print of the superstructure body pieces works. Often it fails. It is a rather thin structure, and on an angle, so early on, the print process sometimes knocks over one or more of the legs, as you can see here:

OLYMPUS DIGITAL CAMERA

I knew the inherent, unsupported criss-cross structure might cause some printing problems, but – and this may just be a coincidence – it’s only been printing incorrectly since my Afinia printer’s print-bed heater has basically shut itself down.

Not preheating the bed causes some adherence issues, where the rafting of the object peels up from the perforated print boards. Otherwise it prints normally. Most small items don’t show any effect at all from not being pre-heated. (I’m going to be working with Afinia to fix this problem, which has been intermittent now for a couple of weeks. All last week it worked fine, but yesterday the bed heating element basically informed me it’s on strike.

But one thing that is interesting to note: The damage to these parts is at the bottom. But wait… note that as the print was continuing upward, it repaired itself. While the bottom was a hairy shambles, near the top it’s fine. I’ve noted this effect before.

Layer-on-layer printing means that each layer tries to lay itself down accurately. If there is nothing under it, it will fail, but if it touches something that is printing ok, then it can extend into damaged space, self-repaired. And over time it can actually get back to printing itself perfectly again, despite the fact that some layers below, it’s completely broken.

In this way, today’s layered 3D printing is a self-repairing system. Amazing.

Update:

I decided, upon peering into the lighthouse head of the King and Queen pieces that the light fixture inside should be easier to see. So I opted to model the light in the opposing color. Yes, this is one more part to print and glue, but I think ultimately, I spent some effort to make an interior space you could peer into, and it should reward you with something you can actually see. So I’m now re-printing the white and red King and Queen with opposing light color. Pics later.

Update:

This is the King and Queen (with opposite-colored light fixtures inside) along with the newly designed Bishop and Rook, with the Pawn.

OLYMPUS DIGITAL CAMERA

Just to show off a bit, here are a few cute little details of the latest two pieces:

The Bishop has a mostly hollow head…OLYMPUS DIGITAL CAMERA

…and the Rook has a valve wheel:

OLYMPUS DIGITAL CAMERA

Up next: The Knight

And here is the whole white set:

OLYMPUS DIGITAL CAMERA

The last piece to make was the Knight, which, as I hinted before, is made from a bent pipe, with bolts around a lower flange, and one at the head, with a valve wheel at the end. This indicates the bent shape of the traditional horse-head knight, while also indicating the piece’s move parameters – two up, one over, an “L” shape. And it fits thematically with the other pieces.

I also think that making the lighthouse light fixture the opposing color worked well.

Now I just have to print 7 more white pawns, and a whole red set. Ok… that’s a lot of printing.

Today’s Print – Gear Bearing by emmett

Thingiverse user emmett created a very clever single-print rotating bearing, a planetary gear.

bearing5_preview_featured It’s clever for three reasons:

  1. It prints in a single print
  2. It requires no support, so removing support (which is necessary for ball-bearing rings) which can be very difficult, is not necessary at all
  3. It is a series of gears with no axles

Each gear has a middle cut (if you’re thinking of 3D modeling) which is rotated around its center making each gear tooth a V shape. These fit into each other flawlessly, but also ensure that they cannot slide out of the ring. They stay put, and rotate very nicely.

Here is my print:

OLYMPUS DIGITAL CAMERA

Using a large Allen wrench inserted into the hex hole in the middle, I gave it a good turn and it began moving. Now it rotates easily.

It inspired me to think of other ways to make bearing rings that require no support, but will not fall apart. Rather than use spheres, I decided to use cylinders, bevelled at the top and bottom to keep them within the rings, which contour to the cylinders. Each cylinder is close enough to its sibling that it should rotate freely, but they should not bunch up causing the bearing to fail.

Here’s the model:

my-bearing-ring-02

The pyramids at the four compass points are my logo for 3D printing, a pyramid with two bits taken out to make it an “H”.

It’s a theory. I’m about to print one and see.

Update: Sadly, mine turned out like crap. The cylinders were too short and stubby, so they acted like spheres, toppling over in their tracks. There was too much open space between them, almost enough to fit a whole other one in the ring. That made it not rotate smoothly.

Oh well… back to the drawing board.


What’s Next? (Or Should I Say ‘What Now’?)

After my satisfaction with my Blade Runner Offworld M2019 Blaster Display Base print, I decided my next print would be my Space 1999 Stun Gun Display Base. One problem: I had to model it first.

First, the Stun Gun itself. I bought a very nice resin model, (pre-painted and pre-assembled) of the iconic Space 1999 Stun Gun, and I really like it.

If you’re not familiar with the TV series or this gun, you should get familiar. This was the TV show of the mid 1970s, and certainly the most popular Science Fiction show of that time. Here’s the gun:

space-1999-martin-landau-stun-gun

So I set out to model a base that the butt end of the pistol would sit firmly on, with the bottom (which has a hole in it) fitted into a slot for stability, and the front little nub sitting on its own little bed.

The goal was to angle the gun a little, allowing for the angular title logo from Space 1999, shown here:

space1999-year-1-title

I downloaded a similar font a while back in anticipation of making Space 1999 models.

I then printed out the “Space 1999” (without the colon… it just took up unnecessary space) in neon yellow, which I will probably use for the base when done. I could use white, but I’m not sure it would stand out properly. I may change my mind on that later.

So then, after three or four test prints of just the chucks that the gun fits into (for spacing, accuracy, fit, etc.) I noticed that my Afinia H479 printer is not heating the print bed for me.

It is recommended that the bed be heated to 100 degrees Celcius, and I always do pre-heat it. However now it wasn’t heating past 25 degrees. Sigh. Nothing I did, restarting, rebooting, reinitializing the printer, nothing worked. But I decided to print anyway, and I found that the results were as good as if the print bed was pre-heated.

I fired off an e-mail to Afinia to see what can be done about this. But until then, I was able to test-print the chucks for the gun, and the logo, both in yellow for now.

OLYMPUS DIGITAL CAMERA

The final base will be in black, with either this yellow logo or a white version. We’ll see about that later.

Tonight, with the base not pre-heating, I decided to print the base model of the gun anyway.space-1999-stun-gun-display-base-model-ready-for-printing

Here is the model in the Afinia printing interface. The yellow “Space 1999” logo should fit into the slots left for the letters you can see cut into the base.

Weird thing: When I finished the print, the bed was hot. Somehow it had decided to begin heating again, but not before part of the base had peeled up off the print bed. I guess it somehow kicked in part-way through the print.

Anyway, despite the warping, the result wasn’t bad. Here is the finished product, or at least a good first print of it, with the resin model of the Stun Gun on the stand:

stun-gun-display-stand-printed

Not too shabby. (That little black thing sticking up by the butt of the gun is actually a WiFi antenna on the back of the DVD player… not part of the model.)

Print of the Day – Heatwave Vase

Thingiverse user virtox created the Heatwave Vase. It’s a lovely, flourishing bit of solid fabric. I love this. I wanted to print this because I hadn’t yet really printed one of these wonderful geometric art pieces.

heatwave-vase-virtox

I saw the potential here for the Afinia Natural filament for this print. That particular filament is near-white, but not solid white. There is a translucency about it that would make this object stand out as a real art piece. The translucency will allow light to hit it in various ways making all of the fabric-like detail really stand out.

I’m shooting video in bits so I can later put together a cross-fade time-lapse of the entire print. If it works.

It’s about 1/3 of the way done and is looking rather good. There were a few places where it needed support, but mostly it printed without support.

People on Thingiverse were suggesting this vase (which was modeled as a solid with 1-2mm walls) be re-uploaded as a thin shell because printing it that way would be easier. As a double-walled vase, the print head would probably rip itself apart printing the thickness, whereas if you were to print it as a shell on a single-sided wall, it would simply whip around the shape layer after layer, which I’m pretty sure would result in a better print.

The creator has said, so far, he/she doesn’t want to upload any variants on it, and it’s under the “no derivatives” license, meaning people can’t upload versions based on it.

But that didn’t stop me from printing my own derivative. I just won’t upload it.

So this is printing rather nicely, and I hope photos of it will do it justice. This is the kind of piece I’d be proud to display alongside our real artworks in our living room, which include some lovely native Canadian carvings and other craft work from serious artists.

Update: Here it is, printed.OLYMPUS DIGITAL CAMERA

Today’s Print – Blade Runner Blaster Display Stand

From a previous post, you saw the basic work behind the design of a stable, solid display base for my Offworld M2019 Blaster replica.

OLYMPUS DIGITAL CAMERA

Here is the finished model:

br-stand-3d-model-first-print-ready

Hidden inside the block are the changes I made to print what I hope will be the real model.

– The front, left and right tiles now have interlocking connections for a solid join, as well as divots at the bottom to fit a bottom bracing part
– The top tile has the barrel holding brace built in. (It’s just two meshes combined, but it should print cleanly.) It also has a cut in it to accommodate the pistol trigger guard
– The rear tile has a cut in it to accommodate the pistol trigger guard, and a chunk removed from the bottom to fit the pommel stand

I’m starting by printing the top tile:

br-pistol-stand-tile-top-model

Printing at .25mm, Normal, with hollow fill – I could have printed this thinner, but there is no detail to catch. As long as a thicker print maintains the dimensions, this should be fine. I could even go thicker, but I’m not sure how refined the final print will look. Let’s experiement with .25mm for now.

91 layers
43.1 grams
1 hour, 38 minutes

Here is the Rear Tile, which faces the pistol grip. There is a notch in it for the trigger guard.

br-pistol-stand-tile-rear-model

55 layers
46.9 grams
1 hour, 33 minutes

Here is the side tile. I’ll need three of these, identical:

br-pistol-stand-tile-side-model

Each:
55 layers
43.2 grams
1 hour, 37 minutes (x3 = 4 hours 51 minutes)

This is the Base Square. It connects to the Pommel Base and ensures the base block’s tiles are all square. Each tile slots into this piece: (The pyramid is just my printing logo. It’s not a functional feature.)

br-pistol-stand-base-square-model

49 layers
15.3 grams
32 minutes

Up next: The Pommel Base:

br-pistol-stand-base-pommel-model

.2mm
155 layers
24.6 grams
1 hour 38 minutes

For a total of:

259.5 grams, or about 1/3 of a Premium Afinia reel, which cost $45. So this cost about $15 to print the final piece, not including test prints and earlier tests. Still, that’s not too bad.

Total print time: 10 hours, 12 minutes, not including bed pre-heating, head heating, etc.

Tomorrow I will post photos of the pieces, and the construction.

Note: The pieces did warp a bit, so they will not meet perfectly at the corners. I may have to do something about that, like apply a putty or something.

Here it is, assembled, glued together with clear binary epoxy:

OLYMPUS DIGITAL CAMERA