Portable Drive Stands
I was at the Apple Store today and I saw a stand intended for holding a Mac notebook upright on its end. I thought I was seeing a stand for a hard drive. In fact, it looked a bit like a stand I have for my ioMagic (Iomega) drive. It made me realize that I have a growing collection of portable hard drives connected to my main computer, and they are all lying flat on the top of my computer.
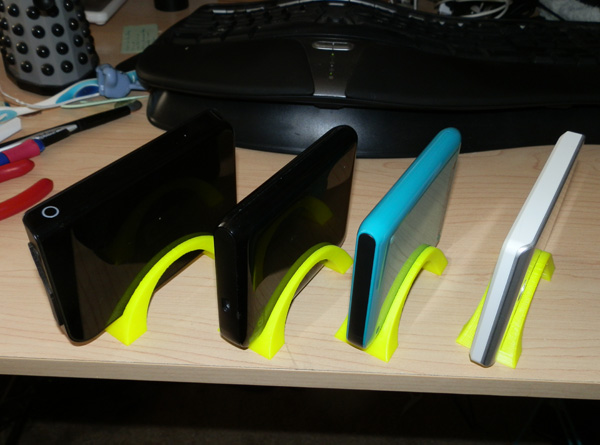
So I decided to model a stand for each individual drive. I have four main ones to fit:
Western Digital Passport 1TB drive
Western Digital Passport 250gB drive (this is a bit slimmer)
Western Digital Passport 320gB drive (this is the older Passports, with the trapezoidal profile.)
Seagate Free Agent 500gB drive
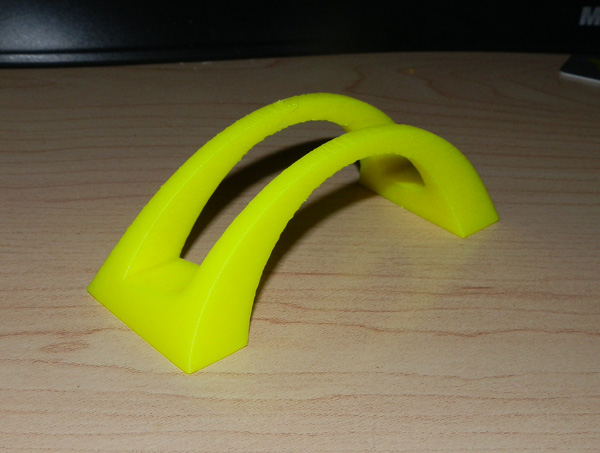
So I started out with a common arch design, and cut the volume of each drive (measured by calipers and modeled roughly) out of the stand and printed them.
I was going to cut the four slots into a single, wider stand, but alas, until my Afinia H479 printer gets its bed heating element replaced or fixed, that’s out of the question. With a cold printing bed, I can print small things, but something that takes up that much surface area inevitably warps off the perf-board, and tonight it actually caused a fault in my printer by springing up and stopping the print head from moving. This caused the printer to just stop.
But the idea is solid. When I get the bed heater fixed, I’ll print a four-in-one stand, and I can increase that as I add more drives.
But for now, here are all four, individually printed and working nicely.
iPhone 5 Earbud Wraps
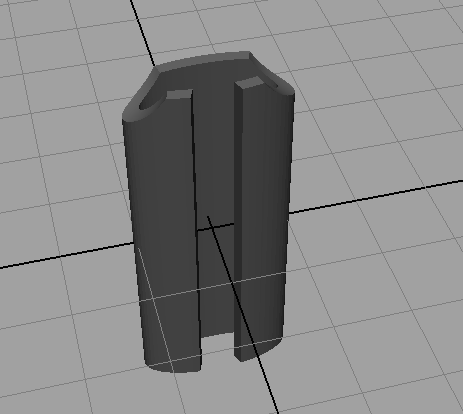
I bought an earbud wrap at Target last week, but it’s not sized smartly for the iPhone 5 earbuds, with the volume control and the slightly oblong buds. So tonight I took a piece of paper card stock and bent and cut it to see what size would be a good starting size to model my own earbud wrap. Turns out, if I’m right, a 5cm height will accommodate the volume switch and allow for a good wrap. This is the starting point:
The indents are for the bud ears themselves. The two cords will be on the inner sides, and then you wrap it around the back, and when it comes over the top, it should fit the switch along the groove, and you can continue to wind it after that. Then, as a nice touch, I hope to put in a small indent to grab the jack itself to secure it.
Update:
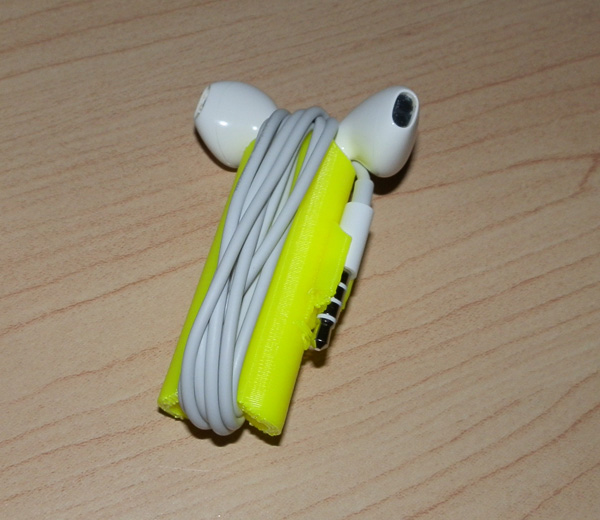
I had to make some changes to length, curved the bottom, widened the inside to better accommodate the earbud stalks, curving the interior to grip them better, and then added a jack clip to one side.
It works very nicely now:
A bit of support material stayed on the jack clip. Must clean that up. Perhaps remodel it a bit. Nice for now, and fully functional!


