
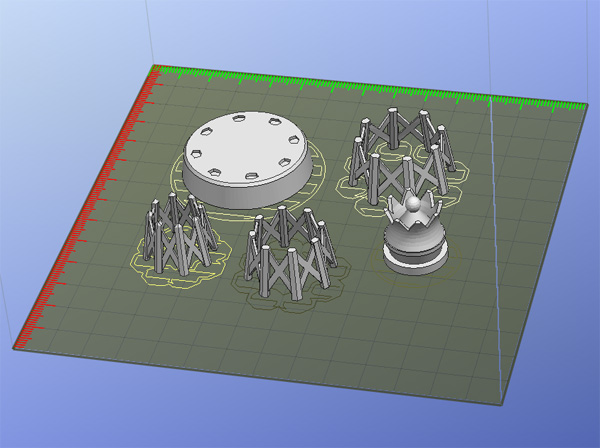
I’m printing something right now that I designed over the past few weeks. I’m not sure this is the final detail, and it’s certainly not the final print, since connectivity isn’t well thought-out yet. It’s a test print.
Can you guess what it is?
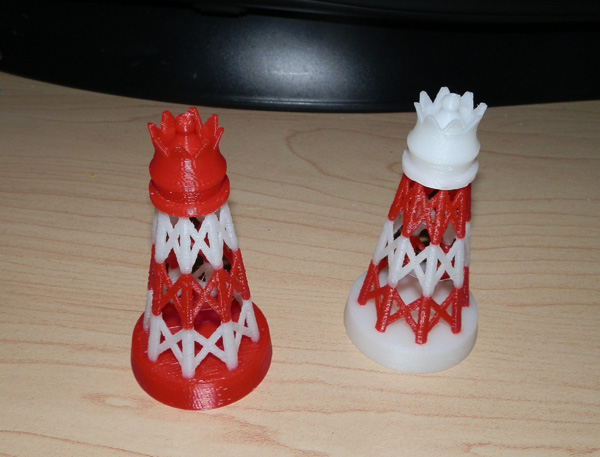
And here’s the first test print:
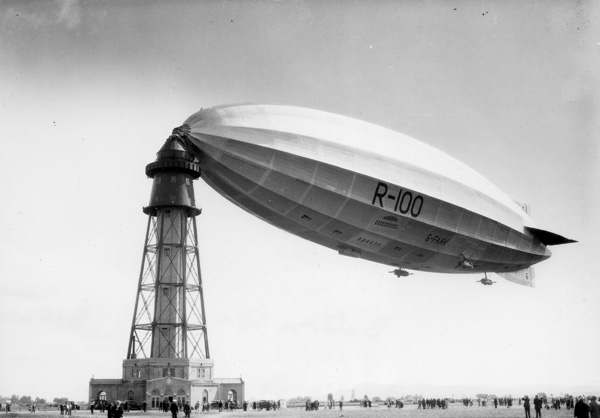
This is a nautical-themed chess set. I wanted a chess set that was reminiscent of harbour buoys, or super-structure lighthouses, or even, given my fandom of airships, an airship docking tower, such as this one:
So I began by sketching various shapes that could be made from plated metal with bolts. First test-prints did not include bolts, but this next test-print does. (The red base is not yet the new version.)
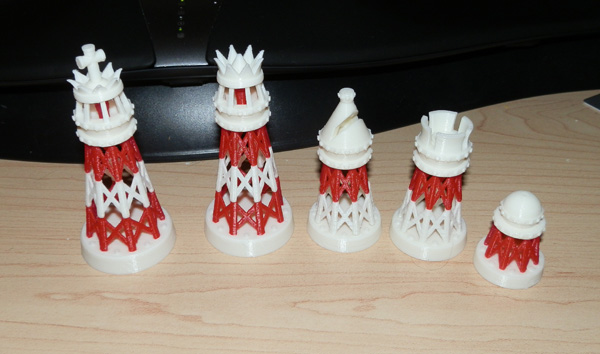
This is a white King, whose head is a light-house with pipes as the cross. The queen has the exact same head with a slightly taller spiked crown. The pawn is simply a sphere with a central band with bolts.
I will later post scans of my sketches with updates to these pieces, plus prints of the Knight, Bishop and Rook, which aren’t yet modeled.
Also I will post a photo of the gluing jig I created in order to make the three body sections line up for gluing. (They are so thin that there is no good way to make a solid connection without glue.)
I use a clear binary epoxy cement, which works very well.
Update:
Not every print of the superstructure body pieces works. Often it fails. It is a rather thin structure, and on an angle, so early on, the print process sometimes knocks over one or more of the legs, as you can see here:

I knew the inherent, unsupported criss-cross structure might cause some printing problems, but – and this may just be a coincidence – it’s only been printing incorrectly since my Afinia printer’s print-bed heater has basically shut itself down.
Not preheating the bed causes some adherence issues, where the rafting of the object peels up from the perforated print boards. Otherwise it prints normally. Most small items don’t show any effect at all from not being pre-heated. (I’m going to be working with Afinia to fix this problem, which has been intermittent now for a couple of weeks. All last week it worked fine, but yesterday the bed heating element basically informed me it’s on strike.
But one thing that is interesting to note: The damage to these parts is at the bottom. But wait… note that as the print was continuing upward, it repaired itself. While the bottom was a hairy shambles, near the top it’s fine. I’ve noted this effect before.
Layer-on-layer printing means that each layer tries to lay itself down accurately. If there is nothing under it, it will fail, but if it touches something that is printing ok, then it can extend into damaged space, self-repaired. And over time it can actually get back to printing itself perfectly again, despite the fact that some layers below, it’s completely broken.
In this way, today’s layered 3D printing is a self-repairing system. Amazing.
Update:
I decided, upon peering into the lighthouse head of the King and Queen pieces that the light fixture inside should be easier to see. So I opted to model the light in the opposing color. Yes, this is one more part to print and glue, but I think ultimately, I spent some effort to make an interior space you could peer into, and it should reward you with something you can actually see. So I’m now re-printing the white and red King and Queen with opposing light color. Pics later.
Update:
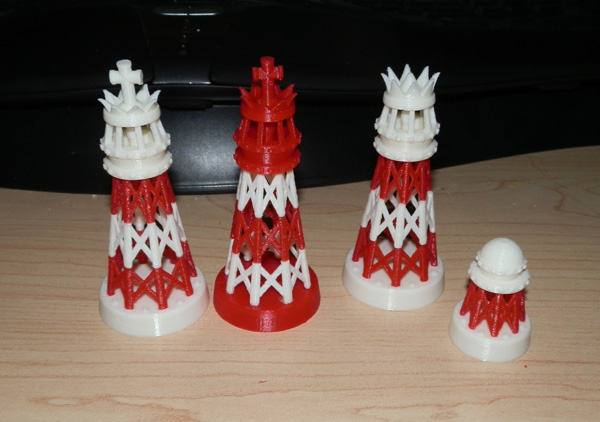
This is the King and Queen (with opposite-colored light fixtures inside) along with the newly designed Bishop and Rook, with the Pawn.
Just to show off a bit, here are a few cute little details of the latest two pieces:
The Bishop has a mostly hollow head…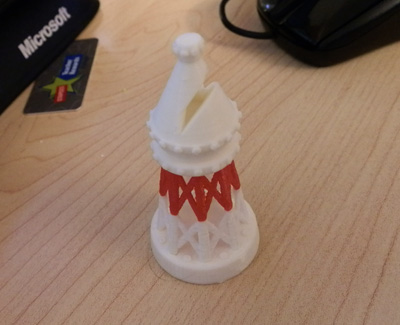
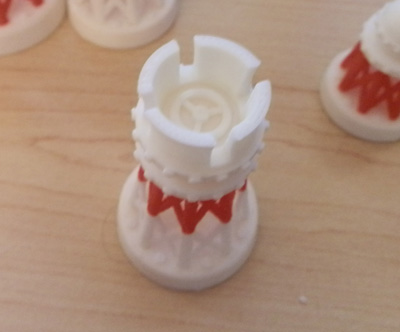
…and the Rook has a valve wheel:
Up next: The Knight
And here is the whole white set:
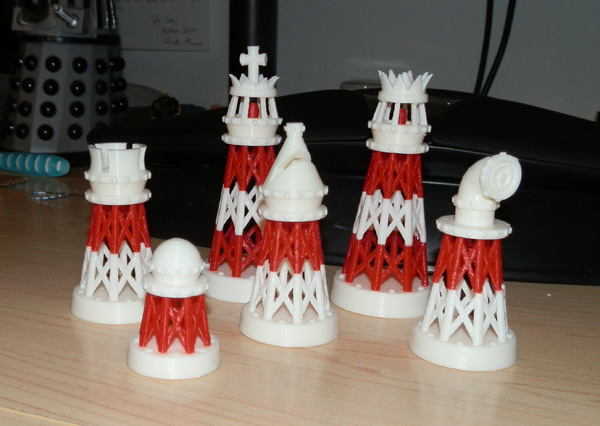
The last piece to make was the Knight, which, as I hinted before, is made from a bent pipe, with bolts around a lower flange, and one at the head, with a valve wheel at the end. This indicates the bent shape of the traditional horse-head knight, while also indicating the piece’s move parameters – two up, one over, an “L” shape. And it fits thematically with the other pieces.
I also think that making the lighthouse light fixture the opposing color worked well.
Now I just have to print 7 more white pawns, and a whole red set. Ok… that’s a lot of printing.