Barnes & Noble First Ever Mini Maker Faire

barnes-noble-maker-faire-small

A month and a half ago I was in a Barnes & Noble in Framingham. I saw a Da Vinci Jr.  3D printer on display there and was staring at it when an employee asked me if I had any questions. I told him I had two printers and was eager to participate in the Maker Faire. He said he would refer me to their community manager, Paige Murray.

She contacted me and we chatted by e-mail and made plans for me to do a talk on Sunday, during the Maker Faire. I would bring some samples, and a printer, and answer any questions people had about 3D printing.

Later she contacted me about an event the previous Friday for a Framingham school. So my first event was for the principal and students, though there were plenty of public there too. It went very well, and I was a hit, apparently.

I printed a rack of Emmett’s (on Thingiverse) planetary gears, one in each color I had:

These were a huge hit. I gave away about 20 of them.

I also had a table full of my best prints.

I did the Sunday event as well. Here are a bunch of photos.

(Note, there were a lot of kids there. I blurred them out of these photos because they are minors and I do not have permission to post their pictures.)

bnmf-cleanup-01 bnmf-kids-01 bnmf-kids-02 bnmf-kids-03 bnmf-kids-04 bnmf-public-01 bnmf-public-02 bnmf-public-03 bnmf-public-04 bnmf-public-05  bnmf-samples-01 bnmf-samples-02

Tintin On The Moon

Tintin, by Hergé, is a character in a series of comic books from Belgium, beloved the world over. I read them as a kid, and my two favorite ones were a pair of books, in a rare thing for Tintin, a two-parter: “Destination Moon” and “Explorers on the Moon”:

tin-tin-moon-books

A year or so I bought a nice die-cast Jeep (the one on the first cover) and I downloaded and 3D printed the rocket, someone put up on Thingiverse.

But not satisfied, I wanted to make a statue of Tintin in his space suit.

Here it is:

12189801_10153071016431105_5607296879127696805_n 12208704_10153071016496105_2524085349619937784_n 12187668_10153071016596105_2605207907898148152_n 10406440_10153071016551105_2176392486078442578_n

The bubble is a vending machine bubble capsule, which is not terribly transparent, which sucks a little, but it works fairly well.

The figure stands about 8-9 inches in height.

Spot On! A Blast From The Past

Back in the 1980s an old friend, Howard Wellman, asked me to do the interior design for an arcade he was building under JJ’s Restaurant, one of Springdale’s best eateries for burgers and such. Everyone ate there. It was quite the spot.

He called his arcade “The Spot” and asked me to design and paint its walls. Somewhere in my archives I have photos of the walls I painted, but sadly, I can’t find them at the moment.

However, I still have this t-shirt:

the-spot-t-shirt-front-01

I later redid the interior, when he expanded it to double its size, and then I did another one in Baie Verte, where he opened a second location. No photos of that, however.

But it’s sure nice to still have this.

Howard died of cancer a few years ago, and before he died, he gave me back a few sketches and things I did for him back then. Little did I realize why he was giving me those things, but at that time, he had to have known, but didn’t tell me.

Iron Giant Head

iron-giant

Ah, my favorite animated movie.

I decided to make a large (as large as my printer could print) copy of the Iron Giant’s head for my desk, with articulated jaw, teeth, and replaceable, and hopefully, lit-up eyes.

Here’s my progress: I ran a 12 hour print last night, and while the print turned out pretty good, sadly, it suffered stress cracks, which seems to be an inherent issue with ABS printing:

iron_giant_head_wip_02

I didn’t help matters by how I modeled the crest. It’s like a knive blade stuck down into a groove of almost the same size. This pushes the head apart a bit more. Some adaptation will be required there.iron_giant_head_wip_03

But the main problem is that I think this filament needs to be printed a little hotter to get these cracks to disappear, and I’m not even sure about that, so when I’m done with this prototype completely, with hinged jaw and retracting teeth, I will reprint it hotter.iron_giant_head_wip_01

I may also be able to print it in PLA which doesn’t require a heated print bed, and may be less prone to stress cracking. We’ll see…

Here you see the space for the upper teeth. There are slots which will hold posts attached to the teeth so I can slide them up and down evenly. Hopefully.

iron_giant_head_wip_04

There is plenty of room inside to add lighting:

iron_giant_head_wip_05

UPDATE – NOV 10, 2015

Last night I printed the jaw, the teeth, and all of the pegs and small bits. I glued the hinge pins to the jaw, then pushed the upper teeth into the gap, glued the pins in place which allow them to slide up and down. Then I glued the pins into the lower teeth and snapped them onto the lower jaw, into similar grooves to allow the lower teeth to retract. (I will have to do some adjustment there, since my tolerances were off. Some cutting down of the pins made it fit for the prototype.)

Here you can see the lower teeth retracted, but still visible on the lower jaw. The upper teeth are fully retracted and hidden:

iron_giant_head_wip_08

Here, both sets of teeth are fully out:

iron_giant_head_wip_07

They are carefully designed to fit together perfectly.

iron_giant_head_wip_10 iron_giant_head_wip_09

All in all (except for those darned stress cracks) I’m very happy with this guy.

iron_giant_head_wip_06

UPDATE: Nov 23, 2015 – Version One Complete!

This weekend, after some redesign, I reprinted the Iron Giant’s head. I noticed a ring around the head, just under the “nose” where the crest stops, and I think there’s a problem with one of my 3D printers. It has been consistently printing a ring about 1 inch above the platform, on a lot of my prints. I’m thinking there’s a worn part in the vertical arm which holds the belt. This weekend I printed the head on my other printer, and at a hotter temperature in hopes of avoiding the stress cracking you see here.

Then I printed a neck, and gave the neck two spherical bumps, and the head two spherical cavities, so the neck could slot into the head. The first attempt had the head too upright, so I tilted the bumps a bit to form ovals at a bit of an angle. The result was the ovals should have been spheres, for more flexible angling. This is how I had it planned originally, but didn’t think it would work.

Here’s some shots:

iron-giant-a-03 iron-giant-a-01 iron-giant-a-02 iron-giant-a-06 iron-giant-a-05 iron-giant-a-04

After I got this one assembled, I went to work creating the “repair summoning” crest. This crest is removable for a reason.

When the giant is hit by the train early in the movie, his crest opens, and a summoning beacon rises up, calling all of his semi-autonomous parts to return and be re-assembled:

Iron_Giant_Becon

So I modeled a new crest, with the aperture open, and the beacon:

iron-giant-a-07 iron-giant-a-08

Later, I will add rings around in semi-translucent glow-in-the-dark blue.

Oh, look, I did it:

12299221_10153100418921105_972279996824590205_n 12274559_10153100419121105_5654223664222722806_n

SP’LUNK! A 3D Printed Tabletop Board Game

SPeLUNK Logo
For a while now I have been wanting to create a board game and use my 3D printer to create the pieces, at least for player markers, but ideally, an entirely 3D printed game.

And for a long time I have been fascinated with hex-grid games. I knew I wanted my concept to work on a hex grid. Better, I chopped each hexagon up into triangles, so it’s actually a triangle game played on hexagonal game board sections.

I wanted to use the idea of building a pathway on the board, and immediately I thought of the old Text Adventure “The Colossal Cave”. I began drawing out sketches for board pieces and what features the game would have.

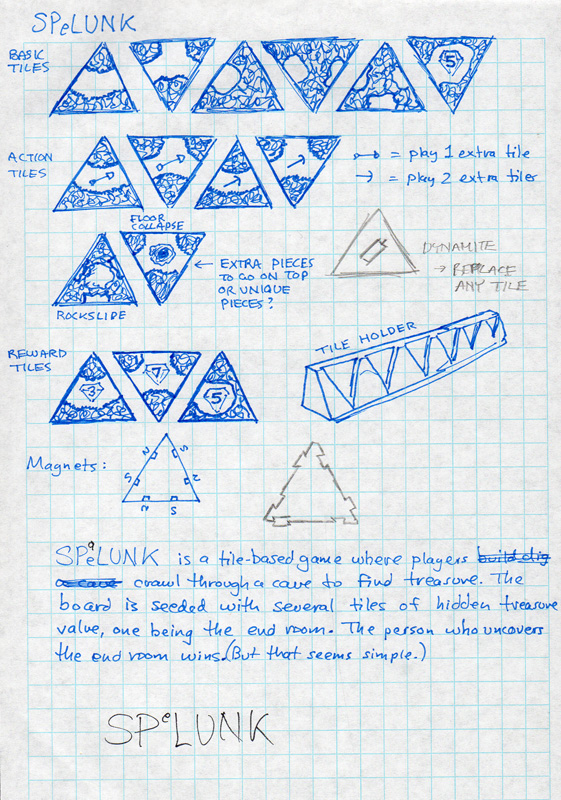
This was my preliminary sketch:

splunk-pieces-sketch-02

This one sketch covers a lot of ground. It not only describes the basic premise for the game near the bottom, it creates the game name and logo as well, and even discusses a couple of ways to create the pieces.

As for the pieces themselves, they show a fairly detailed set of pieces, most of which actually ended up in the game, or at least in some form.

I wanted the pieces to be triangular, and they needed to link together on a table to form a path, and could get quite dense. I thought I’d use micro magnets (I have a lot of those) but it would require six magnets per piece. Then I thought of puzzle piecing them together. Not terribly practical.

Then it hit me. I have a Deluxe Scrabble game. The board is not like the folding cardboard board from the standard edition that so many people are familiar with. It has ridges on the grid leaving each piece recessed so when you lay a piece, it does not move:
scrabble-deluxe-01

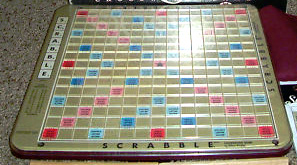
Perfect. I would print board pieces with ridges to keep the pieces in place. And since I couldn’t print the whole board as one part, I actually was forced to create a board that was more flexible than I had even intended originally.

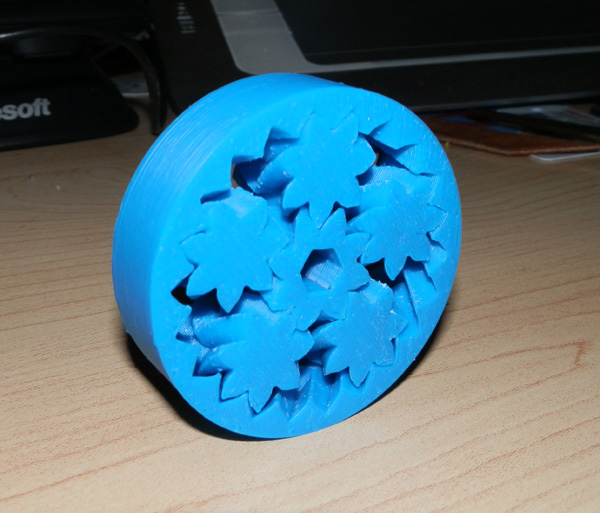
I would create hexagons with 24 triangles in each piece. Each piece would then be connectable to each other by a puzzle system. Underneath each one is a butterfly shaped recess. I printed butterfly-shaped connectors so any board piece can connect to any other.

splunk-board-sections-01

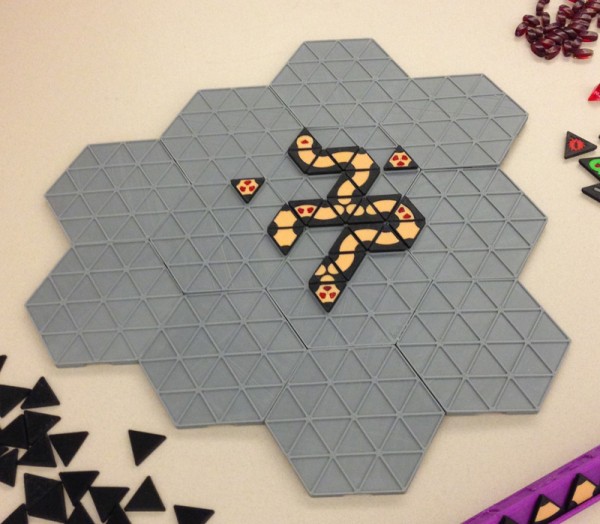
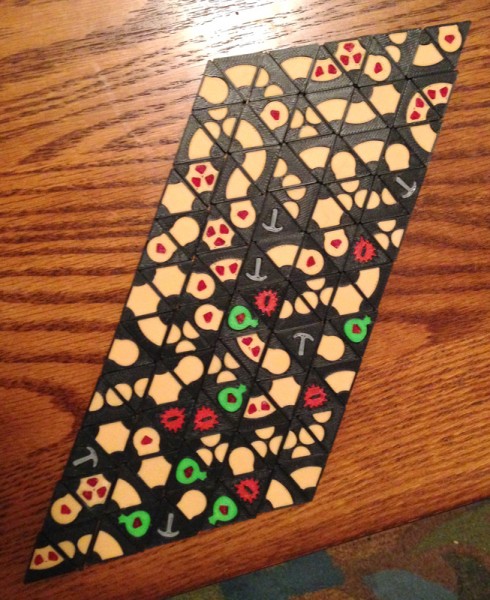
Here I show 12 sections connected into a triangle shape. But the great thing is the players can decide on their own exactly what board layout they want to play on.

You can also see by this picture that the pieces are 3D printed in two colors (or more) and include tunnel pieces that connect two of the sides of each triangle, or 3, and some block the tunnels. (I later determined through playtesting that the blocking pieces had no actual effect, so I eliminated them.)

Some pieces, you will note, have gems (red inserts) that are scoring pieces. Note also the red crystals at the top right of that picture. Those are the scoring markers, and when the game is over, the player with most of those gems wins.

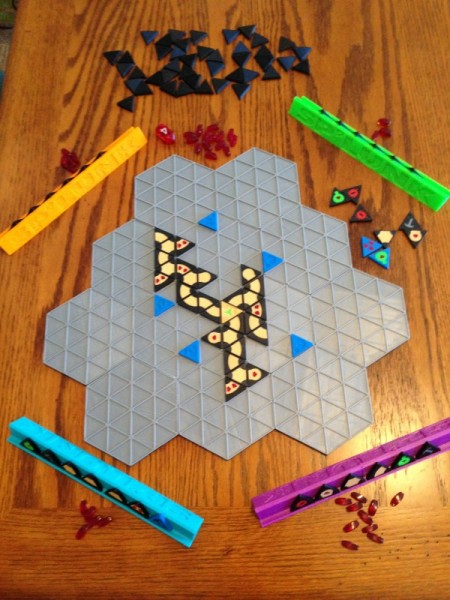
I printed piece holders much like Scrabble holders too, in several colors. Those had to be puzzle-piece connected because my printer could not print them in one run.

Before culling some of the pieces and changing things around due to playtesting, this is a photo of the pieces used in a single game:

splunk-pieces-01

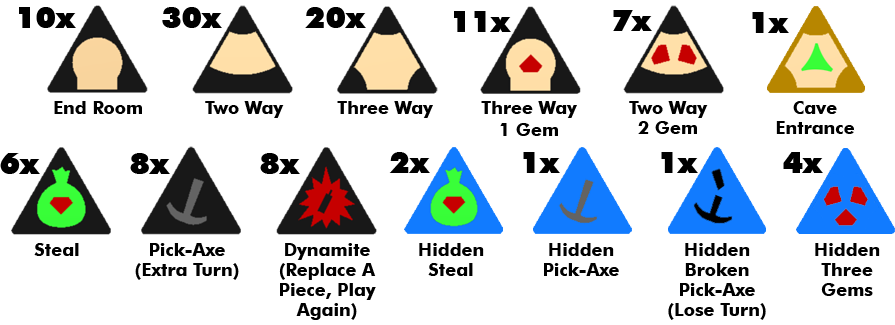
I also printed instructions with illustrations. The pieces I ended up with are, with a total count of each:

Tile Count_v2

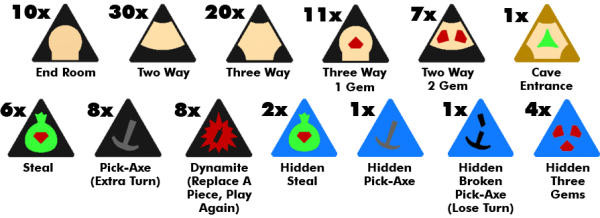
Arbitrarily, also, players can add more pieces (my game will include extras) so they can customize gameplay at will.

Above, you see the tunnel pieces, then tunnel pieces with gems (for scoring). Then the Cave Entrance which is the first piece layed in gameplay, and all tunnels lead off from this piece. Then we have the Steal piece (green bag with gem) which allows a player to roll a D4 die and steal that number of gems from any player (or players). The Pick-Axe gives a person an extra turn. Dynamite allows a player to remove an existing board piece and replace it with one of his own, and then play any second piece he’d like.

The four different blue gems are placed on the board in turn before gameplay by the players, upside down (there is a ? on the back) so no player knows what they are.

During play, you build tunnels on the board with the aim of reaching the 8 blue pieces. When you reach one you reap the reward or pay the piper. Most of the pieces are beneficial, gems, free turns, steals, but one loses you a turn.

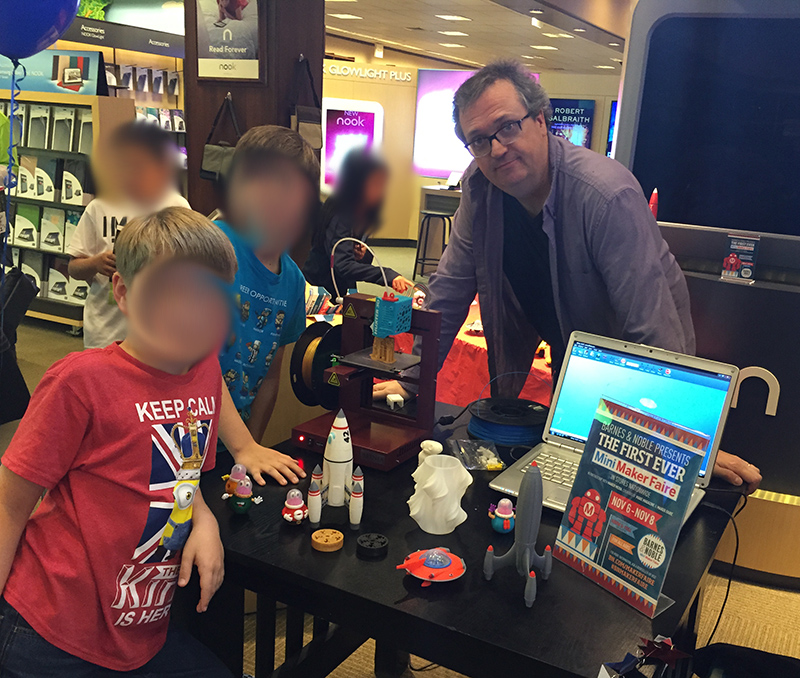
Here is a recent shot of the game I took for the back of the box:

IMG_4191

I have been playtesting it and a lot of the changes that came since the first design are thanks to some excellent suggestions by playtesters which have helped the game immensely.

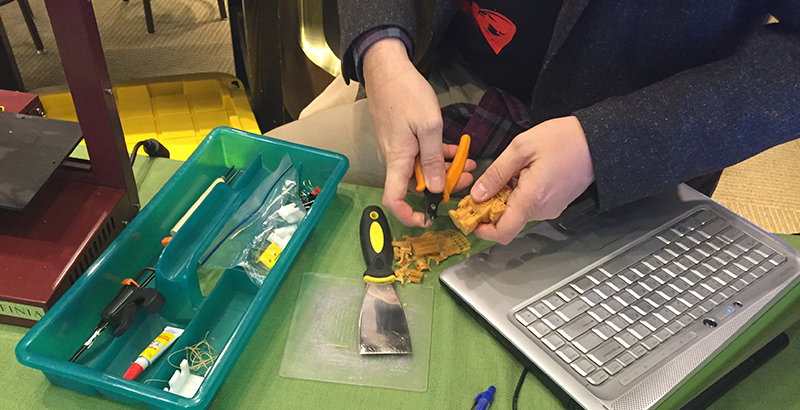
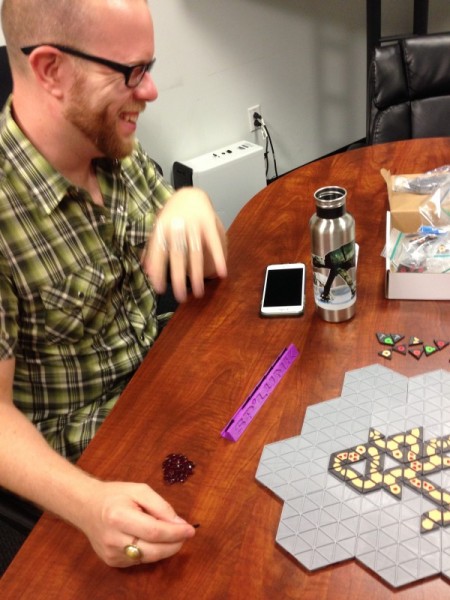
Here my friend Matt enjoys (or pretends to enjoy?) a playthrough of SP’LUNK.

IMG_4021

I also created a box out of an Afinia filament box, and create labels for it. Here is the cover:

Box_Cover_Art_002 copy

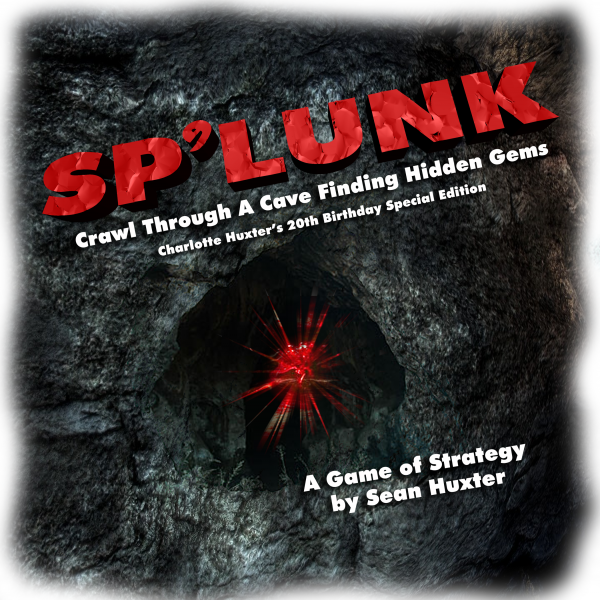
This version has a special sub-title, as it was a gift for my daughter on her 20th birthday. Her friends have played SP’LUNK and they seemed to like it so I gave her a copy, hoping they would play and perhaps suggest even more excellent alterations.


Warping Prints And How Not To

One of the issues I’ve had with the printing of ABS plastic from the beginning is warping. The print bed is heated and it results in warped prints that often are useless.

I created a nice case for a ZoomFloppy circuit board:

zf-done

Looks ok, doesn’t it? Well it isn’t. Not really. This was intended to be printed top-side-up for the top part, and bottom-side-up for the bottom half, giving the exterior the best surface. But when I printed it that way, the seam that joins the two “halves” warped and would not fit together.

To fix this I printed both parts face down, which is not ideal, since the underside of any print with my printer doesn’t print as finished as the top side. So for this case, the interior actually looks more finished than the exterior.

The first thing you need to know about printing in ABS plastic is that there are several useful methods to hold down prints, but even they don’t work perfectly all the time.

Acetone Slurry

This is a common method. Take some acetone in a glass jar, and mix in snippets of ABS plastic (10/1 ratio by weight) and let the acetone dissolve the ABS until you have a milky slurry.

Use a brush (non plastic) and brush a thin layer onto boroscilicate glass (which I use for my print bed), let it dry (seconds) and print on it.

Then magic happens. The print holds down almost all the time, then when it cools (after it is done) you can hear the plastic releasing itself from the glass in little cracks. When the glass is cool the print comes off easily.

But even this fails me.

I have been reading up on many different methods to hold down prints, and one was purple Elmer’s Glue Stick. I hadn’t tried it mostly because from reading early articles, it was apparent that this method wasn’t quite as good as the acetone slurry.

But this past week I read more, and people are swearing by this method as one of the best, and certainly it’s neater to maintain, so I decided to give it a shot.

This weekend I bought a purple Elmer’s Glue Stick and cleaned off my glass sheets and gave it a try.

All I can say is WOW.

Yes, I had a couple of warped prints, but that may have been inexperience.

Mostly, the prints held down like crazy and as the glass cools you can hear a loud POP as the print releases itself from the glass. Sometimes a small print may actually fly into the air a bit and fall off the glass. It’s wild.

So for those of you who are printing in ABS with a heated print bed (PLA does not require a heated print bed and is less prone to warping) and you haven’t tried this yet, run, don’t walk, out to the store and get one of these glue sticks.

elmers-purple-glue-stick