In 2013, not long after I got my first 3D printer, I immediately wanted to make a chess set, but not a typical chess set. Not the typical turned-on-a-lathe set of columns, but something unique. I think I must have recently been to a seaside and visited some lighthouses or something, because those structures were solidly in my head, and I had a great idea for a chess set.
However the result was ultimately disappointing. While the concept of having two-colored structural beams as the body looked Ok, printing it with my 3D printer (an FDM Printer using reels of ABS filament) did not achieve quite the effect I wanted. I wanted heft, some weight, and these printers print very light. I could weigh down the bases with washers or nuts, but ultimately, the printer didn’t give me the resolution I wanted. So this set went unattended for many years.
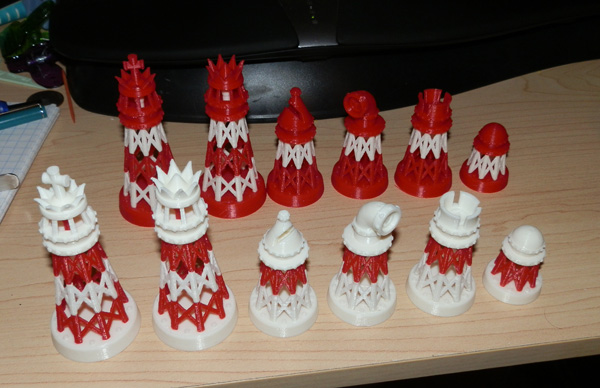
That said, I did do a solid set with solid walls for Afinia two years later, or for a competition or something. I forget why, but I did that, which was more or less an adaptation of this set, with a brick base now, and an octagonal solid building structure, but the heads were the same.
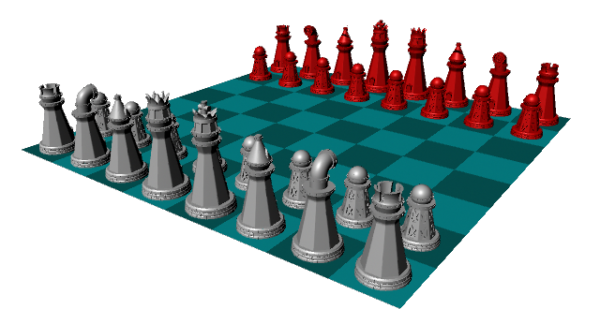
Even here from the render I took of the pieces laid out in the modeling program, you could see my intent for the board. This version was made in 2015.
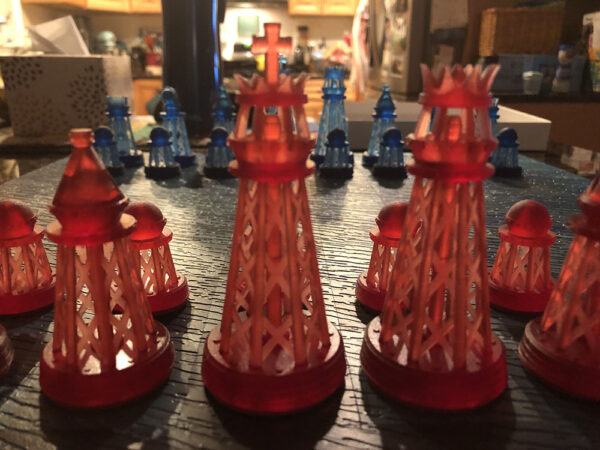
When I got a resin printer, an Anycubic Photon, I finally had something that could not only print these pieces in a much higher resolution, and also solid resin is heavier than hollow plastic.
I did, however, have to remodel everything as solid, since they were originally made to be printed in multiple pieces and assembled. And unbenownst to me, there were some errors in the models.
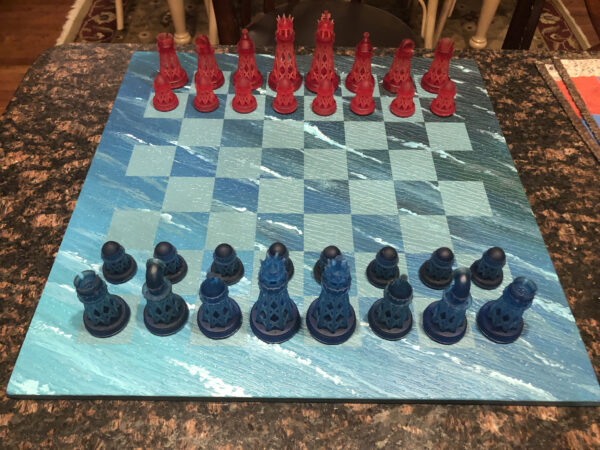
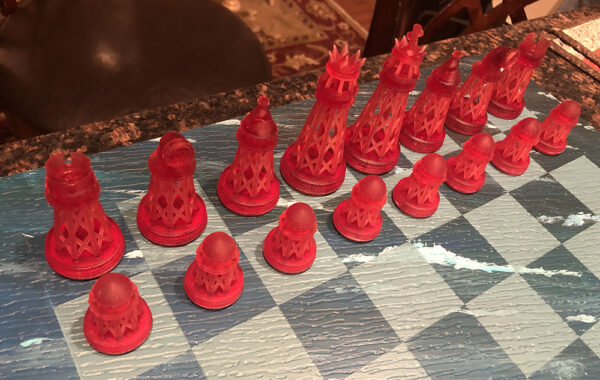
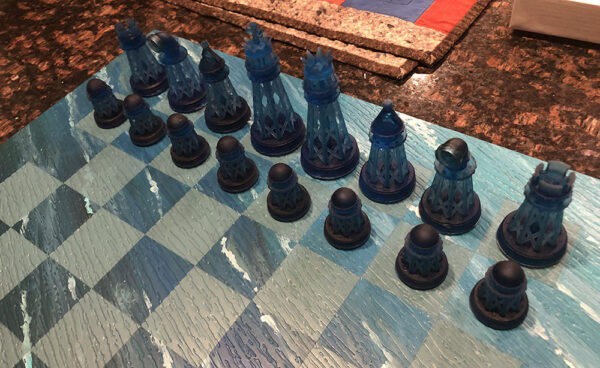
I printed them in a semi-transparent blue and red. And they came out far better than expected.
A blurry photo. Here you see the Bishop, King, Queen and Pawns.
Closer detail of some:
King and Queen
Eight pointed crown indicating she can move in 8 directions. Tall, pointed crown. The King has the same crown, but is smaller, and has the typical Cross on top.
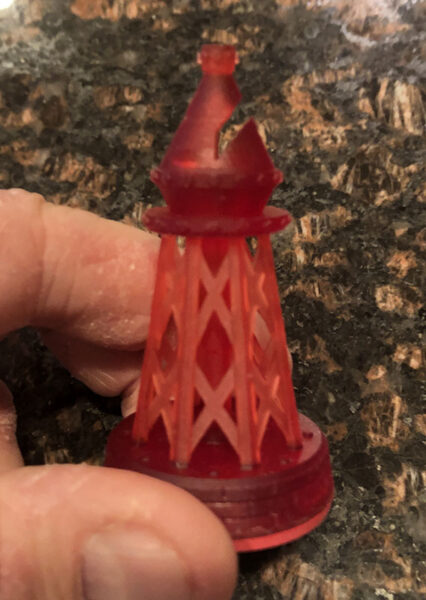
Bishop
A diagonal cut in the head indicates the Bishop can move in diagonal directions.
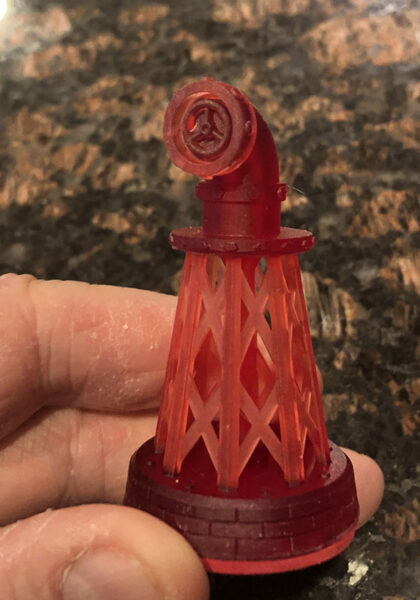
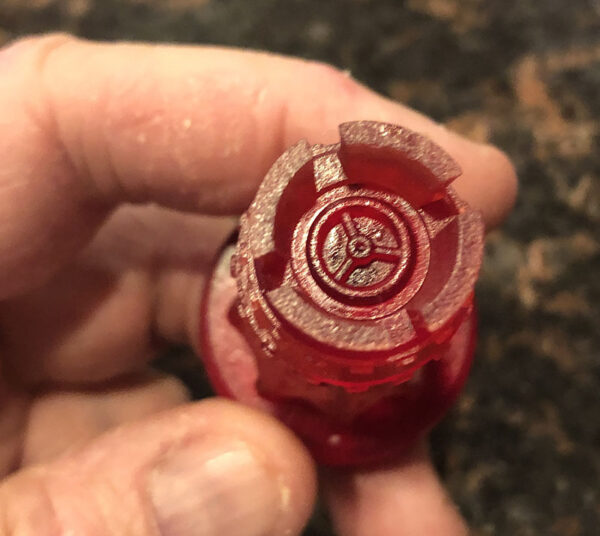
Knight
Bent pipe is intended to give a similar impression as the more standard horse head, indicating that this piece moves in an L shape direction. Note the valve wheel. This is a repeated theme. The Bishop and Rook also have this detail.
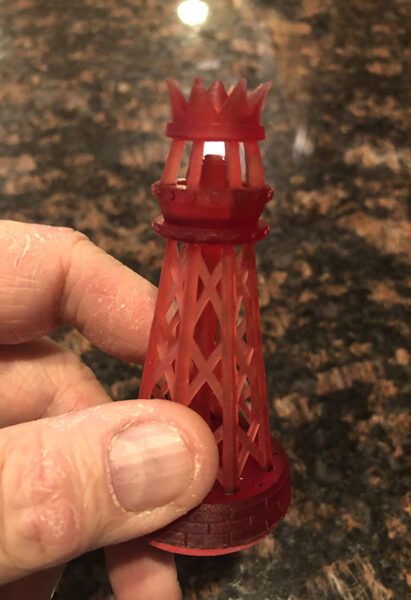
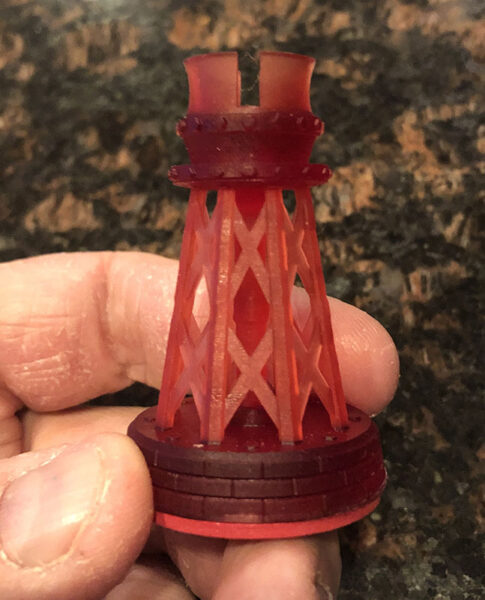
Rook
The Rook has a four-part parapet at the top. Also, as I said, the valve wheel sits atop the piece.
Note the slightly pebbled finish. This isn’t the resin printing, it was the satin clear-coat overspray.
The wheel is inside the mostly hollow head of the Bishop too. It is hard to see, but if you ever look closely in there, you will see the value wheel.

The Board
It took me a long time to consider how to make a chess board. This was going to be for my daughter-in-law, who, with my daughter, got into playing chess a while ago. They live in a small apartment and I didn’t want to burden them with a large heavy chess board. Sadly, it still had to be large, but didn’t have to be heavy.
I am not a wood-worker, so I didn’t really want to make one out of wood. Nor ABS plastic. That would look cheap. I went to my local hardware store and was seriously considering square wall tiles in two tones of blue, or blue and white, but man, those tiles are heavy.
Then I remembered a plastic wall sheet I had used last year to cover a hole in a wall put there by people repairing a crack in our basement. It was just less than 1cm thick, and plenty large to cut a board from, and it also had a grainy surface, I assume meant to look a bit like wood grain, but might also work well as water waves.
And in order to get a more natural wave idea across, I opted not to cut the board with the grain. Instead I angled the board to an angle that made for a natural flow of water on an angle across the surface. So I cut and sanded the edges smooth. The plastic cut rather easily with a carpet knife.
Then I used fine art acrylic paints, which I had used previously on some paintings I did for myself. I started with shallow water, a turquoise, and gradated it roughly out to a dark, deep water on the opposite corner.
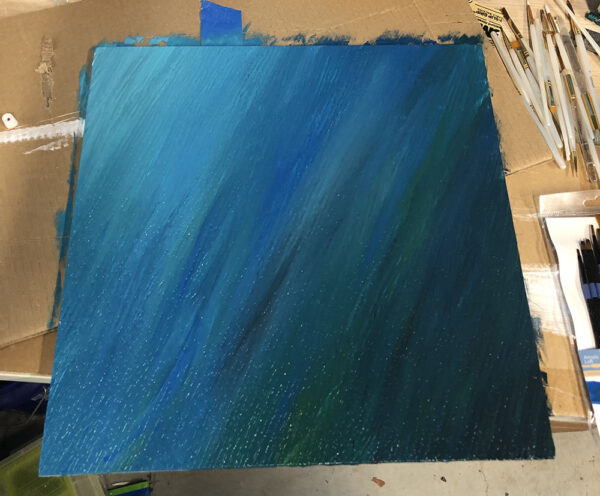
Then I painted some wave differentiation:
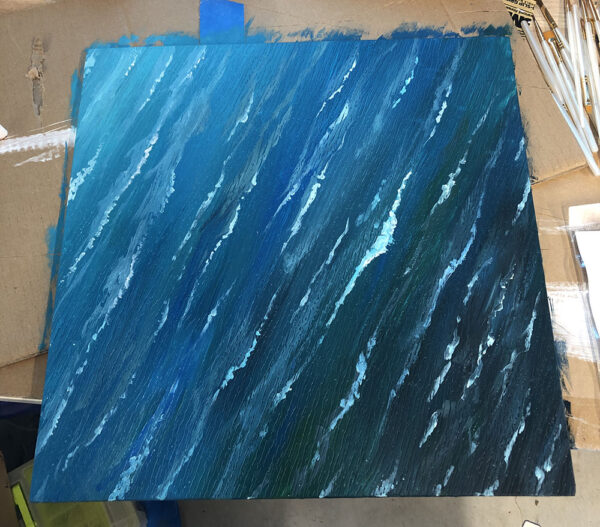
 A bit rough for now, but more or less what I wanted. Then I painted in breakers:
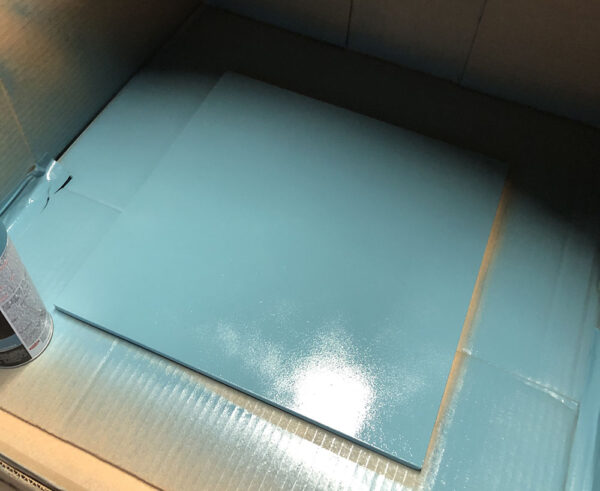
And I was done. Then I spray-painted the underside with a satin teal.
Once all this dried, I covered the entire board with blue masking tape, measured out the squares, and penciled them in.
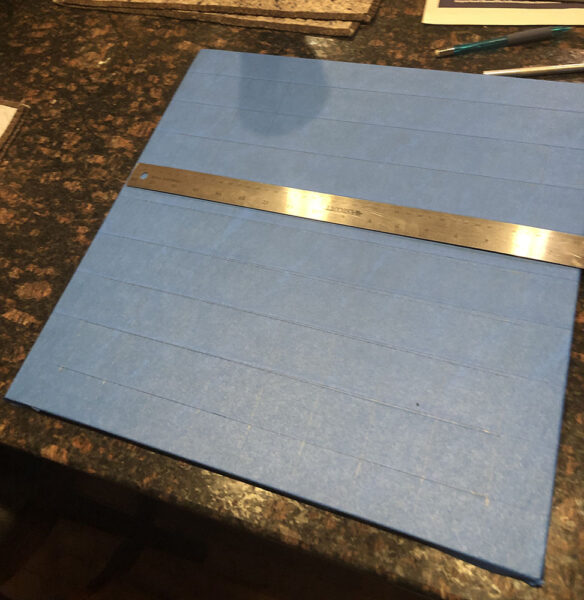
Then I cut those lines, and peeled alternating pieces of the tape:
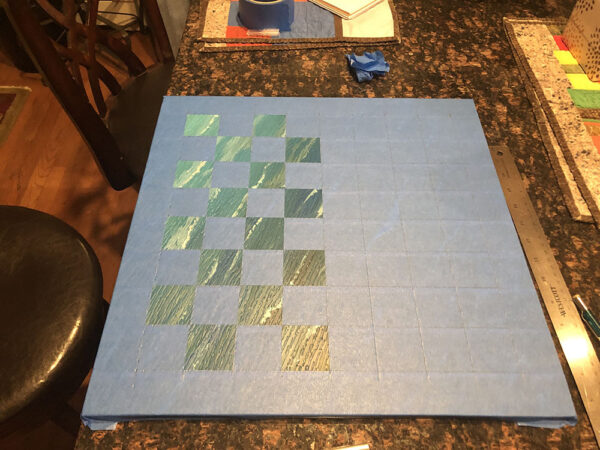
Once I had all the pieces peeled:
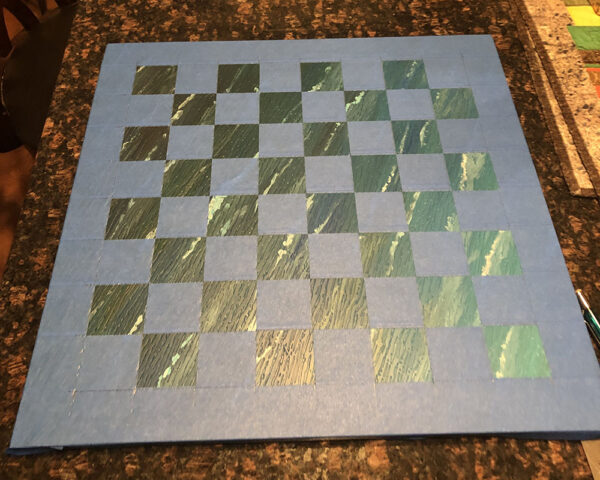
I sprayed the open pieces with a light spray of the same teal I used on the underside.
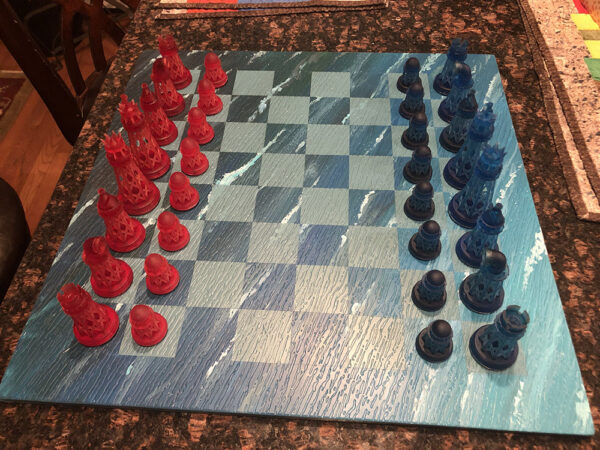
Overall, this came out exactly as I had hoped.
Kinda.
Yeah, I made a few OOPSIES here and there:

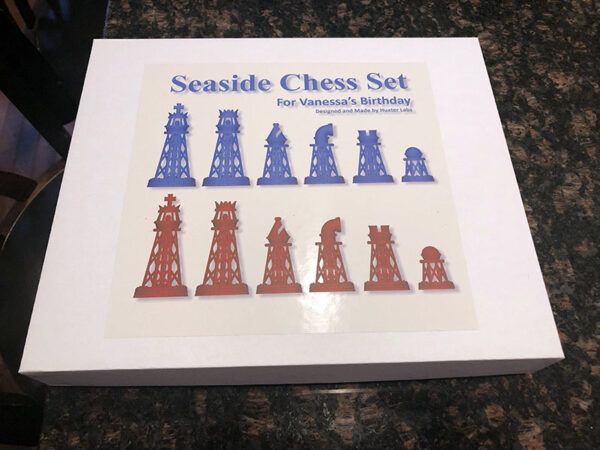
A Box
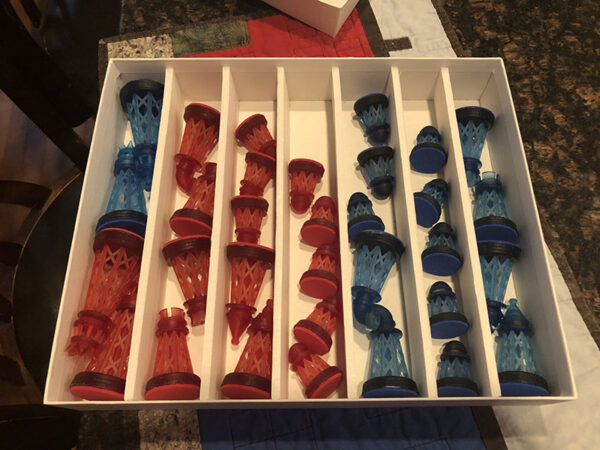
Then I needed a box to keep the pieces in. I found one at Michaels, and used foam-core and white glue to make dividers, to keep the pieces from bashing around inside. Resin doesn’t like that, even though, I had spray-painted all of the pieces with a satin clear-coat to prevent scraping and marking that happens with cured resin parts.
I just rendered a view of the pieces, and added text on a label and put it on the box lid.
And inside:
Result
Yeah, I was pretty happy with how this came out.


