
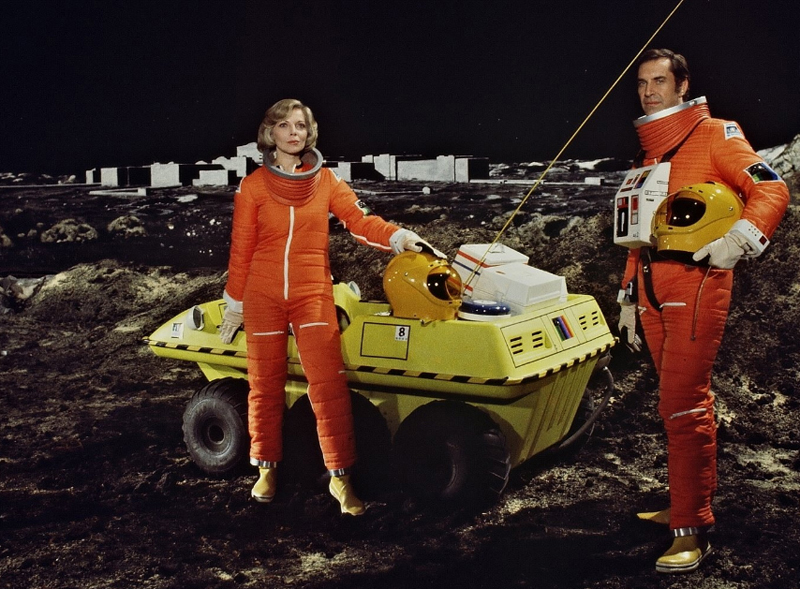
Even before I got my Afinia H479 printer, I was modeling a Moon Buggy from Space: 1999. It was one of the first things I wanted to print.
Here it is, in a publicity shot from the TV show. (It’s clearly a publicity shot… they’re on the moon without helmets!)
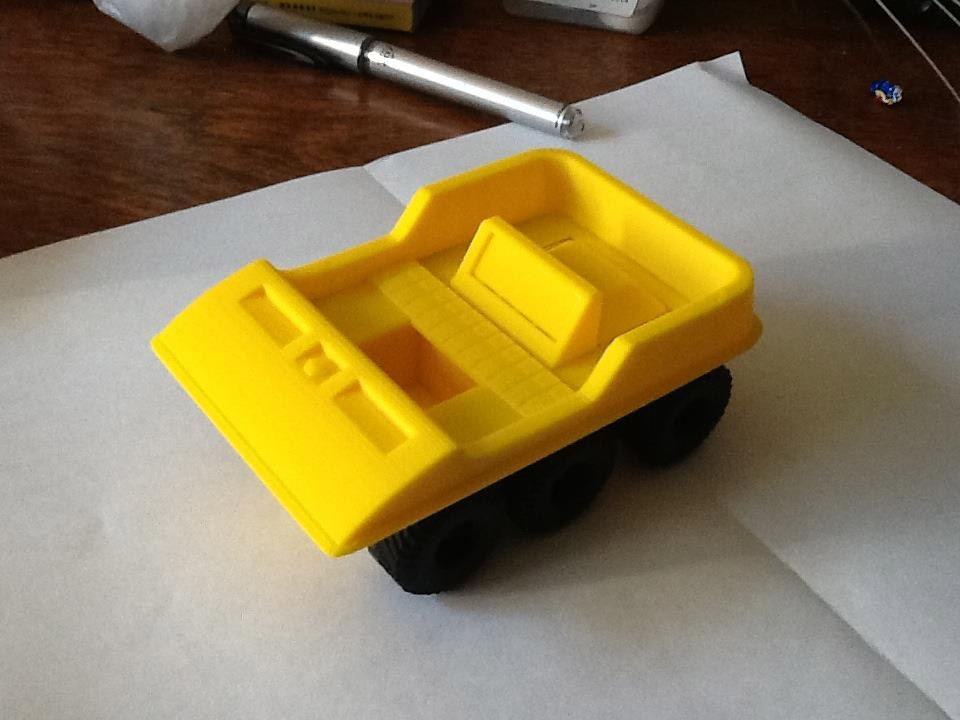
So as a test, I sent a file to them to print. It was not my model. I found it on the internet, and it was not optimized for 3D printing. It had its problems, not the least of which being that it was not correctly proportioned, and was not overly accurate. Here it is:
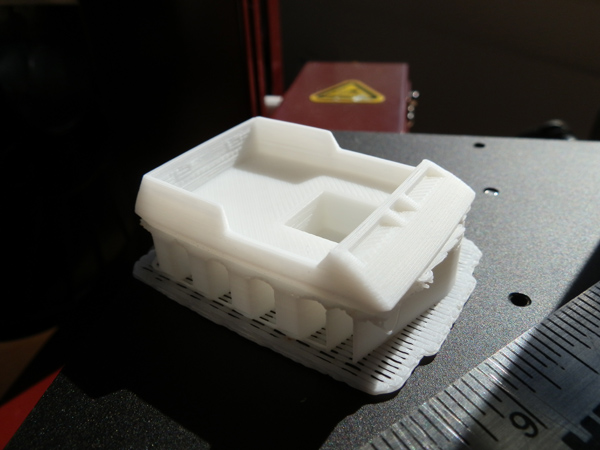
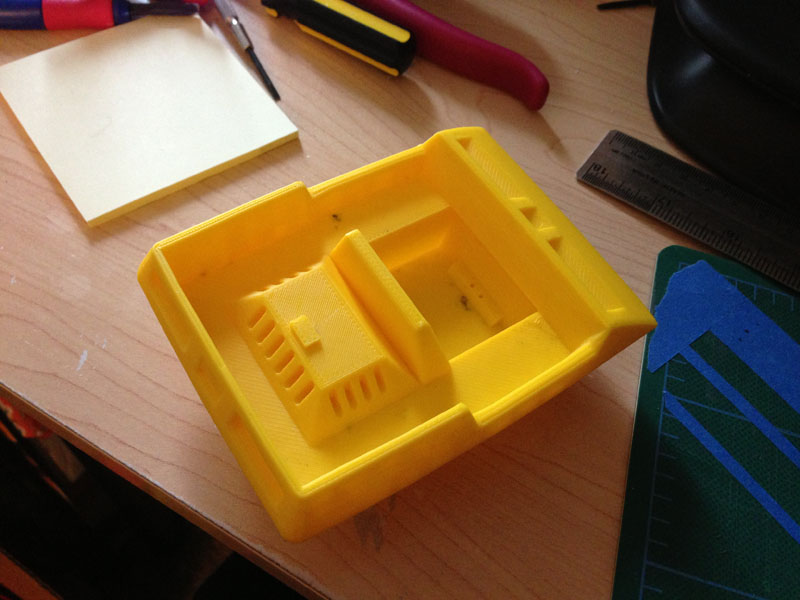
I spent weeks modeling this, refining it, and it was indeed one of the very first things I printed on my Afinia. As a smaller sample, just to see what it would print like:

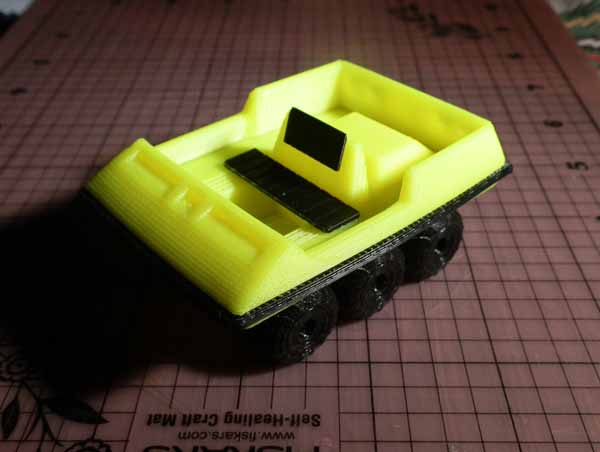
Then I printed it a little larger, with the rest of the parts, in neon yellow and black:
I let this project sit for a while as I was working on many GI Joe toys and other things.
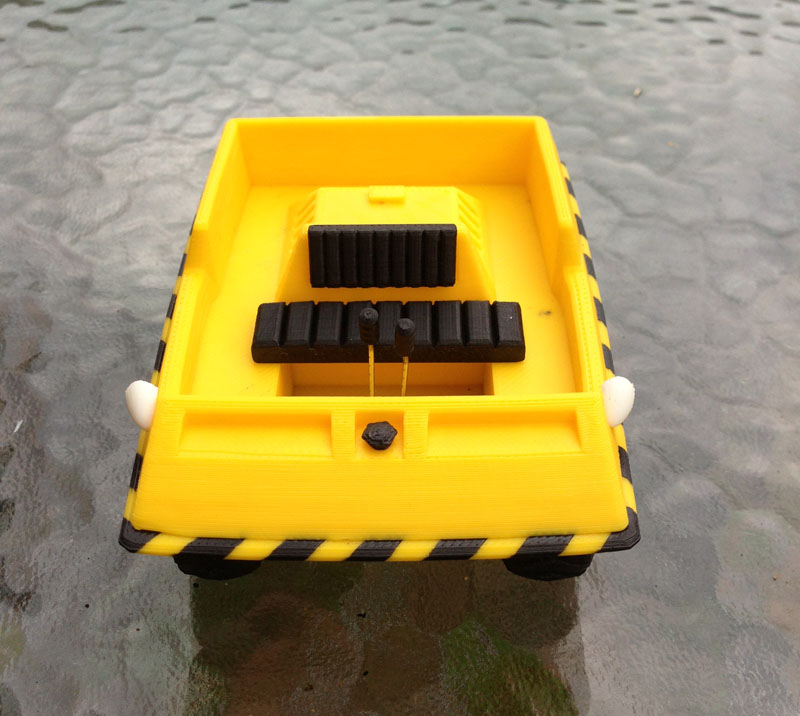
But this last couple of weeks I have been modeling pods for my Dinky and Konami Eagles, and I finally got up the urge to print the whole Moon Buggy. One reason for my delay is that it would take about 13 hours to print the body, if I wanted the highest resolution. Since I had never printed it fully before, I decided to do a test print at .2mm, rather than at .15mm. It took 8.5 hours to print. The result was not bad. It had some issues with oxidization on the print nozzle which dropped carbon deposits into the print at inopportune places, but hey, it’s dirt. Moon Buggies get dirty.
Here is a close-up of the sloped front, which was always an area of concern for me, because a layered printing method will inherently add stepping, which could be unsightly.

But it wasn’t as bad as I had expected, and I’m sure it will be better when I embark on my later, highest-resolution print. But for now, I completed this version:
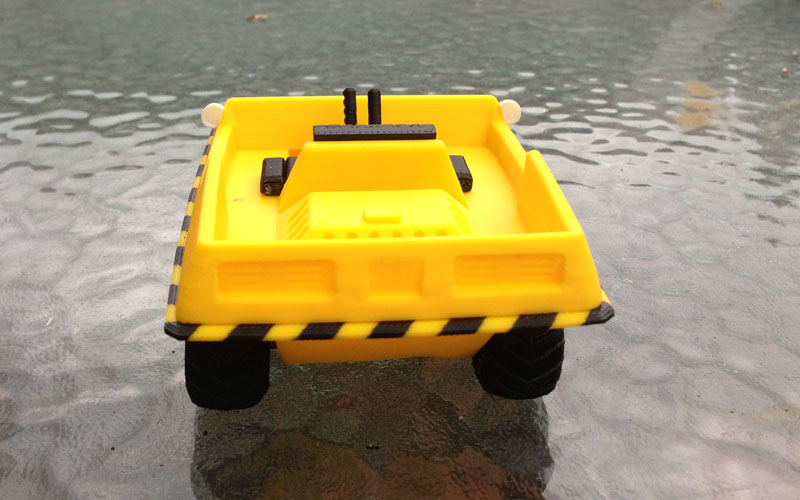
I printed the black parts (there are six wheels. Only four are pictured here.)

Then I printed some white parts (not pictured: Mirrors and headlights)
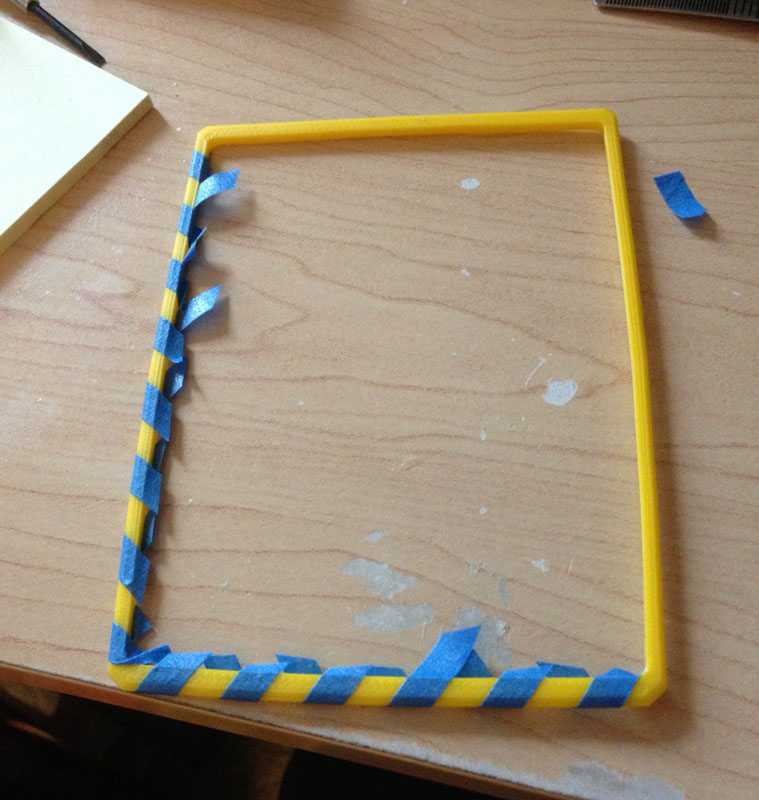
I masked off the yellow bumper every .5cm and then painted it black. I snapped it to the body.
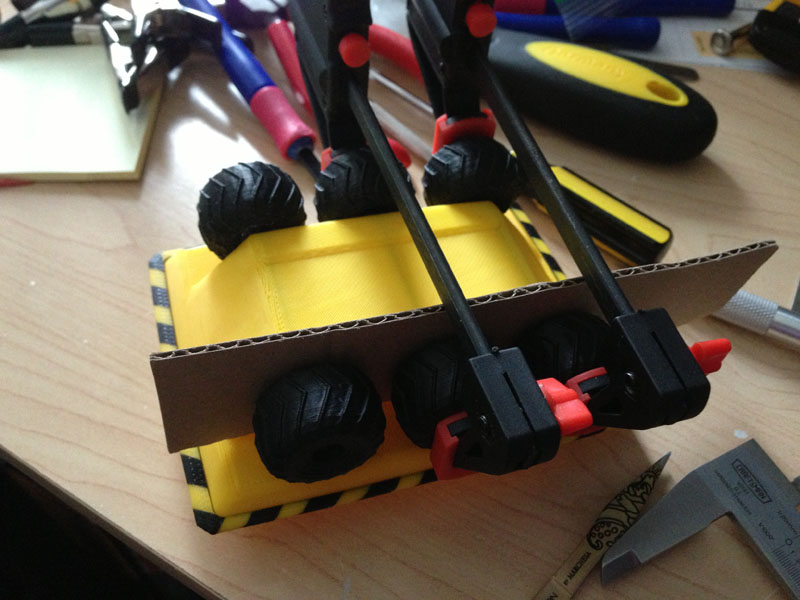
Then I glued on the wheels, using a cardboard spacer to ensure they weren’t too tight against the body:
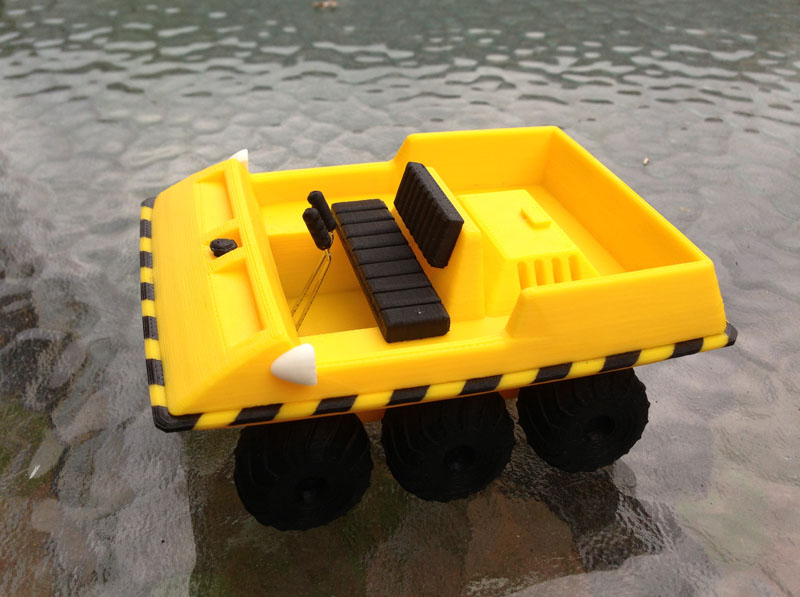
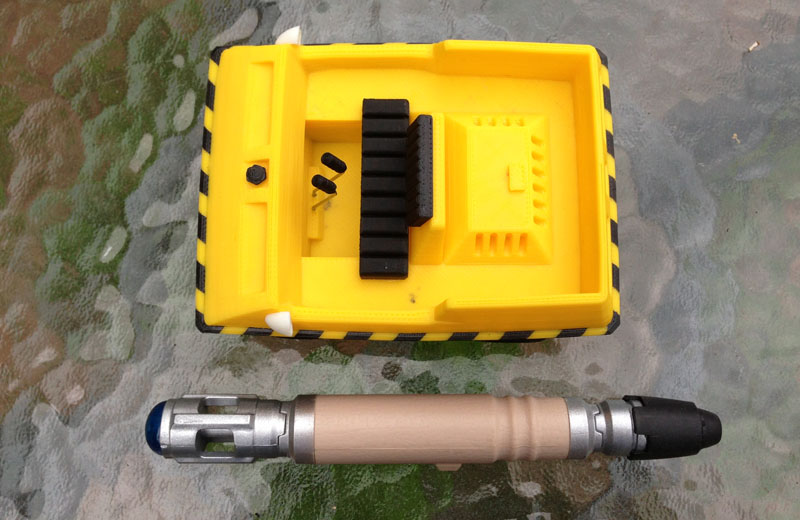
Here is the completed model, with black gas cap, white mirrors and headlights, wheels with coat hanger lengths for axles, the seats are in place, and the control rods (paper clips) glued in place with handles.


Update: June 5, 2014
Since I posted pics of this on the facebook Space 1999 fan pages, I was commissioned to create two 1:30 scale versions, without the engine hub, just a flat rear bed. So I printed a 1:30 version as a test, or close enough. Probably more like 1:36 or so… a bit smaller than 1:30. Here you see it next to this larger one, and a tiny one I had printed at Shapeways to scale with my Product Enterprise Eagle:
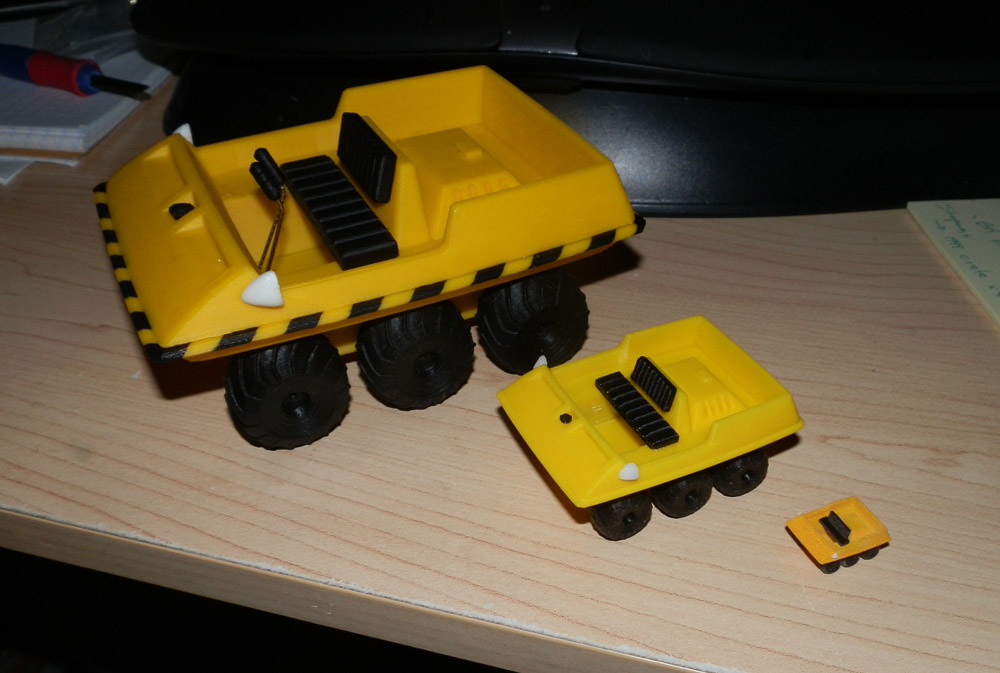
I haven’t yet painted the black banding on the medium one, or the small one, though I intend to. And then I have to do decals for them.
This is an impressive model and print! I’m curious — what type of printer are you using, and what are you doing, if anything, to the parts afterward in order to reduce the visibility of the print lines?
I’m considering the purchase of a 3D printer for doing a lot of the sorts of things that you’ve been using one for. At the moment the top two contenders are the Afinia H-Series 3D Printer and the FlashForge Creator X Dual Extruder 3D printer. I’m leaning toward the FlashForge, since I know I’ll want to print parts that are longer than 5″ on their longest axis. Do you have any recommendations?
Thanks in advance. You’ve done some amazing work!
Thanks. I bought an Afinia H479 printer after it won Best in Show in Make Magazine’s 3D printer special two years ago.
For the model you see here, I did nothing to the parts afterwards except paint the black check lines on the bumper, and glue the parts together. I didn’t do any finishing to reduce the lines. Those lines are really only obvious on the gently sloped front, and there is a picture here that shows those lines fairly clearly. If I wanted to eliminate them, I would probably use a high bulk primer and then sand it.
I have been overjoyed with my Afinia. I highly recommend it. Its print volume is 5x5x5 so that is a restriction. If that’s not going to do it, then get one that has a larger print volume. But my Afinia has been amazing.
Sean.
Thanks again for the insight. I’ll be following your site to see what additional cool pieces you come up with!
Here is what I’m working on: http://forums.voltron.com/eve/forums/a/tpc/f/3171005071/m/6273919177
Wow. That is some impressive work. I did a TARDIS with foam-core once, and it’s beautiful. Can be seen all over this story:
http://www.secondkey.org/
I’m impressed with your dedication and the result!
Sean.
Very nice TARDIS! I like that you captured its early ’80s look.
Thanks. I was going for a Baker-era version. I did not use the blue background for the Police Box or the front sign mostly because at the time I had access to a PMT printer which did very nice high-contrast photo quality prints, but only in black and white. So it’s kind of a hybrid.
And if you look carefully, I made the wrong half of the door open. Oops. But hey, it’s worked for me…
I noticed the door “issue,” but since both sides were seen to open during Baker’s era — such as to let K9 in and out — and since, in “The Eleventh Hour,” the TARDIS doors were seen to open outward rather than inward, I didn’t think it was a big deal. :)
I have some more questions about the moon buggy:
* How large is the print?
* What kind of glue did you use to assemble the vehicle?
* Can the wheels turn?
Thanks again!
Yes, I have seen the TARDIS open from both doors, but only rarely. Usually just the one on the right. In the modern series, it’s much more common to see both open.
The moonbuggy measures 12.2cm x 9.2cm x 5.5cm (ground to top of seat).
I use Super Glue to assemble it. And sometimes clear binary epoxy for some things.
Yes, the wheels turn. I use coat hanger wire for axles.
Sean.