… now that I’m writing IF again.
Interactive Fiction was invented in the 1970s and was not called that at the time. ADVENT, the short file name for Adventure, which later became Collosal Cave Adventure by Will Crowther started it all. A fan of spelunking, he converted his exploration experiences into a computer program that let you explore the very caves he did, only in text on a computer.
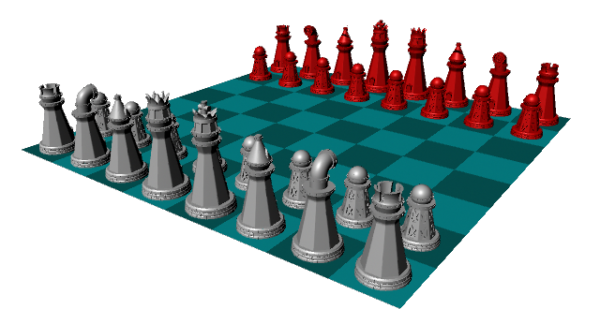
Don Woods later added to this program, adding some Tolkienesque fantasy elements. This would later be adapted by the good folks at INFOCOM as Zork, one of the most popular and beloved computer games of all time and spawned several sequels.
Aside: Recently I attended a dinner party for several hundred under a tent in Hudson, to celebrate art and support the Hudson Armory Project, and we sat with a couple older than us. The wife of the couple said she loved Zork. And she was in her seventies and talked fondly of the game. It was also the introduction into computer games for millions of people.
Generally, in a typical IF game from that era, you would be placed in a world of rooms, connected by directions, so you started in one room, and that room revealed exits to other rooms. Throughout the flow of the game, you would explore all of the rooms, and examine and pick up many objects, some of which were useful, some not. Some were vital to gameplay, and the goal was, early on, to simply collect these as trophies, but as the games got more sophisticated, these objects presented as parts of puzzles you had to figure out. Often a broken machine, or some other thing, you had to repair using these parts.
Story elements featured strongly, even early on, but as the years and decades went by, Adventure Games, or Text Adventures, evolved into Interactive Fiction, a term coined by INFOCOM. And story elements would almost take over from puzzles and mazes to become real works of literary art.
But at the very heart of any IF game or story, is an object-oriented computer program that allows you, through use of language, to manipulate variables. That’s it. That’s all it does. You change the state of objects, and you “win” or “finish” the game/story by putting the variables of a list of objects in a very specific state.
When these states line up, game is over.
Literally – the game is just changing states of objects, then comparing those states to desired states, and proceeding or stopping based on those states.
I work for a computer game company. My first game was a Massively Multiplayer Online Role Playing Game. An MMORGP, often now shortened to an MMO. A 3D world, animated creatures, a fully mapped world that spanned 24km x 24km. And you could run across it seamlessly from one end to the other without any zoning, or loading of cordoned-off areas. It was a fully flowable world, and loaded landblock by landblock.
Even that RPG was a long set of objects with variable states, and all gameplay was geared to changing the states of these objects.
In its ultimately reduced state, any 3D RPG is just a graphical interface over a spreadsheet.
People play the game, but what they are actually doing is manipulating all of the cells in a spreadsheet, hoping to improve the variables, which relate directly to traits in the game.
An Interactive Fiction is a non-graphical text-based interface over a spreadsheet.
It is nothing more than that.
However, the objects and variables are dressed up in text, rooms, connections, puzzles, mood – story.
Anyone can write a game of manipulating variables. But it would be uninteresting.
No one who plays an RPG or IF game would do it if the graphical representation, or the textual representation, were not there.
It is how these objects are presented to the player that makes it a real game. Or story.
So let’s consider a hypothetical example of an Interactive Fiction game, or story:
Bottom line: You need to gather three items, combine them together into a single component part for a machine, then put that part into the machine, which, repaired, stops a disaster from happening that might kill millions of people.
What’s needed?
Obviously you need the parts. You need a machine. You need three separate parts that you combine together to repair the machine.
That’s literally it.
You may name the parts “PART_1”, “PART_2”, “PART_3” and “MACHINE”, and put them all in the same room, with commands that allow you to “>COMBINE PART_1 AND PART_2” (which then creates PART_4), and then “>COMBINE PART_3 AND PART_4”, which creates PART_5. Then you can “>PUT PART_5 INTO MACHINE” and it’s game over.
During each move, the computer is manipulating variables on these objects, and each turn, compares those variable states to a predetermined state pattern.
So only when “>PUT PART_5 INTO MACHINE” do the variables all line up, and the computer prints “YOU WIN”.
But that’s not a game. I mean… it could be a game. But it’s not that interesting, and it is certainly not much of a story.
So let’s first create some rooms.
Rooms are also just objects. Also the player is an object. Room objects are simply locations any object can be in because each object has a variable: Location which tells it which room it’s in. Rooms also have variables attached which tell it what other Rooms you can be transported to if you “>GO NORTH” or “>GO DOWN”, etc. Each room has a matrix of variables which determines which object the player’s location becomes when you make directional moves via text.
So when you are in ROOM_1, and you say “>GO NORTH”, the game checks what Room is pointed to by that direction, and sets the player’s location to that new Room object.
Similarly, an object has a location, and the location can be the player, which implies the player (you) is carrying the object now.
Objects have another property called Description, which is a text string that describes the object.
So PART_1 may have a Description: “A red cylinder with loose wires dangling from it.” Meanwhile PART_2 may have Description: “A blue box with holes for wires.”
This text is meaningless to the computer. It doesn’t care. The only thing it cares about is that when you “>COMBINE PART_1 AND PART_2” these are generally removed from play by setting their Locations to NULL and setting PART_4’s location as the player. PART_4’s Description might be “A long box with a cylinder in it, with wires now connected.”
See? So by combining parts together you give the player the illusion you are doing something real in the game world. You just partly repaired a machine’s component, when in reality you did no such thing. Now you have to continue until that part is fully repaired, then you use it to repair the machine.
But the only thing telling the player this is the text. Otherwise it’s changing the location of objects, the objects themselves, and nothing more.
What about Rooms? This can all happen in one room. But what would be the fun in that? (Notably, some very excellent games do take place in one room, but most happen in larger environments, some quite sprawling.)
So we make more rooms. We generally create a building or a complex, or an outside area, a forest, whatever. It doesn’t matter really. Inside the computer it’s still just a series of objects connected through variables.
Should each room have a purpose? For this game, should there be only four rooms? One holding the machine, and one holding each of the three parts you must combine together to repair the machine?
It would be more fun for sure. But is it fun enough? Why not create a dozen rooms and make the player hunt for the objects? Better.
Then you can hide the objects by putting them in Containers, which are simply objects that can hold other objects. And a property can say they are hidden when inside a Container object. So you may have to “>OPEN SAFE” to reveal what the SAFE object holds within it.
You can make it so that you must have an object to get another object. Like a key, which you may have to search for first, before you can >OPEN SAFE to find the item you really needed.
So it is important to have more rooms than you need, probably. You can get away with a minimalist approach, where every room holds something useful, or you can embellish the world by having intermediary rooms that have no purpose whatever except to provide the illusion of a more meaningful, fully fleshed-out world.
Perhaps to get from the Machine Room to the room that holds PART_1, you have to move through East Hallway, then Middle Hallway and finally West Hallway, before you can get to Dark Closet, where SAFE’s location is set to, and “>OPEN SAFE” which reveals the PART_1.
Some games do this to extremes, creating mazes you have to traverse before you can get to Dark Closet. Some mazes are so twisted that they can twist back on themselves, and can be completely non-linear and make no sense if you try to map it out on paper. These days, however, mazes are considered passe, or at the very least, unnecessary, and in many eyes, annoying.
It’s a fine balance to know how many rooms should have no purpose but to be an intervening space between rooms that do matter. 50 rooms when only 4 are important? Excessive! And highly frustrating. 50 rooms when 20 or 30 are important – may be a good balance.
Even if a room is unimportant, it is generous to give a player something to see or do in those rooms, both to distinguish them, to make a player remember them in a mental map, and just for world-building detail.
So you make a fully fleshed-out building with rooms with no purpose connecting rooms with purpose, within reason. (Reason being a highly arbitrary term.)
And objects? What if a game only had objects that finish the plot? Wouldn’t that also be less than ideal?
So we might create a number of pointless objects. Red Herrings that have no purpose other than to fill out the world. Some might even do cool things, even though they have no real effect on the outcome of the game.
Would you create a Kitchen without a Counter, Stove, Refrigerator, Sink? And would you not want plates, salt shakers, food, etc, to be present? Even if they do nothing?
But what of that? Should they do nothing?
At the very minimum they should have a description. “A half-full salt shaker.”
But what fun would that be if you couldn’t do things with these objects?
“>SHAKE SALT SHAKER” should give some kind of textual response, like maybe “You sprinkle some salt on the floor.”
“>TASTE SALT SHAKER”
“Mmmm, salty.”
Again the balance of useless but fun objects should be carefully weighed. When you encounter an object that matters, it should seem like just another thing, but in fact is actually important to the outcome of the game.
Ambient objects have variables that may mean nothing, but vital objects have variables that affect the outcome of the game when the game checks to see what variables line up with the desired end state.
So you want a series of rooms, only some of which are useful. And a list of objects that fill out the world’s story, but have no real purpose. And a list of objects that do have real purpose.
Debate rages on about unnecessary rooms. Some people think they are superfluous and no room should exist that has no purpose. But there are many reasons to have these rooms. Let’s say for example you have a hub room that leads to many rooms in the 8 cardinal directions, but each of the other rooms you may want to put a door. If you try to put 8 doors in the hub room, and you ask “>EXAMINE DOOR”, you will confuse the game. Which door? There are eight doors in this room.
A common solution is to make RED DOOR, BLUE DOOR, GREEN DOOR, YELLOW DOOR, etc, and since the parser can understand both words as the object, >OPEN DOOR will elicit a question “Which door, the Red Door, the Blue Door, The Green Door” etc. Or you can type >OPEN GREEN and it will just work.
Do you know many buildings whose doors in a common hallway are different colors? (I capitulate there may be a few…)
How about DOOR ONE, DOOR TWO, DOOR THREE, etc? More common in real world scenarios, sure, but it does tend to make you lose track in your mental map as you play. Without a physical map in front of you (most games would provide this, or you map as you go) then you would quickly lose track, I think.
To alleviate this, you can make an intervening room in each direction, each of which leads to the 8 vital rooms. Then, if you go NE towards the NE room, you can be in a hallway between the hub and the room. That hallway can have one door, and if you say “>EXAMINE DOOR” which now would have no problems disambiguating the door, since there is only one in the room.
So this is all pretty dry stuff. Objects, Variables, Manipulating variables via text, comparing variables to desired settings, and then printing out a “Win” message.
Then there’s STORY. The heart of the matter.
We can add People. Characters. Interactions. Hidden rooms. Hidden objects. Objects that do nothing until you “>SEARCH THEM” which may reveal more about them. Perhaps PART_3 has a screw hidden inside it that is vital to attach PART_5 to MACHINE, which is not obvious on “>EXAMINE PART_3” but is revealed on “>SEARCH PART_3”.
>EXAMINE can generally be thought of as a cursory glance, while >SEARCH means a detailed look, and may include peering closely at it, which may reveal details not noticeable on a cursory glance. This is of course contextual as chosen by the Implementer.
The story comes when you begin describing your Rooms, your Objects, and any text that is printed out when you make a move which changes the variables of these rooms or objects.
Imagine:
You have PART_4 (the result of combining 1 and 2) and PART_3. When you type “>COMBINE PART_4 WITH PART_3)”, the code checks that you have the two objects, but also interprets your command and can respond in text. It could simply remove PART_3 and PART_4 from play and make the location of PART_5 (the fully-repaired component) the player, and provide no feedback whatever. The internal state change would be the same.
But it is not smart in a game to do this silently. The output could simply say “Done.” and when you examine the object, you would maybe see “The fully repaired component.”
But where’s the story in that? Better, when you combine the objects, the response to the command can be:
“You push and twist, and finally the partly repaired part fits into the Spring-Loaded Box. Lights flash and the repaired component begins to get warm.”
This is what makes Interactive Fiction a game or story. Not just what’s going on underneath, what happens in the spreadsheet, but much more importantly, how the changing of the variables is presented in text to the player who does the manipulation.
Also adding non-game-important properties to an object can add to the story. Like let’s say each part can have IS COLD, IS WARM, IS HOT as properties, and as you combine parts, you set these properties in the same command statement.
So you could have:
>COMBINE PART_1 WITH PART_2
Done
>COMBINE PART_4 WITH PART_3
Done
>PUT PART_4 INTO MACHINE
You Win.
Fun right?
Not so much.
Instead try:
>COMBINE RED CYLINDER WITH BLUE BOX
You push the parts together and notice that they almost fit, but the wires are in the way. You twist the wires and push them through the holes in the blue box until they snap to connect, and you hear a high-pitched whine and a click. Lights on the partially repaired part begin to glow.
>EXAMINE PARTIALLY REPAIRED PART
The partially repaired part is getting warm.
>COMBINE THE PARTIALLY REPAIRED PART WITH THE GREEN TUBE
Though it doesn’t look like it should work, with enough effort and persistence, the parts mesh together and begin to glow brightly to form a fully repaired part. The heat is getting intense.
>EXAMINE REPAIRED PART
The fully repaired part is getting a bit hot to handle.
>PUT REPAIRED PART INTO MACHINE
Gently sliding the repaired part into the machine causes a series of sparks, a loud noise, until you hear gears meshing and a growing hum of what can only be described as engine efficiency. A loud hum begins to decrease, settling into a nice low-key sub-aural vibration. The lights around the complex begin to fire up, a few at first, but more and more until the whole place is lit like daylight.
Soon doors begin to open, and people, groggy at first, begin to walk out into the open space. They notice you and are confused, but slowly they come to understand that you are the hero they’ve been waiting for all this time. Suspended in cryo-sleep, these men and women may have never been revived if you had not come along and stumbled upon their plight.
They surround you and sway, cheers and cries of joy begin low and slow, but soon are a raucous noise of celebration as they begin to understand what happened, and how you must have been the one to free them.
They lift you onto their shoulders and carry you through the complex, telling everyone they encounter just what you did to save their entire civilization.
YOU WIN.
See?
It’s really that simple. You are no longer just manipulating variables on computer objects, but affecting a world.
Great, right?
But that’s not all there is either.
Oops.
What happens if you try to put PART_7 into PART_1? It should fail. But not silently. Generally in IF, when you do something to an object that has no in-game effect, you get a message telling you that it can’t be done. It might be pointless to put PART_7 into PART_1 because there is no game benefit. And if you did, it would not help win the game. So we’d need some kind of response that helps you figure out not only that it didn’t work, but provide some hint as to why.
>COMBINE PART_1 AND PART_7
You try to force the red cylinder into the coffee maker, but there just does not seem to be a way to do it.
This is a gentle way the game has of telling you this is not intended to do anything.
Error messages are intended to prod, not slam you with a sledgehammer. If you “>GO NORTH” in a place that has no North exit, you will see “You can’t go that way.” Fine. The computer has told you what you need to know. This is clearly a generic error response when you try to go in a direction that has no destination location.
(It would be an awful cheat, on a Douglas Adams level, to say “You can’t go that way.” only to find that if you >PUSH NORTH that it lets you go there Or if you >GO NORTH three times, and the third time lets you. Mis-use of a generic error message may be seen as cruel, or at the very least heartless.)
(NOTE TO SELF: Write that game! The game where every default response actually is hiding the fact that you CAN do the thing, if you do it in a special way.)
(NOTE TO SELF: Don’t. People would carry pitchforks and torches to your door.)
The same would go for any command that does nothing useful in the game.
>EAT PART_1
That’s not edible.
This command checks PART_1 for a property IS_EDIBLE and if it is not, it spits out the default error response message. If IS_EDIBLE is true, then it will do something meaningful, responding with a different message, one of success. But even that may have a default. If it is edible, it may simply say “You eat PART_1.” and removes it from play. Which may not be desirable either, so in a case where a game/story requires eating PART_1 to do somethin game-useful, then the Implmenter has to code that specifically.
An IF Parser is filled with these default responses for commands that could do something with the right objects, but fails to do something to the wrong objects. Sometimes these responses are very … uninteresting. But they are soon easily recognized as the game telling you that this is not something that could work in the course of play.
But perhaps you want PART_7 to fit into PART_9. So if you put it into PART_3, and you don’t want that to happen, it should not just respond with a default response, if at all possible, it should inform the player that putting PART_7 can fit into something, just not PART_3:
>COMBINE PART_7 WITH PART_3
The aperture in the yellow laptop is not the right shape for the Blue Box to fit in.
This is a way of saying this is not a generic error which might mean the very action of combining is not designed to work with any of these objects, but instead tell you that the action would work if you had the correct objects.
You might even get more direct with the message:
The aperture in the yellow laptop is not the right shape for the Blue Box to fit in. The aperture is too large.
Hinting that a smaller object might indeed fit.
So what is the point of all of these default responses? Don’t they, too, hint that perhaps the command would work in the right situation? Sometimes these default responses seem less than informative.
I mean at which point should an error response just reduce to:
No.
?
>GO NORTH
No.
Would you not get the point? Why add to that direct refusal?
I sometimes think one day I will write an IF story where I change all default responses to simply “No.” and then code my own specific responses for good tries, and efforts that could work with the right objects.
Wouldn’t that be fun?
No?


 A bit rough for now, but more or less what I wanted. Then I painted in breakers: