
The Afinia H479 comes equipped with a good set of basic tools:
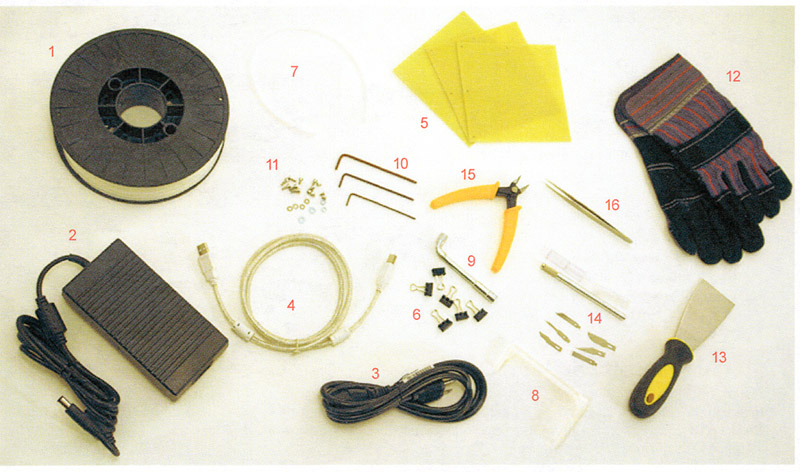
1 – A reel of Premium White filament.
2, 3, 4 – Power supply, power cord, USB cable (I list these together because they are essential parts of the printer, not extra tools)
5 – 3 perf-boards – these are what you clip to the print bed to print on
6 – 6 clips – these clip the perf-board to the print bed
7 – Filament tube – (this doesn’t scan well in the photo) It is a channel for the filament to go through when extruding. It helps keep the filament on a good angle while printing
8 – Spool holder (also doesn’t show well in the photo) This is good only for Afinia Premium reels. (More on this later)
9 – Nozzle wrench – this is for removing the extruder nozzle if it becomes clogged or needs a cleaning
10 – Set of three Allen Keys – for removing the various bolts used on the Afinia
11 – Set of replacement screws in case any go missing
12 – Heat-resistant gloves – 3D printing is a hot process, so using gloves can save you a lot of hand heat
13 – Putty knife – this is for removing the print from the perf-board, and for cleanup
14 – X-Acto knife and blades – for cleanup
15 – Wire cutters – also for cleanup
16 – Tweezers – also for cleanup
Most of these are the very basic tools needed if you wish to do 3D printing.
However, if you plan to do a lot of 3D printing (like me) there are other things you will want to have. None of these are necessary for basic printing, but believe me, you will want to have these if you are serious about 3D printing and doing it right:
When I bought my Afinia H479 it was part of a bundle purchased through a third party, an approved vendor of Afinia. It came with the printer (and all you see above) bundled with three reels of Octave filament in my choice of colors, a set of 5 small chisels, and an extruder nozzle temperature switch. I found these to be absolutely necessary for any serious printing.
Set of Wood Chisels
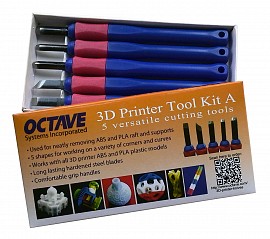
The X-Acto knives that come with the Afinia are great for cutting. But most of cleanup is not cutting the plastic, it’s prying and wedging along natural separation lines. I would recommend not using the X-Acto knife at all. I’m more likely to expect the blade to snap than it to work well.
You can purchase a set at a hobby or wood-working shop. The Octave 3D Printer Tool Kit A (shown) is what I bought with my Afinia as part of the bundle. It is a set of five hardened steel wood chisels and they are essential for cleanup. This one comes with a flat blade, an angled blade, a 90 degree wedged blade, and two curved blades.
With these, cleanup is much easier.
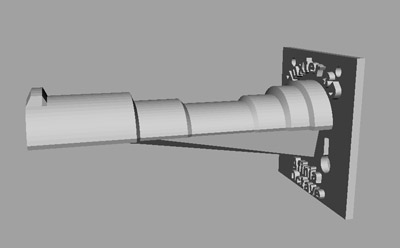
Octave Extruder Nozzle Temperature Switch
Afinia’s Premium Filmanet works perfectly with the stock Afinia H479 printer. This filament extrudes at around 260° Celcius. No problems. Cleanup is easy, it prints beautifully.
However, most ABS filament prints at a lower temperature. You can use third-party filaments on the Afinia without changing the extrusion temperature, but the plastic fuses harder, making removal from the raft layers and cleanup far harder. Printing at the correct temperature for the filament makes cleanup so much easier!
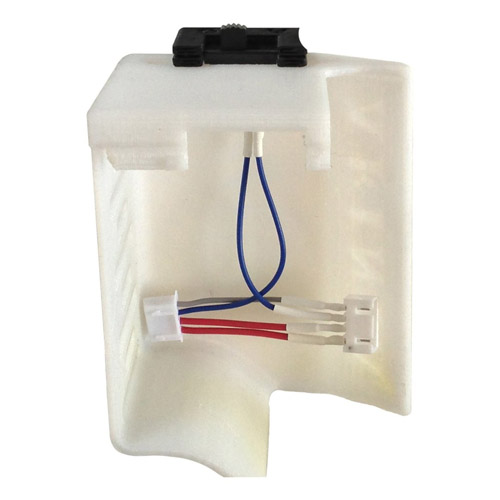
The Octave Extruder Nozzle Temperature Switch is a simple device. It is a two-way switch with a resistor on the active circuit. It is attached to two plugs. The extruder nozzle is attached to the Afinia by identical versions of these plugs. You simply separate the plugs on the Afinia, and fit this directly in-line. All you’re doing is inserting this switch into the circuit.
It also comes with a plastic printed part to secure the switch to the top of the Afinia Extruder Heat Shield.
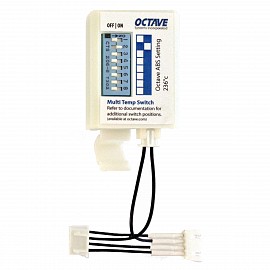
If left in the off position, the Afinia prints at its native temperature of 260°C. If you turn the switch on, restart and re-initialize the printer, it now prints at around 230°C.
Octave no longer sells this simple switch on their web-site. They have replaced it with two more sophisticated switches. One has 8 different temperature settings, and the other can do 127 settings, each one using similar 8-bank DIP switches.
Warning! – This add-on hardware is NOT approved by Afinia and sending a printer to them for repair under warranty with the switch attached may void your warranty!
Octave Adapter and Filament Reel Holder Spindles
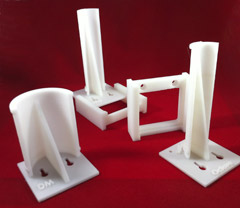
Octave makes available free on its web-site a set of .STL files to print a modular filament reel holder system. Download these and get printing.
The reel holder that is supplied with the Afinia H479 is not useful for many third-party reels which have different size holes and different widths. Also, it is screwed to the body of the printer so fast swapping for a different holder is difficult.
Octave’s Adapater is a housing that screws to the Afinia and then any number of different reel holder spindles can be swapped in and out in seconds.
They supply various reels that fit the housing, but I found that several of them could be combined into one singular design, so I made some modifications and made available my own multi-reel holder.
It works by having several consecutive dips in a rod spaced for the various known reel widths, and is small enough around to fit most reels. The Afina reel with its large hole does not need a large curved holder. It works perfectly fine on my “universal” reel spindle.
This works with almost all reels I have printed with including Afinia Premium, Afinia Value Line (with a thinner spool hole) and Octave’s wider spools. It is downloadable free from Thingiverse and fits Octave’s universal adapter.
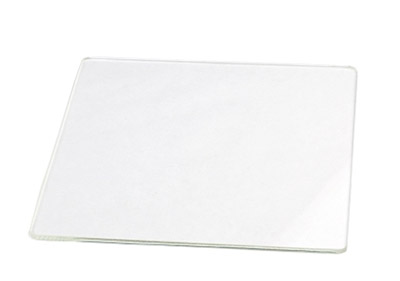
Borosilicate Glass
The perf-boards that come with the Afinia are fine for most normal printing but they have serious drawbacks for serious printing hobbyists. ABS is extruded into the holes during printing of the raft layers and it grips the print to the bed fairly well. It can also be covered in blue masking tape which holds very well for smaller prints. However, you will begin to notice that on objects with a larger base, corners and edges will peel up during printing no matter what you do, as long as you use these perf-boards. Warping will be a constant issue.
Now it is not.
I was skeptical at first, when the guys at Afinia talked to me about their new Borosilicate glass. But I was eager to try it so I bought three sheets.
First, it is thicker than the perf-boards, and requires larger clips to hold it down. You will have to recalibrate your nozzle print height since, as I said, thicker.
Printing on the glass alone does nothing useful. The real trick to this method is the acetone slurry you will have to mix.
Luckily, this is fairly easy and the glass comes with instructions. Simply put, you mix acetone with 10% (by weight) of scraps of ABS. You can use rafting cast-off, or clip small lengths of unused filament right off the reel. (Use the scrap.) Cut it up into small bits and put it in a sealed glass jar with the acetone and stir for a while. Let it sit for a few hours and soon you will have a thin soupy mixture of acetone and ABS called slurry.
Get a vinyl brush (not plastic – acetone melts certain plastics) and use it to brush a thin layer of the liquid slurry over the top of the Borosilicate glass and let it dry. It dries in seconds.
Then clip the Borosilicate glass to the print bed with the (supplied) larger clips and print.
Amazingly, the raft layer bonds to the slurry on the glass like crazy! I have no idea whay sorcery is involved but it works! And removal? Believe it or not when the glass cools, (two-three minutes) the print peels up better than the perf-board. As it cools you can hear cracking sounds. This is the ABS unsticking itself from the formerly hot surface. It lifts off as if it was never stuck in the first place.
This is magic you simply have to see for yourself to believe.
I have been using this method exclusively since I got it and I have had almost no warping or peeling-up of a print (except where my slurry was incorrectly mixed.)
Calipers
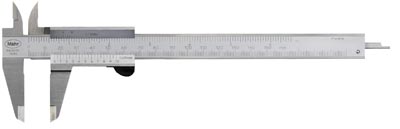
If you are into designing 3D models for printing like I am, not just downloading and printing things, one of the most essential tools you will need is a measuring caliper. This is a device with a ruler on a sliding arm with claw tips that can be used to measure distances of widths of objects. Perfect for measuring a pipe’s diameter, or the inside diameter of a hole you need to make a plug for, it allows you to accurately measure distances which you can than use in designing your 3D models.
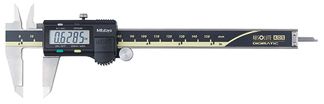
You can also buy digital versions but for my purposes, I figured a standard one would suffice so I got one much like the one pictured. I like it, but the digital versions are calling me… I must get one, but they are much more expensive.
Summary
I have been printing with an Afinia H479 for 14 months. I have printed literally thousands of individual parts, hundreds of print runs, completely used up a dozen filament reels, currently have more than a dozen active reels, and I have a fair amount of expertise in printing with the Afinia H479 printer. I still say that along with my Commodore 64 in the 1980s, this is the best machine I have ever purchased. I have been waiting for this machine all of my life, and I now have it. You can count on me for advice on making your printing life better.