

I am involved in many projects, both at home and at work. Each one has shown me how important iterative development is. I have found that nothing is ever “done” but it does get ever-closer-to-done.
At the request of a friend I took on the fun task of modeling and 3D printing Rick’s flying saucer car from Rick & Morty, the Adult Swim cartoon series. This request was probably prompted because I had been creating things using vending machine bubble capsules, and the ship has a perfect bubble-capsule canopy. (This is a good series, but it is not for kids.)
I found first that no matter how much research I do on the web, I see no two versions of the ship are alike, which is expected because they are hand drawn by various artists.
I did a quick version that worked fairly well:

But of course this was a test print only. I had full plans to do a detailed interior.
The problem: I made the aperture for the capsule tight. Very tight. Applying the capsule should be done only once, and it could be tight. To get it to fit, I had to warp the edge inward, snap most of it in, then let it relax outward to fit the rest of the circular indentation.
So that worked. Then I added the detailed cockpit interior. When I was done, I had 50 individual pieces to make the car with the detail I wanted. (Some of this was to make printing easier or cleaner, such as making the interior tank out of 3 pieces instead of 1.)
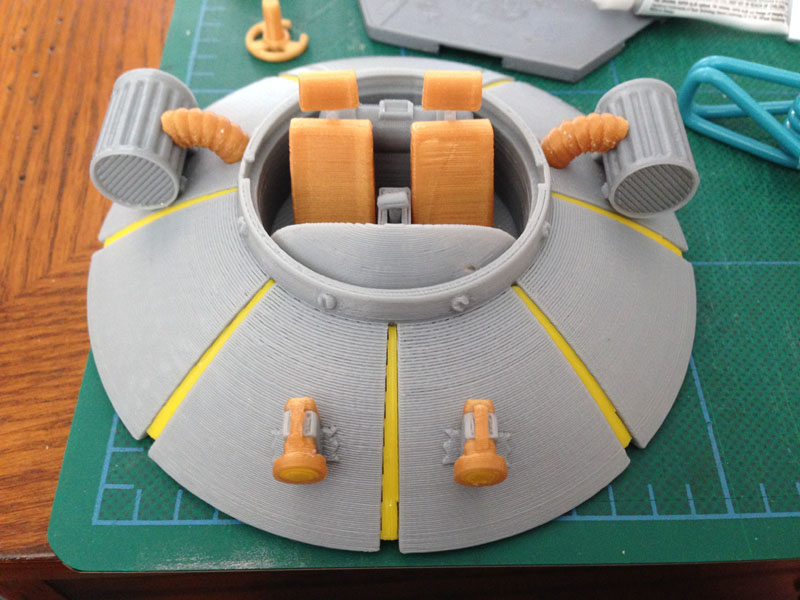

Uh-oh. I soon found that there was no room to bend the capsule inward to fit it properly without dislodging or breaking items inside the cockpit.
I had to think for a bit. This version is solid. Can’t fix it. So perhaps I can try to get it to fit after all, but it will be hard.
But then I came up with the perfect idea:
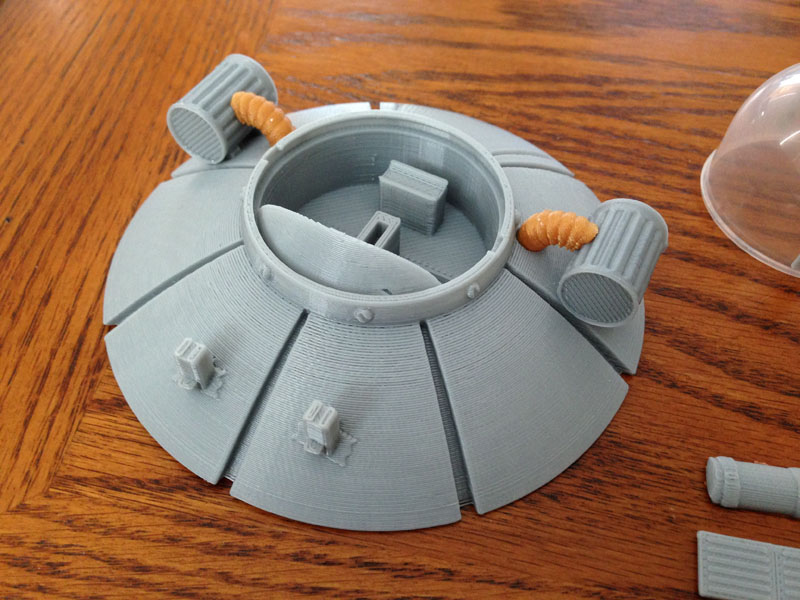
I would break the interior out as a circular floor, and cut it out of the body, and then install it from below after the bubble capsule is in place. The bottom would glue to the body, and then the oval under-piece will cover the hole. The result will be visually identical, but far easier to assemble.
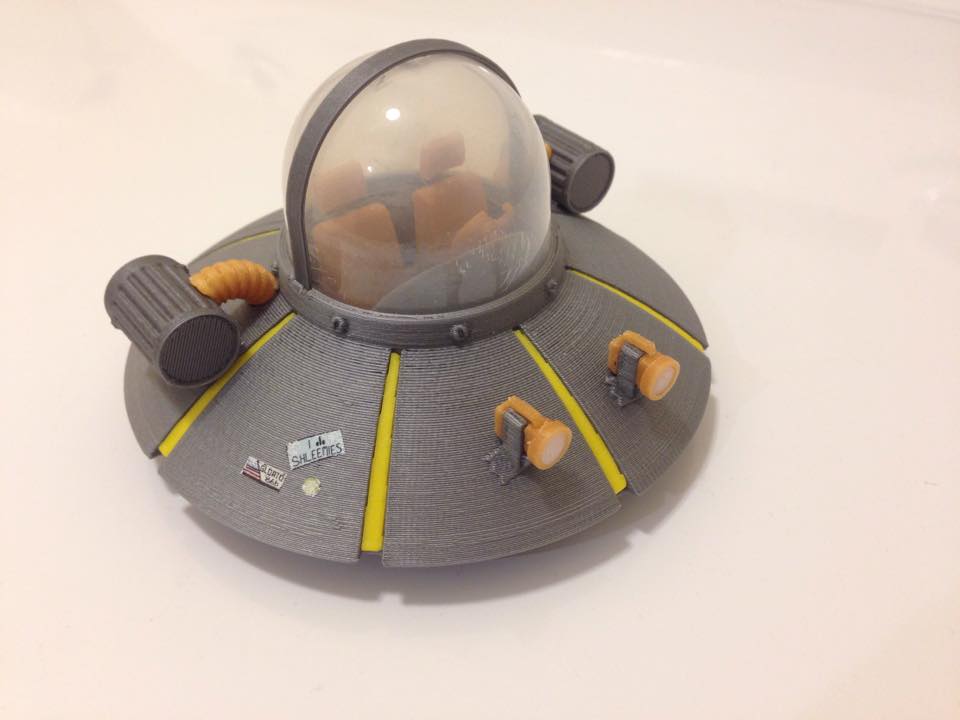
UPDATE: Nov 23, 2015 – The Finished Ship
Here is a photo of the finished ship. I also created and added waterslide decals of the “bumper stickers” on the side of the ship.
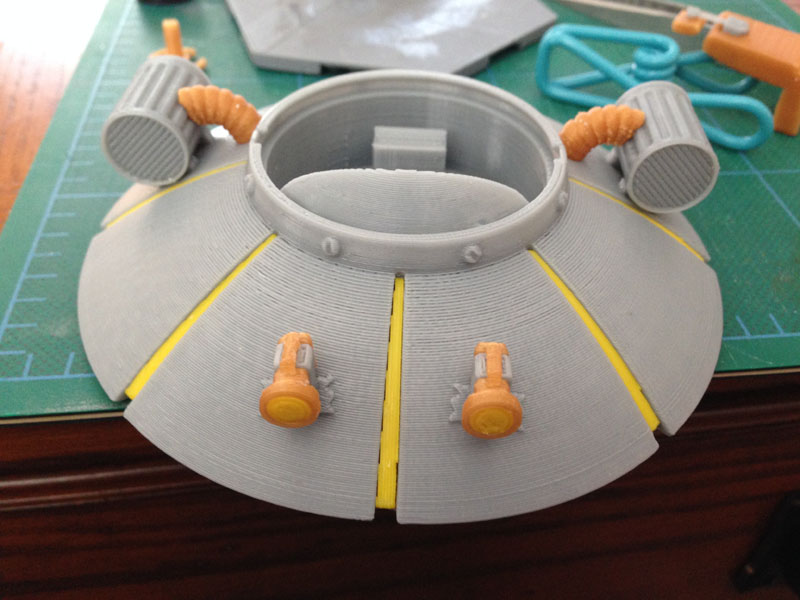
This version has the separate cockpit which allows for easier assembly.
Sooooo… interesting story:
This whole project was suggested to me by my friend Bil Mauritzen. When I sent him a copy, he showed photos of it to the co-creator of “Rick & Morty”, Justin Roiland who reportedly said it was the best bleeping thing he’d seen.
I sent a second one to Bil, who will be giving it to Justin.
So that happened.
Hi my Name is Marcel and i am a Big Fan of Rick and Morty.The Ship looks more than great it is amazing and the details are very cool.i search a long time for a ship that looks like this but it is very hard to find.can i buy one them?
Kind regards
Marcel
Since this is not my own intellectual property, I cannot sell it. If the creators of the show give me permission, I might be able to. (I sent one to a friend who knows them, and he was supposed to give them one because one of the creators said it was one of the coolest things he ever saw.) Still, even if THEY approve, that doesn’t mean I can, since the company that owns the rights would also have to give me permission.
Let’s see how it plays out.