
I’m usually working on a half-dozen projects at once, but today I decided I’m ready to begin printing my next project. I’ll print it in pieces and see if anyone can guess what it will be when done.
Here’s the first print. (I’m using red only because I have a LOT of it – Octave sent me a free reel of it when I complained about their plastic wrap fusing to the filament in my first reel. They not only refunded me 1/3 of the reel (I wasted about 1/8 of the reel unwrapping it cleanly) but they sent me a free new reel of red. (Thank you, Octave. That was good customer service!)
So here is the first print:
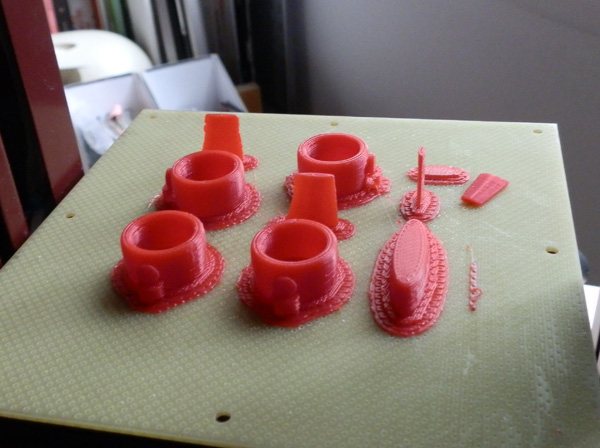
(One object did not fall over, I had removed it from the rafting before I thought to grab a pic.)
Any guesses?
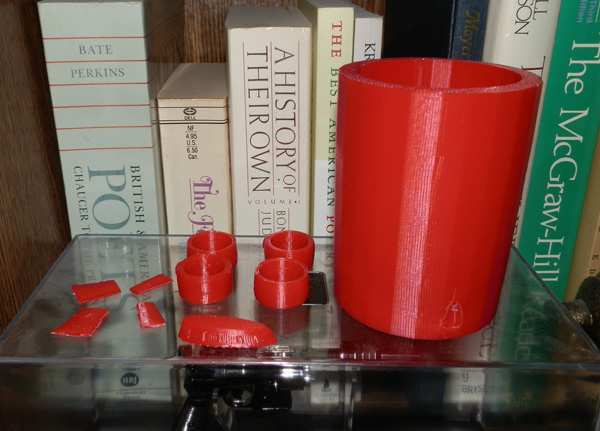
Here are the parts together with one of four main sections:
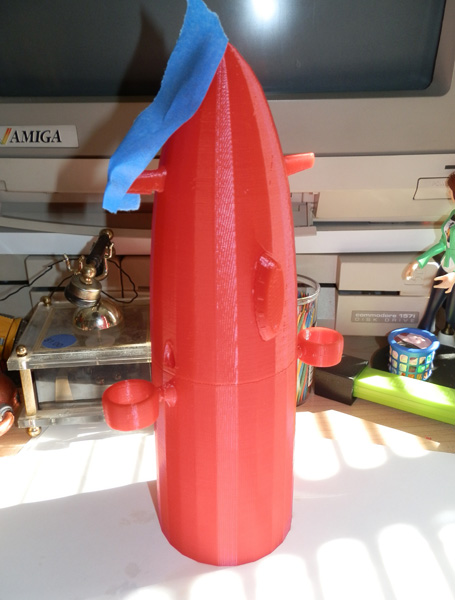
I printed deep into the night and printed the four main sections. I didn’t take photos of the whole set of pieces, sadly. Forgot. But here you can see the front section glued together, being held together by masking tape until the glue (a clear binary epoxy resin) sets.
I had to redesign the elevator flaps because I had the base of them as part of the ship body and that was causing the printing of a lot of unnecessary scaffolding. Instead I made insets for them in the body and put the base on the elevator itself. Since they do not rotate for real, this works. Later, I will have to redesign this of I want them to actually rotate.
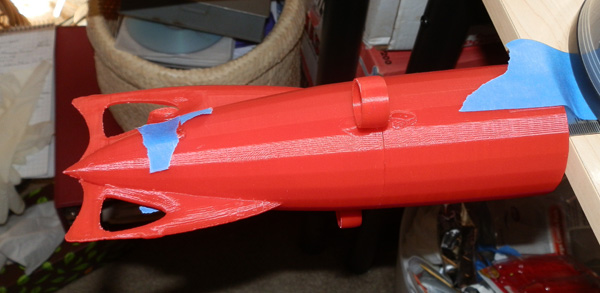
And here is the rear section being held for epoxy setting:
I have modeled a display base, but have not yet printed it. I’m currently printing something for a friend for his birthday. Then I’ll print the display stand while the two halves are drying.
And here it is with the display base I designed and printed.
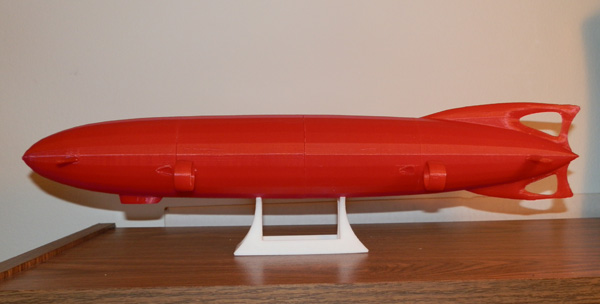
The ship measures about 16.5 inches right now, and cost a total of 180 grams of plastic, which from a 1000g reel of Octave red, cost about $5.94. Not bad. It took about 14 hours, 20 minutes total print time, not including setup, etc. Printed at .2mm layers, in Normal mode.
Each of the four body sections is printed hollow, rather than use filler, and has a wall of about .8cm. It is glued together with clear binary epoxy for now, but eventually will have connection pegs for strength and alignment. I will be adding some necessary body detail.
If I cut the body up into even more segments I could print it at double this height. Since it is not quite 2.5″ in diameter, doubling the size would keep it in the Afinia 5″ print area, and cutting the body up will make pieces short enough to print.
Doubling the size, of course, quadruples the plastic used, so it would cost about $24 to print, using 3/4 of a reel of Value Line silver.
Update: Today I got another reel of natural white Premium Afinia filament, and a reel of silver Value Line Afinia filament. I’m having a bit of an issue with the silver reel because the walls of the reel aren’t quite tall enough to contain the filament for the first quarter-inch or so of printing, so the filament spills out over, and that can cause snags and breakages if the filament is not wheeling off nicely. I may have to cut a cardboard wall and tape it to the wall of this reel in order to get it to not snag.
I was a bit worried about the silver filament. It has a metallic sheen to it as expected, but not too much. When I extruded it for the first time, the line seemed unsmooth. Kind of chunky. Unlike most other filaments that extrude very smoothly.
But I printed the smaller bits of my Airship One in silver to test it out. I have to say I’m not unpleased with the silver filament now that I’ve seen it on parts.
Here they are, hot off the printer:
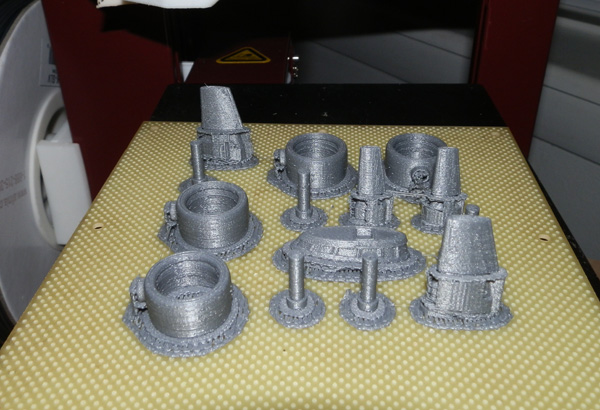
This lot may look familiar. You can see them higher up in this post in red. With some changes. I’ve remodeled some of the parts for the second version of the airship:
- The elevators are taller, because they now incorporate the stub flange that attaches to the ship’s sides. Instead of printing those struts on the body (which requires scaffolding) I now print a hole in the body and these should fit in snugly, meaning I won’t have to guess at alignment when I assemble.
- The engines now have some extra scaffolding. This is because I drilled a hole in the engine housing for a peg.
- You can see five pegs (I printed one extra just in case) on the board. These will fit into the engines, through the body of the airship, so the engines will be able to tilt. The fit is a bit snug, but I think it’ll work. I may have to increase the size of the hole in the body, though. The engine hole is to be glued, so a tight fit is fine. It has, however, to rotate in the shaft hole of the body, so I’m printing a test part of just enough of the body to include the holes, to see how it fits.
- The Wheelhouse now has a square hole in it, and the windows are inset further. I noticed on my first (red) print the windows were too subtle. No more. And there is a square hole in the floor of the Wheelhouse. This is to accommodate a later-modeled landing wheel or some other landing gear. I added a hole in the rear lower dorsal fin too, for a rear landing wheel to be modeled/designed later.
- You can’t see it because I haven’t printed it yet, but I increased the scale of the detail on the air intakes, because the detail was getting lost in the print. Too fine for the resolution of the printer. (More on that when I print those body sections.)
The “fabric” texture of the print in silver is much more noticeable than it was in red, or some other colors. I guess I’ll have to live with that. I did not print the pieces in .15mm, but .2, which is what I printed the red version in. Perhaps I’ll reprint these in .15 to see if the texture is improved.
It’ll do for my purposes, though.
Next up: I have to model some detail on the ship, including top-mounted intakes, windows along the bottom of the body where passengers might look out, and other details that may be common on airships. I have a great book on the Hindenburg which also features other airships too. I’ll be using those as reference to add in some detail.
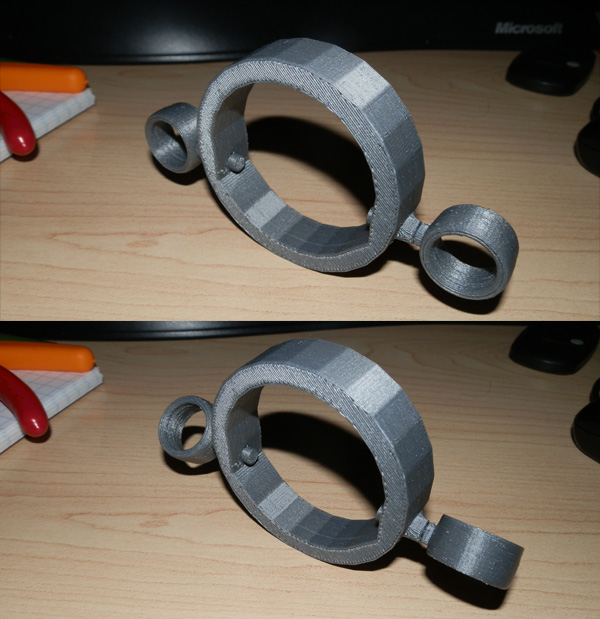
Update 2: This is the test-ring of the ship with the engine shaft holes modeled in, cleared of support, the peg inserted through the body and into the engines. The fit is snug, but because of the ringed nature, it grips fairly well without glue, and rotates nicely, and not at all loosely.
Update: July 16
I modeled connecting pegs and holes for the body pieces so they will fit together nicely.
I added housings to the top of the body, some ballast venting holes to the front, and some passenger windows in the body, and set out to print.
The silver Afinia Value Line filament has an issue: It’s a lot of filament. 1Kg, or 2.2 lbs. The Octave is the same weight, but it comes on a fat, stubby spool. The Afinia comes on a cardboard spool shaped much like their Premium filament spools.
The problem is that the filament, when it’s almost all there, slips over the cardboard walls of the spool, strangling itself in the reel holder, meaning it can halt printing because the printer is not being fed smoothly.
What’s weird, though, is that I was printing the full Body Section 2 (the small ring of which you see above.) Even though for the first centimeter the filament was feeding fine, the print is much rougher than the ring you see up there. I’m not sure if it was just because the printer was showing signs of the strangulation at the reel holder early, or whether the silver is just inconsistent in its printing cleanliness. It is a chunky filament.
Will have to find out by printing this piece again tomorrow night. (I wish it were the weekend…)
Update – July 17
It took about 3 hours and 20 minutes to print, but Section 2 of the body is done. I remodeled it to feature four peg holes, with printed pegs to snap in the holes. This will allow me to build the body without glue at all. The pegs snap in rather firmly.
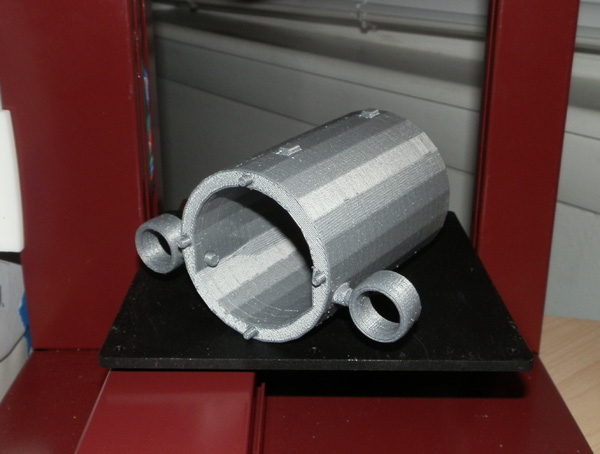
This also shows how the engines fit. There is now a hole in each side of the engine flange, and a peg that snaps into a hole in the engines. These are in nicely, and can rotate freely, but not loosely. Exactly what I wanted.
I also modeled air intakes at the top. Real airships had these.
You can see that the silver sheen is going to work rather nicely for the finished model.
Pingback: Airship One – My First Airship Ride in 3D Printing | Huxter's Words