
One thing I’ve always wanted was a Blade Runner blaster, one of the most iconic weapons in movie history, next to the Light Saber. This past year, thanks to judicious sales of some of my collectibles, I was able to buy a very very nice one for under $300.00, which is low for this item. Some models can cost over a thousand, depending on the day, and how many eBay buyers are interested.
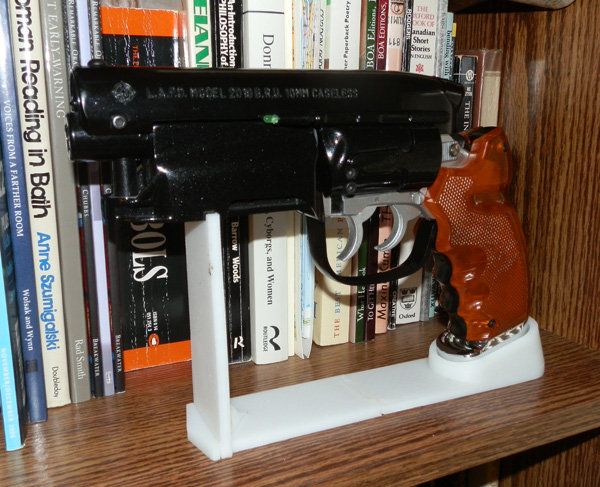
Known as the Off-World M2019 Blaster, it’s a lot of die-cast metal and plastic, has lots of moving parts, including an opening cylinder which spins, and can be loaded with fake bullets, and a working bolt. It has clear amber grips, and four LEDs that light up under the barrel housing.
It came with a silver plastic handle frame, trigger guard and pommel. I bought a custom-made die-cast metal replacement set on eBay, and what you see in this picture is my pistol, upgraded with that kit. What it’s on is the display stand I’m currently designing and printing with my Afinia H printer.
What you see there is the bare frame, which is modeled in 3 pieces (because the Afinia printer only does 5x5x5 volume, and the bottom strip is about 8 inches long or more. I printed it in two parts with a dovetail connector which snaps nicely into place.
The pommel (both the original plastic one and this gorgeous polished silver one) fits into a cuff at the back of the stand. Then a post rises up to cradle the housing under the barrel.
However, that’s very bare-bones indeed. It serves the purpose, but it’s not overly attractive.
So I opted to design a nice, iconic base for the stand, and I decided to base it on the tiles used in Deckard’s apartment.
Deckard’s apartment was shot in the Ennis House, built by Frank Lloyd Write in 1924 for Charles and Mabel Ennis.
This house has been used in dozens of films due to its iconic Mayan-inspired tile design.
You can see Deckard in his apartment here, the wall made entirely from these tiles.

So I put my M2019 blaster on my scanner and used the Maya measure tool to make various measurements, then modeled my 3D model to those specs.
I printed test pieces in ugly neon yellow (because I had a lot of this yellow and no desire to use it on anything finished) to test the fit, and once I had the fit right I simply had to design the aesthetic components.
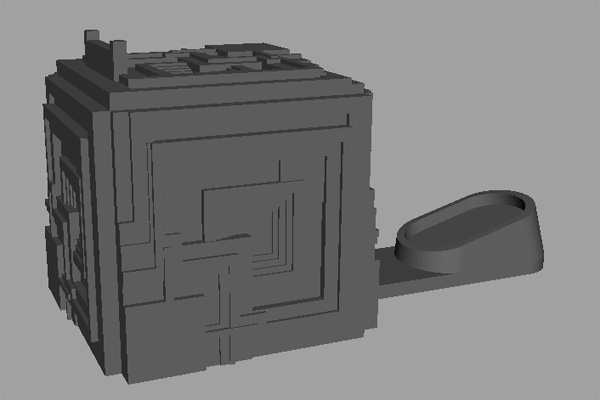
What you see above is the structure of the stand that will fit under the block of tiles, and is really all you need for the display stand if you like minimalism. However, I’m going ahead with my block design, which will have a cut in the block to fit the trigger guard, which will also lend more stability. It’s unlikely this stand will fall over when I’m done, especially if I proceed with my plan to model it as a hollow block I can fill with pellets or BBs for weight.
Then I’ll put felt under it for a non-slip, solid standing.
Modeling it, however, proved to have some issues, as I modeled the back of the cuff a bit too close to the inner edge, and the printer didn’t like it, as you can see here.
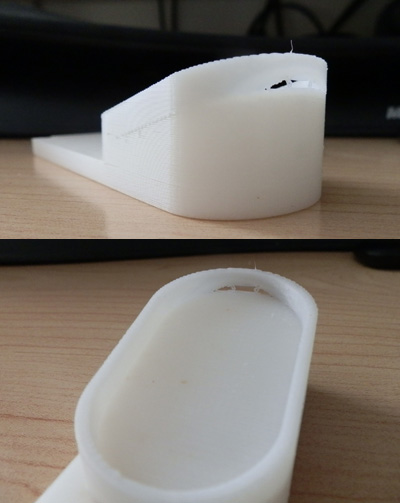
So I moved some vertices around and reprinted it, and the one above is the one that I fixed, and is nice and stable. Perfect fit too.