After printing the first version of the Space:1999 Stun Gun I noticed a few issues.
First, the front bar was too short. The silver part should dip down to about even with the bottom of the hand grip. The black pommel should protrude below.
There were other issues including the switch length, the panels for KILL and STUN which I decided to do using inlaid text on red and green plates which has the letter spaces cut out to allow white printed letters to be put in place.
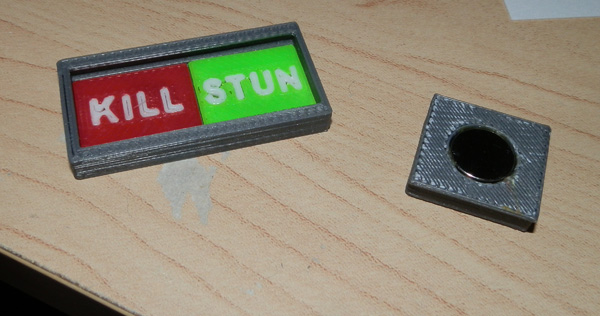
Here is the switch assembly in parts:
The letters do this odd thing whenever my Afinia tries to print small solids. If they get too small, the Afinia seems to print the outer edges without trying to fill the interior until the letters get big enough and then they print rather better.
But these letters are TINY! And here they are glued into their slots.
The switch, seen here upside down, has a cup modeled in it to hold a rare earth magnet that’s about .95cm in diameter.
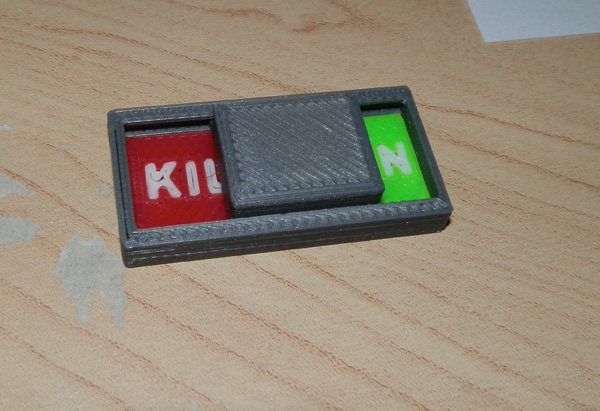
Here, the magnet is in place, resting on the two colored panels, sealed in by the switch’s rails.
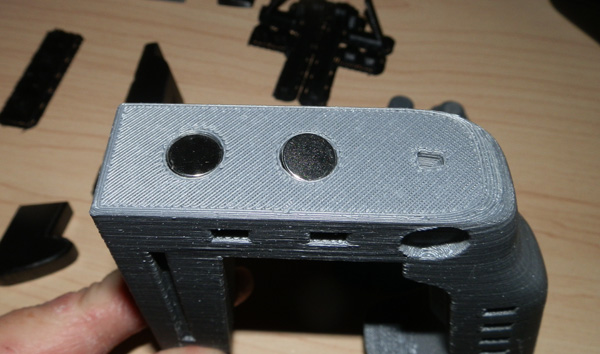
Then I put two more rare earth magnets in the main gun body, one underneath the “KILL” and one underneath the “STUN” panels.
I then glued the switch housing in place on the top of the gun, sealing the magnets in place. Then I glued a magnet into the switch’s slot and shoved the switch into the rails of the switch housing.
When fully assembled, the switch does a very strong “snap” from one setting to the other because the magnet in the switch is very strongly attracted to the closest magnet to it, whether that be the one under KILL or the one under STUN.
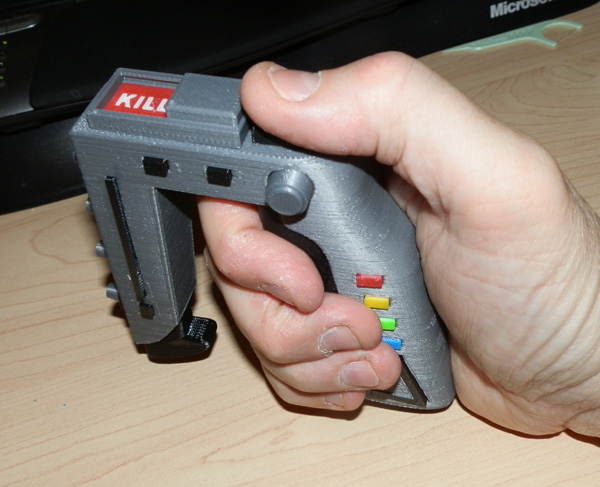
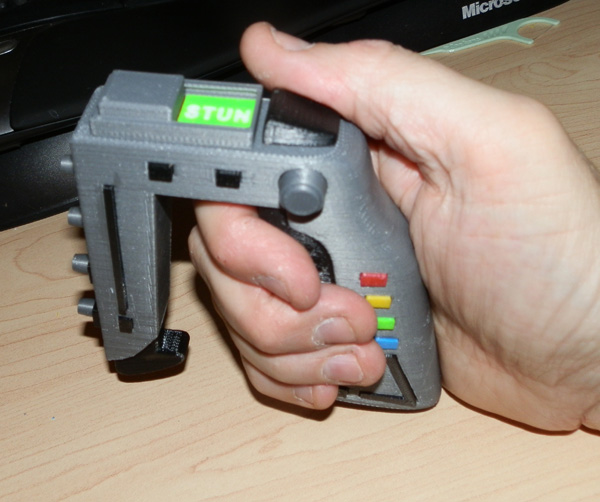
Here are some photos of the gun in my hand:
Here is a short, poorly-lit video I did to show off the gun and its functioning switch.
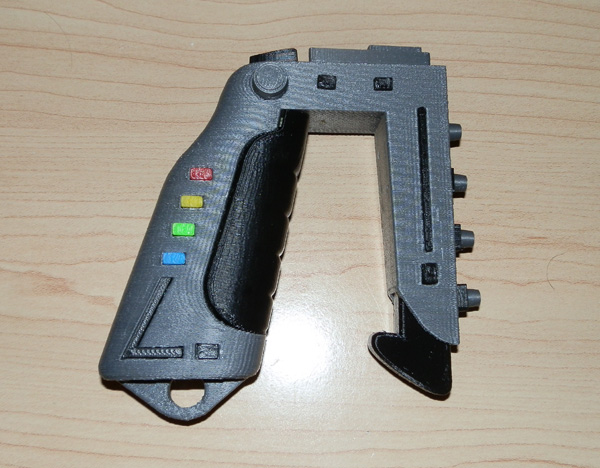
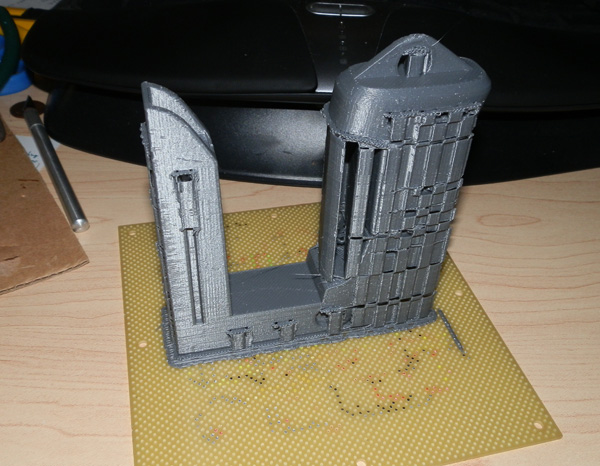
Here is a gun body hot off the printer:
Note that it prints a fair amount of scaffolding material up the sides. This is there to build support for roof sections of the small holes I use to inlay the various pips on the gun. In a future version, I will try to model those with 45 degree slanted roofs to avoid scaffolding altogether.
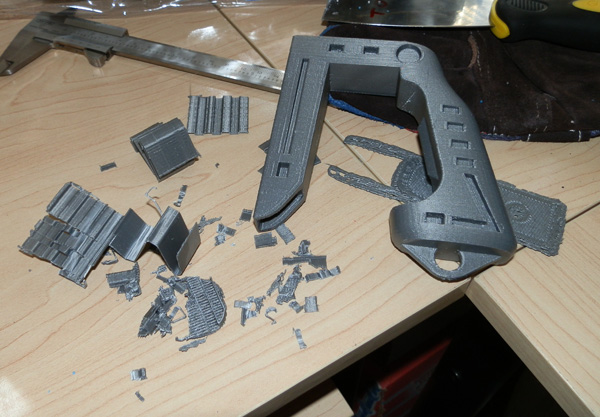
Here is some of the plastic I cleaned up:
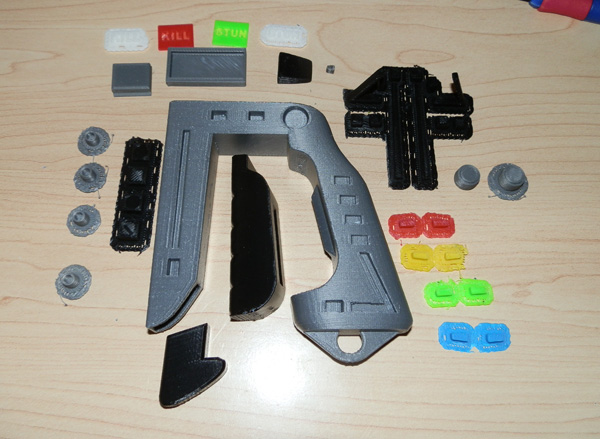
And here are all of the parts required to build one stun gun. If you count individual text letters, which I do, there are a total of 47 individual pieces, not including the 3 magnets I use to make the switch feel awesome to flip. (Some pieces are connected together in this picture by the rafting they are printed on. I did this to keep track of them. As the small black pips are very similar, I need the layout to remind me which is which.)
What Now?
This gun is still a work in progress. I am very happy with the results, but because I wasn’t 100% happy with the silver filament, I’m planning on trying one in gray, but I don’t have any gray at the moment. I will try some later.
But besides that, I intend to make a Commander’s Special, which is my own variant which will be printed in white, with most of the rest being the colors you see here, with perhaps the exception of the switch housing and maybe the switch. Since white and yellow won’t necessarily read, I may change yellow to orange for the orange pips.
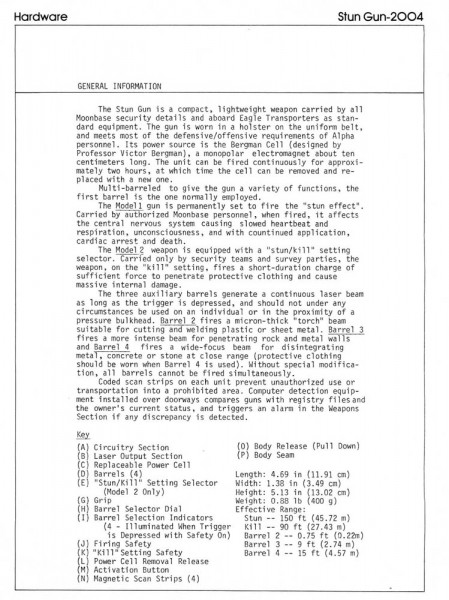
Also, one of the first things I get asked is “what’s that black thing in the bottom front.” I dont’ really know, but I always imagine it to be a removable battery or energy magazine. It’s never really referred to in the TV series. But if you bought the “Moonbase Alpha Technical Notebook” back in the 1970s (which I never did and always regretted not buying) it is revealed that this is in fact the Bergman Cell, a battery to power the gun.
I intend to further augment this model to allow the energy cell to be removed. It will be held in place by smaller rare earth magnets if I can arrange it.
I also intend to figure out a way to make the trigger work. That is, it will depress, probably using two more rare earth magnets, this time to repel each other, for a spring-like feel.
More on this if I ever get to it.
More on that when I do it.
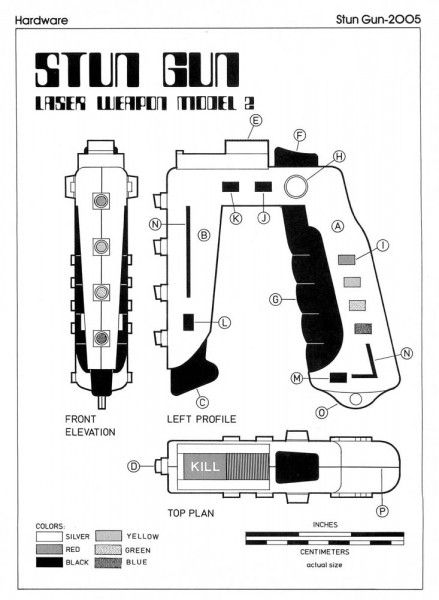
Oh, and here is a scan of the pages referring to the Stun Gun (Model 2) from the “Moonbase Alpha Technical Notebook”:

Are you intending on selling any of your works? I am a serious collector and your gun is pretty awesome representing the technology. I would love to purchase one. Please let me know. Thanks in advance.
Gordon
Hi, Gordon.
I may sell one or two. These things take a long time to print, so I’m not going to go into business selling them yet. But I wouldn’t mind selling one or two (just to recover filament cost) if there’s no time pressure. It takes 4 hours to print a body, 2 to print a handle, and the rest of the parts (each in its own color) take a day to print, swapping out filament, resetting the printer, etc.
So perhaps, just to make a bit of coin to buy filament I may be persuaded.
While not “finished replica” quality, these are sturdy and play nicely in the hand. The settings switch feels awesome, with the magnetic action!
Sean.
Can I have a go with it?
I have access to a 3D printer at work. I want to only print pieces from the gun itself for my 30-year model of the same design from the technical manual.
I really appreciate it. Is it in STL format?
The gun is made up of 47 individual parts, and each one is an STL file. Some parts are combined in a single STL file where convenient.
I can’t make it available online since it’s not my copyrighted design.
Sean.