
The yellow jetpack is wrapped in bubble wrap in three pieces: The main body, and two engine housings.
1. First, lay the jet pack on its back.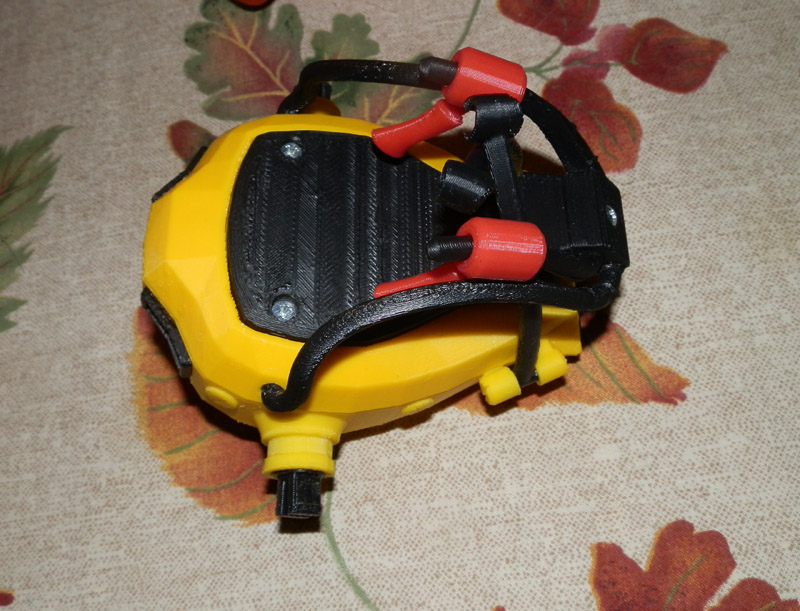
2. Swing down the control arms (with joysticks).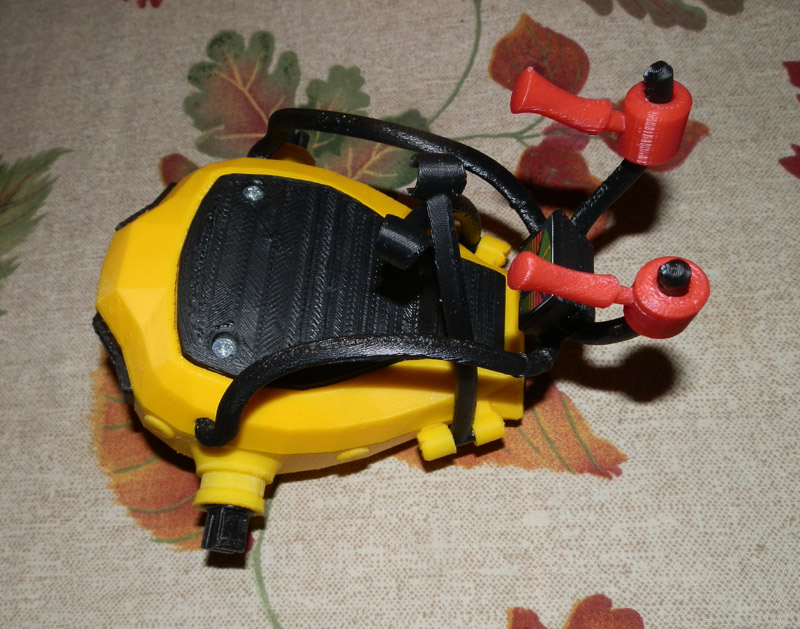
3. Lift main shoulder harness up, and open up the two under arms.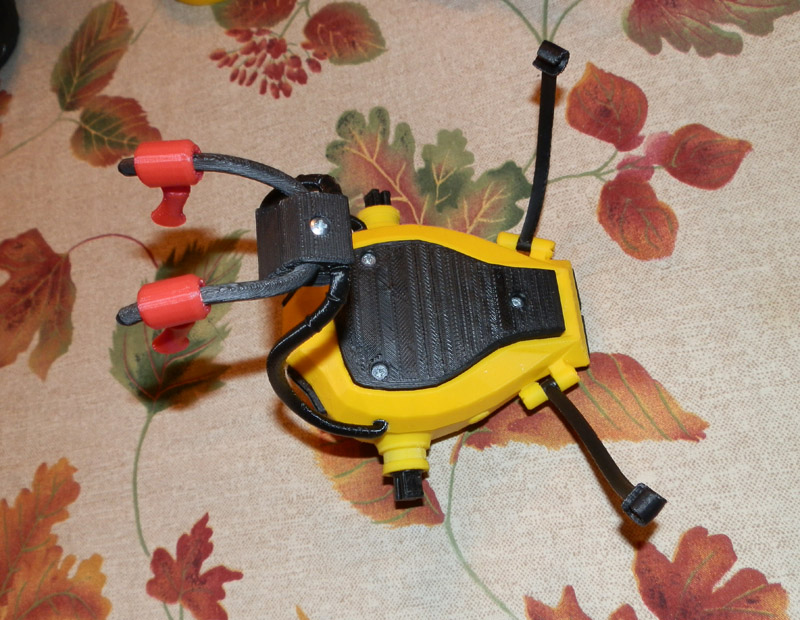
4. Placing GI Joe’s head in first, situate him so the shoulder harness fits snugly over his body.
5. Lower the harness, keeping the control arms straight out.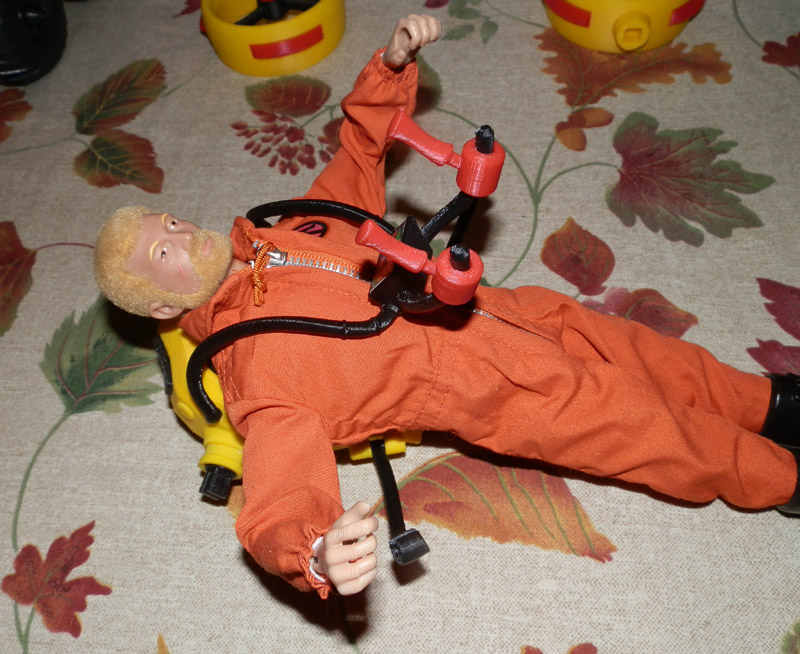
6. Snap one under arm cuff to the main harness. Be gentle. These fit between two rings on the main harness.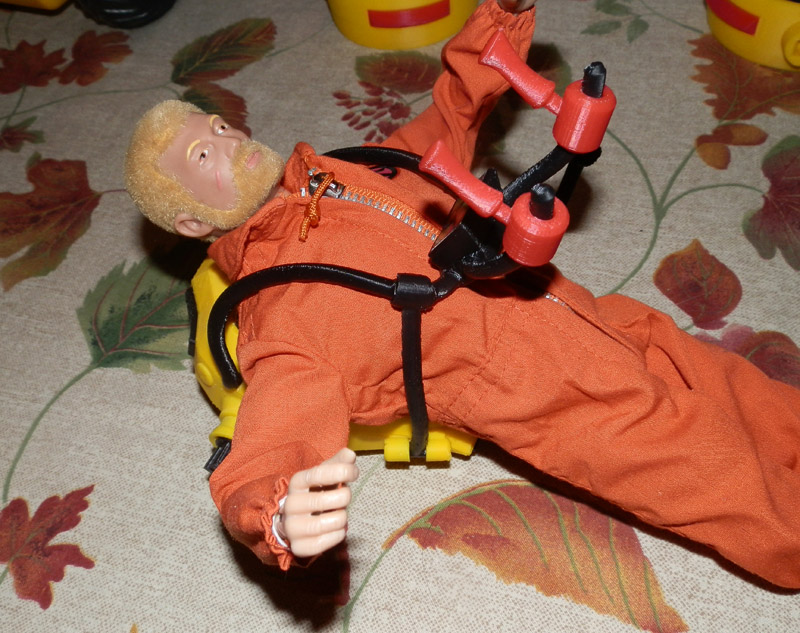
6. Snap the second under arm cuff to the main harness.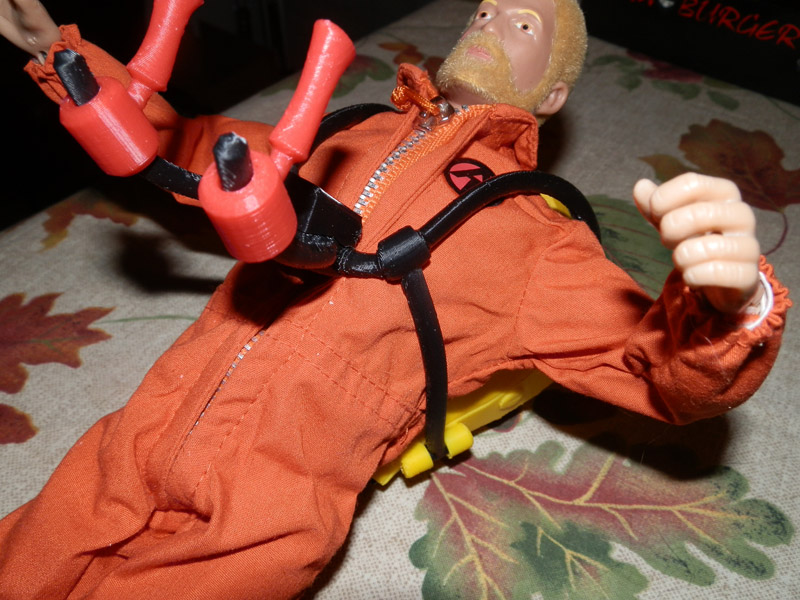
7. Place Joe’s hands on the joysticks. Prying the fingers open is better than forcing it, because the joysticks or the control arms can break.
8. Put Joe in the figure stand. The two metal fingers can be pulled open to fit him in. The metal stand fingers slide down into the white tubular vertical part of the stand. (This is to make sure he doesn’t fall over while on display. GI Joes are famous for that.)
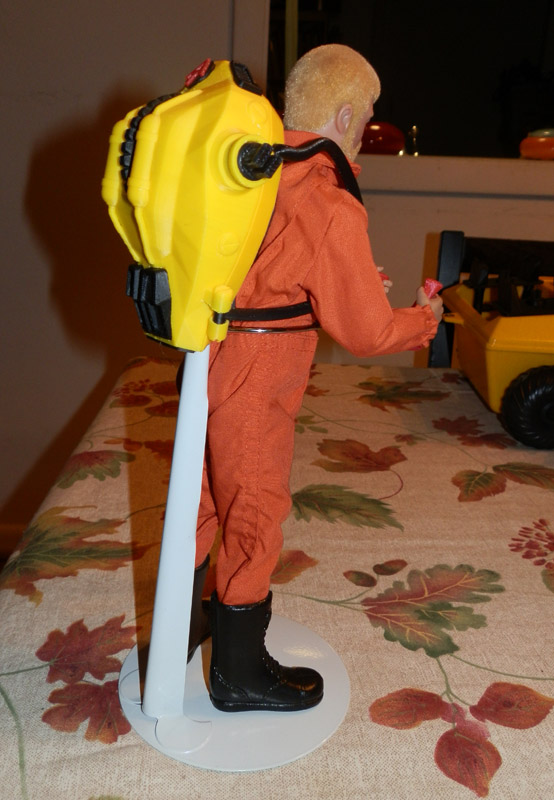
9. Snap one engine housing into the engine shaft. Note: The red engine hub should be facing up.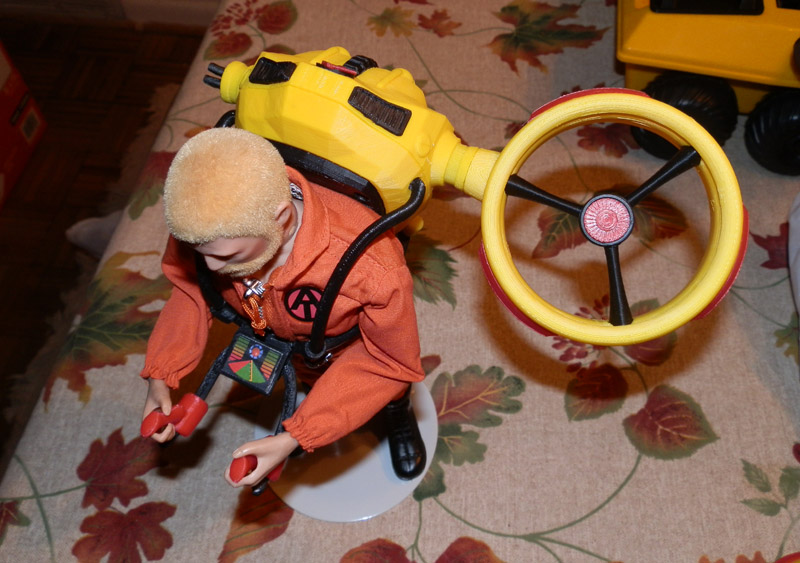
10. Then snap the other in so they align.
11. He’s ready for display!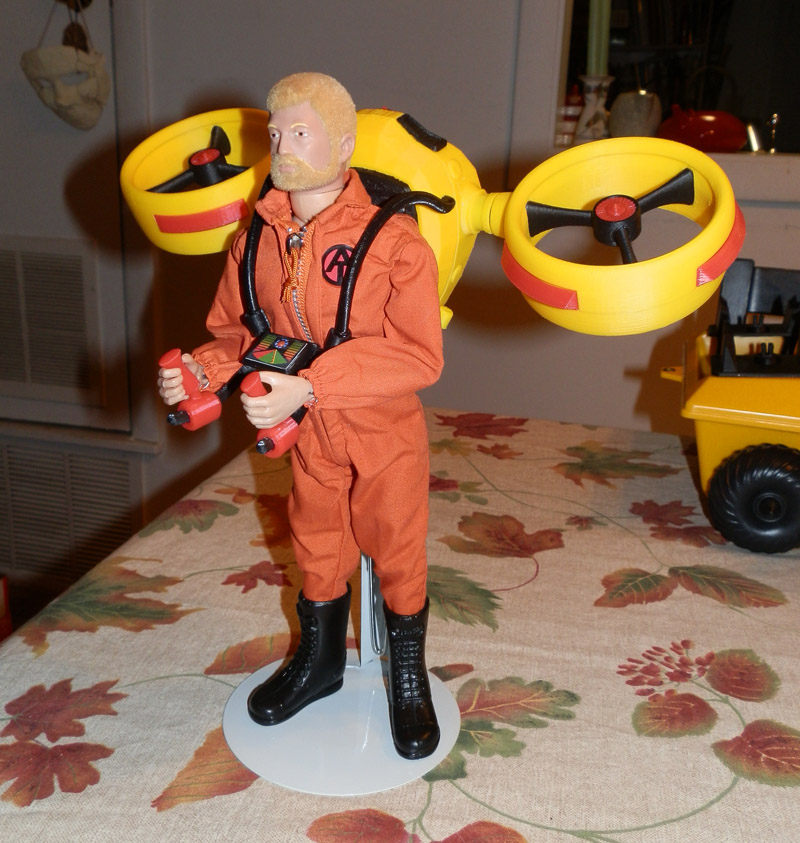
12. Snap one black engine housing to the engine shaft of the black jetpack, but sideways so the hub connects. Do the same for the other side. Place the black “stealth” version next to him. This shows off the way the jetpack compacts for storage and transport.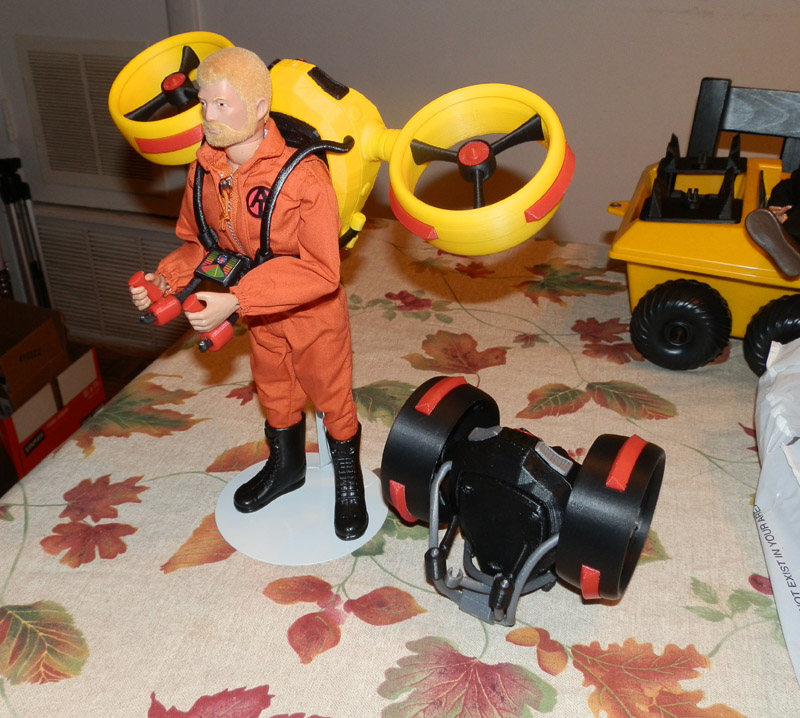
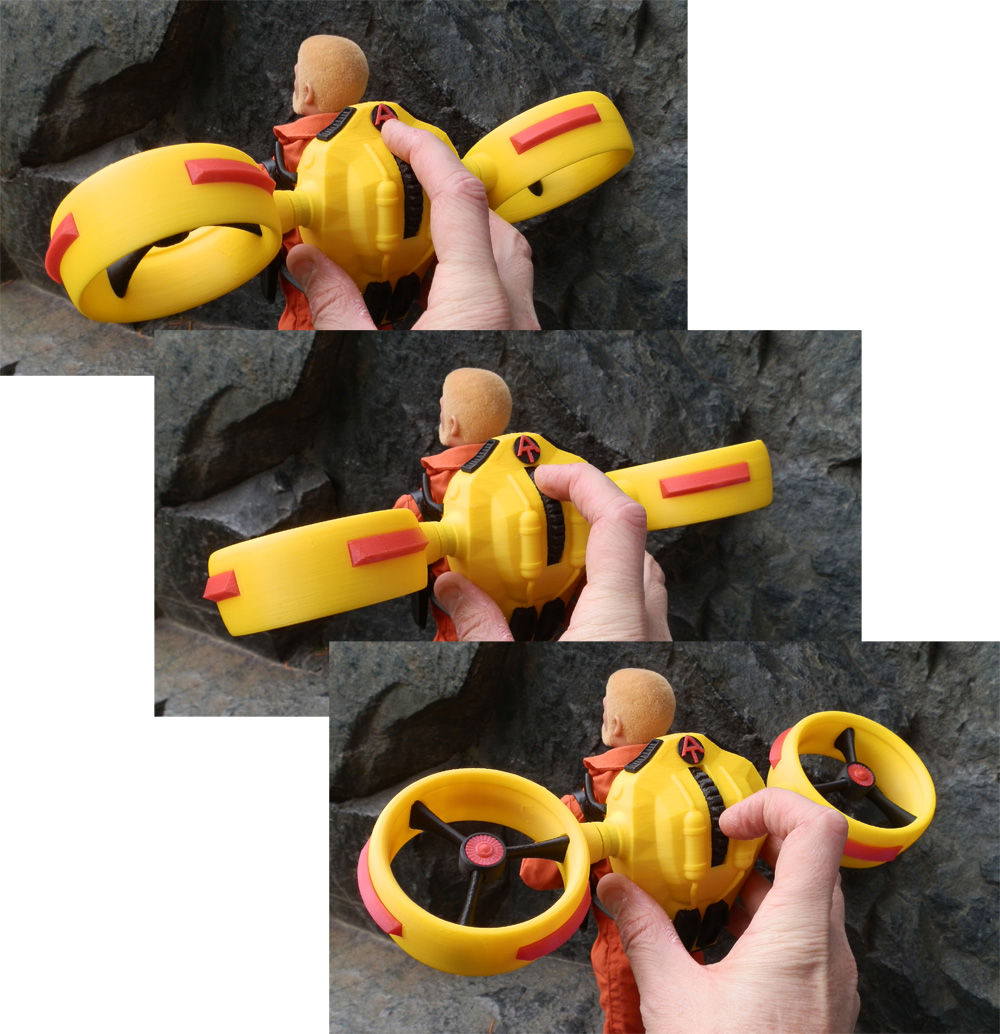
Note: The engines tilt using the thumbwheel on the back of the jetpack:
I’d love to have photos from the show showing your booth. If you take some, please let me know. I’d love to see them.
are these for sale yet
they look awesome
I don’t sell them, mainly because they can be delicate, and breakage is easy. And if I sent the designs to Shapeways, the final result would likely be nice and strong and look pretty good, but cost a hundred bucks or more. I wish I had a better answer.
dang well we can all dream
it would be an awesome set to have
how about casting it in resin