Someone gave me a great idea – model and 3D print an ornament for the Christmas Tree.
I thought this was an absolutely great idea. Since Christmas Tree ornaments are an important part of our family tradition, I thought I would make one this year, the first year I got my 3D printer, and every year after, to show the evolution of both my ability, and, I hope, the technology.
So for the first one, the subject matter seemed obvious!
The Afinia H 479 printer which had just finished printing a Santa hat!
So I started sketching, and then began modeling. Here is the 3D model:
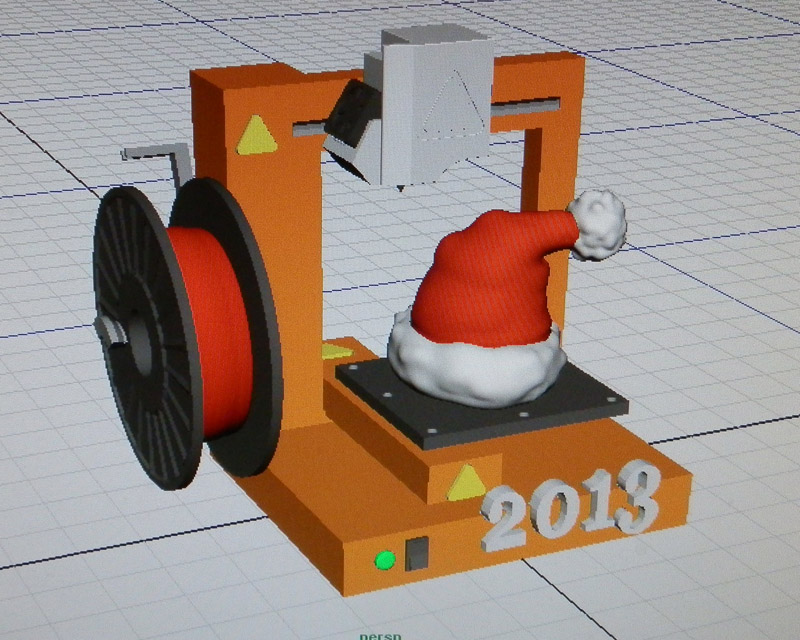
(Sorry. The photo is taken using a camera off my monitor because my PrntScrn button just chose this moment to stop working. I will require a reboot and I’m busy right now.)
The one issue I couldn’t really solve was the color of the printer. The real deal is kind of like primer, but glossy. It’s a maroon color. I have no filament that even comes close, so I chose orange to be a bright, happy color. I could also have used green, which would also hammer home the Christmas theme, but it seemed a bit much. Still, I may go with green.
Anyway, to test, I printed a prototype which, as usual, outlined several issues to fix.
You can see here some of the issues, but there are others you can’t see as easily. Note the separated sections of the text: “2013”. I have to thicken the thin lines because the printer has a minimum size tolerance for area.
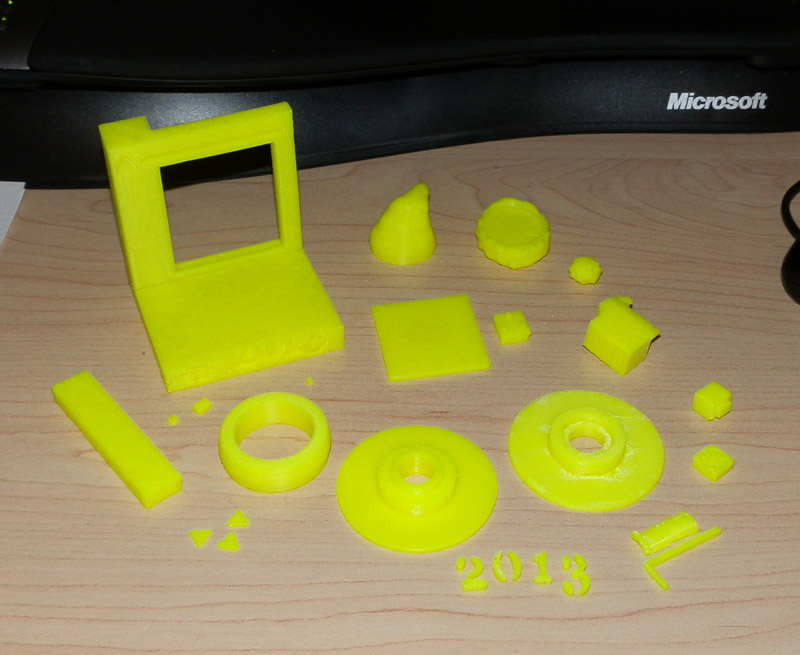
Also easily seen here is the broken spool holder. The shaft is too thin.
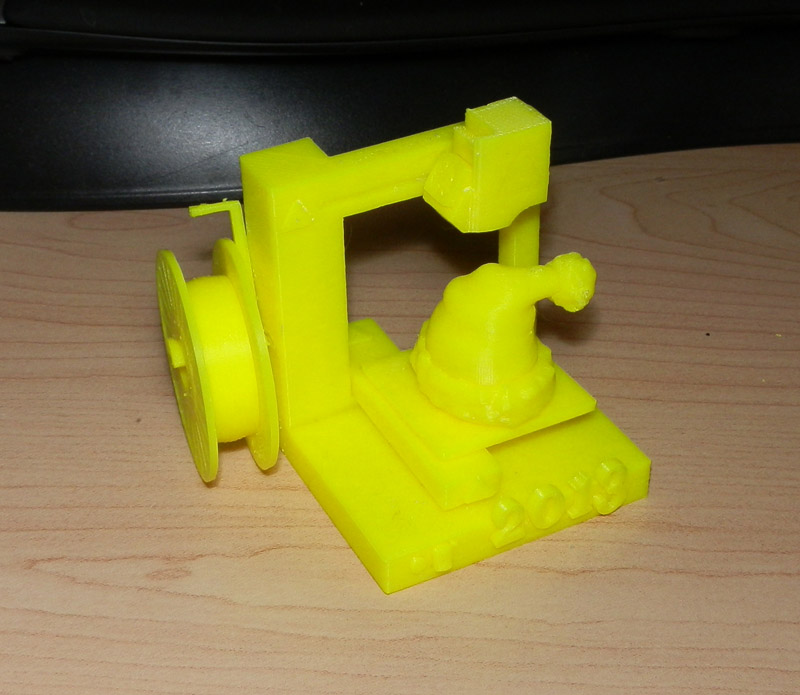
After fixing those issues and re-printing some parts, here is the first assembled (day-glo yellow) prototype:
There is a hole for a screw eye, which may be too small, but that’s easily fixed too.
Note: One reason to print test prints is to make sure everything fits. It’s only theoretical in the model, you have to print it to see. This pointed out several issues, and one was the height. The printer is too short in this test print. Fixing it for the real print.
Here are the black parts:
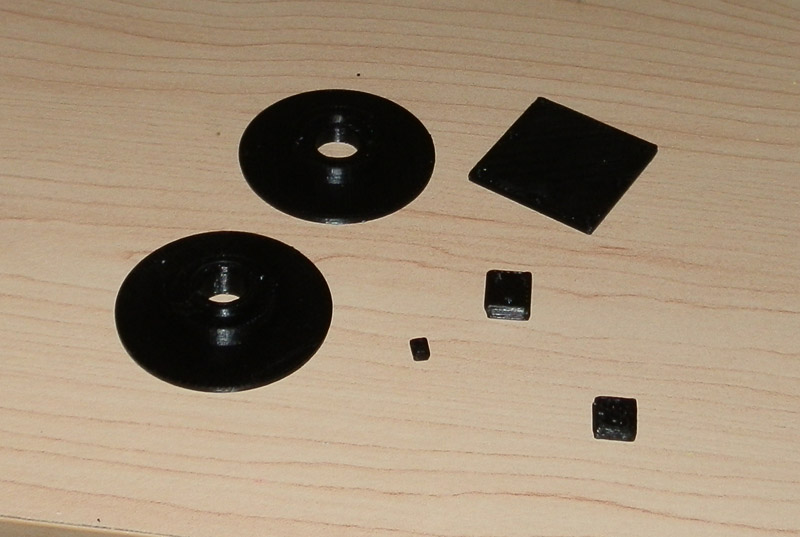
- Two spool halves
- The Initialize switch
- The print bed
- The print bed heater
- The print head fan
Here are the white parts:
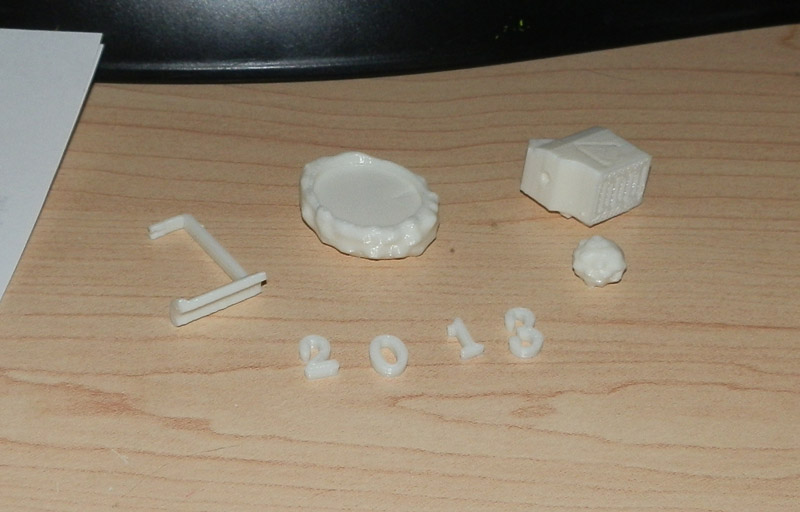
- Spool Holder
- Hat Fringe
- Print Head
- Hat Tassle
- 2013 Year
And the red parts:
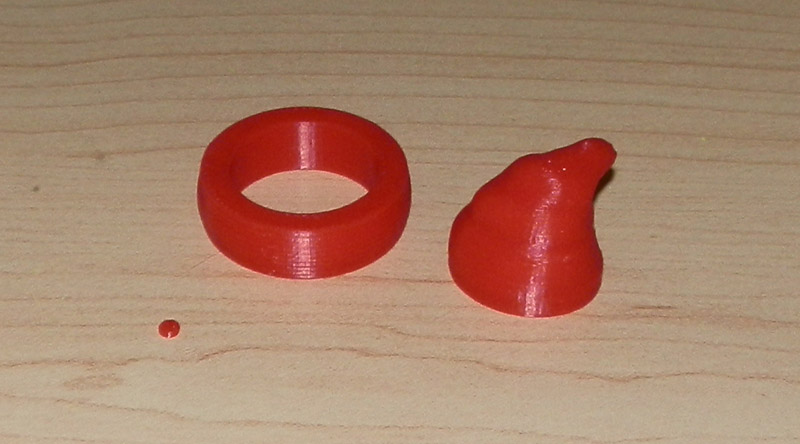
- Red LED (in case I want it. I am also printing a green one. The LED flashes red and green on the printer.)
- Reel of red filament
- Santa hat
And the final parts, in day-glo yellow and silver:
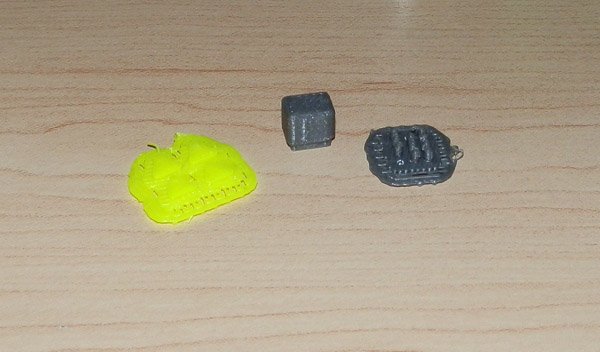
- Warning labels
- Z-Axis Motor
- Nozzles
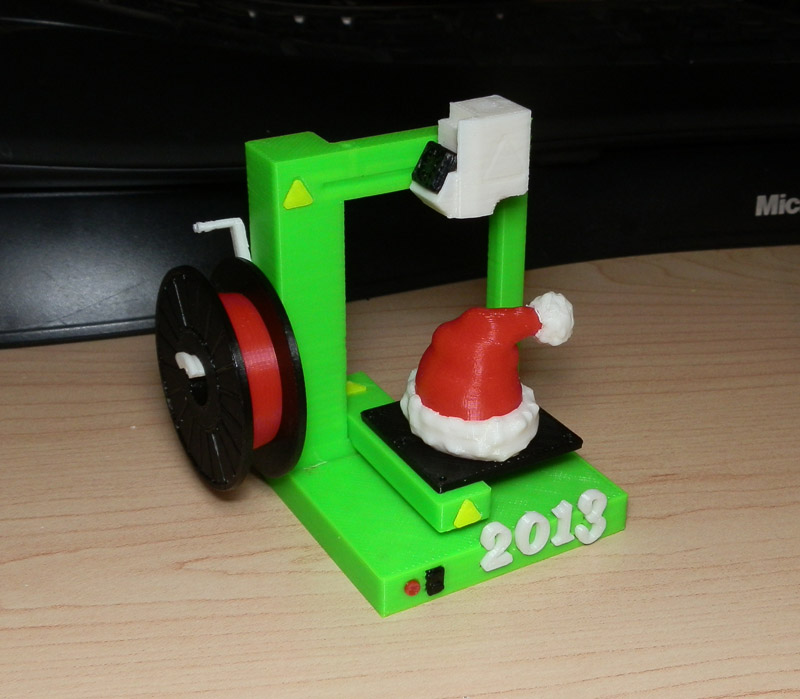
And here’s the finished product!