
Last year it was announced that WETA, who made all of the awesome designs for the Lord of the Rings and Hobbit movies, among other accomplishments, would be reviving the iconic TV series Thunderbirds, created by Gerry and Sylvia Anderson in 1964. The new series is going to be named after the first of two feature films the couple also made back in the day: Thunderbirds Are Go.
The first big teaser image from the show is the CGI model of the updated Thunderbird 1, seen here:
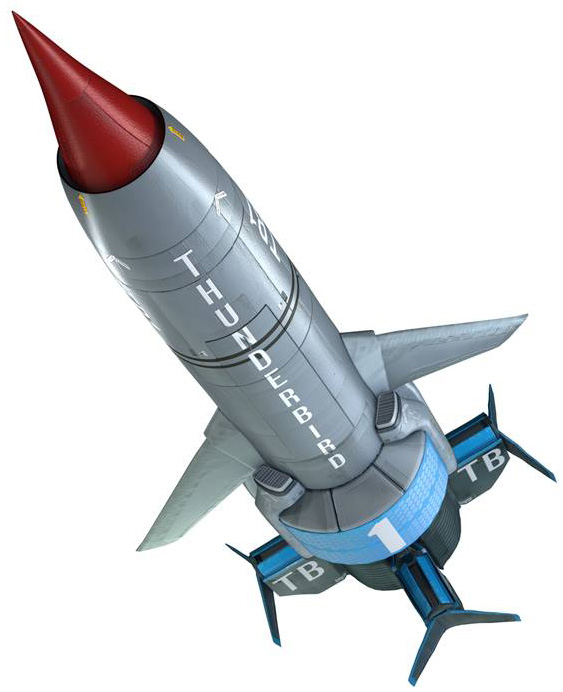
It was soon followed by this image, almost the same, of Thunderbird 1 (TB1) flying inverted over the Hollywood sign:

So I set out to model this and 3D print it using my Afinia H479 printer. (And my Afinia H480.)
Luckily, WETA has been touring around the toy and merchandising conventions with a large 10 foot physical model of the ship too, and some photos gave me more information about shape and proportion, as well as detail.
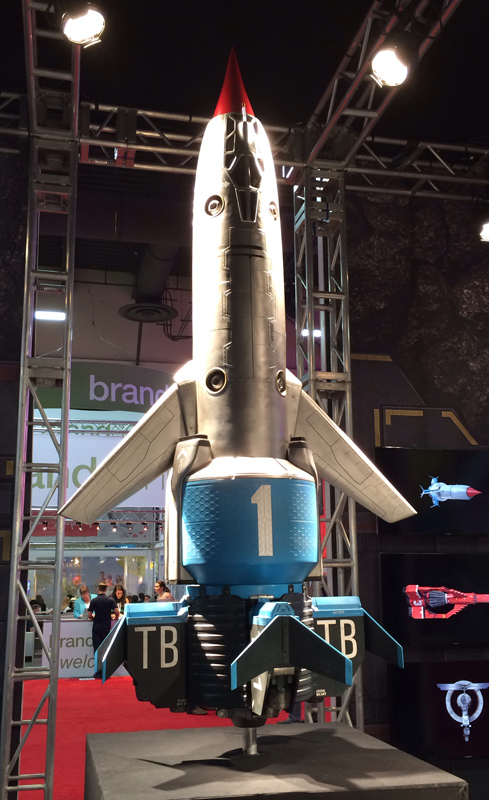
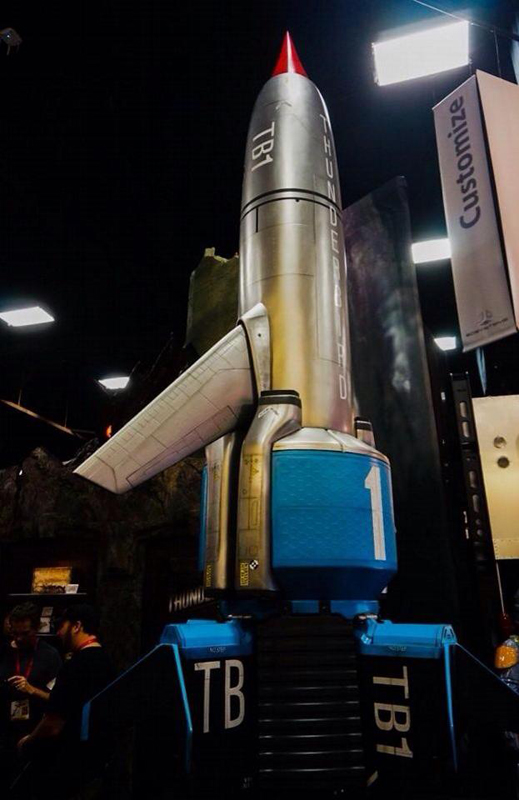
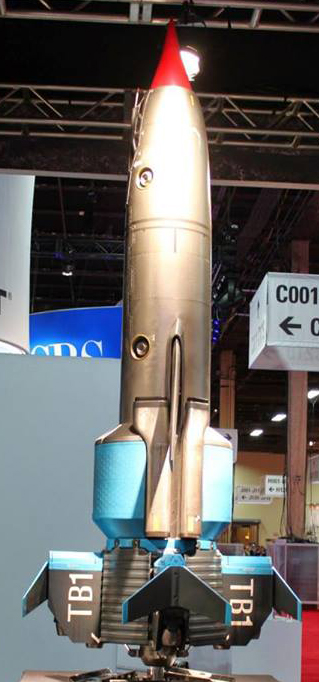
And of further help, a friend of mine, Barry Kay, took some very nice high-rez close-up detail shots from various angles all around the model, which I used to work out a lot of the detail. (I may post those later.)
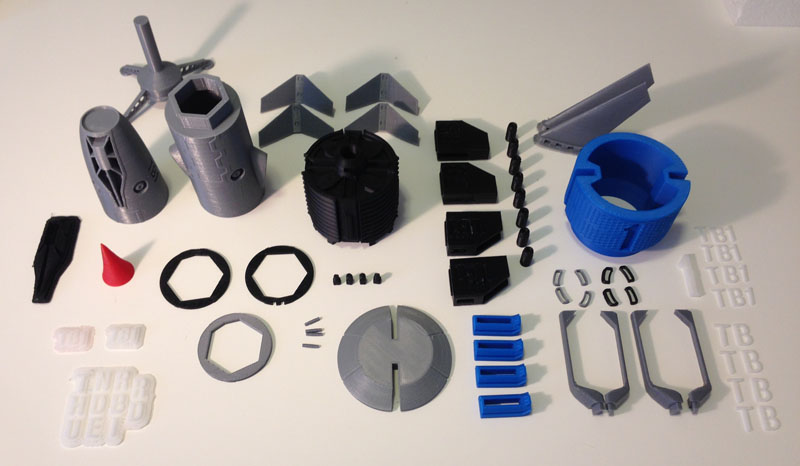
The Parts
Here is a photo of all of the parts that make up this model. Note that there are 98 individual parts, including a display stand.
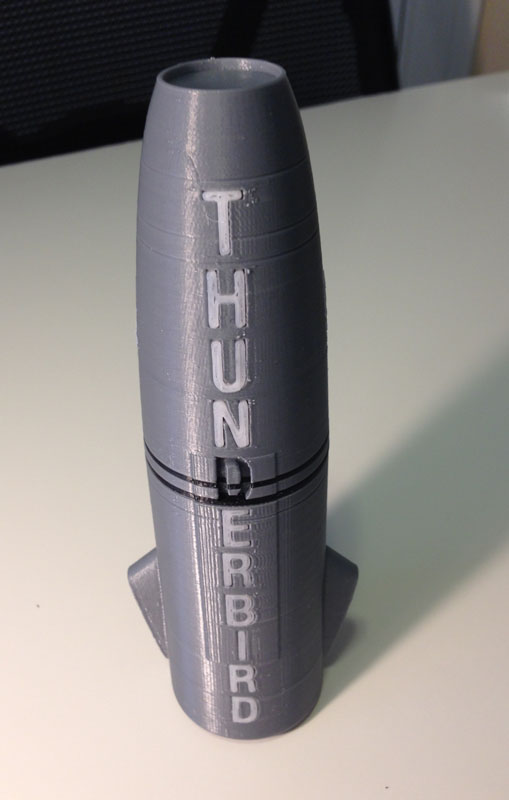
The Main Body
The main body tube is made up of five separate parts. These parts comprise the main tube in silver, and two stripes in black mid-body.
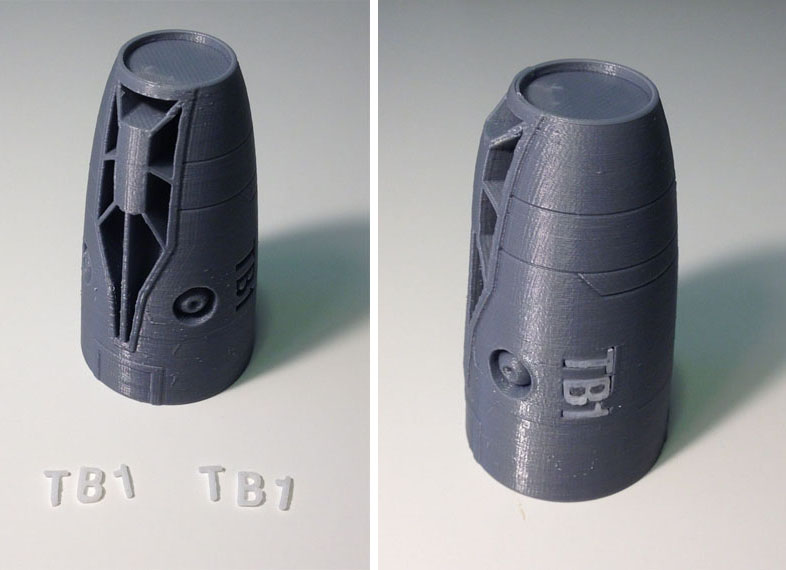
Here, the top section has two underjets, and cutouts for the cockpit windows and body text which will inlay as white pieces.
Here the side text is inlaid, so that the TB1 reads upright from either side of the body (only one side shown here.)
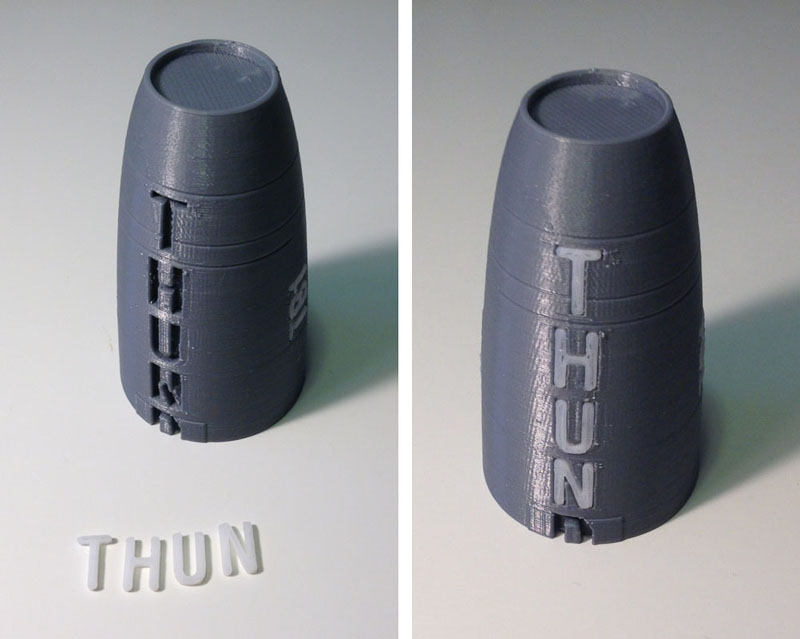
Then the topside of the body, which has the word THUNDERBIRD going down its entire length, is inserted, or at least the first few letters that are printed on this top section.
Then I do the same for the bottom body tube section:
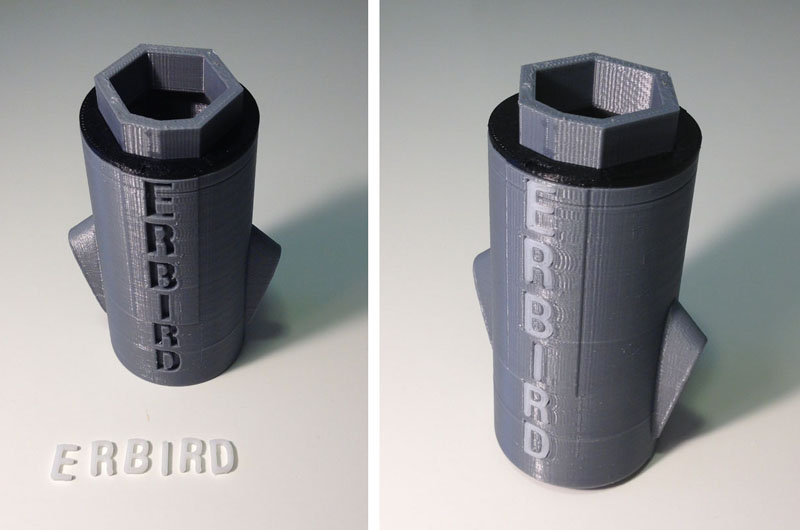
Next I attach the five main section pieces including the sandwiched black/silver/black rings, which leaves a hole for the letter D:
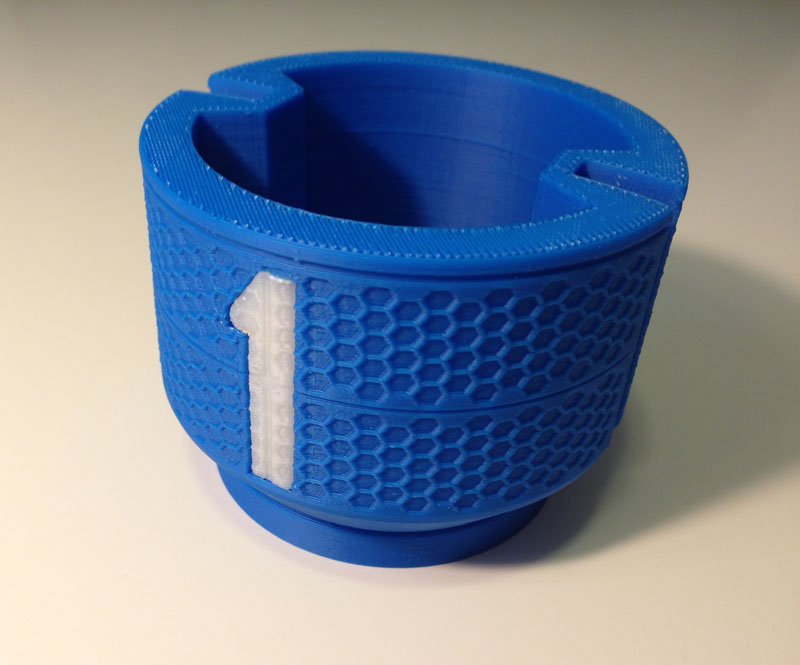
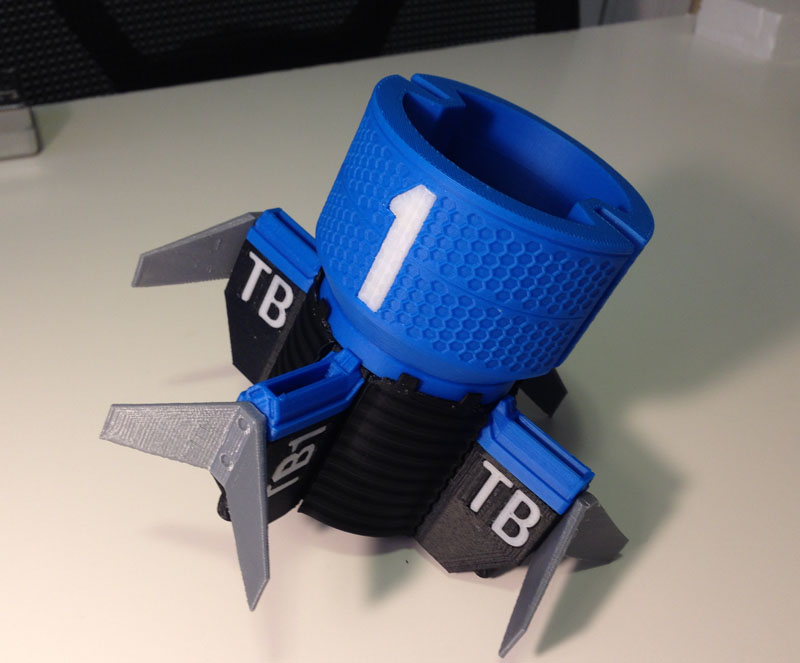
The Engine Section
The blue section of the body, if you look closely, is honeycombed with hexagons. This was the most difficult part of this model to make, but it was oh-so-satisfying when it printed so nicely. I cut the large number 1 from it and made that an inlaid piece, but with the honeycombing intact.
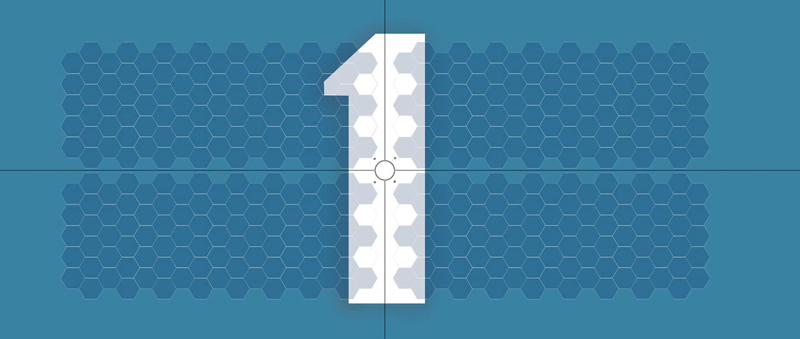
Here is an image someone posted of a texture used on this part of the body:
Here, I attach the large dark part, which looks like a heat sink, to the blue section. Note the detail on the bottom. This was not in any of the photos or CGI images I have seen.
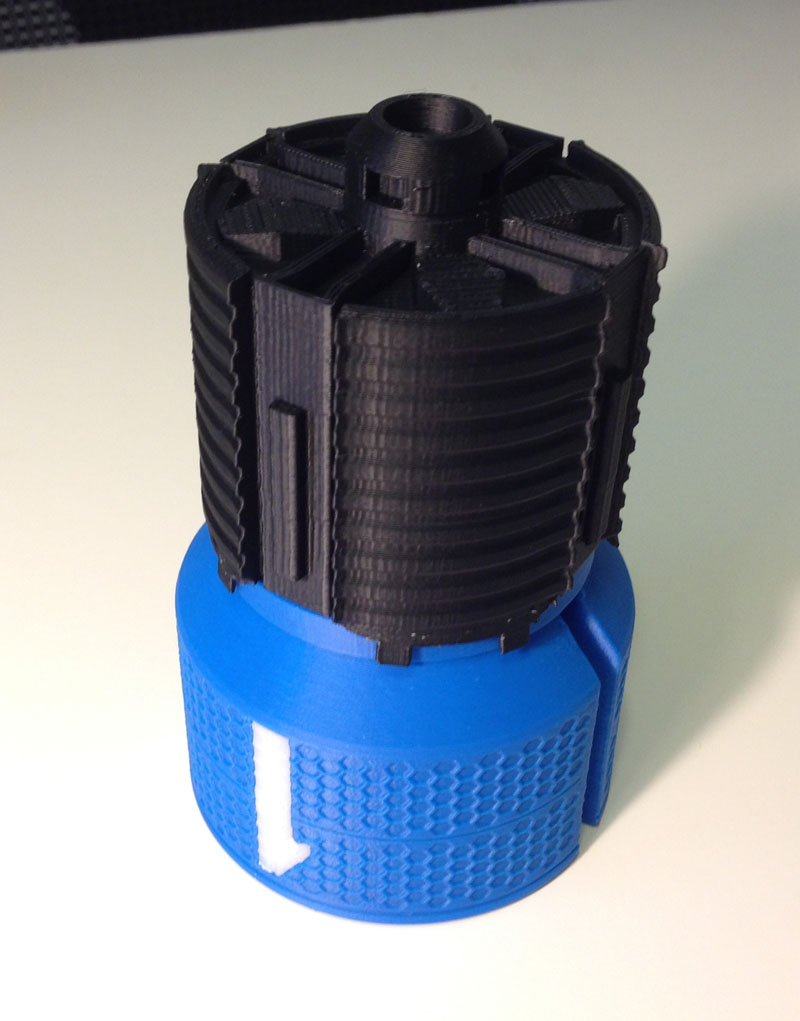
I got the detail from a rough GIF file someone posted of a turntable rendering of the ship that was on display on monitors next to the physical models at the conventions:
I snapped two frames of this GIF as it rotated and used them side-by-side to create a 3D parallax image (like a ViewMaster slide) and while the video has serious GIF dithering, I was able to make out some detail in depth, so I modeled in what I could see.
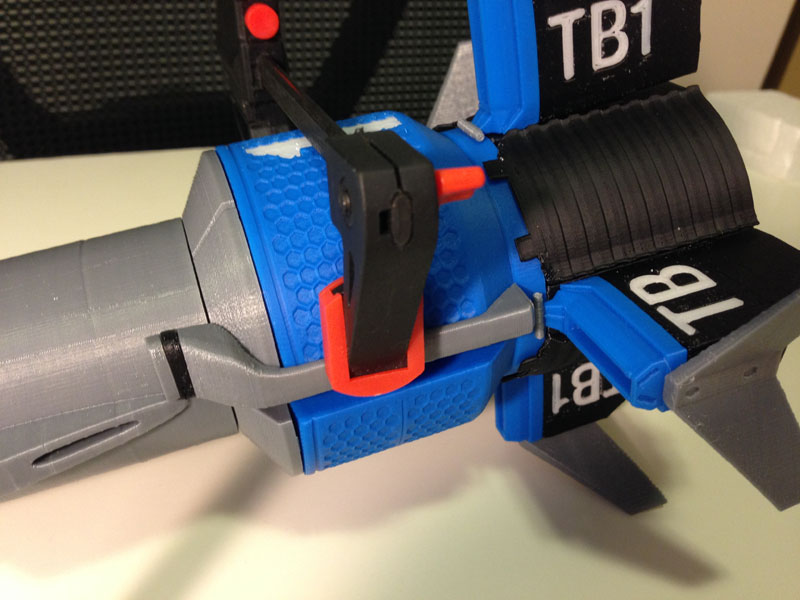
Next come the thruster housings for the 8 jet engines. Each housing has TB or TB1 (depending on which one) inlaid in, and two jet engines attached:
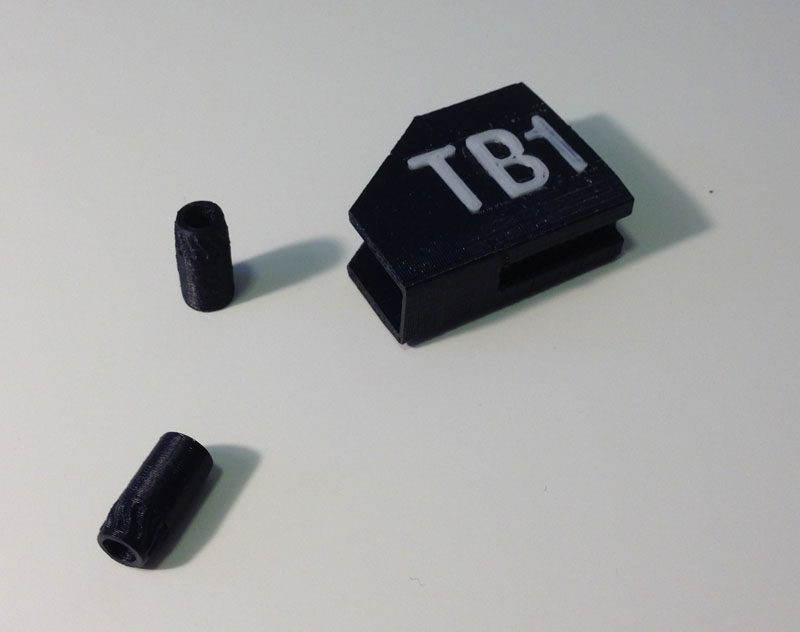
Here are the four housings:
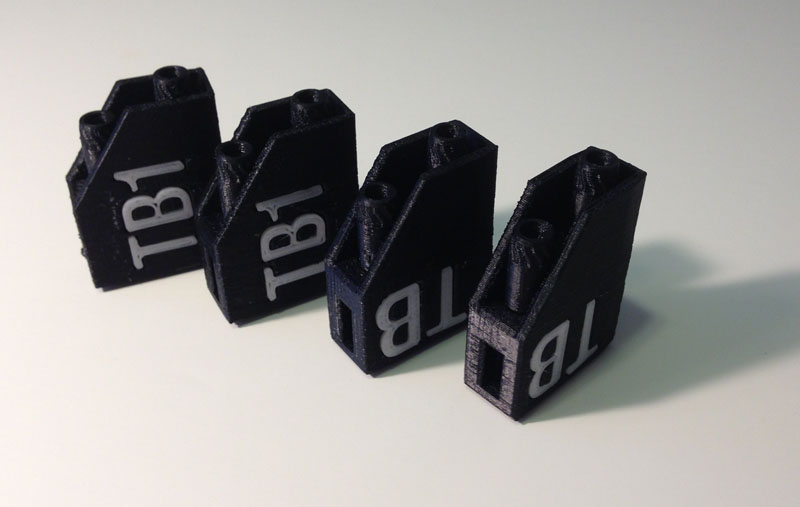
I had a conflict here. While the rotating turntable image (posted above) clearly shows the TB1 as upright on the upper and lower housings, so when the ship is landed flat it reads correctly, the physical model my friend photographed showed the TB1 as reading upright relative to the body, so I decided to go with the physical model for now.
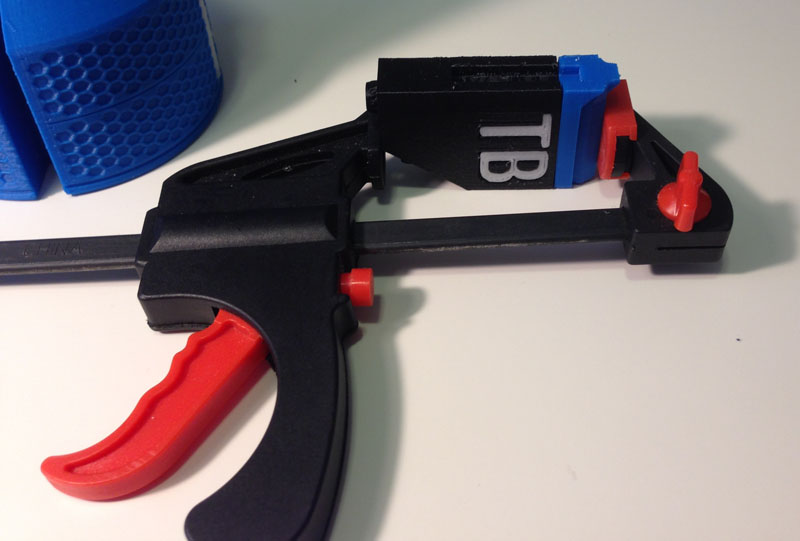
(To make that a changeable thing, I opted not to glue the bottom thruster housing in place. It snaps in rather well, so it holds. Later, I will reprint that one with the TB1 facing the way it faces on the CGI model.)
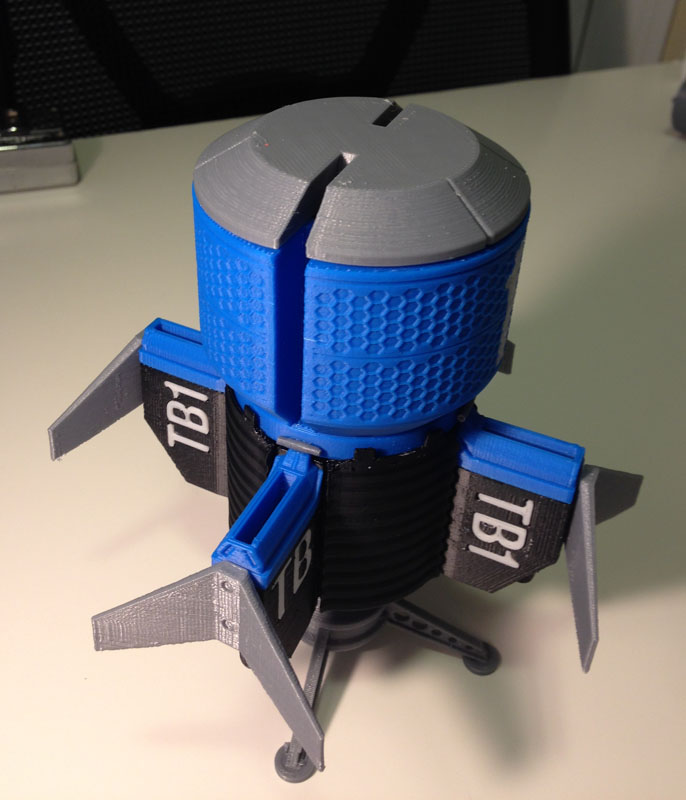
Then I added the blue jet intakes to the tops of each thruster housing:
Then I added the housings to the heat sink section:

Next I added the fins
Then the flare section that connects the engine section with the body section, adding the silver pins to the tops of the thruster intakes. (Note the display stand, which is not canon. I just made it interesting.)
I then joined the two body sections together.
Next are the main engine intakes, each made from 3 pieces:
These get attached next to the slots where the wings would retract:
Last Bits
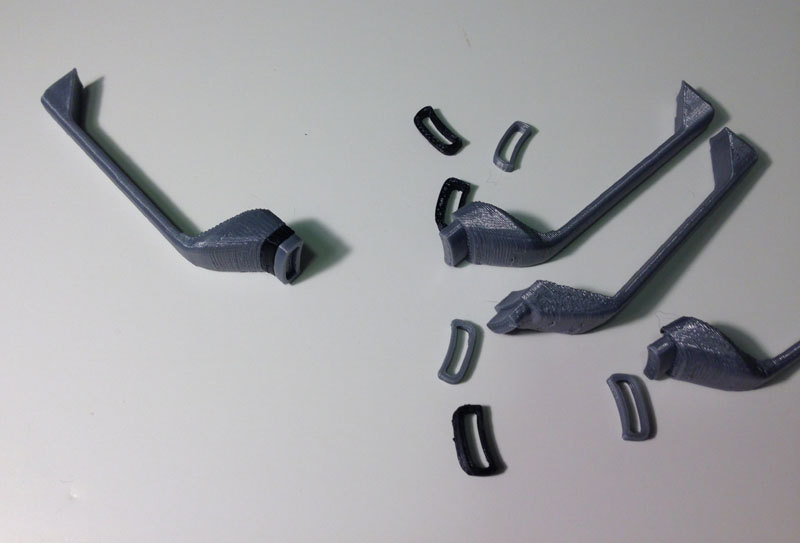
Then I prepared the wings, which have tabs that fit into slots in the body shoulders.
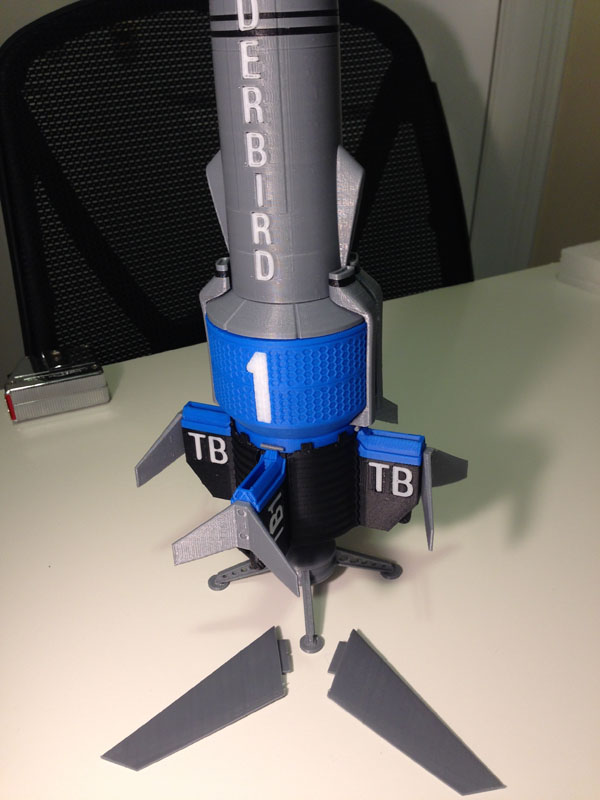
And here they are, slotted in place.

(In a future version of this model, these wings will actually scissor out on gears, so they can retract, like they do on the show. But for now this will do. The wings on this model are static. Making them do what I hope to do later will be quite a complicated job, but one I hope to take on later this year.)
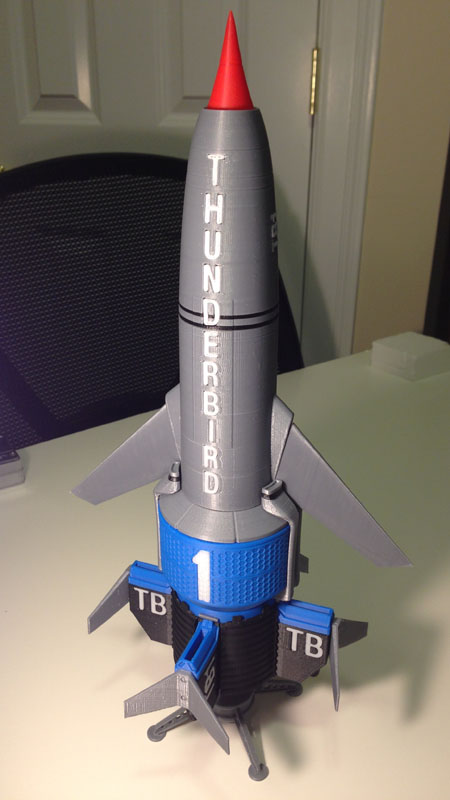
Almost the last part is the nose-cone:
The very first image showing all of the parts has the window inlays printed in black. While I was assembling this model, I got a shipment with some glow-in-the-dark sky blue filament from Zen Toolworks, and I printed the windows again in that color to see if it worked better than black.
I also used a sample Zen sent me of translucent filament and tried that.
The winner was blue:

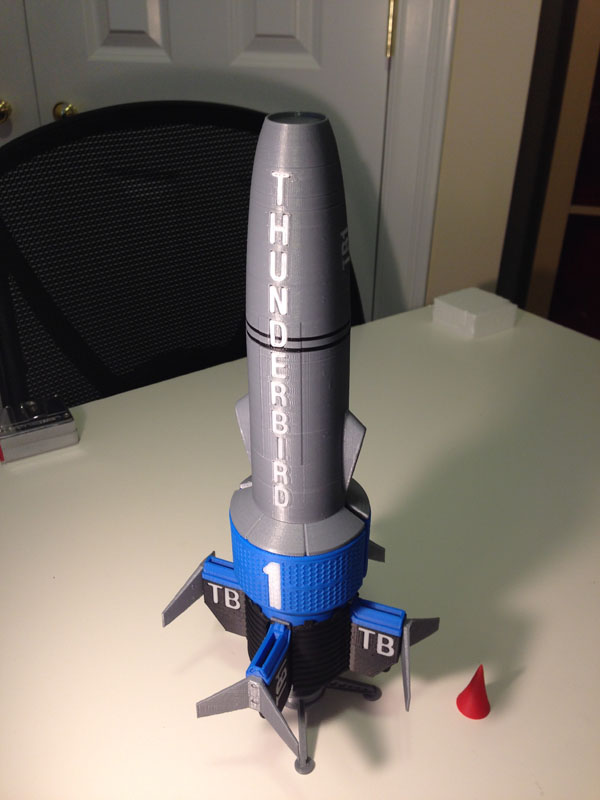
So there you have it. My version of WETA’s Thunderbird 1 from Thunderbirds Are Go.
Here it is on display:

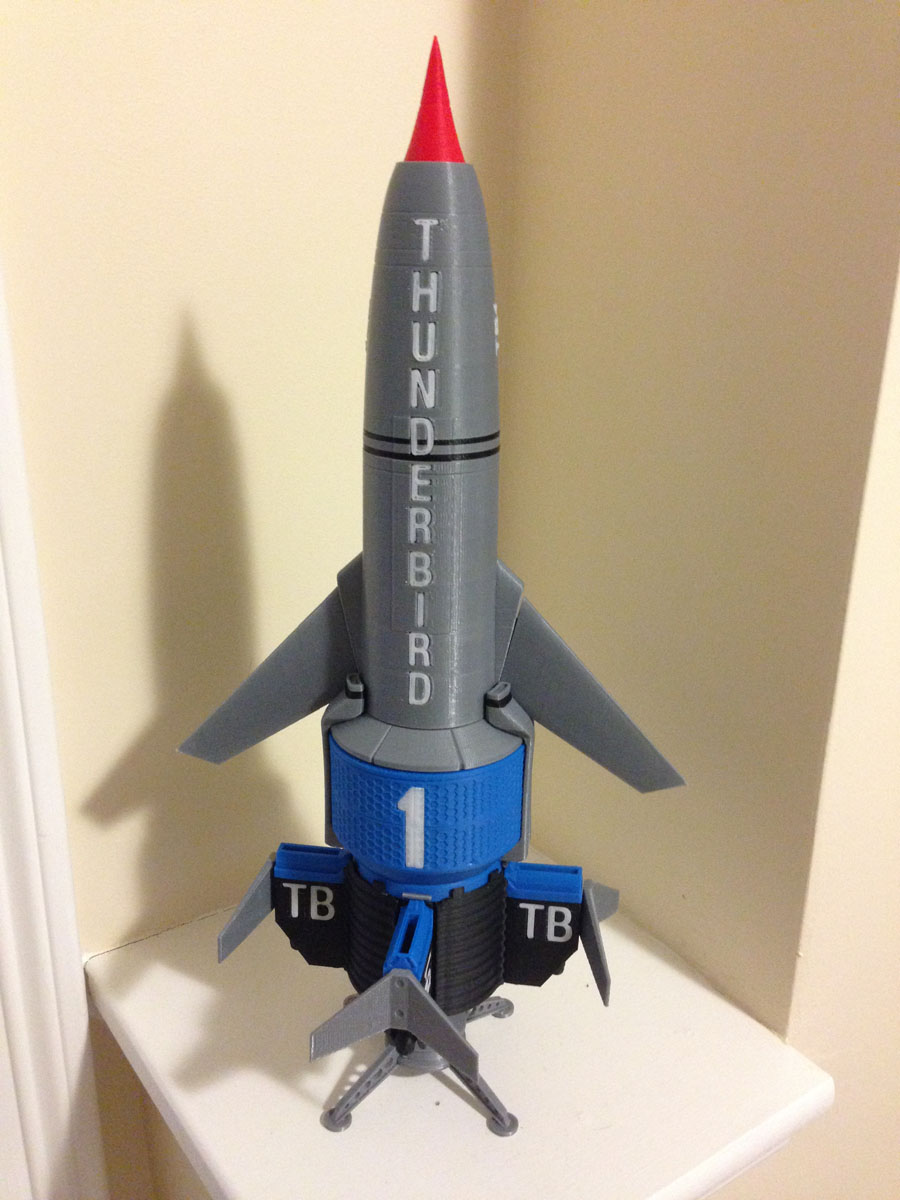
Still missing: The Pitot tube which juts from the cockpit area, and some other body detailing, which I hope to add when I make the retractable-wing version later.
Great work, do you make these for customers? If so how much would this model cost?
Sorry, but this particular model is not my Intellictual Property. I can’t sell these without proper licensing. Thanks for asking, though.