
As you may recall from this post, the antenna struts of my TB3 Rocket gummed up if printed alone, due to the head not giving the plastic time to cool. This post is about how to do it right… and even righter.
And after fitting my curved upper arm onto the body, I thought it a bit thin, a bit flimsy. So I remodeled it by thickening it up a bit. I took the opportunity to print three antenna struts, so the print head would take time to go between them to print them, rather than gumming up the strut as you see in the picture above.
This was the result:
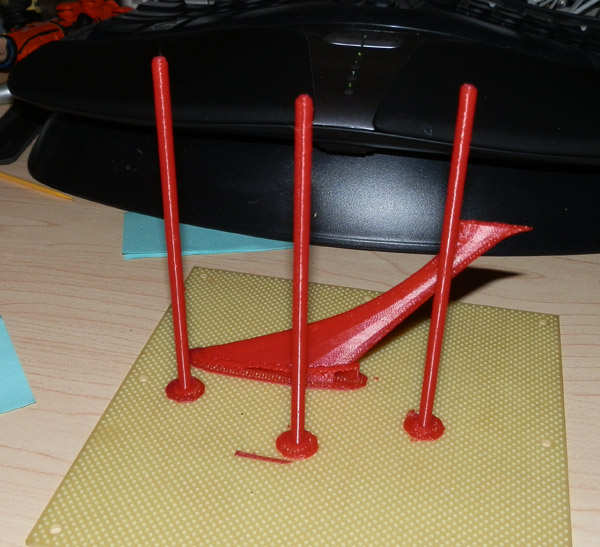
I did learn something though: Rather than print three, I should print five. When it was printing just the three struts, it kept going back and forth in a sensible way, so it would do A, then B, then C, then C, then B, then A. Only B got a clean cooling break. A and C got two layers in a row, which didn’t seem to harm them at all, but to play it safe next time, I’ll print five, and toss A and E, keeping B, C and D.
Meanwhile, I modeled three slots into the Lower Body piece to accommodate the Main Fins, modeled the Main Fins to fit into those slots, and created the slot that the main engines would eventually fit into, so I could test-print a Main Fin.
The printer is currently printing those pieces.
Meanwhile, here is the result of the reprinted black and yellow vanes, slotted into the body of the rocket:
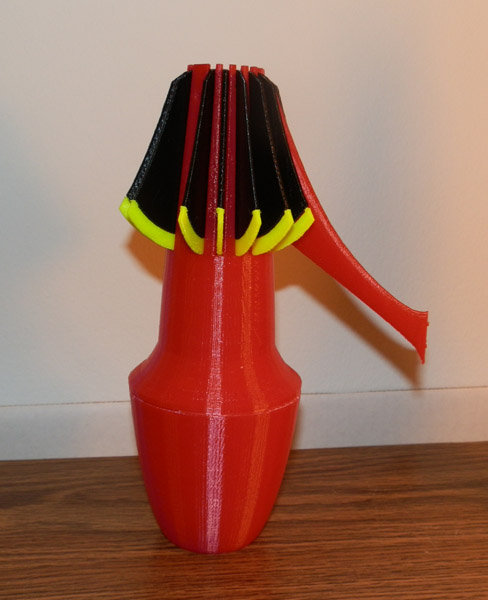
The yellow (the cheaper plastic) needs to have some trimming done where the tips meet the black, but that’s easy.
And here it is, assembled, as of today. The only thing missing is the antenna strut which I had no good way to put on for this photo.
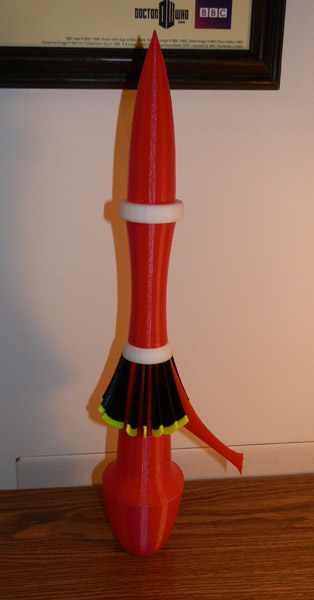
Once the arm, main fin, engine and antenna work, I will print two more and put them on the body, and I’ll basically be done this test print. Then to print one for real, at .15mm. Yikes. That will take some time to print!