
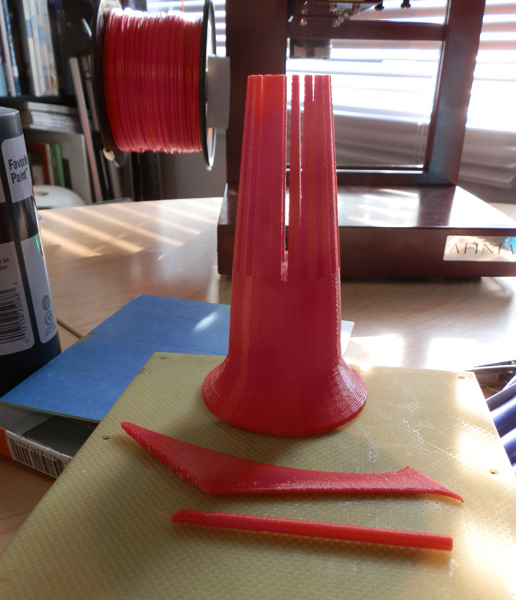
Last night I got quite a bit done. I printed the slotted mid-body part which the black and yellow vanes will stick out of, and I printed the bottom of the rocket again (though come to think of it, I should have held off until I had modeled in the peg-holes needed for the main fins. Oh well, another sixty cents gone… :-)
When I had the body printed, I tried test-fitting in the black vanes I had printed the day before. No luck. The black fins are way too thick. (I had remodeled them to be a bit thicker, and have not yet gotten a handle on how much gap to leave between tight-fitting pieces.)
So I remodeled them again, did a test print (just a short piece of the fins) and test-fitted, and while they fit, it was still a bit tight. So I did another remodel. I am confident this one will work.
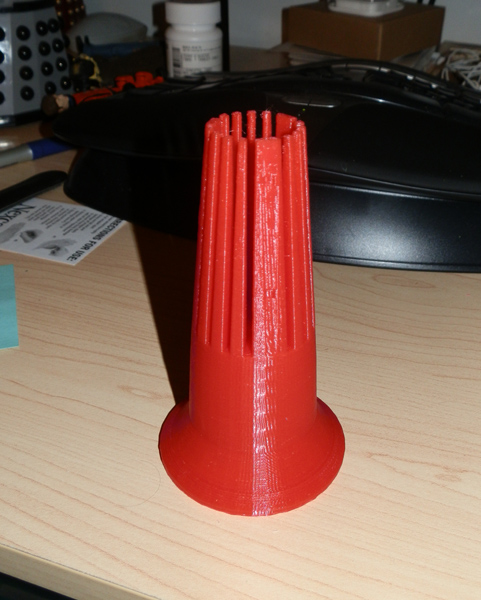
Here is the body, as printed last night. It shows a few things that need to change, but nothing immediate.
And then this morning I decided it wast time to see how I would even print the main upper arm of the rocket. The problem is it’s thin, has no real square base to sit it on, and I wanted it to print fairly well. I decided since this was a test, let’s test the limits of printing on an angle without support material.
Here’s a picture of the 3D printing software with the two pieces (the upper arm and the antenna strut) as the printer would print them:
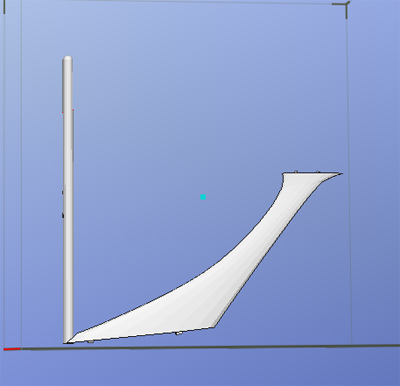
Believe it or not, the damn thing printed! Like this! I mean it was printing the arm out into space! There was no support material, but it took that graceful arc out into nowhere like a pro!
Notice something not quite right with the antenna strut? (The stick.)
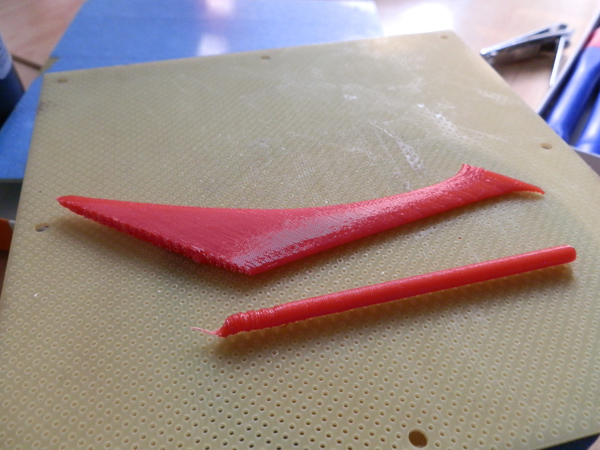
A further test was printing the very thin pole of the antenna strut. I knew this would print quickly because it’s so small but it has a lot of layers. I found out something interesting.

Notice how, at the base (on the left) it is nice and even, and prints fairly smoothly all the way up. But near the end it gets kind of gummy. (I aborted the print. It should have been another 1/3 this length.)
Here’s what happened:
While printing both the vane and the strut, the printer head had to move between the two parts, printing each layer separately, moving to the next piece and printing that layer, etc. That gave the plastic cooling time.
Once the printer was left to print only the strut (because it’s quite a bit taller than the upper arm) it printed over and over without giving the previous layer cooling time.
What did I learn? When printing these thin struts, print 3 or 4 at a time, with space between to give the plastic cooling time between layers!
I knew I was learning something.
Here is last night’s work:
Pingback: More Rocketeering Today | Huxter's Words