
MEETING GREG BROWN
As reported before, I went to the Dallas GI Joe Convention in 2014. I had brought some of my 3D printed GI Joe stuff with me, including my two dioramas for the show, the GI Joe Action Pack Jetpack on a custom AT Launch Tower:
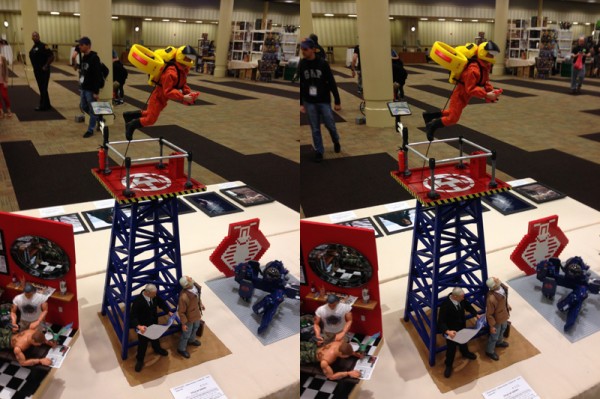
(cross-eye stereo image)
And the Search for the Endangered Pygmy Rhino set, which included a number of 3D printed items including a tranquilizer bazooka, an aerial drone and its backpack, a laser cutter to remove a rhino’s horn, an electronic prosthetic surveillance horn, and a sealant gun to affix it.
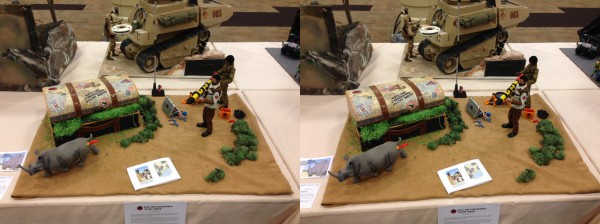
(cross-eye stereo image)
While there I found Greg Brown at the Cotswold booth, where I bought a cool set they had made featuring a black puma and outfit. I also had on-hand some samples to show him, and he took a few minutes to look at what I had brought, while he was dealing with other customers and some issues with the online billing software.
He seemed excited with the jetpack especially, and we chatted for a bit, and parted company. I had a great convention, my second, and first traveling, we did the parachute drop, including a later clandestine drop, I got to meet up with the Regular Joes and have dinner out, walking past the Book Repository, Kennedy’s assassination site and his memorial there.
It was some time later when I was back home that Greg approached me with some ideas for Cotswold Collectibles.
THE JETPACK – (or, the not-yet-ready-for-prime-time-jetpack)
First up, he wanted to distribute the jetpack. From previous writings on the subject, I felt that the jetpack needed some serious redesign if it were to be strong enough to sell. I would hate to sell something that was easily breakable, and I knew my current design was very delicate in how the harness connected to the body. 3D printing can be strong in layers, but not so much in tall thin cylinders. The layers break easily like a twig, but there are definite ways to make very strong things.
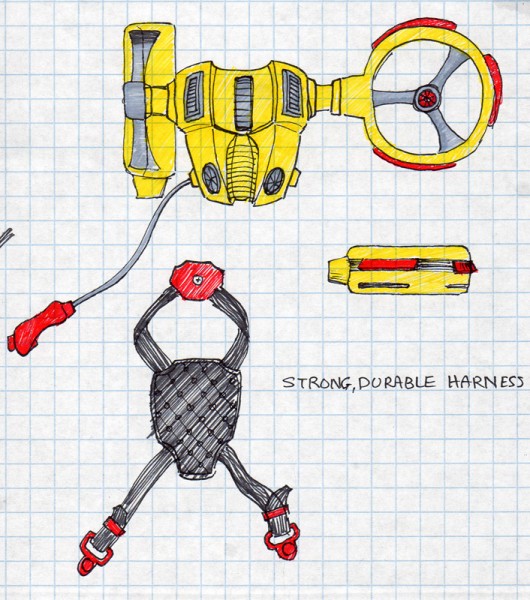
Here are some early concept ideas:
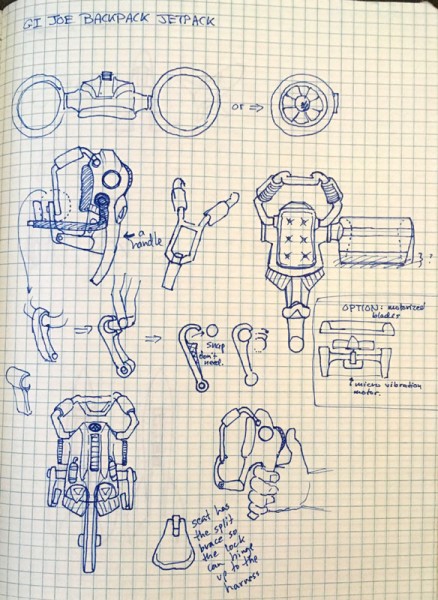
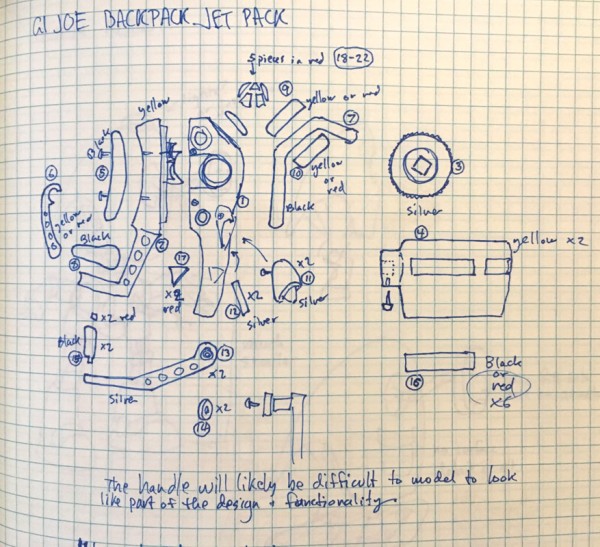
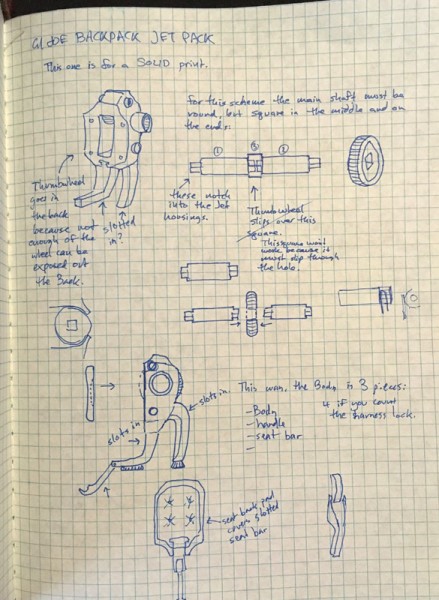
So I went back to the drawing board with that project.
THE SURVEILLANCE DRONE
Meanwhile Greg brought up my surveillance drone. Seems he wanted to do a special outfit set that included these new cloth backpacks they had made, and wanted some things to go in them. The first thought was to 3D print some of my cool aerial drones, but smaller.
My original was too big to fit into the backpack.
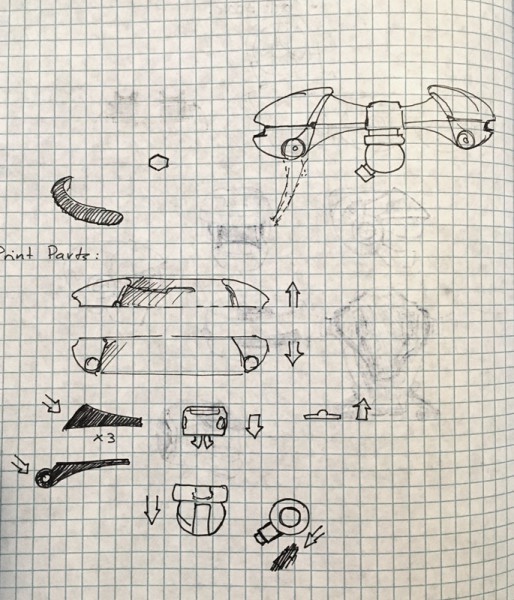
But the design was very cool. The one issue I had (being very nervous about breakage and ease of assembly), was to consolidate the hub and top struts into a single piece which would be very strong.
But you can see below that I still had not yet come up with a good landing leg system, even though the rest of the drone was basically fully fleshed-out.
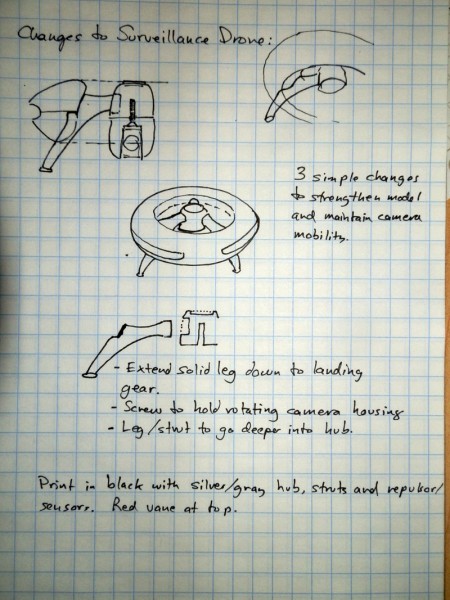
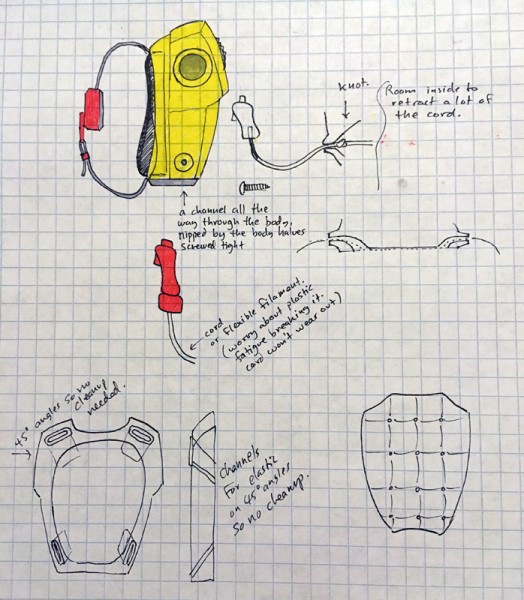
I continued hammering away on concept sketches:
Mostly, it was beginning around the basic design of the jetpack engine housing, a Dyson-like central hub forcing air through a hollow body, downward in a stable air column for lift. Even the hub and struts were nearly identical.
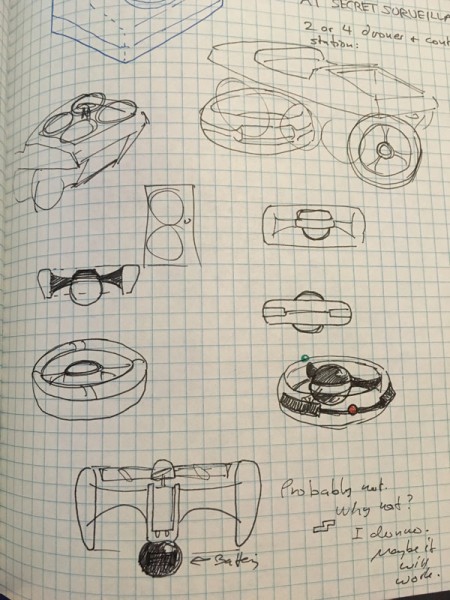
I decided I wanted fold-away landing legs.

That’s when I discovered I could split the strut and make the lower half a landing leg that hinges down!
I could retain the incredibly cool leg system I created where I split a nicely sculpted strut right down the middle so that half of it hinged down as landing legs. I could retain the camera, which has a 360 degree range of rotation along with a pivot that allowed the camera to see a full hemisphere below the drone. (Play of course. No real camera… duh)
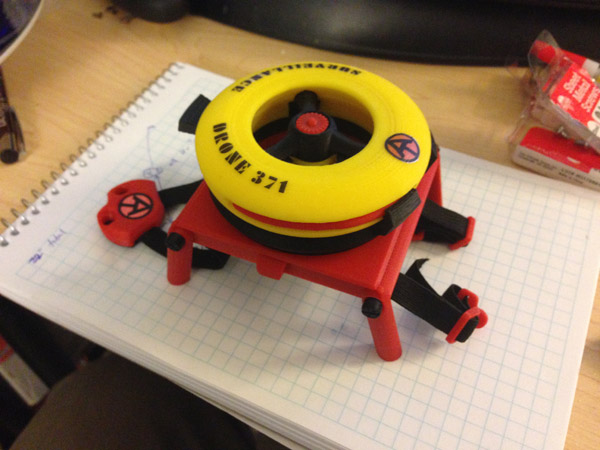
This entry talks about how I was able to scale them down, and found, much to my surprise that even at 50% of the original size, I didn’t have to make any changes to the model and it still worked as intended.

I think it was the first step down that actually fit into the packpack:
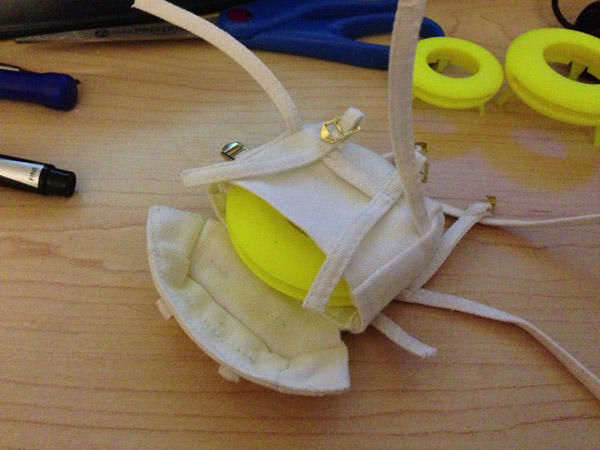
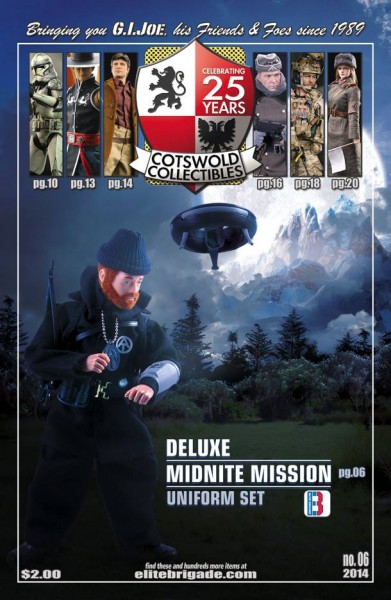
So not long after that, the Deluxe Midnite Mission set was introduced, which included the black drone as well as an arm cuff which acted as the remote control and monitor for the drone. These both fitted onto the cloth backpack very nicely.
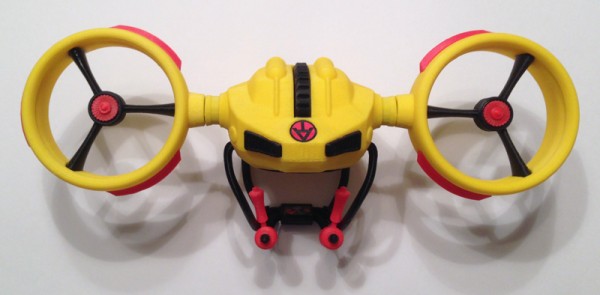
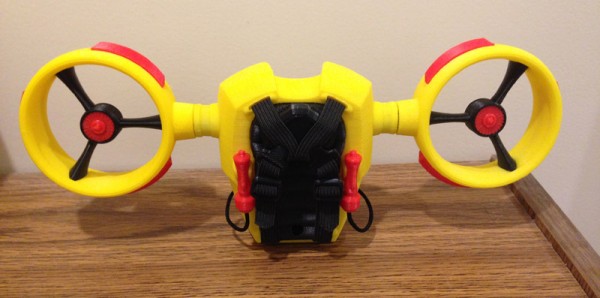
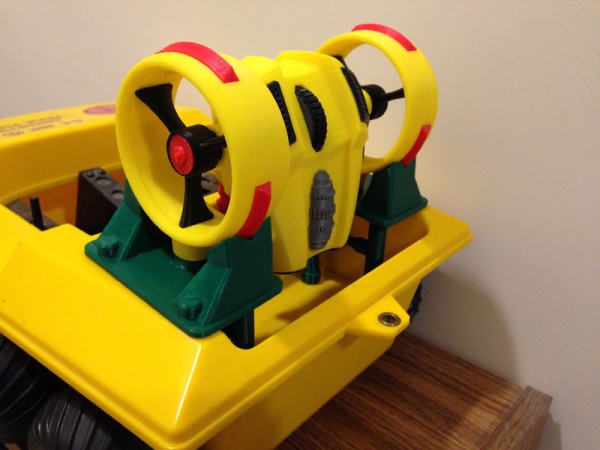
THE HELI-JET – The Action Pack Jetpack V2.0 – (now ready for prime-time)
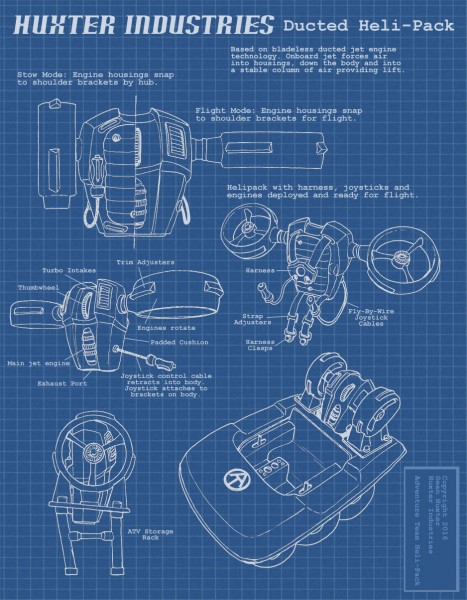
I spent some months in the summer redesigning my jetpack from scratch. I reduced the size of the jet bells, I completely redesigned the body to be more compact, curvier, and less – bulky and awkward. It retained the exact same thumbwheel and mechanism for tilting the rotor housings, which were still based on the Dyson fan design – a jet engine forcing air into hollow housings, out an aperture cut into the interior of the bell, down the aerodynamically curved housings, and straight down into a stable column of forced air. But much more powerful.
The harness was the hard part, since the original was 3D printed and so easy to break I had to be very careful mounting it on a Joe and taking it off.
So I went back to how the original vintage GI Joe rocketpacks and other items were made. A lot of those used elastic strapping with clips as harnesses. The one thing I wished to avoid was sewing. To connect two pieces of elastic strapping I’d need to sew them together. I could do that for a prototype, but I couldn’t imagine doing it for a larger run of, say, 30.
So I came up with a way to do the harness as a single loop of strapping that began and ended in an angled dart, which I could then cauterize with heat to ensure it didn’t fray at the ends.
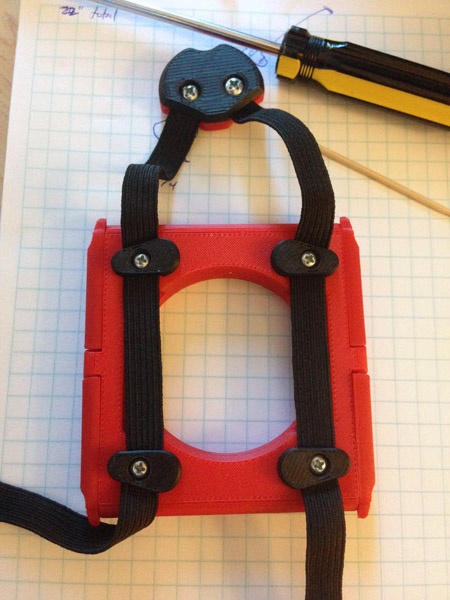
I hate bragging (too late!) but I came up with a very clever and intricate way to feed a length of elastic strapping into the jetpack body, onto a harness connector, then folded back onto itself and back into the body, so that the two loose ends hung down freely so strap adjusters and clips could be attached easily. Again. No sewing required.
The trick was folding it in the middle and connecting it to the chest piece with two small screws which did double duty as holding the two halves of the chest piece together, and also holding the strapping in place by having the screws screw into the straps.
I invented the method for the Aerial Drone Backpack.
Likewise, inside the body, the straps were clamped to the inner body by the seat cushion, both of which had ridges printed onto them to hold the strapping in place, and then two of the screws went into the strapping to secure that hold.
This worked like a charm! And the 3D printed strap adjusters allowed the user to fit the harness onto just about any size body.
The next thing I struggled with was the control handles. My original had them on rigid arms that swung down so Joe could hold the twin joysticks. But I had seen real jetpacks designed without rigid arms, and even the GI Joe Collectors’ Club Convention Set “Search for the Sasquatch” had a very cool repro jetpack with two cables attached to two small hand-grips. That was the answer to my final fragility question.
I would attach two hand-grips to cables, non-rigid.
Then with that in mind I could do a few new cool things, like snap the joysticks to the body itself, and then allow the cables to retract into a hollow area inside the body of the jetpack for very compact storage.
The engine housings would still snap off and snap back onto the shoulder clips just like before, but before the clips were printed vertically like the cylinders they were attached to, which meant they were inherently breakable. Printing those sideways strenghtened the clips, but I wouldn’t want to print the cylinders sideways. So I printed them separately, and glued them together. Strong!
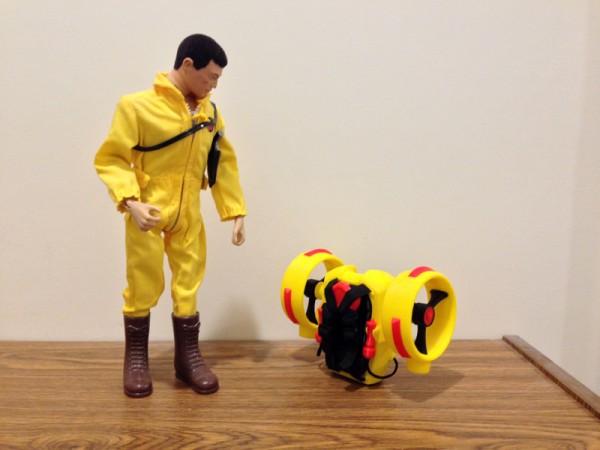
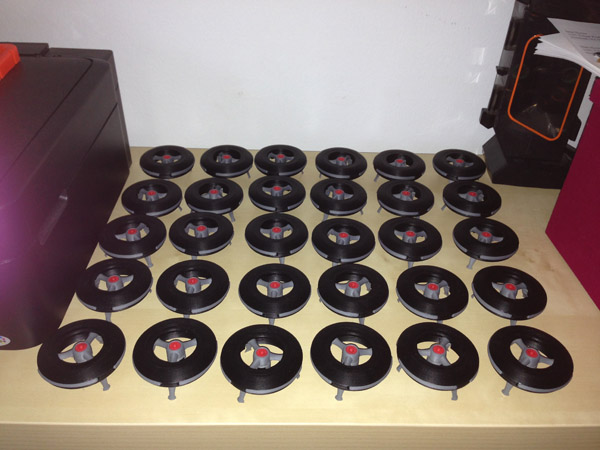
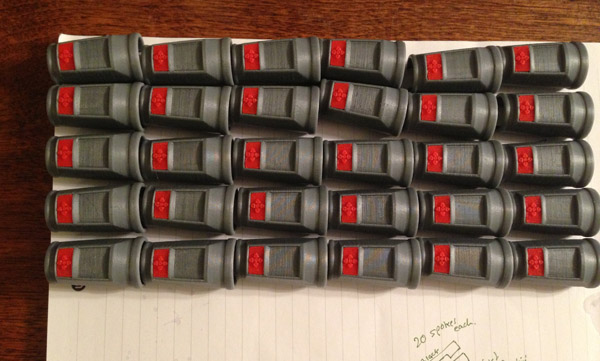
When I had made all of these changes, I was confident I could sell them without much fear of breakage. So I agreed to deliver 30 of them.
Yikes! What was I thinking???
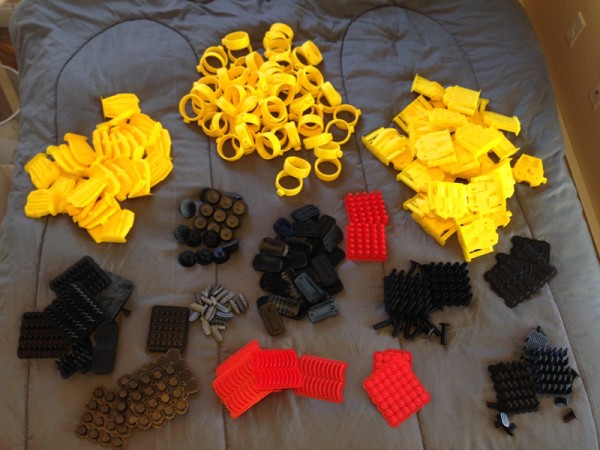
Printing just one half of the jetpack body required 8 hours of printing. The other half took about 6, and that didn’t include the housing bells (2 each) the cushion, the thumbwheel and cylinders, the clips, the harness pieces, the jet intak embellishments… this was going to take a while.
With two printers I could do the job in a couple of months, probably. But of course at that point one of the printers failed and I had to send it in for repairs, so I was down to one printer churning out 30 jetpacks, each of which had 30 parts.
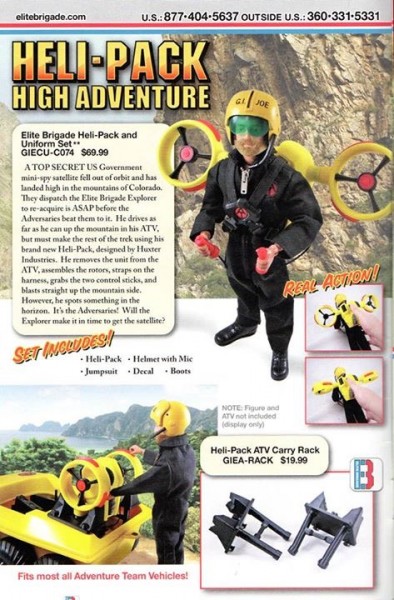
And I also had to print 30 ATV racks which slot nicely into the cargo bay of a vintage GI Joe Adventure Team Vehicle (or Trouble Shooter) so the jetpack could be carried by an ATV easily.
Whew. I was wondering if I had done something very stupid.
But when I finally got 30 of these babies printed, assembled, tested and ready to send, I was very happy with how it all went.
But I couldn’t stop there either. I decided to make a blueprint/instruction sheet for it.
I used the money I made to buy a third printer so future orders could be done far faster.
(In case anyone should think I’m in this for the money, the design time alone would be worth 10 times what I charge for these things. I charge just enough to cover material costs with a bit extra so I can buy new stuff for the hobby. Also, things like screws, elastics, paracord, etc, I also have to buy, experiment with, toss out, get different versions, etc. This is just my hobby. When it stops being fun, I will stop doing it. Until then, look for more designs from me.)
hi Sean I have been buying the raacs system items from Cots and jut got the charger for Mike powers and the tri blade I remember when you were showing your work on the trenches . Will you be making the jet pack again I missed that one when Cots was selling them. I really like your work and hope to get a printer in the next year . thanks George
Hi, George. Thanks for the kind words!
I can’t reveal the plans for future sets of course, but the RACCS system does lend itself to many very useful features.
And of course demand for the jetpack has been large, larger than I can accommodate in my spare time, but I still want to make more, and some color variants. They are by far the largest single project I do. Time! YIKES!
It’s all me here. No factory workers buzzing away! Just me and my printers and my table. :-)