Don’t Go To Jail!

At my company, several times a year they host a Game Jam. Teams are given a week to come up with a game for judging. Since we use Unity, usually the teams write a game in Unity and have a bit of fun coming up with some cute little games.

This week we are holding one with the theme: “Don’t Go To Jail!”.

I usually don’t partake, as I’m usually way too busy doing my own thing, but this year my colleague Dan Parke asked me to consider helping him with a game idea, and I agreed to at least listen.

He pitched me an idea I was fascinated with right away. It was a physical game, not a computer game (as such) featuring hand movement in a game using a light sensor. The idea was to use your hand to manipulate a light on a project circuit board called Circuit Playground Express, holding it in one space for as long as you could. If you failed, you would “Go To Jail”, exactly the thing you’re supposed to avoid in this competition.

Dan thought a circuit board alone would not be very enjoyable, and was hoping I could 3D print something fun to house it in.

I was intrigued, and immediately came up with some sketched ideas for a casing for the game.

My first thought was, since I had made so many UFOs and other designs using Vending Machine bubbles, that the circuit board would perfectly fit under one, which would give us a nice first idea for a casing.

But with just the circuit board and a battery case to worry about, the casing could be quite small. But I thought since the theme was about jail, and the game idea was escaping arrest, that we needed to put this into a cartoon-like prisoner character.

My first sketch showed an angry moustachio’d villain, which I thought a bit too angry.

My second sketch was more emotive, a bit scared, hands up, perhaps in surrender.

And since we had exactly one week to create this game from the start, I knew I could call on existing creations to make this little guy work.

The hands and arms are almost unaltered from my WERBLZ characters:

And with that, I began modeling, and soon had this basic character modeled:

Prisoner 0110 was born.

The Circuit Playground Express has touch capacitance on some of the contact points around the periphery, and that came in very handy. I was worried, though, that the capacitance would not conduct through a metal screw or other metal bit, and touching the circuit board itself would be impractical as game play. So I immediately came up with the idea of using two cotter pins I had in my own inventory already, and used a Dremel to cut them down to size, and angle the ends so they could slip over the circuit board’s contacts.

With this plan, I began immediately to model a body and a collar (a manacle) that would allow me to use these two cotter pins to secure the collar to the body and act as the function buttons of the game. Dan programmed the pins to accept touch control, and I modeled (and re-modeled, and re-modeled) a collar that would fit the circuit board and hold down well with the cotter pins.

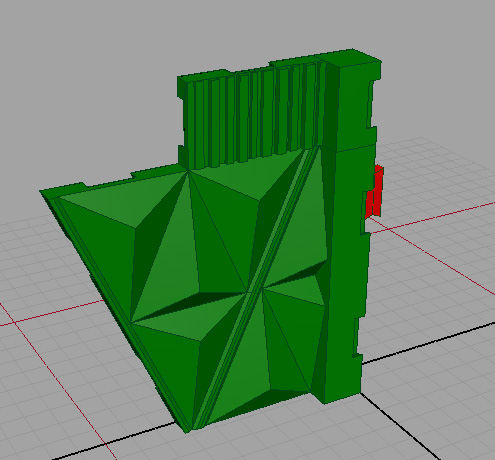
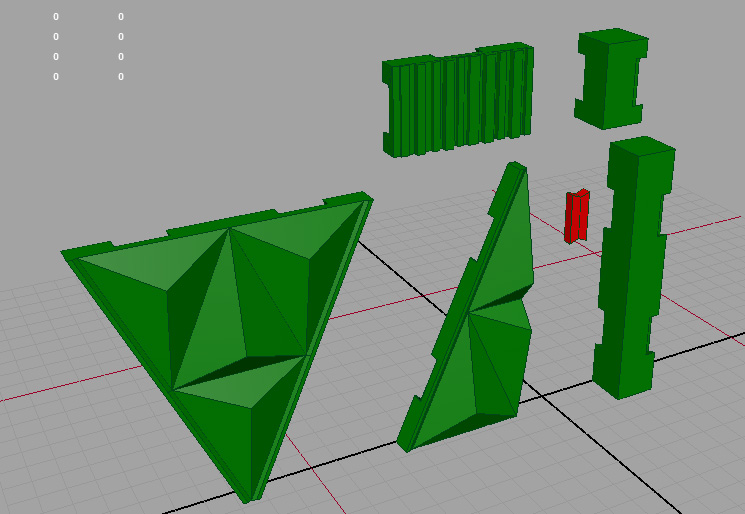
Here you see the prototype body in green, the collar base in pink (and an earlier prototype in purple) and the collar cap also in pink. (I use these colors for test prints because I don’t use them much for real, and this is better than wasting colors I have to buy a lot.)

After I assembled this all and got it working, I began detail modeling which involved slicing the body into stripes (for a prison uniform) and adding the other details. Starting with a base that could fit the battery container, and feed the wire up to the head, with room in the body for the extra length of wire.

I drew a sticker for the mouth, and 3D printed eyes, manacles for the wrists, and slots for the arms. Assembly began.

Here he is on my office desk, being tested before we began real iteration on the game itself:

Meanwhile we did some play testing and found that the game was not quite what it could be. Dan worked on it some more and came up with the idea of having to use your hand to move a single light around the rim of the board (there are 10 lights around the circumference) and then a single light would light up, which would soon add another light to the right or left of itself, then another, in an ever-increasing arc that would come at your light “character” on either side, and your job was to hold your hand in such a way as to not let your light collide with the encroaching lights.

After that was working, complete with sound samples to tell players what to do, the game was more or less complete, and even kept track of high scores.

With a few suggestions from me during game testing, I thought flashing all lights green 3 times would be a great way to indicate you won the level, and failure should result in 3 flashes of red. I thought that would be intuitive to players.

And Dan’s original chase lights were purple. I thought the universal color for police would be more immediately recognizable, so he changed those to blue.

Now you are represented by a green light, which you can play with before you begin the actual game. Then you’re on your own. You can move the light around the perimeter until the cops start homing in on you. Then you have to hold your hand steady to keep the prisoner where he is. IF you can hold out with the police lights to both your left and right and not move it into them for a given interval, you win the level. If you collide with their lights for too long, you lose the game and go back to jail.

This is the final version as will be played by our judges:

The left cotter pin triggers the game to Start, while the right one can recall the high score.

Game Jam ends exactly as I’m typing this, and judging has begun. Two judges already told me they really liked the game.

Cotswold Catalog – Spacey!
This catalog features three of my latest designs, mostly space-themed.

On the left is a metal box I found at Lowe’s, to which I added a harness and antennae, as well as other details. This is my Mobile Communications Pack.

On the right is the Extravehicular Mobility Unit 10. This is a full outfit, and my part is the space helmet and chest mount, belt and belt-mounted oxygen scrubber which eliminates the need for bulky oxygen packs. And a wrist controller.

In back is my new Wing Pack, known as SWIFT (Swing Wing Individual Flying Transport), which features a swing-wing action and stowable joystick controller.

GI Joe Hi-Tech Communications Pack – Adapting a Found Object

The Find

This year at Lowe’s hardware, the diamond plate cargo gift card box is no longer available. It was replaced with a metal box made to look a bit like their miniature tool chests.

Of course my brain went immediately to “Astronaut’s Oxygen Pack”. And that it certainly can be. But I went in a way that really could be used for various purposes, so I will call it my Hi-Tech Communications Pack.

Luckily I had a reel of ABS plastic filament for my 3D printers that closely matched the cobalt blue of the Lowe’s box. I started immediately to think of how to adapt it. First, I needed to cover the bottom, which is recessed, and contains the UPC code and other information.

Then I had to cover the Lowe’s logo on front. No problem.

Then I knew I would need antennae. So I modeled and printed a mount on top for two antennae.

And of course it needed a harness. I had produced a harness for my Action Pack Heli-Jet, which works nicely for most cases, but the front chest clasp was too complicated.

While designing a new flight pack for Joe (A Wing Pack coming soon!) I adapted the chest clasp to be far simpler to construct, and much less bulky, while still allowing a cover plate for a logo of some kind.

Using a single length of .9mm elastic I created a front piece that allowed me to thread it through in two directions, then into an upper frame piece, down the backpack, and into a lower frame piece, then on to the body where there are standard strap adjusters and two clasps which fit nicely into the front piece by friction and holds very strongly.

I am comfortable saying that this is my new harness design and most of my future backpacks, be they flight packs or simple backpacks, will use this new clasp, and not the bulky old one which had to be screwed together to work. (This cap snaps on nicely, and can even be removed, as the simple clasp frame is not too ugly by itself.)

The Final Product

Here it is, my Hi-Tech Communications Pack posed on my Club Exclusive Super-Articulated 12″ Super Joe that they produced last year.

GI Joe Atomic Man Cargo Box – Adapting a Found Object

The Find

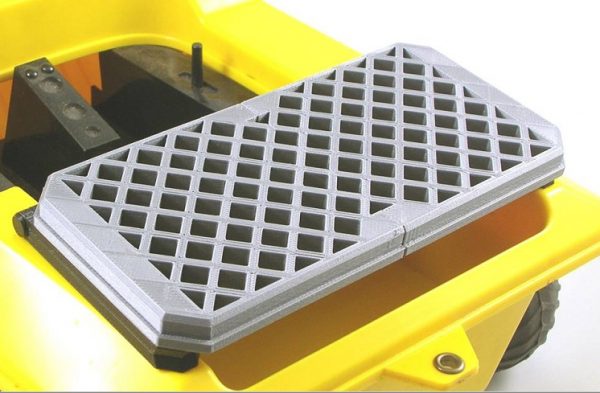
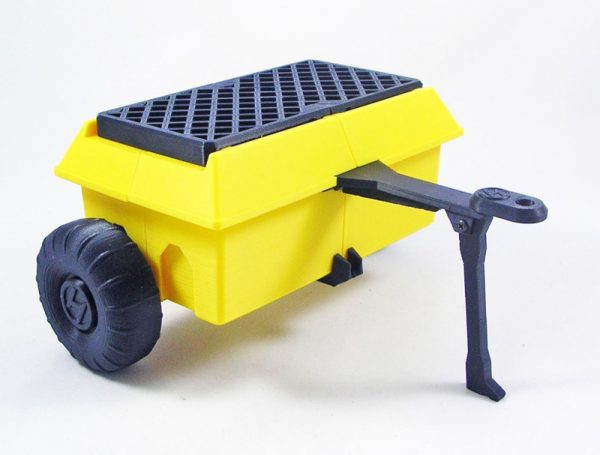
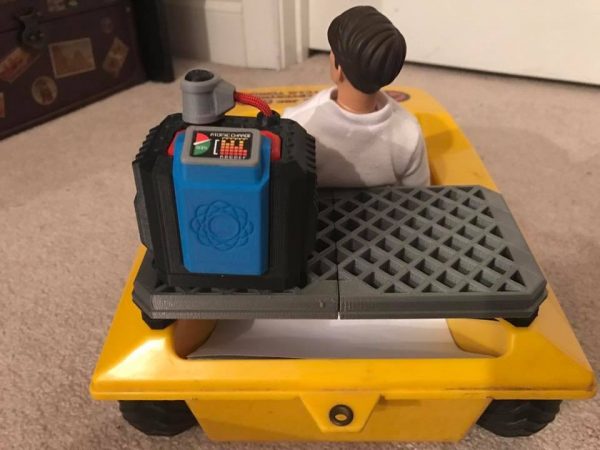
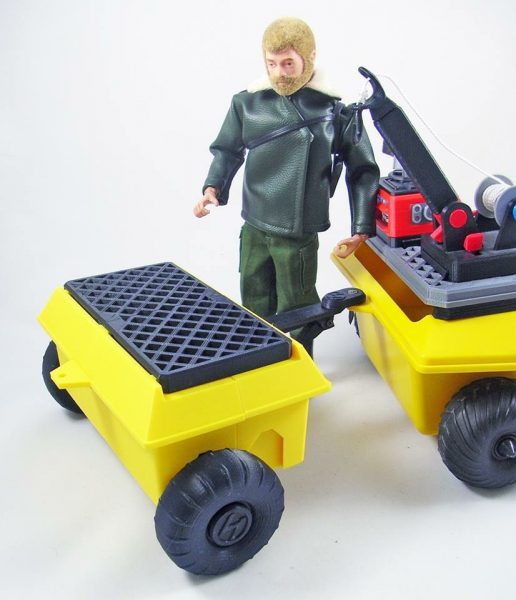
Last year at Lowe’s hardware store I found a metal box sold as a gift card holder. It was in the form of a miniature diamond-plate pickup truck cargo box.

Needless to say I find it hard to shop anywhere without seeing every object that comes into my sight in a 1:6 scale filter, to see what I could make of it. This was a no-brainer.

I bought a few, took them home and began to think how I could best use them.

Since the new GI Joe Club Exclusive Mike Power Atomic Man had just recently arrived at my door, I figured how better to use this than to make it Mike Power’s personal equipment box.

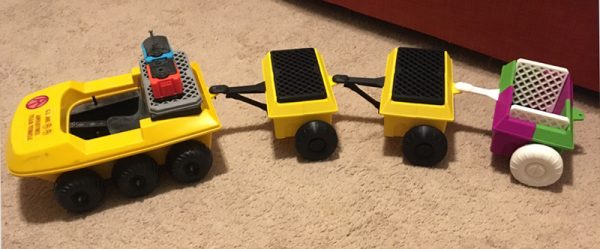
It is a great fit for the GI Joe Adventure Team Vehicle or Trouble Shooter, too.

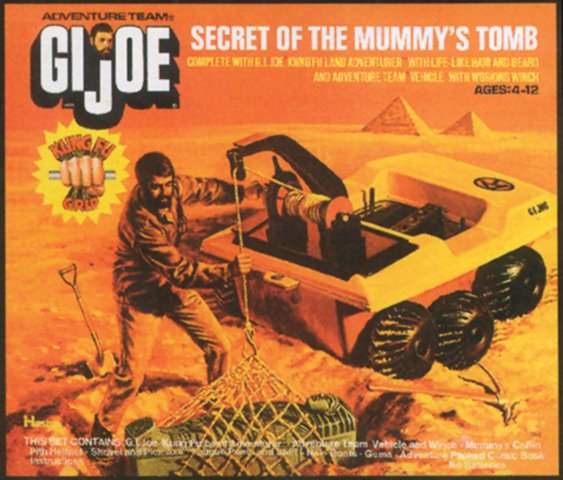
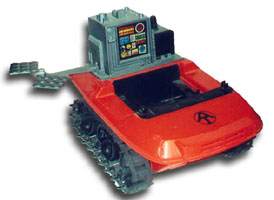
And around that time the Mattell Halo Warthog was making its rounds on Amazon at sell-out prices and a bunch of us collectors were getting them, and I’m no exception. I bought two green, and painted them (one in AT Yellow and the other in a bright AT Red) and then they came out later with a red version, so I have one of those too.

The cargo box fits nicely into the cargo bay of the Warthog.

The Final Product

Of course I wanted to cover up the LOWES logo, and make it Mike’s, so here is the final product:

What’s Next?

This, I should say, is almost finished. I have one other thing I want to do, and that is to put a tool-box-like handle on the top lid.

More on that later…


Space: 1889-inspired Ship

This is not a 3D model (not yet). It’s a ship I created in 1997 based on a ship from the Steampunk RGP game: Space: 1889.

At one point, Fine Scale Modeler featured a beautifully constructed model from the game, similar to the one shown below (not my model!)

But at the time I was envisioning my own world where air whales floated around like dirigibles, and I thought this was a nice base for an air whaler ship, which I then modeled in 3D in Lightwave, and rendered out as a fairly poor GIF file which I still have.

Keep in mind, this was 1997.

The wires spanning the two boom arms were to carry the weight of the slaughtered air whale, which would of course no longer be able to support its own weight in atmosphere.

A Christmas Home Invasion – Doctor Who Photostory 2005

Since my adventureteam.com page has finally gone down forever, I am reviving some of my web content and putting it elsewhere. That may take some time. In the mean time, let me re-post “A Christmas Home Invasion”, a short story I published on my page the Christmas after I finished my 8-part epic Doctor Who Photostory, The Second Key (which is still safely viewable).

Star Trek Discovery Phaser

The night I went to Rhode Island to visit the Regular Joes to watch them do their podcast, I was not really expecting Jason Isaacs (Captain Lorca) to pop by and sit with us for a half-hour or so going into great detail about his new show “Star Trek: Discovery”, but it was amazing.

You really need to hear this interview, and you can do so by catching The Regular Joes Podcast, Episode 214 – Rhode Island Comic Con 2017.

During that evening, Tod Pleasant talked about how he was currently printing the new Discovery Phaser, after having downloaded it from Thingiverse.

When I went home, I downloaded it and printed it.

Not satisfied with the solid black model, I immediately began cutting it up into pieces for full-color printing, and without going into detail, here are some pics of my final product:

The original model was in four pieces, which I originally printed in black, with a silver nozzle. The new version prints in five colors, and 31 pieces.

I use magnets to attach the nozzle and the Phaser I hand unit to the main unit. This way the nozzle can spin.

I use translucent blue for the setting indicator ring, which I can also print in translucent red if I want to set it to KILL!
A slot in front for the emitter, and a magnet at the back, allow the Phaser I hand unit to come out and snap back in easily.

As you can see, the middle one is set to Kill.

I also made an appropriate display base, with the new Insignia with pips.

The Phaser I hand unit has a translucent emitter the same color as the setting. Eventually I want to add more functionality here, to allow the targeting sight screen to flip up.

I made five, one for me, and one for each of the Regular Joes.

2017 Christmas Tree Ornament – Stonehenge Me Crows!

Since 2013, when I bought my first 3D printer, I have designed and printed at least one Christmas Tree ornament.

2013’s was a 3D printed version of the 3D printer I bought: An Afinia H479:

2014 we had just purchased our lovely brand new house, so naturally:

2015 saw two different sets of decorations. One was a Santa Werblz, based on the wobbly WERBLZ toys I had created that year.

Also in 2015 I couldn’t resist doing these profile ornaments of me, Carol and Charlotte:

2016 I shrank down a version of my recently-designed ray gun:

And in 2017, I opted to commemorate a rather cool moment from this year – our trip to Europe, and the wonderful hour we spent in and around Stonehenge. While we were there a crow perched atop the lintel stones at the back:

A closer view:

So I downloaded a previously made model of Stonehenge from Thingiverse. I found it was rather inaccurate in placement of the inner stones, so I fixed that. Then I cut the thing into a sphere to fit these 8cm plastic sphere ornaments I had purchased. You can get these at most big craft stores. Two halves snap together to put anything you’d like inside. I filled the sphere with a spherical cut of Stonehenge, concentrating on the rear stones, and put a crow on the lintel.

And if you can cross-eye 3D freeview:

Spirited Away – No Face Pez Dispenser

Let me start by saying that I love the visual style and look of the Studio Ghibli Miazaki movies. I’m not the biggest fan of them for content reasons. To me they lack something. What they do not lack is visual gorgeousness. Even though most of them use repeated themes and character imagery, they are fascinating.

Spirited Away gave me an idea – to create some small statues of a fairly simple-to-create No Face spirit.

I started with something very simple. The mask is all inlays printed in white, with purple, black and grey inlays.

The body is meant to be that simple, amorphous shape.

Later I added arms and scaled him up a tad:

Then Carol said: “That looks like a PEZ Dispenser.” !!! Ok! That was an inspiration!

So with just a bit of extra work slicing the head and using Booleans to create a smooth curving circular structure, and a PEZ head mechanism I downloaded from Thingiverse and altered to work better (the original tapered the hinge holes making them not fit), I was able to quickly put together a working prototype.

The two on either end, with visible seam line at the “neck” (mouth in fact) are the PEZ dispensers.

The hinge is rounded at the back for a smooth opening without a huge gap in the body from behind.

The truly hard part is finding PEZ dispensers with a black body so I can make it all black.

In a future version, I may add red mouth and teeth inside, meaning I will likely use red PEZ bodies. But that’s for later.

Inspired by this wonderful mechanical bank Studio Ghibli put out: