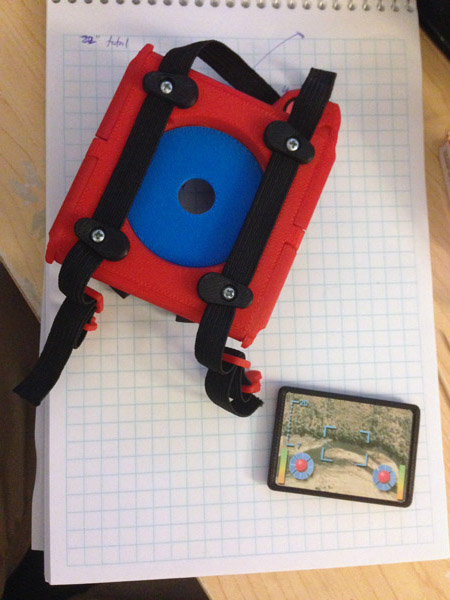
SQUID – Submersible Quad-Utility Intelligence Drone – Prototype

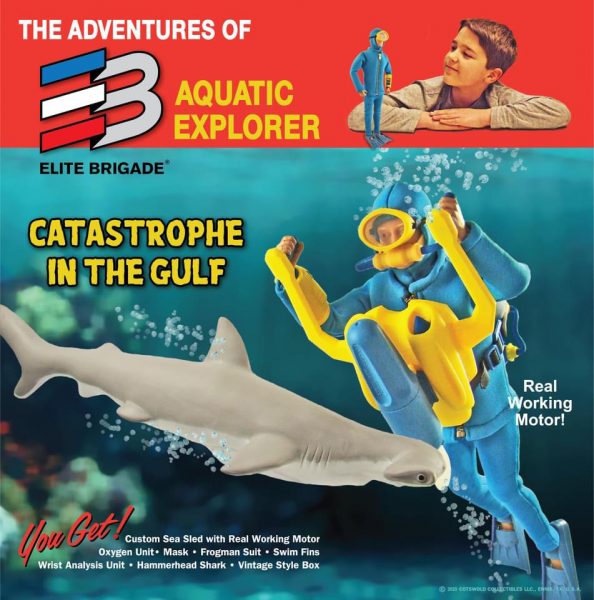
Some sets I have created with Cotswold Collectibles were undersea sets. Scuba outfits with Sea Sled, rebreather, other gear.

Sets like Catastrophe in the Gulf.
Recently for a new set, I created a Dolphin Equipment Pack to fit on the back of a dolphin:

The Idea

Then I got to thinking. The Santa Noses I buy from Dollar Tree because of the flashing light electronics come in this wonderful red sphere, in two parts. One part is a half dome that I saw had great potential.

First, I looked up what some modern Undersea Drones look like, and found these:

The Concepts

So I started sketching concepts of an Remote Undersea Explorer unit, like those used to find the Titanic, and used around the world to explore under the ocean where humans can’t go.

I used this robot mower as a basic inspiration:

I liked that yellow hood, and the curved back. The yellow side control holders. Using these basic forms, I designed an undersea drone.

So I began sketching some ideas and basic shapes:

Then a little more refinement after I had some initial general shape ideas down:

I had initially thought of one rear thruster which steers, but I realized that can be done with the two main side thrusters. However, I would need a better way to tilt the drone, so two up/down engines seemed a better idea.

Then after building the first few fit prototypes I realized I’d want a small camera cluster underneath the face, a way to hold the finger light in place but be removable easily (the need for a sliding face piece to get access to the light) and landing gear. Note also “a grip nub” is part of this next sketch because my first couple of prints showed me that it was very hard to pull the tail back to turn the light off with nothing to grip. The louvered vents were not enough.

It also highlights my attempts to make a bracer for the finger light to make sure pulling the tail back only pulls the switch back, and not the whole light, which my first failed prototype made quite clear. (Ooops! This is why we iterate!)


Prototypes

First, this is a fit test. All shapes are basically in place. But no functionality as such.

The bubble is in place. The Dyson-like engine bells don’t rotate. The rear ones aren’t going to. Those are for tilt adjustment.

The front engines will rotate for maneuverability.

The goal is to use a finger light inside to light up the face bubble.

Then I needed to figure out a way to turn it on and off unclumsily. I thought of several ways to add a switch to flip the finger light’s switch, but they all seemed awkward. I already designed a casing that fits the finger light parts to make a 3D printed case and switch, but then it hit me:

I can slide the tail of the SQUID forward to push the switch as it sits inside the body. And pulling the tail back turns it off.

This required some clever designing. I had to brace the light at the back so the light wouldn’t slide forward when I pulled the tail back. That had to be anchored to the body. But I also needed a brace in front to hold the light as the tail pushed the switch forward.

It worked. Now it lights up.

But it’s still far from finished. Details.


Details and Refinements

I wanted to add some detail. Mainly inside the bubble I wanted an instrument array that you could see from outside. I also wanted landing legs, so it could sit without flopping over. And then some stripes on the engines. Also, under the main face, I wanted a camera and some other instrumentation.

I found these amazing solid resin bubbles that are intended to add water beads to crafts. These come in various sizes and make perfect camera lenses. The refractive qualities are astounding! I’m using one for the main camera, and while you can’t see it in this picture, there is a tiny one inside the secondary camera opening. I have adjusted the depth of that to make it more visible in later versions.


Update: Prototype Finished

After refining some fits, adding a pair of magnets to keep the face plate in place, but allow it to slide down to replace the Finger Light batteries, tightening the side engine fit, I am considering this now a completed project.

Here, you ca make out the instrument panel inside the dome:

The side engines swing freely. (The rear engines are not movable)

You can imagine the deep sea exploration light being quite powerful in dark depths.

We are now production-ready!

You can watch a video of the full construction of one unit here:


Save the Endangered Pygmy Rhino

In 2014 at the Dallas GI Joe Convention I brought a diorama entry called Save the Endangered Pygmy Rhino. You can read about it here.
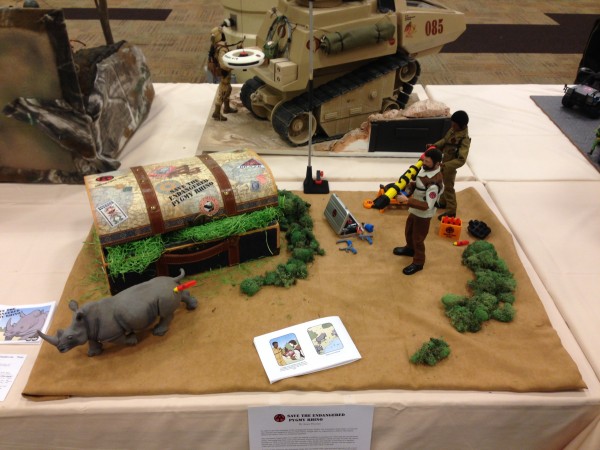
For 2024, Greg Brown asked me if we could revive the set to commemorate that original diorama, sold as a boxed set with cover art, the works.

So I set to work. Greg got some of the same Rhino, and got an outfit made. I updated a few pieces since the designs were old and imperfect. But nothing major had to be done.

The one thing we didn’t do was cut the horn off the rhino. My original set was intended as a conservation effort. Remove the rhino’s horn and put a prosthetic in place so poachers would have no reason to kill the rhino. The prosthetic included solar chargers, GPS and cameras to track poachers.

It wasn’t practical to cut the horns off these toy rhinos, so instead I created a tracking cuff that could be attached to the rhino’s horn. I used rhinestones as camera lenses.

The result was sold at the GI Joe show in 2024.

Here you see the final product.

As in the original Dallas Diorama, the set includes a tranquilizing bazooka with four tranq darts; a box to store the darts; an aerial surveillance drone; a drone charger/launcher/backpack; a control tablet; and two Rhino Horn Tracker cuffs.

For this set I used a larger drone than the one Cotswold has been offering for many years. This drone is the original design, and original scale. The backpack charger needed some small improvements, including my new harness. It also uses a shiny blue card-stock printed solar panel. The ammo box had improvements made too.

The box now has a vertical sliding holder to fit 2 Rhino Horn Tracker cuffs. You pull up on the rod and it brings up the trackers.


I had to make some revisions to the comic, since the whole story has changed. I updated the safari outfit, but also had to redraw parts that referred to the cutting off of the horn and replacing it with a prosthetic. Instead I show them just attaching the new tracking cuff. I also updated it with the Huxter Labs logo since that didn’t exist when I first made this comic. The original was an Adventure Team theme, for the 50th of GI Joe.


Drone V2 Charging Pack

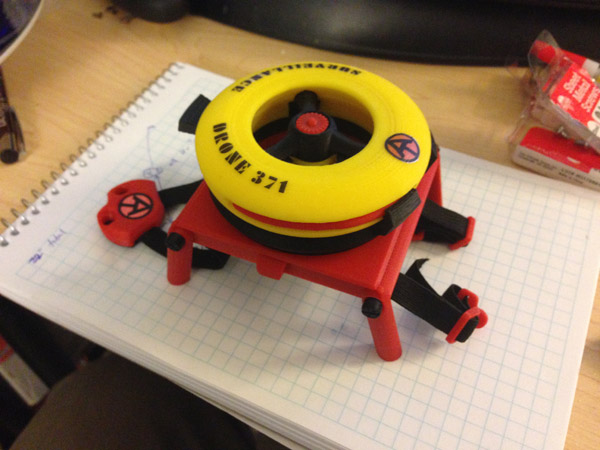
While my original Surveillance Drone is fairly popular, and I quite like it myself, with its rotating camera and fold-down landing gear, it is also harder to construct. For the Arctic Danger set I did with Cotswold in 2021, I designed a new drone, one that would fit inside a metal backpack, and be solid-state. No moving parts.

That was fairly successful, and we used a black and red version in the Spy Island: Aerial Assault Superset.

When in 2023 we decided to do a little focusing on RACCS, I finally got around to making a version that had legs, to make the RACCS more versatile. No longer would you have to attach it to an ATV or the Training Tower. Now you could make it a table using attachable legs:

So along with this, I thought it would be a very good idea to make a charging/launching station for this new drone, a bit like the charging/launching station I made for the original drone, which I originally used in the Save the Endangered Pygmy Rhino set, and revised last year for the Cotswold set of the same name.

So I made a new base, designed to snap to the RACCS platform. This base would have fold-out solar panels to charge an internal battery, which could then, in turn, charge the drone when it was docked.

I’m quite happy with how this turned out. The solar panels are printed squares on a shimmering blue paper, with a CRICUT-scoring to make the panels look real.

The two solar panels fold out flat. Each is offset vertically, so when you fold them up, they fit into a central area with a third solar panel. They fold nice and flat.

Here, you see the drone clips onto the base via two red clips. These snap nicely into place, and you can pull the drone off easily. The set comes with a yellow Wrist Controller.

Here you see the drone base with its solar panels out:

And again, on a RACCS Platform, ready to deploy!

Cybernetic Counter-Attack – EMP Cannon

When I first started in on making GI Joe Adventure Team gear sets, I began with a project that seemed fitting for the time. An Adventure Team Cyber Counter-Attack set. This would be a set of gear designed to counter a Cyber attack by a terrorist operation.

The concept is very old:

I’d say I sketched this up in 2013, not long after I got my first 3D printer. Or maybe even before.

Anyway, since then, this set has kind of sat dormant in my mind, but at the time, I actually had begun working on it.

As you can see from the concept, the Cyber EMP Grenade/Mine is intended to emit a blast of electromagnetic energy powerful enough to shut down any electronics in a region – the aim, to counter any Cyber Attack.

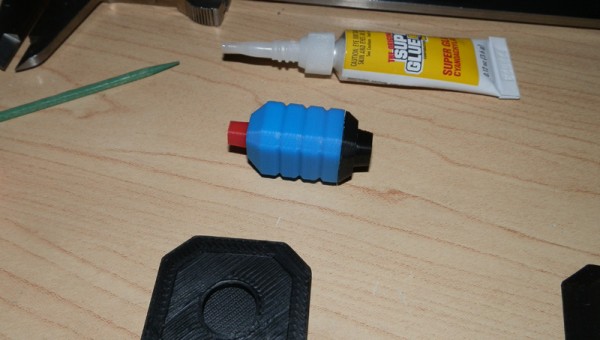
I did work on this EMP Grenade long ago. The design uses 3 magnets. One sits in the main body of the mine/grenade. Another sits on the end of a plunger, with a repulsing effect, so it acts like a spring. This allows you to push the plunger down as if there is a spring inside. This section acts like a grenade, and can be tossed.

Then the EMP Grenade can sit inside a cradle with another magnet inside that acts in two ways: It attracts the EMP Grenade to keep it in place in the cradle, and also the base magnet works to attach the mine to any metal surface for detonation later.

In 2023 Greg and I made a new set called Spy Island – Aerial Assault Superset, which included a Helijet in red/black, an Aerial Drone (with attachment), a drop canister, 3 EMP Grenade/Mines, and a wrist controller. The rest of the set is themed in black/red and together it made one gorgeous set!

The next item in the original (old) concept is an EMP Cannon. I did begin fleshing out some basic shapes in 3D but left it alone for many years.

This year, my brain got obsessed with it again, and I worked on a prototype of the EMP Cannon that I could use to help flesh out this original set, long abandoned.

So to cut a long story into a short clip, I did it:

These are not final pics. Though the only difference between this and the “final” so far, is that I actually cut the hexagonal light blue emitter into a backing, and a hex grid, so the grid itself is actually black.

Also, I intend to use an internal light (a finger light) to make it light up.

More on that as it develops.

The astute will note that to complete this set, I still have to make a pair of VR Goggles, and a control tablet. Though the control tablet is actually made, just not quite to the design in this concept:


Undersea Dolphin Equipment Pack

Been a while since I posted anything new. This is because I’ve been very busy prototyping new ideas, and manufacturing items for Cotswold Collectibles.

Let’s review some of what I’ve been up to. You recently saw my Centrifuge, which I’m calling REACT: Remote Electromagnetic Analyzing Centrifugal Tester.

And SPIDER, the Surface-Penetrating Imaging and Dimensional Electromagnetic Radar.

Since then, I was tasked with making a blue and white version of my Underwater Sea Sled that I made a few years back to complete a Cotswold set, Catastrophe in the Gulf.

Greg wanted a blue/white set to go with an orange SCUBA suit but reflected the design aesthetics of an original GI Joe Sea Sled in blue and white.

Trust me, there’s white underneath!

With that, we wanted a shark or a dolphin to make a new set involving undersea exploration. We were trying to source a reasonably scaled and reasonably priced shark, but the only ones that seemed to be available were too small.

I did find a nice hammerhead shark (because hammerheads are my favorite!) which is large enough:

But in the end, we decided to go with a dolphin instead, because I managed to find a nice Dolphin at about 10 or so inches long, and we went with that. (We can save the shark for later.)

In the resurgence of GI Joe in the 2000s, Hasbro made a Dolphin Handler set, and man, that would have been ideal, but that’s impossible. (I have one, but I don’t know where. It’s in a bin somewhere. Fun figure. If you pinch the two pectoral fins together, the dolphin squeaks quite realistically!)

So along with the sea sled in blue/white, I created a dolphin gear pack that in some way is meant to resemble Darwin’s pack from Seaquest DSV.

So let’s start there:

Dolphin Equipment Pack

This dolphin backpack uses elements of the Sea Sled, bent and fitted to a backpack for a dolphin that has a hole for its dorsal fin, and a strap to hold it in place. I was toying with the idea of making a rebreather for the dolphin that covered its breathing hole but opted against it.

I went with prototyping in blue/yellow as Darwin’s pack was blue/yellow. In the set, we will use blue/white.

The strap, you might think, should go straight down under the dolphin’s belly, but no. That is more awkward to fit on. This way, you slip the strap under its chin, and pull the pack down over the dorsal fin and the tension holds it perfectly in place.

This is one of those things I’ve wanted to do for along time, and now it’s done. Coming to a set near you soon.