Plastic Confetti

Almost immediately after my first print I noticed something about maintenance of the Afinia printer, and any printer that uses perf-boards as a print bed. (Perf-boards are quite good at holding down the part. There are other methods, but this one is tried and true.)

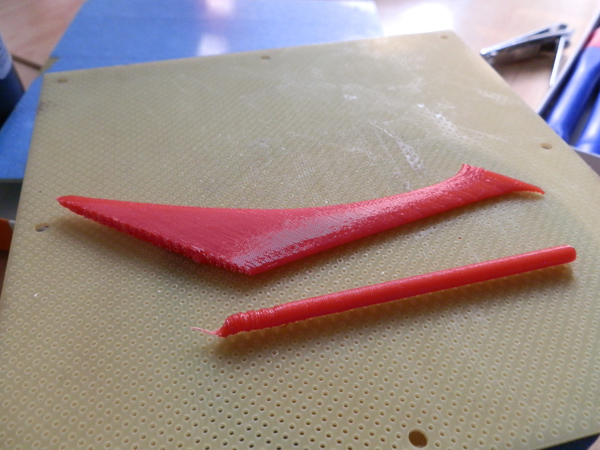
When the raft is pried up off the perf-board, it doesnt’ always come up cleanly. That means that the plastic pegs that have melted down into the holes (which make the part hold firm to the board while printing) have come off and are now stuck in the perf-board holes.

These should be removed before printing again otherwise the benefit of the holes will be diminished.

I use a hard-wood toothpick. The ones that are square for most of the shaft and are sharpened to a non-sharp point. These points are perfect for shoving into the perf holes.

Flip the board upside down and begin pushing the toothpick through any hole that has plastic in it. It’s not always easy. Sometimes those little buggers are stubborn. And the toothpick breaks. You’ll need a lot of these.

(I’m considering finding the right paperclip gauge to use a paper clip instead, and then print a little handle for it. But that’ll be later.)

And so after doing this over my trash bucket about 20 times now, I thought: “That’s a lot of tiny bits of plastic. I wonder how that accumulates over a year.”

So I decided I’m going to keep all those bits of plastic in a jar and see how it looks when a year has gone by. It should be interesting considering I’m planning on buying a lot of colors to print with.

Switch Safety

In our kitchen we have a garbage disposal in the sink. The switch for it is, somewhat disturbingly, right next to the switch for the light over the sink (and an outlet) all in one switch plate. The plate looks like this:

duplex_outlet_2_toggles_switch_plate

The other disturbing thing is that the switch sits under a low cupboard and to operate either of the switches, you really have to do it by feel. And since garbage disposals are dangerous, there could be metal things dropped down there, like spoons, etc, or a cat’s paw (since they get in the sink a lot), turning on the wrong switch could be – very bad.

I got a bit tired of this problem and thought I should do something about it. My first thought was put a bit of duct tape on the disposal switch so when you feel for it, you won’t hit the wrong one.

Until I got a 3D printer.

So I set out to design a switch safety protector which I could replace the switch plate with. But the plate was wider than the 5″ maximum print area of the Afinia printer. So I thought, why not just print a plate to go over the current one?

So I downloaded a switch plate from Thingiverse to use as a template, to get the holes in the right place.

Then I cut the plate into a fairly thin strip and modeled two protecting arc guards to prevent accidental flipping of the wrong switch:

disposal-switch-safety-cover

I printed it out roughly (.25mm, Normal mode) and installed it. The thing works perfectly.

And to install it you don’t have to remove the original plate. This fits on over it. You just remove the screws above and below the switch you want to protect, and put them back in.

Now, to switch on the disposal, you have to do it very deliberately. It is no more difficult to switch it, but it is certainly more difficult to do it accidentally. OLYMPUS DIGITAL CAMERA

The Rocket Work Continues

Last night I got quite a bit done. I printed the slotted mid-body part which the black and yellow vanes will stick out of, and I printed the bottom of the rocket again (though come to think of it, I should have held off until I had modeled in the peg-holes needed for the main fins. Oh well, another sixty cents gone… :-)

When I had the body printed, I tried test-fitting in the black vanes I had printed the day before. No luck. The black fins are way too thick. (I had remodeled them to be a bit thicker, and have not yet gotten a handle on how much gap to leave between tight-fitting pieces.)

So I remodeled them again, did a test print (just a short piece of the fins) and test-fitted, and while they fit, it was still a bit tight. So I did another remodel. I am confident this one will work.

Here is the body, as printed last night. It shows a few things that need to change, but nothing immediate.

OLYMPUS DIGITAL CAMERA

And then this morning I decided it wast time to see how I would even print the main upper arm of the rocket. The problem is it’s thin, has no real square base to sit it on, and I wanted it to print fairly well. I decided since this was a test, let’s test the limits of printing on an angle without support material.

Here’s a picture of the 3D printing software with the two pieces (the upper arm and the antenna strut) as the printer would print them:

tb3-upper-arm-antenna-printing

Believe it or not, the damn thing printed! Like this! I mean it was printing the arm out into space! There was no support material, but it took that graceful arc out into nowhere like a pro! 

OLYMPUS DIGITAL CAMERA

Notice something not quite right with the antenna strut? (The stick.)

A further test was printing the very thin pole of the antenna strut. I knew this would print quickly because it’s so small but it has a lot of layers. I found out something interesting.

OLYMPUS DIGITAL CAMERA

Notice how, at the base (on the left) it is nice and even, and prints fairly smoothly all the way up. But near the end it gets kind of gummy. (I aborted the print. It should have been another 1/3 this length.)

Here’s what happened:

While printing both the vane and the strut, the printer head had to move between the two parts, printing each layer separately, moving to the next piece and printing that layer, etc. That gave the plastic cooling time.

Once the printer was left to print only the strut (because it’s quite a bit taller than the upper arm) it printed over and over without giving the previous layer cooling time.

What did I learn? When printing these thin struts, print 3 or 4 at a time, with space between to give the plastic cooling time between layers!

I knew I was learning something.

Here is last night’s work:

OLYMPUS DIGITAL CAMERA

The Cuts

When you buy an Aerobie (a wonderful flying ring invention that still is the thing furthest made and thrown by man), the first game you learn is “fetch”.

What I found out not long after my first Afinia print is that the first thing you really learn is to wear the damned gloves they send you.

Two prints after I got the Afinia, I sported two cuts on my fingers.

And after about 20 printed things, now, I have learned some. But not much.

I even cut myself – twice –  through the gloves, when using the putty knife to pry the object off its rafting.

This morning I left one of the gloves downstairs where I was cleaning up an object last night. So I just decided to push away from my hands and fingers. But dammit, I still managed to, using a smaller chisel, slice through my thumb. The thumb contains a fairly main artery, and so this bleeding still hasn’t stopped fifteen minutes later.

I’m keeping pressure on it until it clots, so I can apply a band-aid, but, man…

And this was after I promised myself I’d be more careful.

No photos will accompany this particular entry. :-)

Pistol Display Stands

I collect pistols. Not real, functional ones, but prop pistols from Science Fiction TV shows and movies. I have some very nice ones including a model kit of the Galaxy Quest pistol, a Steampunk pistol, a medical tracking gun from Doctor Who, more Star Trek phasers than I can remember, a very nice resin model of a Space:1999 Stun Gun, a QMX Mal Reynolds pistol from Firefly, or more accurately from the film Serenity, and a gorgeous die-cast/plastic blaster from Blade Runner.

One of the projects I want to take on with my Afinia printer is to make theme-based display stands for these.

One thing that 3D printing doesn’t yet have, at least easily or cheaply, is a 3D scanner. I would love to be able to scan the pistols and use the exact dimensions as a template to build the display cases. Let’s take the Serenity Pistol, for example.

qmx-firefly-mal-reynolds-pistol

I searched online and found a model of it on Thingiverse:

thingiverse-firefly-pistol

So ideally, to model a stand that would take the shape of the butt of the gun, I cut the butt off, inverted it and printed it to see how closely it matched the QMX pistol.

firefly-pistol-butt-only

I printed this in black. It was hard to get off the raft, and the hole was filled with support (normal) which was hard to get out.

I am reprinting it in a reel of blue premium filament I just got. The premium filament prints so much nicer.

There is, I believe, a systematic problem with printing with the cheaper Octave filament. Even Afinia’s web site store says that the extrusion temperature of the Octave filament is 210-250 degrees, while the head heats to 270. I found the hairs on the TB3 rocket project were likely due to the extra heat making the Octave filament “runny”.

I think most of my important printing will be done with premium filament from here on out, though I will probably need to print some things with the cheaper stuff.

The Print Shop Is Open!

Since the Afinia printer was glitching out, ending a print job by continuing a previous one, I had to shut down the print shop. Tonight, I risked the old method of formatting the Micro SD card to see if that would work because I was itching to print again.

I printed this topographical model of Mount Everest in a 7cm square block.

This print, in Octave black (which tends to be shiny), did not end properly, but at least it did not end catastrophically, with the head damaging the print. I was able to shut down the printer before anything bad happened.mount-everest-in-black

AS this print was being made, Afinia updated their site, putting V1.19 of the software up, which promises a fix.

I immediately printed a filament clip (that fits on the edge of a reel, so the filament can be clipped to it when not in use.)

SUCCESS! The print ended perfectly!

I am now printing another thing, to be talked about later.

Update: I have since printed three things successfully, each item finishing perfectly, with no further glitches. Yay!

TB3 Rocket – Test Fit

Despite the black and yellow vanes of my TB3 Rocket being redesigned, I was able to test-fit the old black vanes into the new body section. The yellow ones would not fit due to the redesign. I printed the new body section (with fingers reaching upward to accommodate the vanes) but the printer glitched out and broke the fingers, snapping the protective face plate off the print head assembly. (It was after that that I decided to shut down the Print Shop until a fix was in.)

But for your edification, here is the TB3 rocket, just test-assembled, with the seven parts I have currently printed. Every part on this body will be re-printed due to design changes, except the nose cone which is fine. The pre-assembled rocket stands at 15″ currently. Once the engines are attached, it will be taller.

OLYMPUS DIGITAL CAMERA tb3-concept-test-render-500

So I think you can see that real progress is being made. Once the print bug is fixed, I should be able to get this finished in a week or two. (There is still some considerable modeling to do to make the various parts of the engine arms fit with each other and the body.)

Note: The whole thing will be reprinted in highest resolution later, when I’m satisfied all the parts are “finished”.

The Print Shop Is Closed! (Printer Still Misbehaving!)

The Afinia printer continues to glitch out when finishing prints, sometimes. If it was every time it would be easy to continue printing. I could watch it end and just shut it down. But I printed four pieces today, and three printed fine, and the last one glitched out. Before I caught it, it had pushed down onto the fine fingers of my latest piece, breaking some of them, and even popping the head cover off the printer head assembly.

Afinia promises a new version of the software that fixes this glitch, but I’ve been waiting several days since they said it would be up “probably today, maybe tomorrow”, and I still don’t have it.

The Print Shop is Closed until I can rely on the printer finishing properly.

On the plus side, I now have at least a test version of all of the main central body pieces of my TB3 rocket printed, and it now stands on its own, at over 15″ in height. And the interlocking fingers and black vanes slide into each other very nicely.

The piece that just broke has to be printed again anyway, because I redesigned the base after I started printing. I also have some more minor changes to make to make it easier to pull off the rafting.

The black and yellow vane pieces were redesigned after I printed them today, so they, too, will be reprinted, when I can.

Also, I think there are too many vanes going around the waist of the rocket. There are now 21 (one every 15 degrees, but with 3 gaps for the main fins.)

I think I’ll change it to 15, one every 20 degrees. It will thicken the body fingers, and I could even thicken the vanes themselves if I have to.

I think I’m going to be a bit upset until I can be sure the printer prints and ends the print jobs properly – every time.

Results Of Printing The Rocket Vanes

The printed part came out nicely, but the support material was arduous to get out of a cylinder walled by very thin vanes. The vanes began to break off, which I expected, but hoped wouldn’t happen. I am printing in a way that is not optimal for this printer.

Here’s the result. (Well, almost. I broke some of the vanes off on purpose after the part became useless.)  OLYMPUS DIGITAL CAMERA

(Hey, I almost accidentally made a Turbine logo! :-)

So this morning I set the part up to print upside down and watching it was fascinating.

Here’s a video of the first bit. It’s not time-lapse. Feel free to zip around:

Here’s a video of the part as the vanes are about two inches tall. What I find interesting is that when the head disengages from any given vane, the vane wiggles. But note how perfectly vertical it is printing, with no extra support – just the thin vane it’s printing.

Here is the part fresh off the printer. See how printing it upside down removed all need for support material. Almost. There is some needed now because at the bottom there is a peg, and the area surrounding the peg needed some support.

OLYMPUS DIGITAL CAMERA

The black (lower quality) ABS plastic leaves fine hairs between the parts, but for the most part, at .2mm and Normal mode, it’s printing quite nicely. A brush would remove the hairs easily. They are spider-web-thin. (I’m holding it in a glove because I was trying to remove support at the top with sharp tools.)

OLYMPUS DIGITAL CAMERA

Let me tell you now why I have to redesign this part:

It’s too flimsy. I cannot hold it hard enough to remove the support material without breaking the vanes.

So I’m redesigning this section.

I’m a bit stubborn. It would be incredibly easy to design the part so where the vanes stick out of the body, the body too is black. (And yellow for the lower vanes) but I want to do this right. So now I’m going to redesign the vanes with a central core, and then build the body with vertical teeth (much like the separate vanes) but the teeth will be thicker and stronger. And I’ll design it so the vanes will slip down a hollow cylinder, but stick out of the red body.

In theory.

And now I printed the yellow vanes (in the old system) to see how they would print. Getting the support material off was a bit challenging, but I only bent one vane. Looks fairly good.

Here it is still on the print bed, before removal of any material.

OLYMPUS DIGITAL CAMERA

Here it is with the black vane part just resting on the yellow.

OLYMPUS DIGITAL CAMERA

This is fine for test-fitting, but I remodeled the whole thing to work better, and be stronger, I hope. I’m about to print the updated mid-body section to see if it all works together. I’ll have to re-print these too, but these current versions will at least help me see if they will fit into the body section.

Learning Lessons – And Still Glitchy

I spent some time tonight making three pieces of my rocket fit together without conflicting in space. That can be quite difficult when you’re trying to make it so 21 thin vanes slide into a cylindrical body part which has slots for those 21 vanes. And further complicating matters, the vanes themselves are part black and part yellow, meaning I have to print the black area as one part, and the yellow as another. And both of those have to slot into a red body part. Like so:

tb3-mid-body-assembly

On the left you can see the red middle body part with slots. Slipping down onto that cylinder would be the 21 vanes of the mid-section’s black vane piece. The cap at the top stops at the top of the red body tube. Then underneath the yellow part of the vanes would slide up into the red cylinder. A delicate fit. If it works. If it does not, I will have to redesign this part if I want to print it on the Afinia without issue.

This is where I may have to eventually redesign the rocket to accommodate some of the limitations of the 3D printer technology.

Incidentally, in my modeling program I’ll be coloring parts of my model no one will ever see (when assembled) cyan in order to remind myself that those parts of the model will be hidden. Of course coloring the model has no bearing on how the model prints. It prints with whatever color filament I’m using at the time.

So I printed this piece tonight, at .25mm in Normal mode. It took not long under two hours.

tb3-black-vanes-1

I learned an important lesson. It can print these thin vanes ok, but they are very weak. And if I print this pieces oriented like you see here, the hollow inside (which is capped at the top) must print support material. And that means pulling thin support material away from thin vanes, and at the cap at the top you really have to get in there and remove rafting material. With 21 thin vanes in the way.

When I print this again, I will be printing it upside down. The angle allowed for printing without support is variable, but I’m almost sure that the vanes are at an angle slightly less than the maximum. So printing this upside down may just work. If it works as I hope it does, it will print like an upturned dixie cup, and the only support material needed will be just a bit at the “top” which has the peg protruding.

tb3-black-vanes-upside-down

But, sadly, the printer glitched out again. When it finished printing this part, it didn’t finish cleanly, rather, it looked like it was trying to print a previous print job, forcing the print head down into the part.

I am assured a new version of the software fixes this, and should be live any day now, but I haven’t seen it yet.

Until this new software becomes available, I can’t trust the printer to print anything, as it freaks out at the end, and I’m afraid the slamming of the head into the plastic part can only damage the printer.