AT Set 3: GI Joe Adventure Team Action Pack Backpack Drone Surveillance

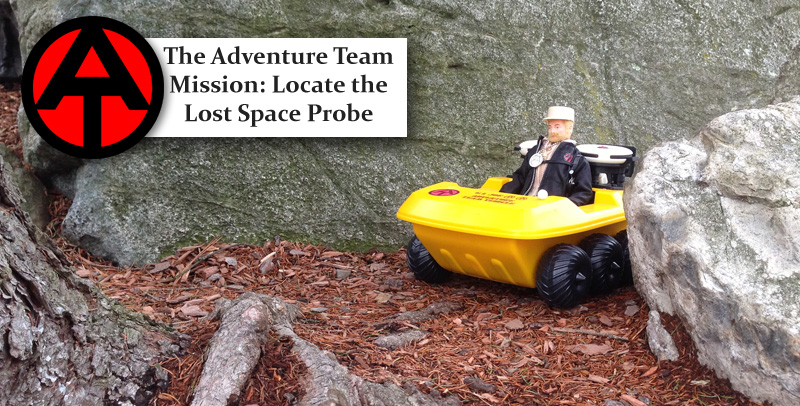
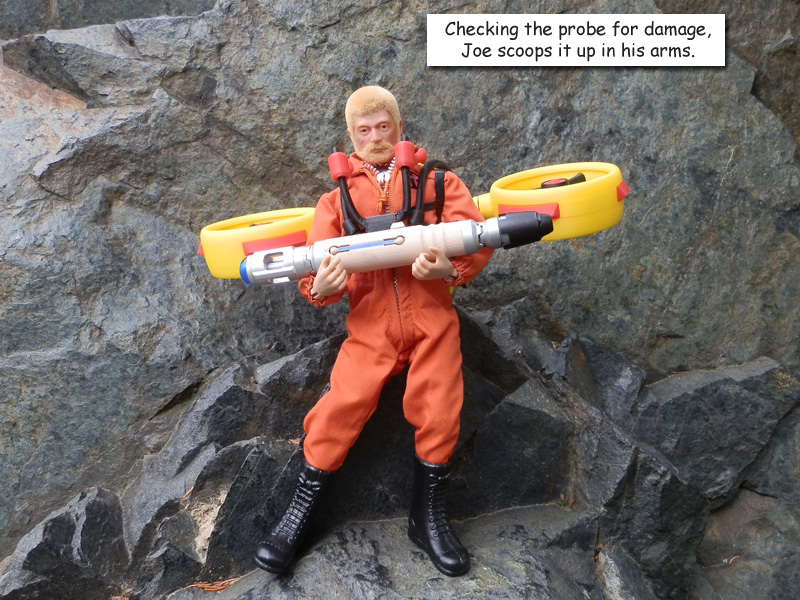
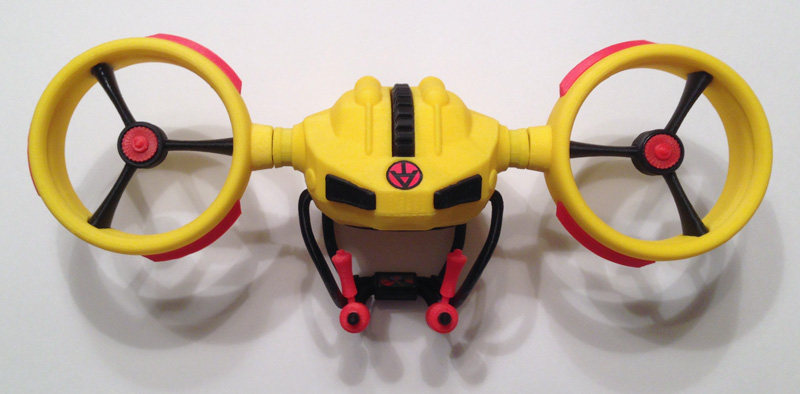
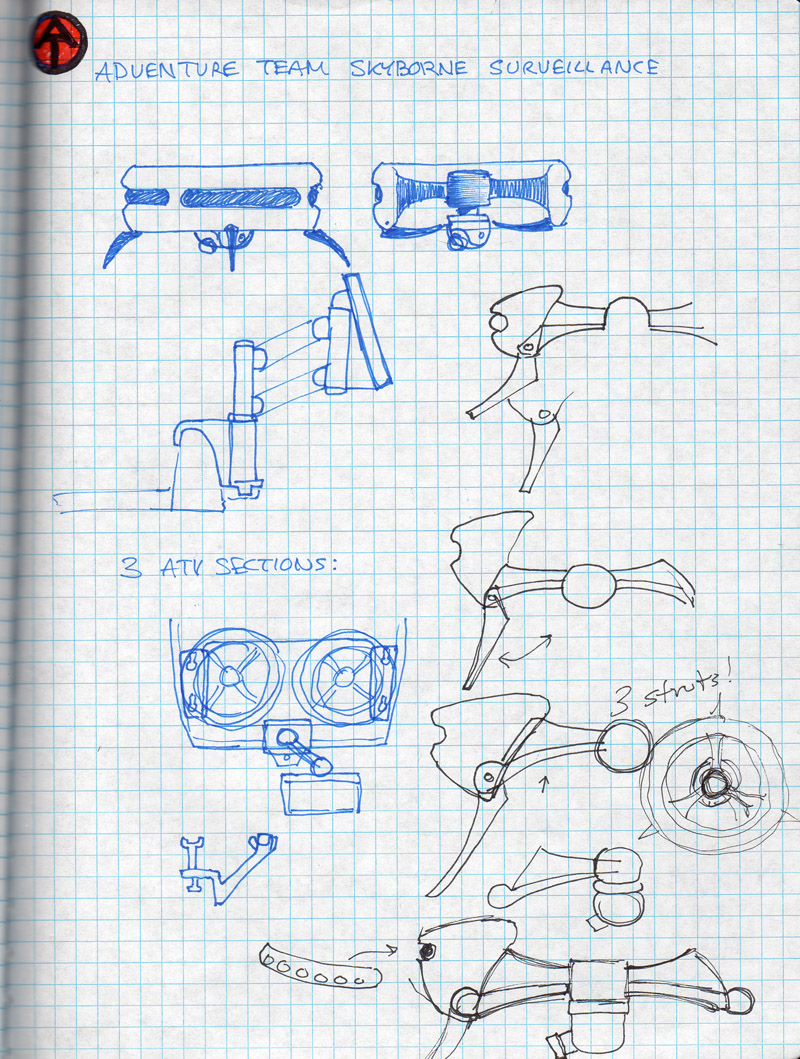
Since my second 3D-printed Adventure Team set, the AT Remote Drone Surveillance,was completed a couple of weeks ago (see the post here and the photo story) I decided that some Joes would want to carry along a Surveillance Drone without having to have the ATV or Trouble Shooter handy.

at-drone-05

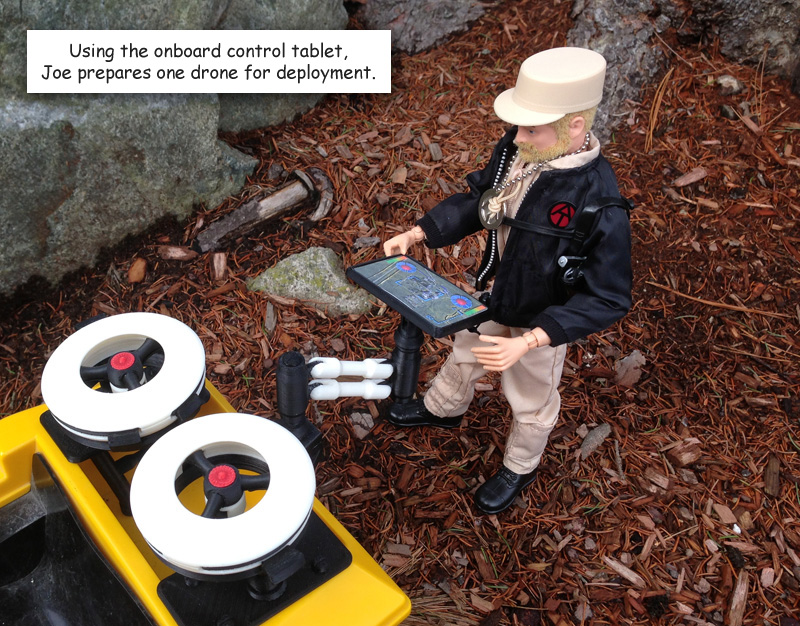
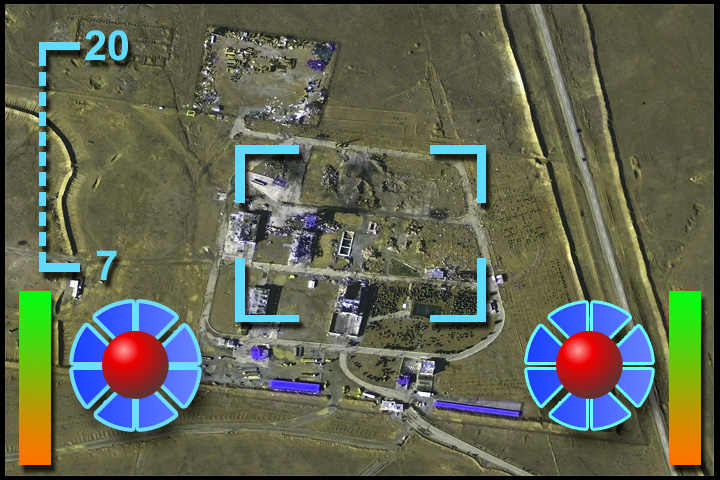
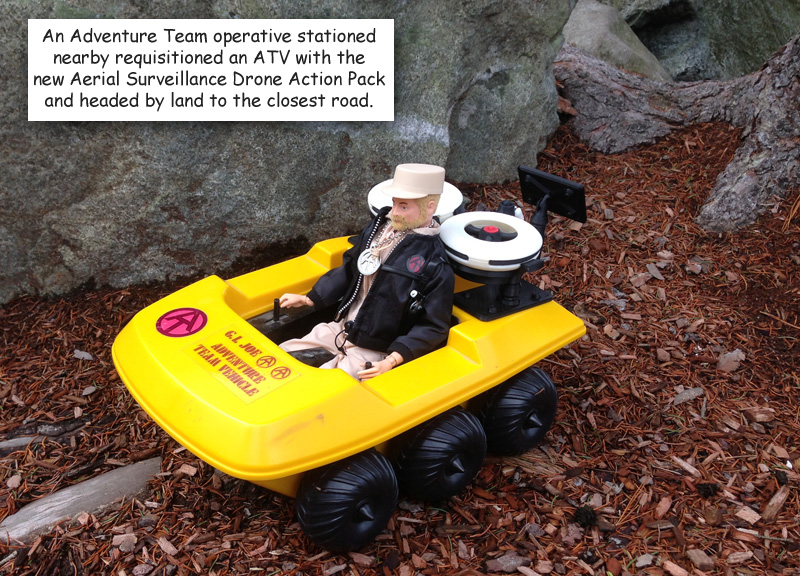
Having these mounted on an ATV is fun, and allows me to add an armature carrying a control tablet so Joe can stand next to the ATV and control the whole operation.

Two drones are nice, but sometimes you only need one. And the best way to carry it would be on a backpack. These drones are lightweight but large and cumbersome to carry.

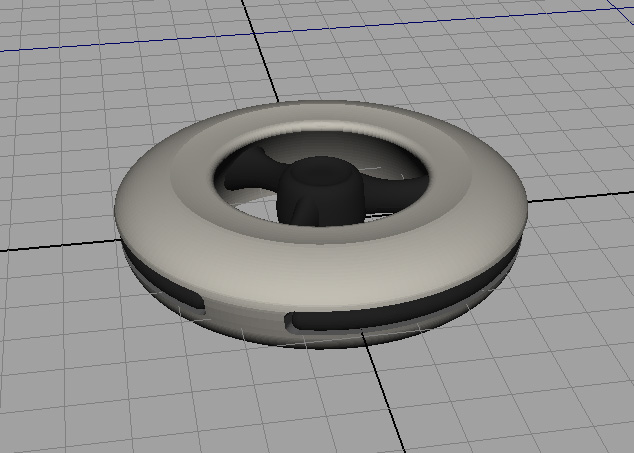
So I designed a portable version of the drone with backpack that had multiple purposes. (Note: There were no changes necessary to the drone itself.)

First, it allows Joe to carry a single drone and control tablet wherever he needs to go on foot.

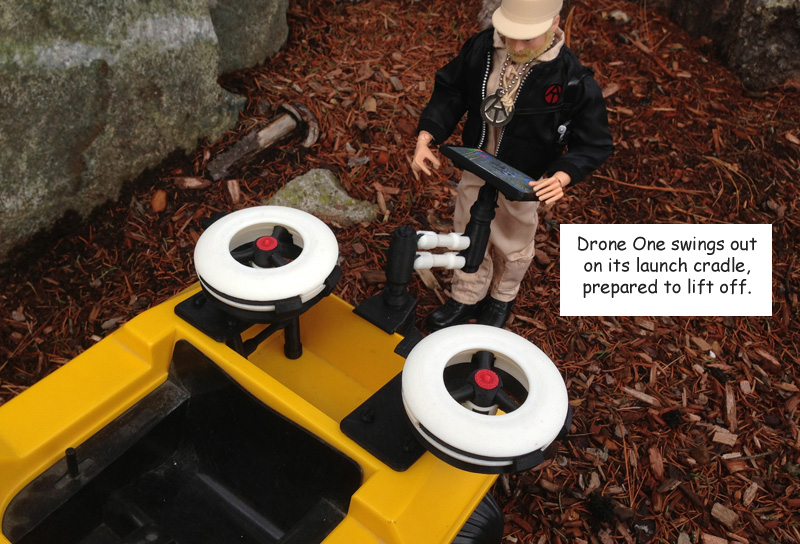
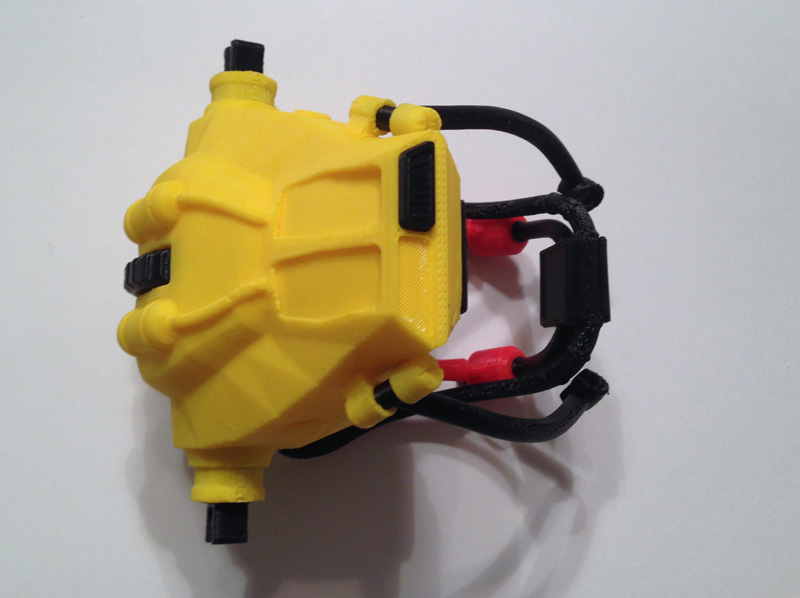
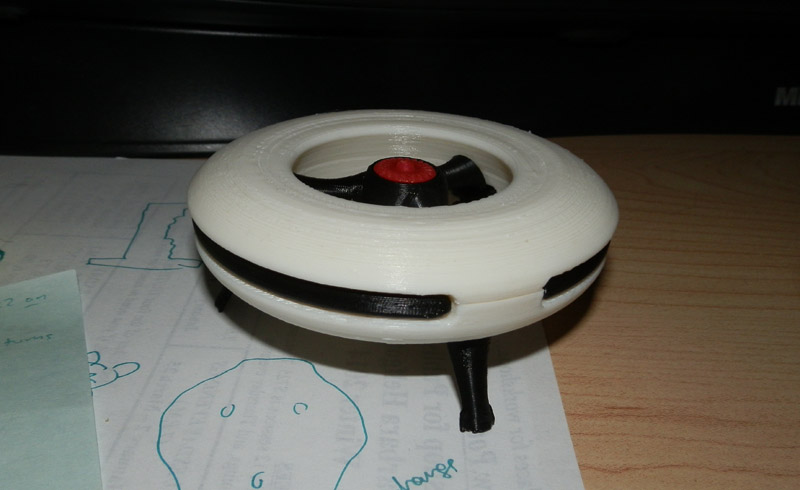
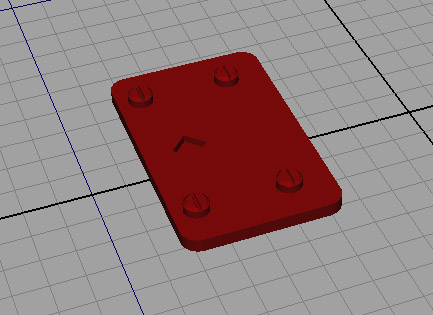
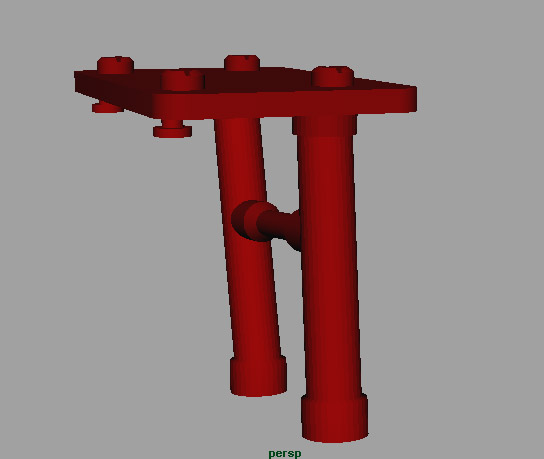
Second, it removes and acts as a launch pad, with legs to set it on the ground.

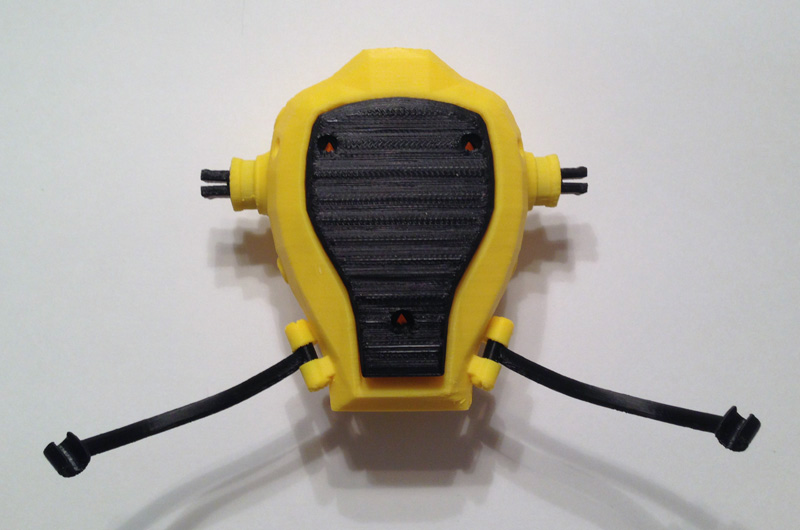
Third, it is a solar charging station. The solar cell absorbs the sun’s energy and powers internal batteries that charge the drone when it is attached.

It stores the control tablet for convenient carrying.

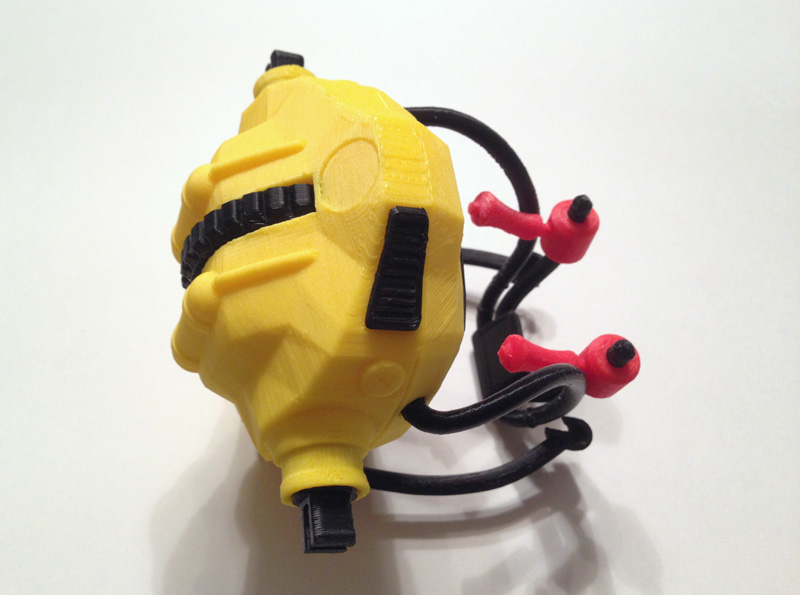
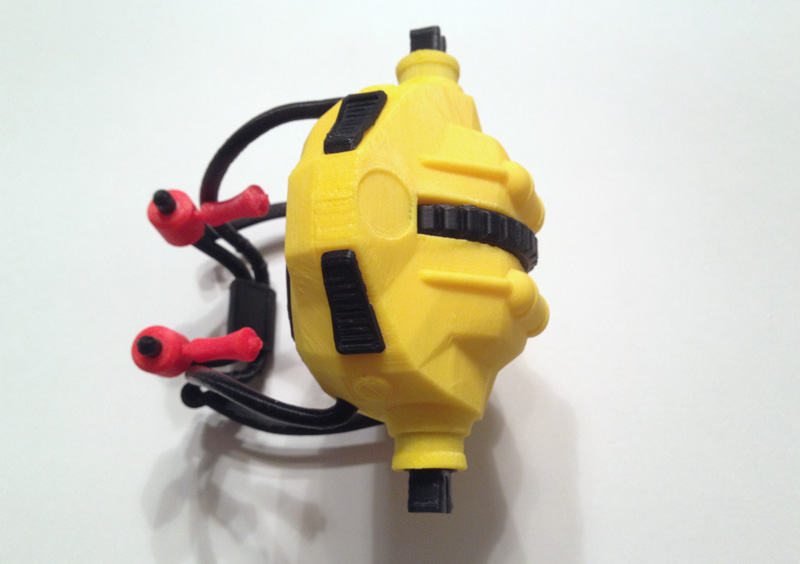
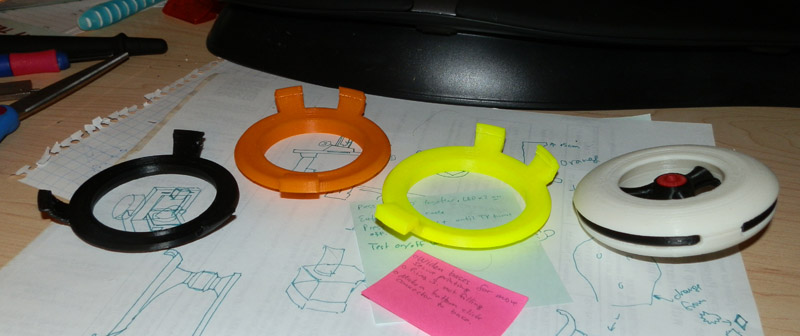
I designed this to be very much like an original Action Pack GI Joe set. I printed it in orange and black (mainly) which are traditional Adventure Team colors, and the solar cell is in blue because most solar cells do tend to be blue.

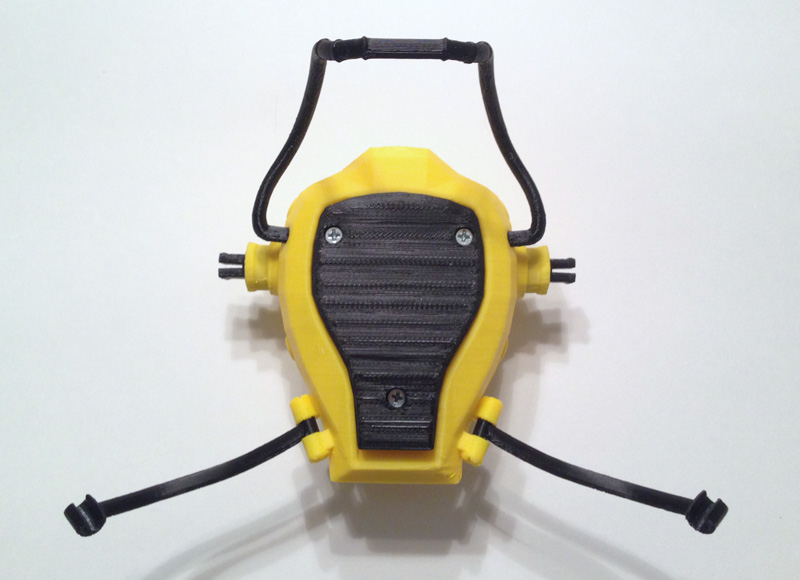
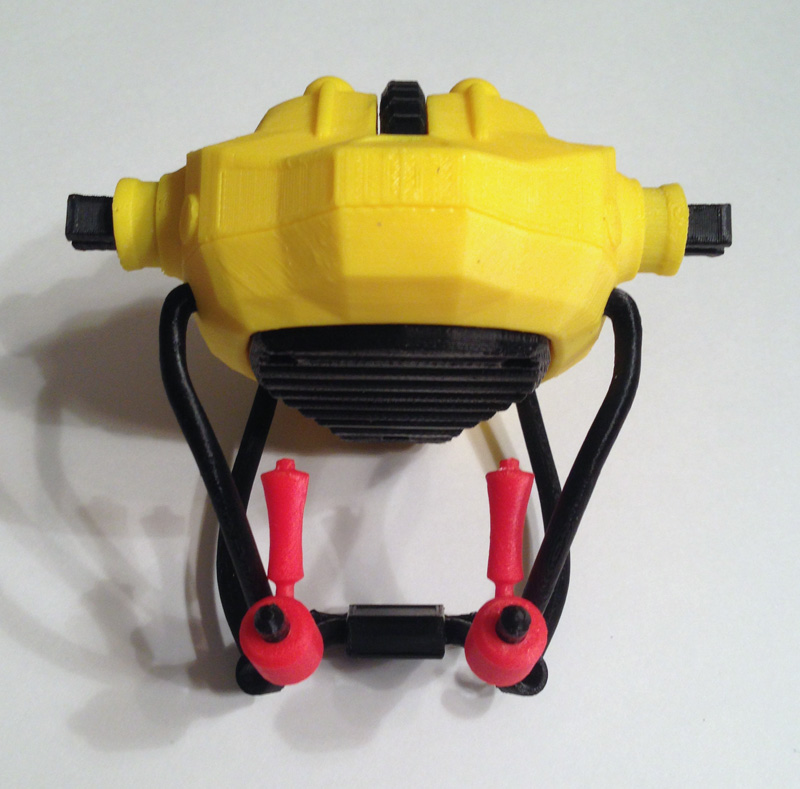
I used 1cm braided elastic for the harness straps, and printed the harness chest piece, the strap clasps and strap adjusters.

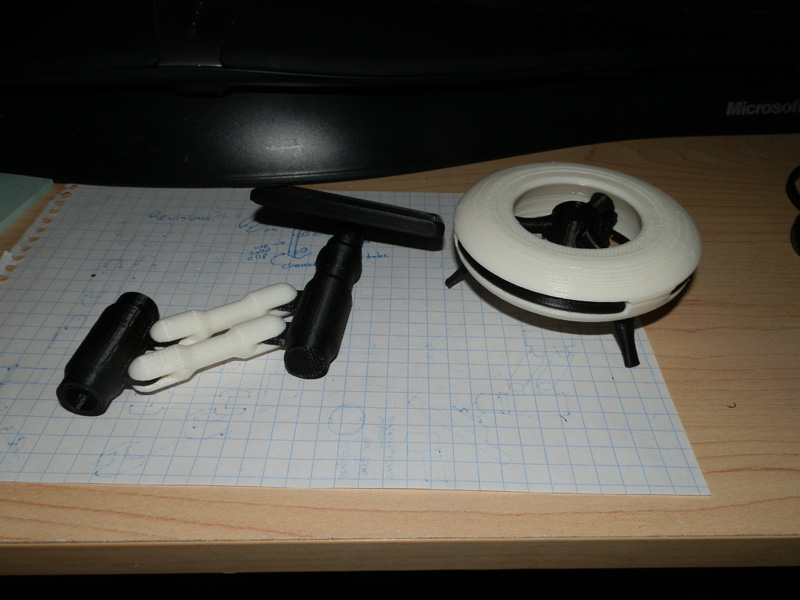
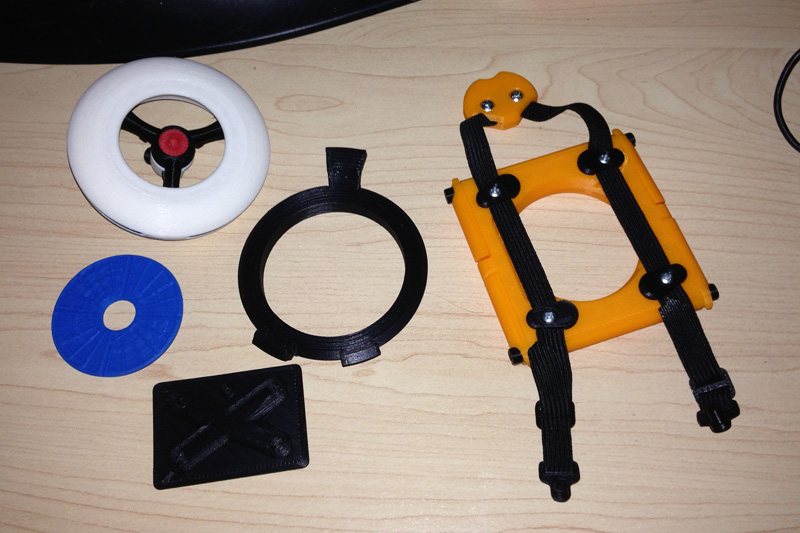
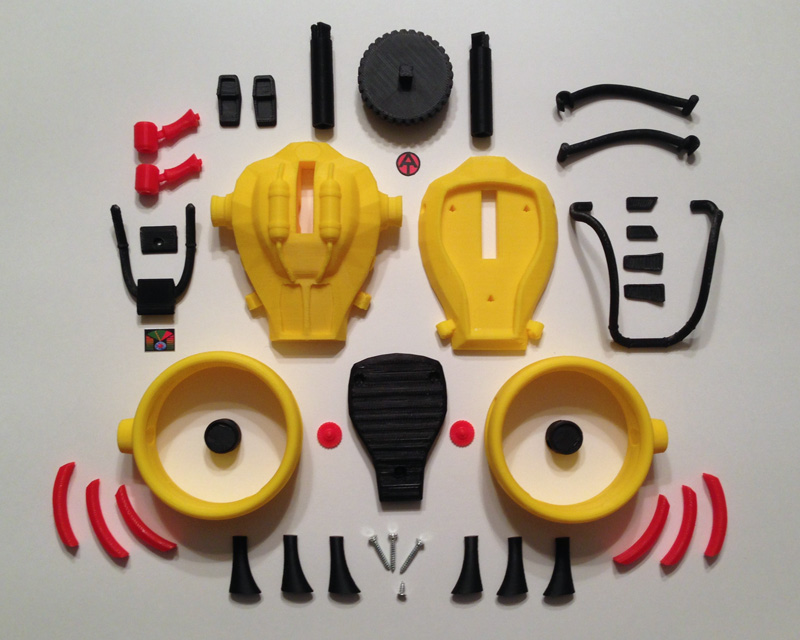
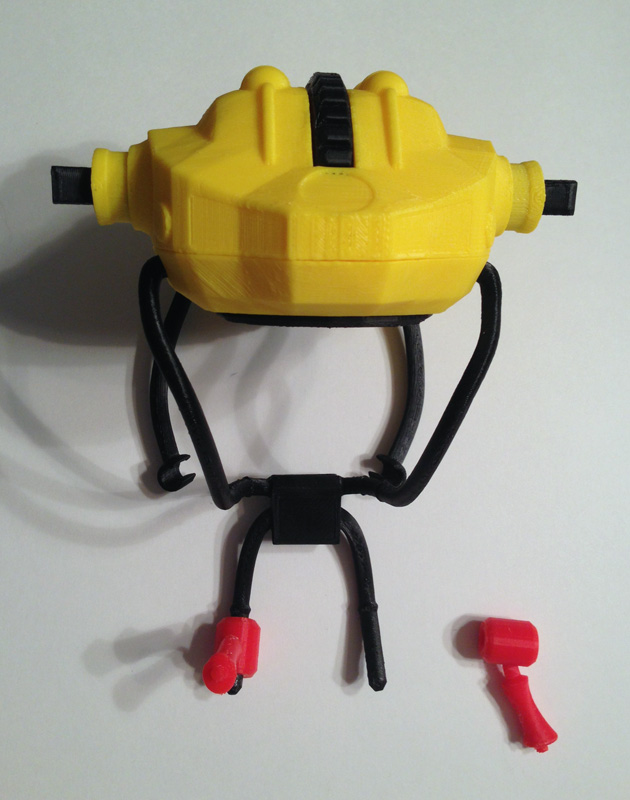
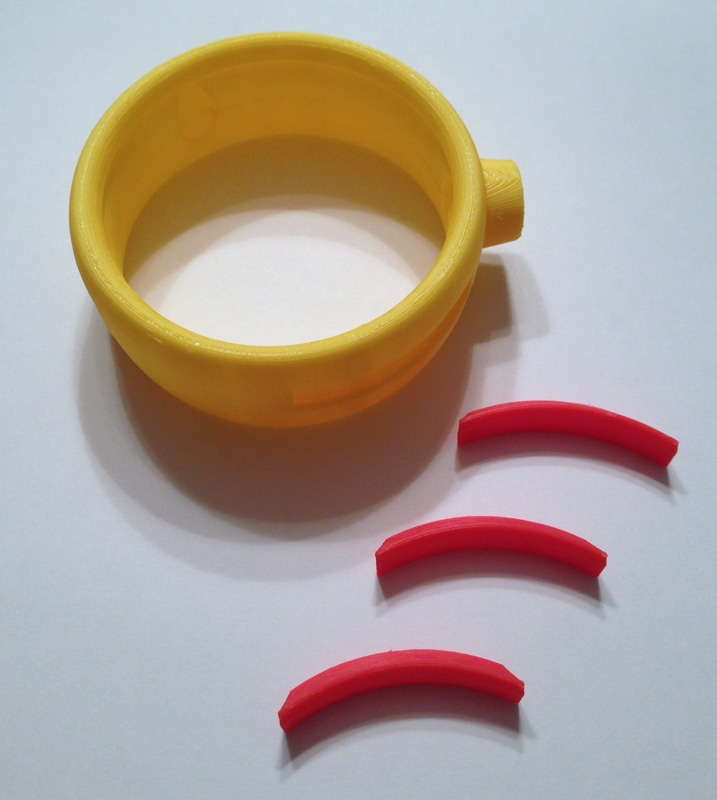
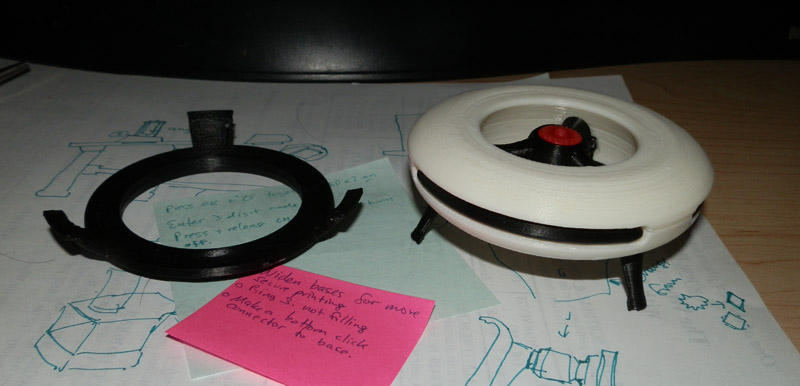
Here are the main parts, printed.

at-drone-backpack-main-parts
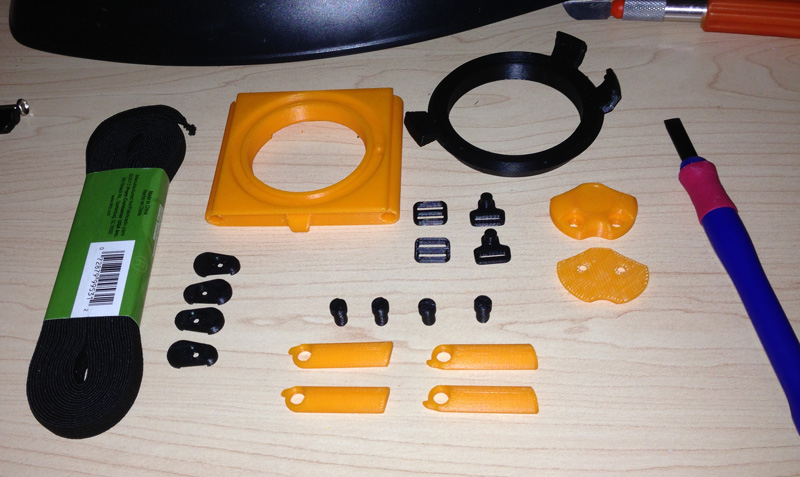
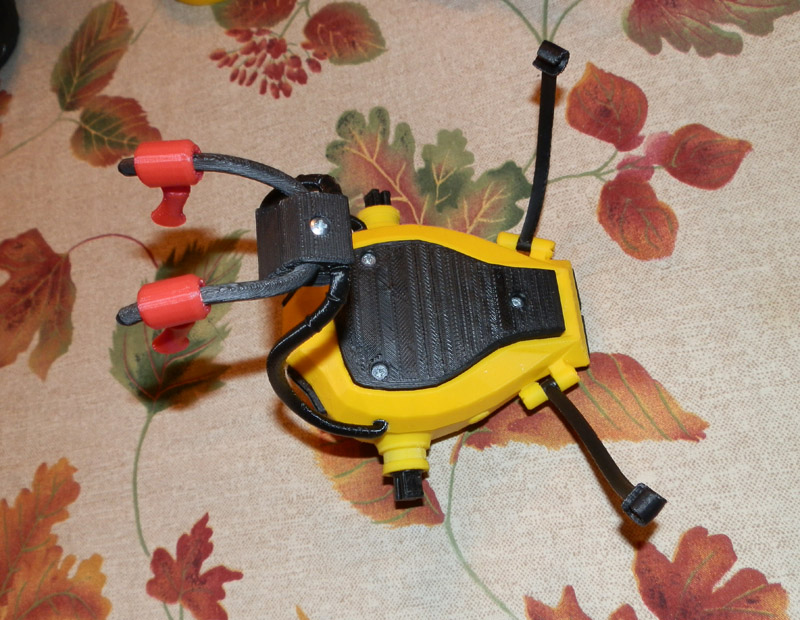
Seen in this picture is the main backpack frame, the drone carrying and charging cradle, four strap connectors for the frame, four legs, four leg bolts, two strap adjusters, two harness clasps, and the front and back half of the harness connector.

at-drone-backpack-more-parts
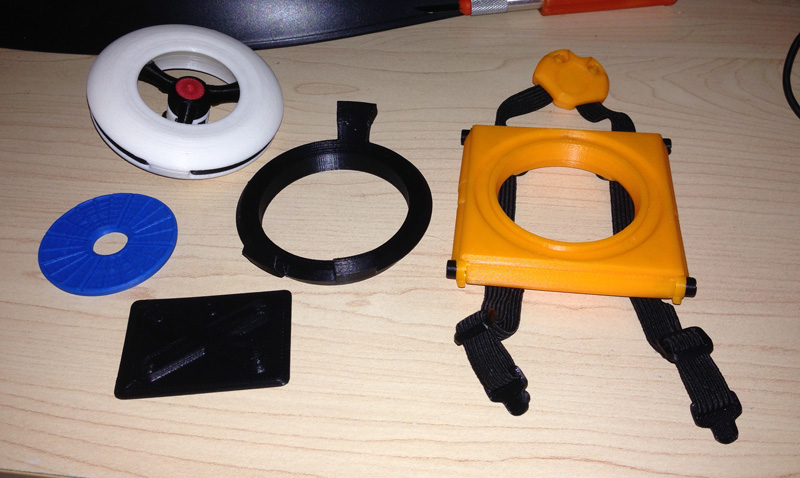
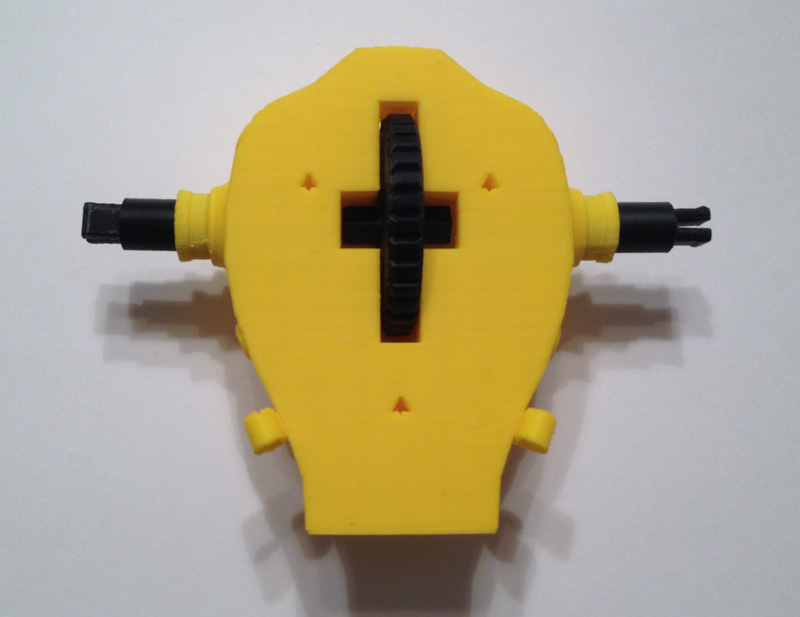
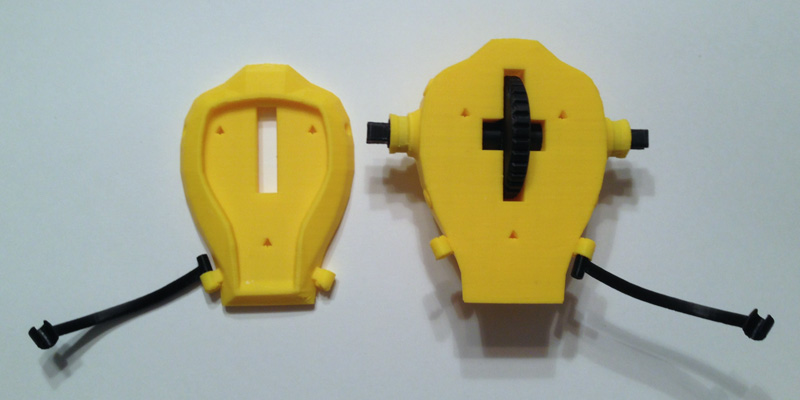
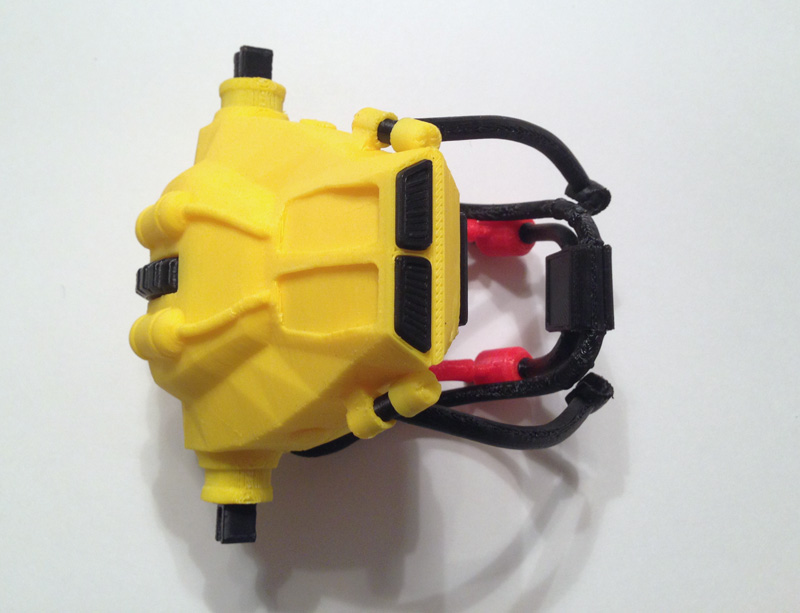
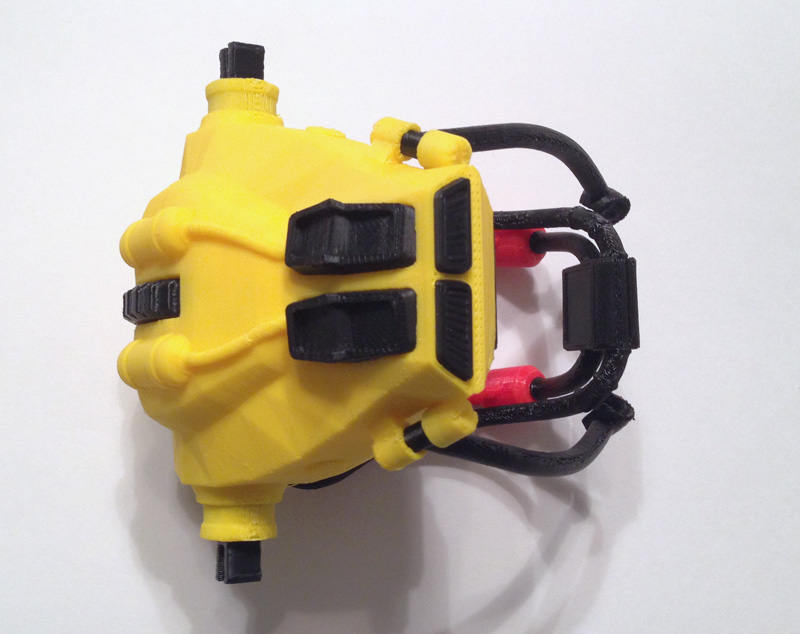
Here we have the solar charging cell, the control tablet (seen from the back – the front will have a paper insert) the charging cradle, and the backpack, partially assembled.

at-drone-backpack-main-parts-02
One main thing I wanted, especially after experimenting with a hard printed harness for my GI Joe Adventure Team Action Pack Flight Pack, was an elastic strap, like some older GI Joe sets. I found that 1cm elastic worked well, and I could melt the cut ends to prevent fraying.

My main concern was that I didn’t have to sew anything, so I designed the strap to not have to be sewn at any point.

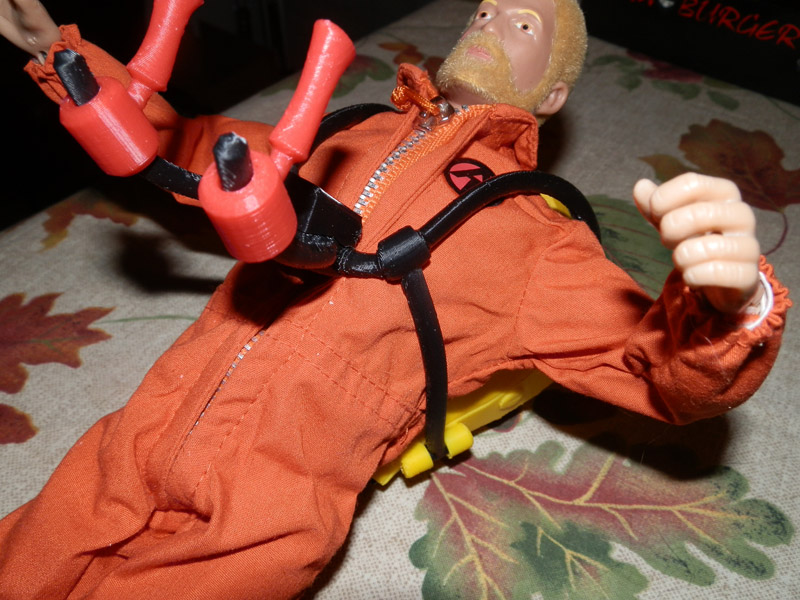
What I did was, I thought, pretty darned clever. The strap is one continuous length of elastic, melted at both ends. The strap’s middle is sandwiched between the two halves of the chest harness connector with two screws that serve the dual purpose of joining the halves, and anchoring the elastic straps.

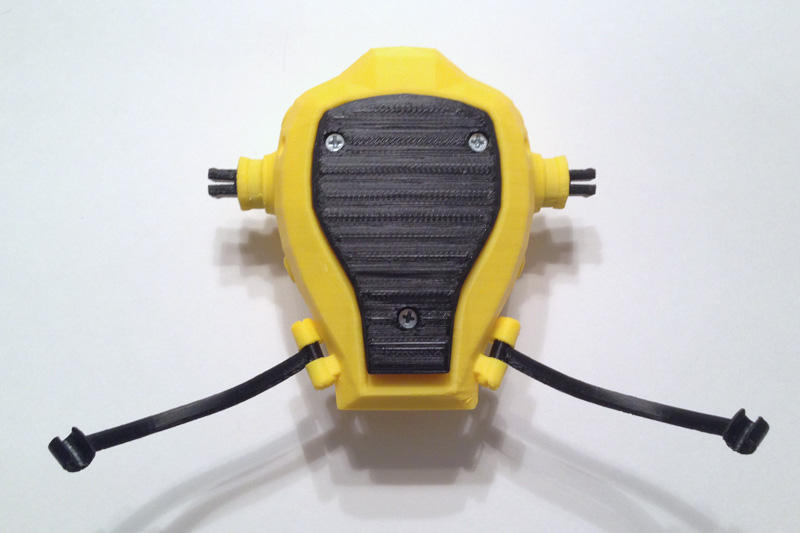
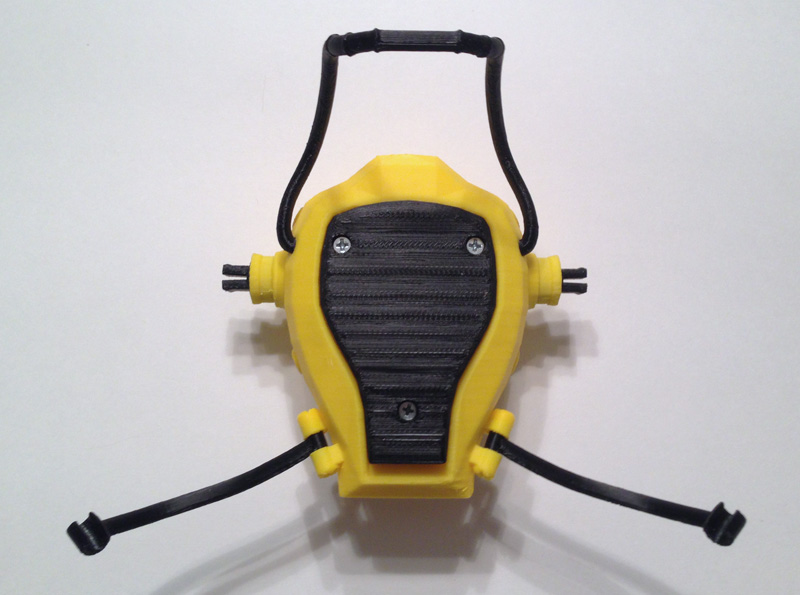
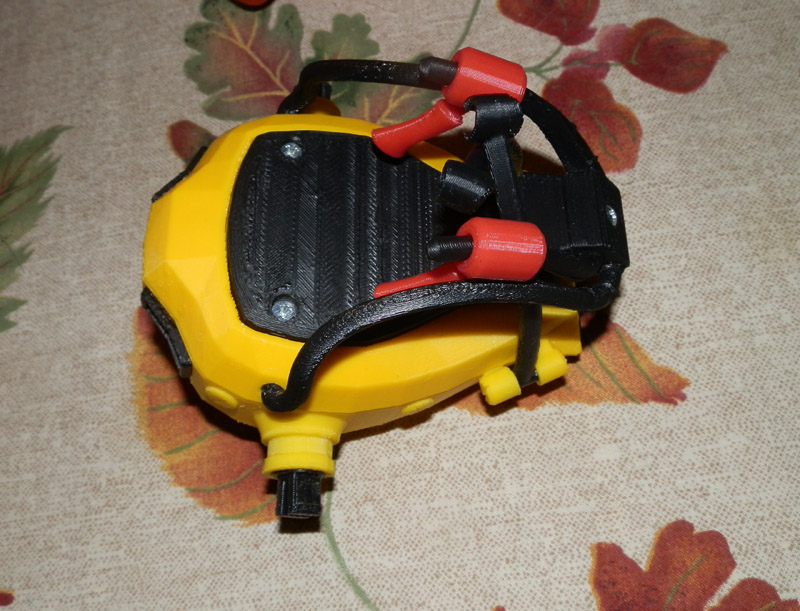
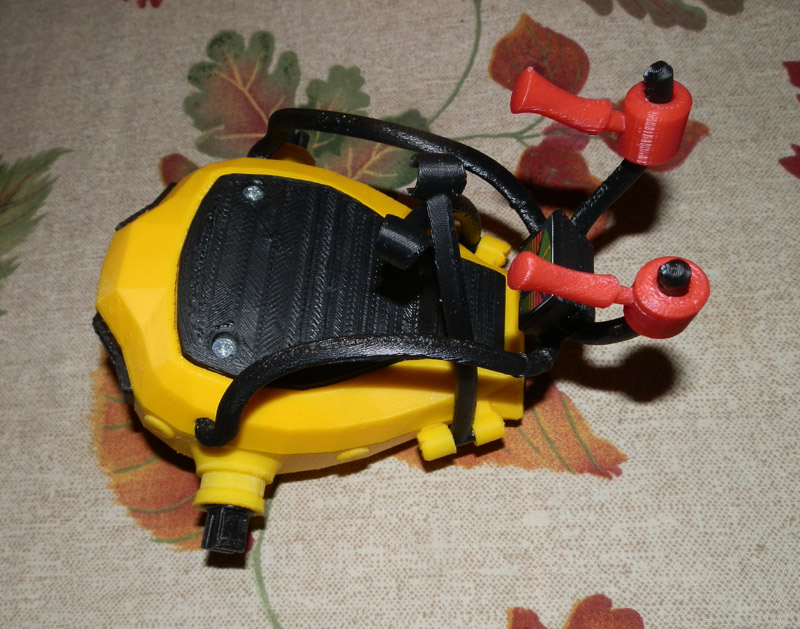
Next, the straps go into two black plastic strap clamps on the backpack’s top half. Again, screws hold the parts in place as well as anchor the elastic strap to the backpack.

Then the elastic straps are stretched a bit and clamped again at the bottom half of the backpack with two more clamps, screwed into place.

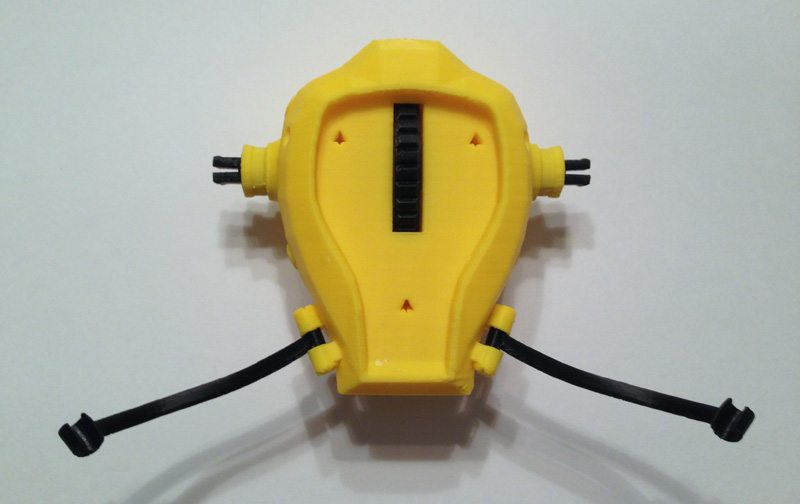
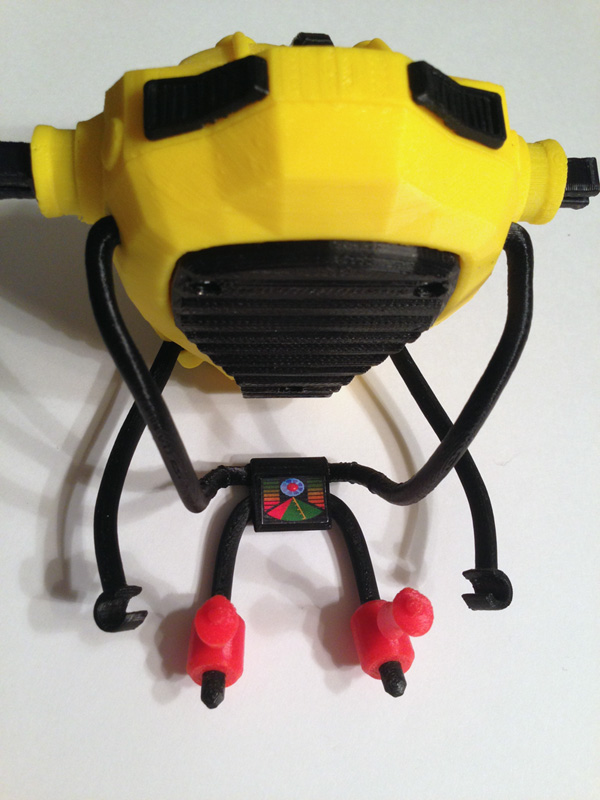
The clever part here is that now the two straps are used to hold the control tablet in place, which has a seat slotted into the back of the backpack.

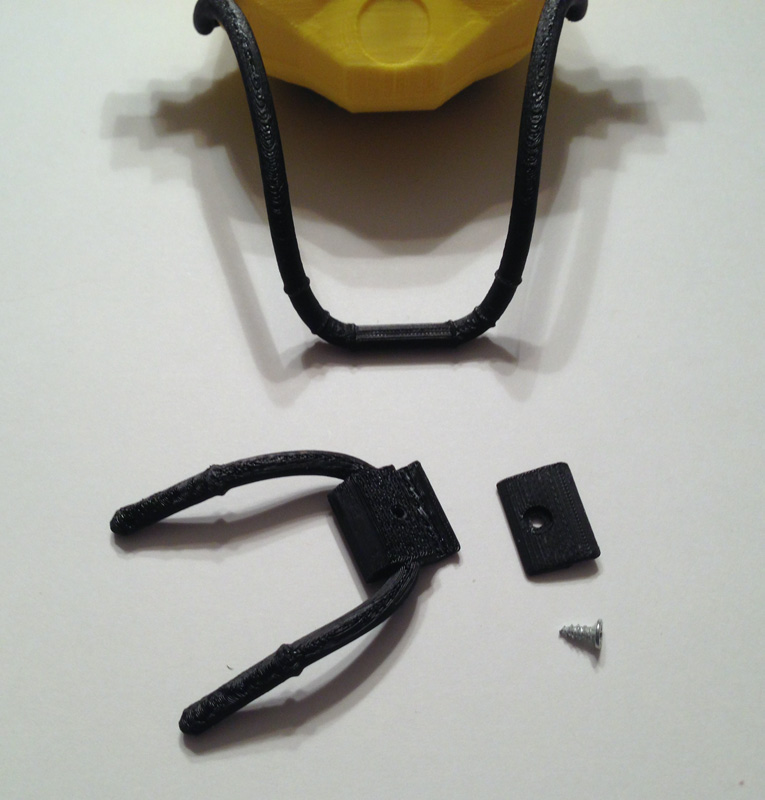
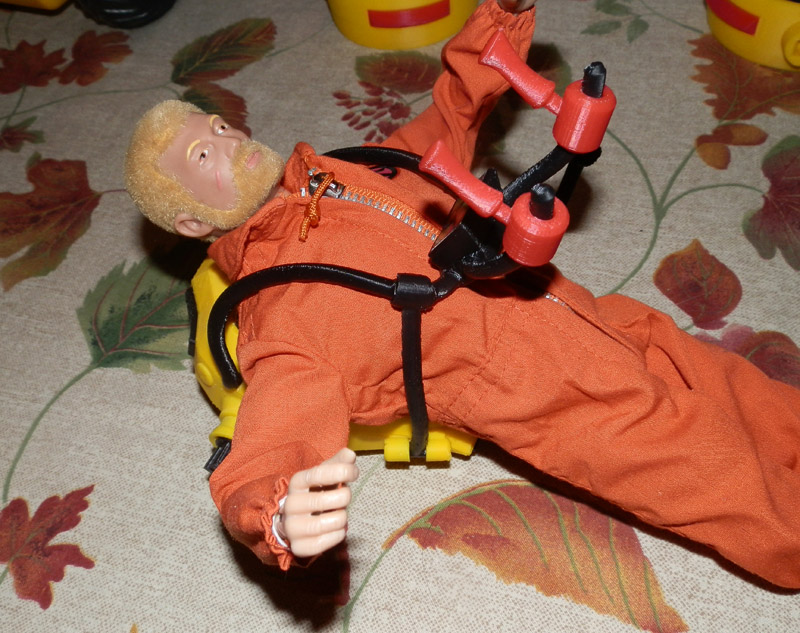
Then the straps go through strap adjusters and into the harness clasps. There is enough remnant strap to do a lot of adjustment for body size.

Then the harness clasps have a cylindrical peg that fits into holes on the harness connector, nice and snugly so the strap won’t come out, but not too tight to make removal difficult.


at-drone-backpack-worn
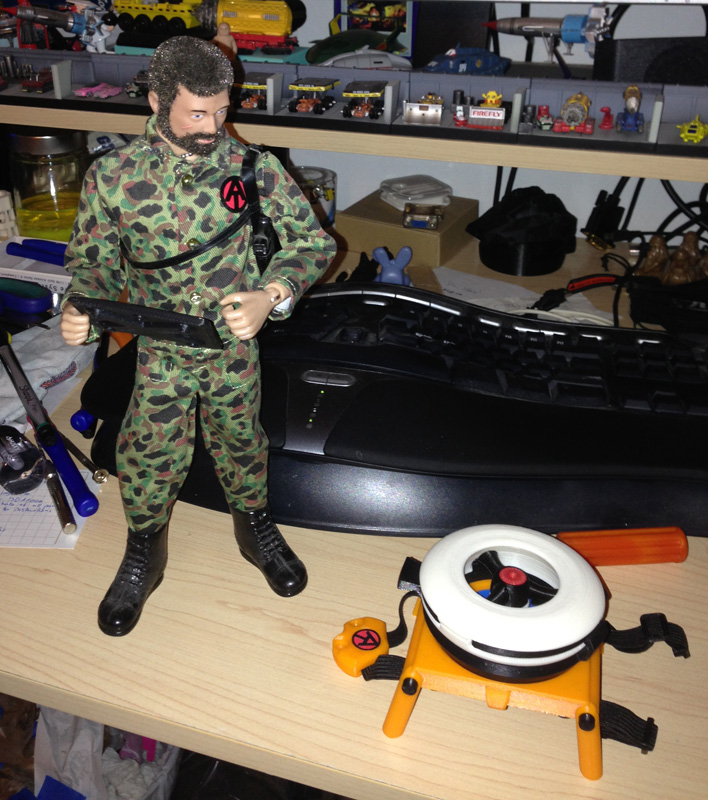
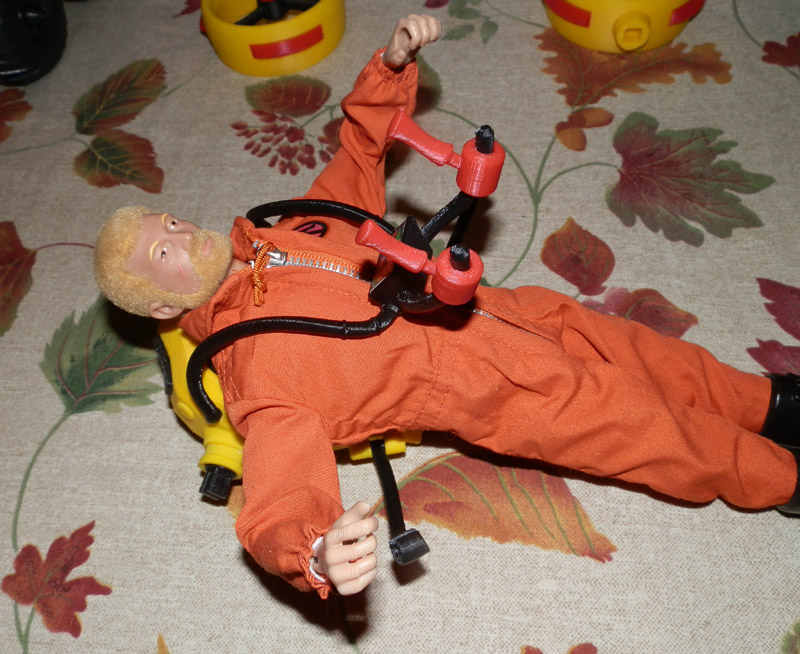
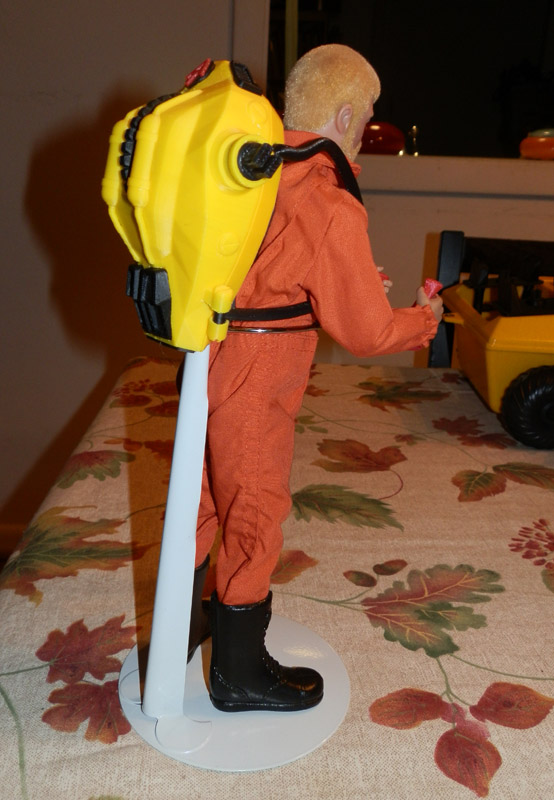
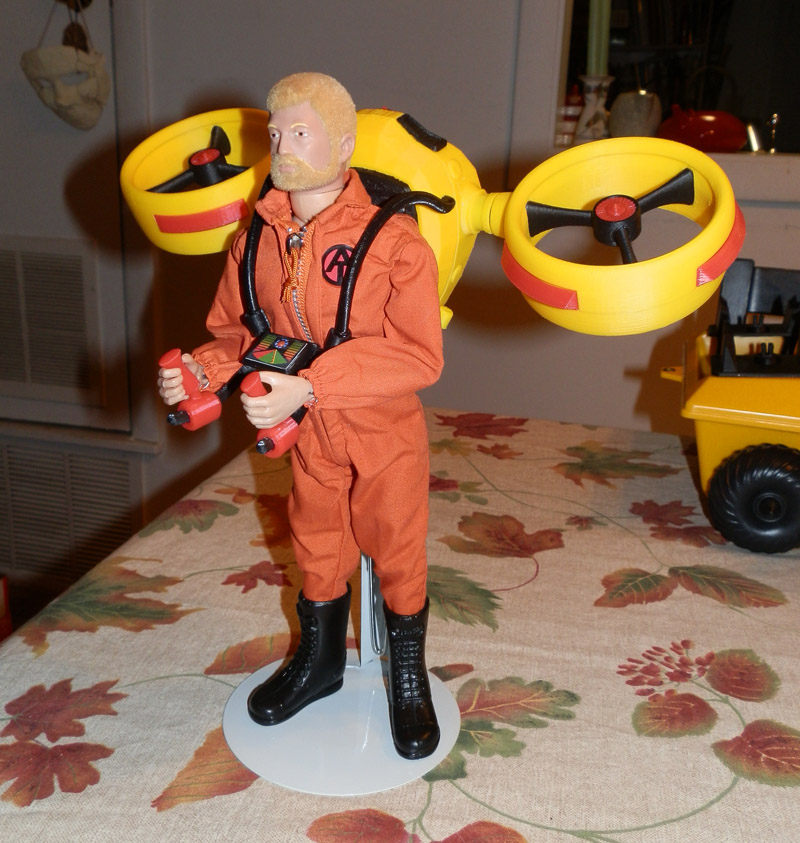
Here’s the Land Adventurer, with backpack on his back.

at-drone-backpack-launching
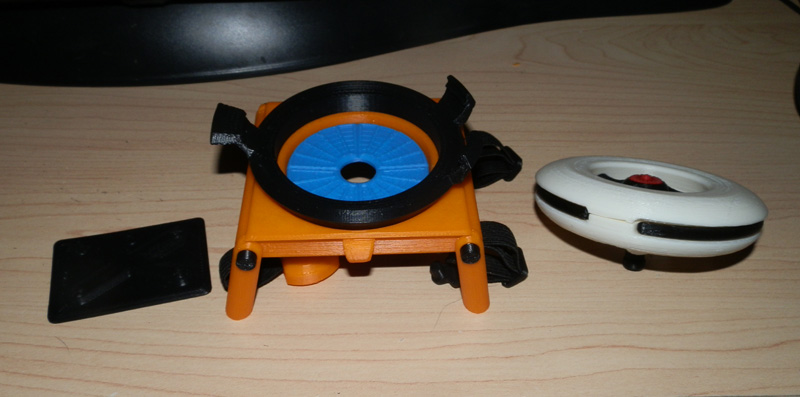
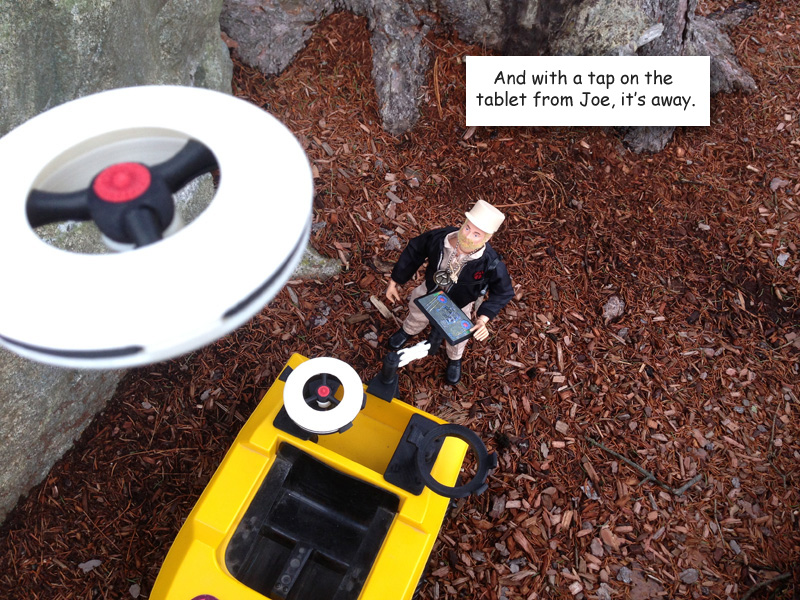
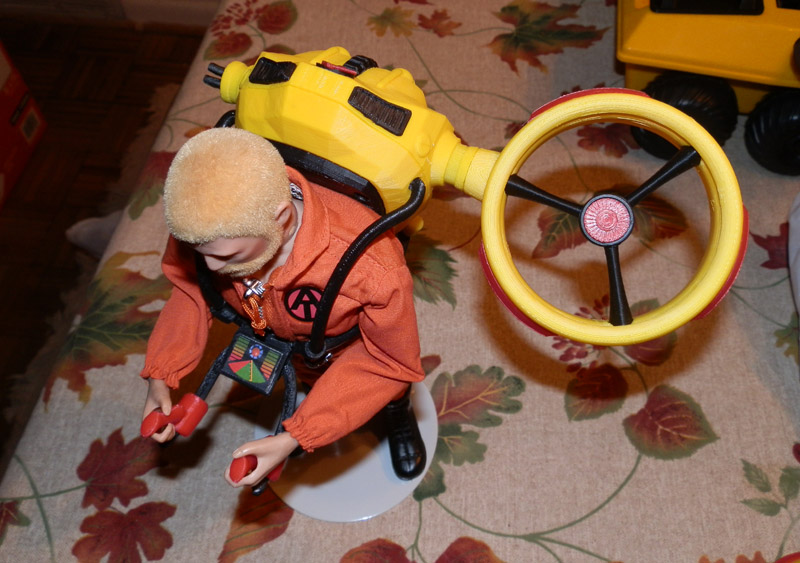
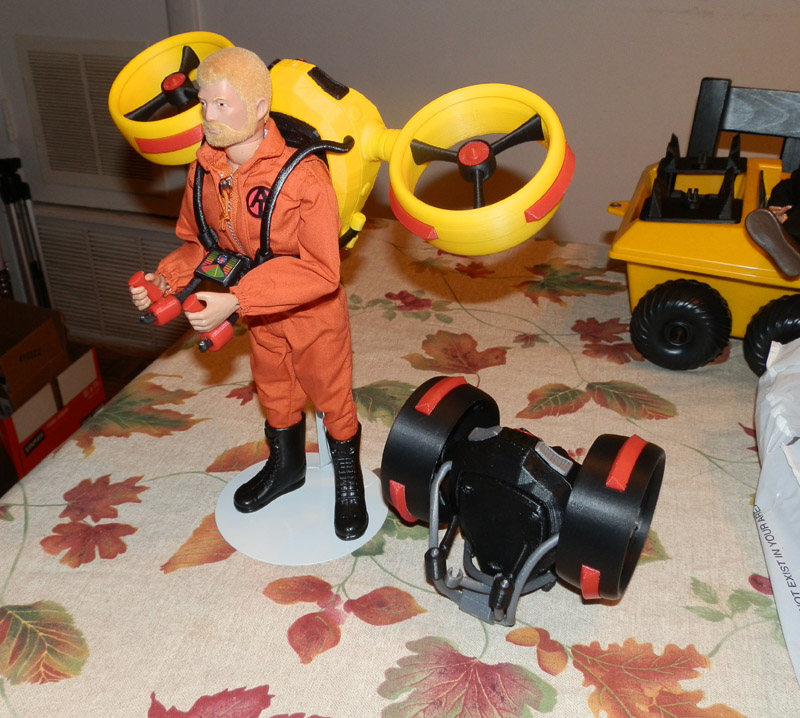
Here he has placed the backpack on the ground, deployed its legs, removed the control tablet and is ready to launch the drone.

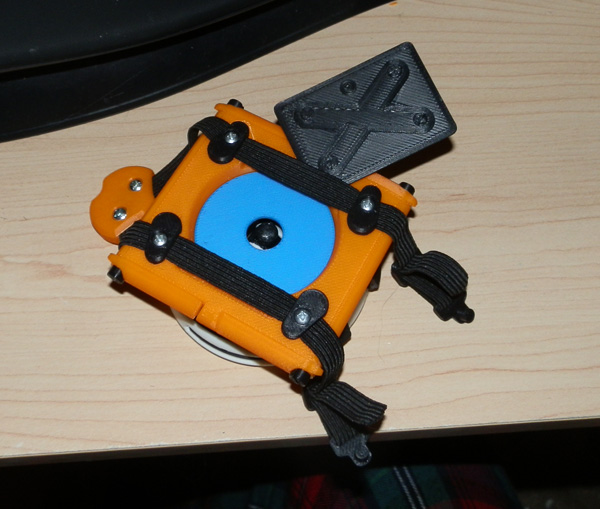
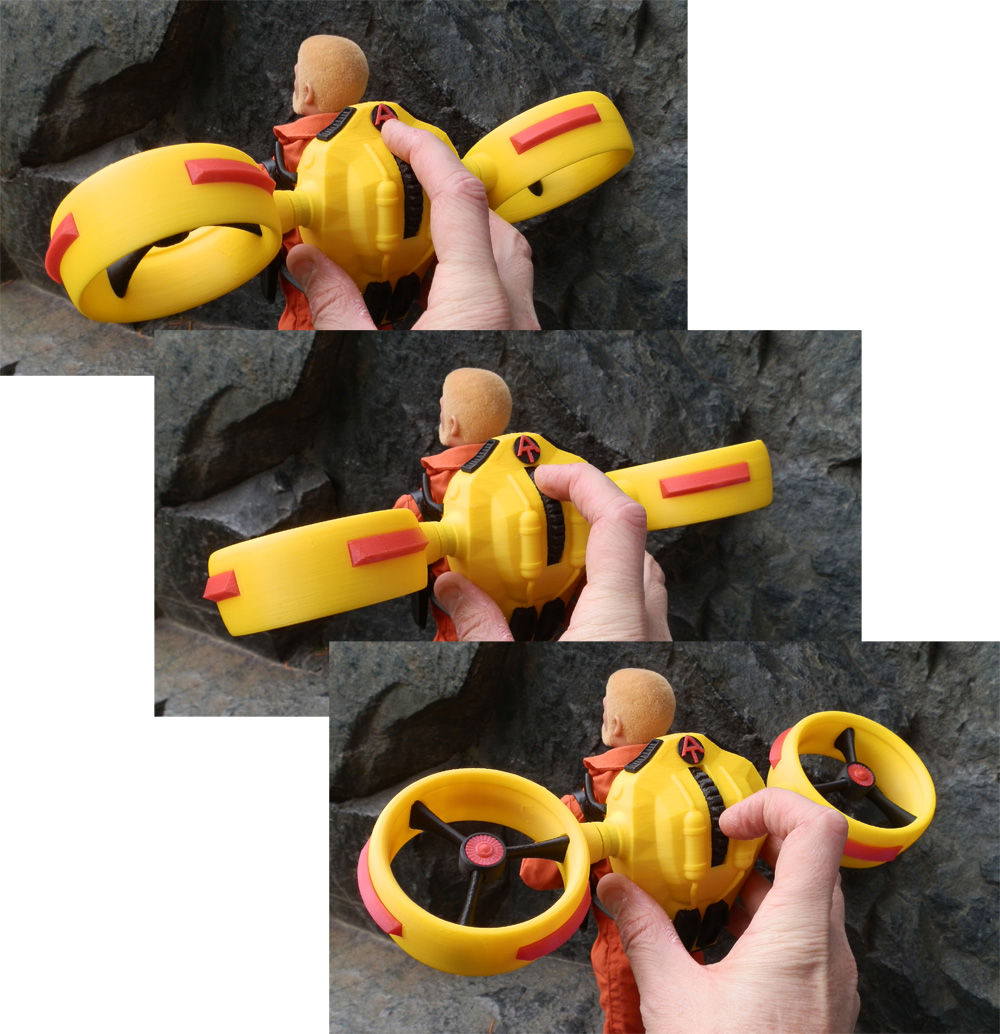
I designed the backpack with a slot in the back to store the control tablet. When not in use, the tablet fits behind the two elastic straps. (Clever me!):

OLYMPUS DIGITAL CAMERA

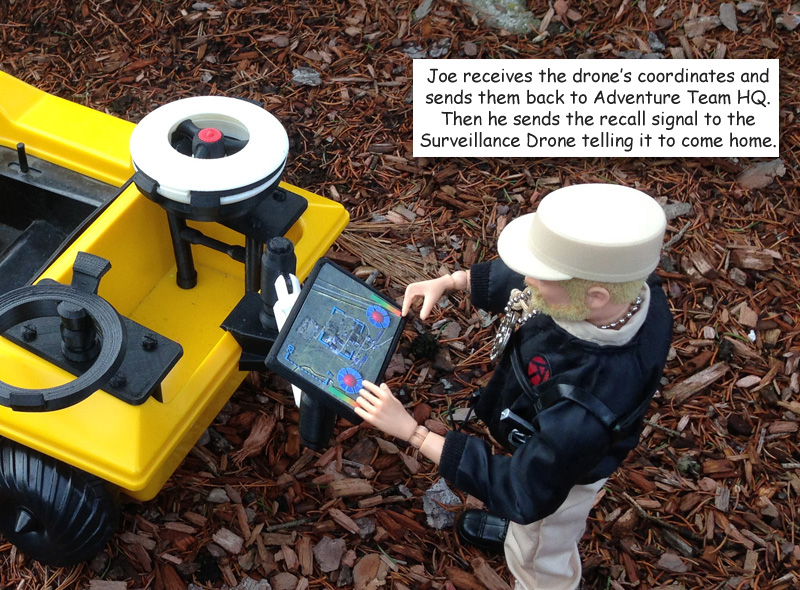
Here, you see the tablet being removed:

OLYMPUS DIGITAL CAMERA

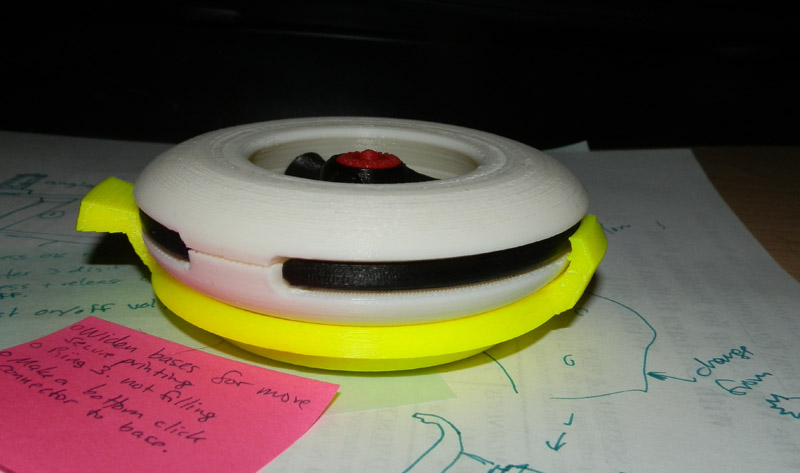
When the drone is launched, it exposes a solar panel to charge the internal batteries, to keep the drone powered:

OLYMPUS DIGITAL CAMERA

AT Set 2: GI Joe Adventure Team Remote Drone Surveillance

Introducing my second GI Joe Adventure Team set: Remote Drone Surveillance. The set consists of two Remote Surveillance Drones with articulated camera and hide-away landing struts; two launching cradles mountable on an ATV or Trouble Shooter, as well as a rear-mounted Control Tablet on an articulated armature. All designed by me and printed on my Afinia H479 3D printer. Seen here: at-drone-01 at-drone-02 at-drone-03 at-drone-04 at-drone-05 at-drone-06 at-drone-07 at-drone-08 at-drone-09at-drone-10 at-drone-11 at-drone-12 at-drone-13 at-drone-14 at-drone-16 at-drone-17 For the sequel: Retrieve the Lost Space Probe

AT Set 1: GI Joe Adventure Team Action Pack Flight Pack

After some minor visual and a few major internal changes, the GI Joe Adventure Team Action Pack Flight Pack is more or less done. I still want to make some changes, but I’m happy with it for now, and I will be concentrating on a third GI Joe Adventure Team set for a while.

So for now here is the updated Photo Story to introduce the Flight Pack. (I changed some things in the story because it is now a sequel, which you will see shortly.)

Flight Pack designed by me and printed on my Afinia H479 3D printer.

OLYMPUS DIGITAL CAMERA

OLYMPUS DIGITAL CAMERA

OLYMPUS DIGITAL CAMERA

OLYMPUS DIGITAL CAMERA

OLYMPUS DIGITAL CAMERA

OLYMPUS DIGITAL CAMERA

OLYMPUS DIGITAL CAMERA

OLYMPUS DIGITAL CAMERA

OLYMPUS DIGITAL CAMERA

OLYMPUS DIGITAL CAMERA

OLYMPUS DIGITAL CAMERA

OLYMPUS DIGITAL CAMERA

OLYMPUS DIGITAL CAMERA

OLYMPUS DIGITAL CAMERA


Target Barbeque Set – With Hard Case – New GI Joe Aluminum Coffin Box

On a display case for Christmas, Target had a number of “Holiday Gifts for Men” this season. One item was a very nice stainless steel Barbeque set for $19.99 held in a very nice aluminum hardshell case.

target-hard-case-closed

target-hard-case-open-bbq-set

After Christmas, these items began to be discounted rather heavily. I bought two for $11.88.

A week later I found three more for $9.98. I may go looking again next week, but by now unsold items are, in some stores, put in sections appropriate for the item. The Barbeque set may be in with the other BBQ sets if that special section is no longer intact.

Anyway, here’s the reason:

target-hard-case-empty

target-hard-case-in-use

That’s right. It makes a perfect hardshell Coffin Box for carrying two Joes. Even the velcro straps help hold the Joes in place. If you put them head-to-toe, two figures fit in.

There isn’t much room for anything else, though. But if you’re carrying some figures around for a show, or a photo shoot, this is the ideal way to carry them.

Update:

By the way, they also had a small Poker Chip set in a similar but differently-proportioned hardshell case. I got it for about the same price.

target-hard-case2-closed

Here’s the very nice (but small-ish) poker set inside:

target-hard-case2-open

And with the contents removed, there is a thin flocked plastic tray at bottom and a very nice coned sponge layer on the top lid.

I imagine the bottom tray could be removed in favor of some black sponge, cut to fit some components or parts you’d want to carry to a Joe convention or a show or a meet-up.

target-hard-case2-empty

And as an added bonus, this one comes with two keys and a lockable clasp.

GI Joe Adventure Team Action Pack Flight Pack

I recently made a slight change to the name of my GI Joe Adventure Team Action Pack Jet Pack. It is now the GI Joe Adventure Team Action Pack Flight Pack. I did this on the advice of a fellow collector who said that it didn’t really have the look of a Jet Pack.

atapfp-jetpack-back

However, this design has (fictionally of course) a jet engine in the back pack that forces air out through the engine housings for a forced-air effect that provides upward thrust without jet-flame output that would burn the pilot. But since it doesn’t really look like a Jet Pack, I thought I would take the advice of a fellow collector and call it a Flight Pack.

atapfp-jetpack-top

The otherwise overly long name stands, however, since it means something.

It’s for GI Joe. It’s for the Adventure Team. It is intended to be (retro-actively) a part of the GI Joe Adventure Team Action Pack line, which were generally useful bits of equipment that in some way folded up and were worn on the back for transport when not in use.

This toy that I designed in 2013 has been an important thing for me. I came up with the design, modeled it, with functionality and fit in mind, then I printed it over and over on my Afinia H479 printer until the parts all worked, and even now I’m refining it.

Some news:

Publishing

I published the model on 3DAGOGO. 3DAGOGO is a pay-per-model site and I’ve sold a few pieces there, mostly the Airship I designed.

Afinia

Afinia asked to use this model in their CES booth, which was a thrill to me. I sent them both a yellow and a black (stealth) version along with a GI Joe figure to model one on. It will be on display at CES in their booth. I will post pics if they send me any.

Design Refinement

This is v1.2, which takes most of the design from the first prototype, but adds some things and changes some things to make printing easier and to make assembly easier.

Changes to this version include a more open clip design to clip the under harness arms to the main harness, and a better system to clip the swing-down harness control arms. I straightened them out, because before, if you rotated the joysticks all the way around, the subtle curve in the arm and the joystick bent the arms until they broke. That should not happen now that the arms and joystick cuff are perfectly cylindrical. Also, I made the harness control arms use two pieces so I could screw them to the main harness front, instead of trying to force the pieces together. This often broke the pieces. This version is a tad loose, though, so expect another minor change.

V1.1 had a control screen on those arms, but the screen was too tall. When the control arms were lifted up while the pack was being worn, the screen prevented the arms from going up, becuause it tried to go into the figure’s body. This version flattens it and should work better. I’m still working on that.

Mostly, this is otherwise similar to the other version with some changes to the screw holes to allow easier printing (the first few I made printed fine, but later the printer kept hitching on the screw holes because of their starburst design.)

I also puffed out the cushion a little. The printer doesn’t allow it to print very smoothly, but it’s better, I think, than the original.

Here are all of the parts for V1.2 of the Flight Pack:

atapfp-all-parts

37 printed parts in 3 colors. 4 screws. 2 printed pieces of paper, (glossy paper, on sticky back works, or glue it.)

And here is the assembly process, step-by-step:

atapfp-thumbwheel-engine-mounts
Push one engine shaft into the body shoulder hole, and the other. Place the thumbwheel in the body slot. Rotate the two engine shafts until they fit onto the thumbwheel. Make sure the forks of both engine shafts are aligned (not aligned in the photo.)

atapfp-thumwheel-engine-mounts-snapped
Push the two engine shafts together until they snap onto the thumbwheel.

atapfp-bottom-harness-arms-mounted
Ensure that each harness lower arm is aligned correctly. Place one in the lower bracket (on the body front part) and the other in the upper bracket of the main body piece. This is done so when fitting the two parts together, they can be wiggled into place. This is much harder if you try putting both harness parts in the same body piece.

atapfp-bottom-harnesses-body-joined
Fit the body front and body main parts together, ensuring the harness arms fit into the four brackets nicely.

atapfp-back-saddle-placed
Put the back saddle cushion in place.

atapfp-back-saddle-screwed-down
Use the three longer screws to screw the cushion, body front and body back together. Do not overturn the screws. Once they are tight they should be fine. Further turning will simply weaken the holes.

atapfp-shoulder-harness-placement
Place the main harness into the two holes in the body front piece by gently prying the frame apart.

atapfp-shoulder-harness-pushed-in
Push into the holes until they stop. Test rotation.

atapfp-harness-handles-disassembled
Prepare the harness handle section.

atapfp-harness-handles-assembledPlace the two pieces over the flat front part of the main harness and use the small screw to attach the parts.

atapfp-harness-handles-joystick-one
Push one joystick onto the control arms, rotating as you go.

atapfp-harness-handles-joysticks-both
Attach the second joystick by rotating and pushing.

atapfp-vent-upper-left
Using Krazy Glue, attach the upper right vent by fitting the vent into the aperture.

atapfp-vent-upper-right
Do the same with the upper left vent.

atapfp-vent-lower-right
Glue the lower right vent into the space provided.

atapfp-vent-lower-left
Glue the lower left vent in place.

atapfp-vent-back-right
Glue the lower back right jet vent into the gap. It should snap nicely in place.

atapfp-vent-back-left
Snap and glue the lower back left jet vent in place.

atapfp-control-screen
Glue the control screen into place.

atapfp-at-logo
Glue the Adventure Team logo in place.

atapfp-engine-housing-vents-disassembled
Prepare the engine housing and the three vents.

atapfp-engine-housing-vents-assembled
Glue them in place.

atapfp-engine-brace-first
This part is particularly hard. Coordinating three of these is a difficult feat of manual dexterity. So we glue the first engine brace in place so the flat part is towards the top (the uppar part has the ring aperture inside to let jet air flow over the body.) The curved part points downward.

atapfp-engine-brace-second-hub
Then glue the second bracer in place and glue the hub onto the two braces being very careful that the square hole in the hub is flat with the engine housing arm grip (the round part that connects the engine housing to the body.)

atapfp-engine-brace-third-vane
The next operation is the most difficult. Placing a bit of glue into the third gap in both the engine housing and the hub, push the bracer into place. This can be quite difficult. When it fits together, the three bracers hold the hub in place by sheer pressure, but we glue it because pressure can break the connection. Then glue the engine vane into the center of the gap.

atapfp-engines-on-side
For traveling on the back of the pilot, and for transporting via ATV, push both engine hubs into the engine mount shafts.


Setting Up GI Joe Action Pack Jetpack – A Guide to Not Breaking It!

The yellow jetpack is wrapped in bubble wrap in three pieces: The main body, and two engine housings.

1. First, lay the jet pack on its back.OLYMPUS DIGITAL CAMERA

2. Swing down the control arms (with joysticks).OLYMPUS DIGITAL CAMERA

3. Lift main shoulder harness up, and open up the two under arms.OLYMPUS DIGITAL CAMERA

4. Placing GI Joe’s head in first, situate him so the shoulder harness fits snugly over his body.OLYMPUS DIGITAL CAMERA

5. Lower the harness, keeping the control arms straight out.OLYMPUS DIGITAL CAMERA

6. Snap one under arm cuff to the main harness. Be gentle. These fit between two rings on the main harness.OLYMPUS DIGITAL CAMERA

6. Snap the second under arm cuff to the main harness.OLYMPUS DIGITAL CAMERA

7. Place Joe’s hands on the joysticks. Prying the fingers open is better than forcing it, because the joysticks or the control arms can break.OLYMPUS DIGITAL CAMERA

8. Put Joe in the figure stand. The two metal fingers can be pulled open to fit him in. The metal stand fingers slide down into the white tubular vertical part of the stand. (This is to make sure he doesn’t fall over while on display. GI Joes are famous for that.)

OLYMPUS DIGITAL CAMERA

9. Snap one engine housing into the engine shaft. Note: The red engine hub should be facing up.OLYMPUS DIGITAL CAMERA

10. Then snap the other in so they align.OLYMPUS DIGITAL CAMERA

11. He’s ready for display!OLYMPUS DIGITAL CAMERA

12. Snap one black engine housing to the engine shaft of the black jetpack, but sideways so the hub connects. Do the same for the other side. Place the black “stealth” version next to him. This shows off the way the jetpack compacts for storage and transport.OLYMPUS DIGITAL CAMERA


Note: The engines tilt using the thumbwheel on the back of the jetpack:

thumbwheel

I’d love to have photos from the show showing your booth. If you take some, please let me know. I’d love to see them.

Adventure Team Remote Surveillance Set – Designing the Trays

The plan for my Adventure Team Airborne Surveillance playset includes two remote drones, launched from an ATV, with a control system attached at the back to control and view the output of the aerial drones.

As you can see from the link above, and from these photos here, the 3D model is nearly complete.

at-surveillance-prototype-2

Since that post, I did a lot of updating on the drone itself, making it more robust, the parts now fit better, and the camera head rotates. The legs drop down in a better cut body and it all works rather nicely. I still have one or two very tiny changes to make.

OLYMPUS DIGITAL CAMERA

Now comes the part of the set which attaches the drones to the back of the ATV (or Trouble Shooter) and allows for launching by the Joe team.

OLYMPUS DIGITAL CAMERA

My first attempt was made by taking the shell of the bottom of the drone body and extruding it, adding three tabs on the sides to clip to the drone where the black side stripes are. The tray itself had a ridge near the center that clipped nicely to the underbody of the drone.

OLYMPUS DIGITAL CAMERA

However, this arrangement made it hard to remove the drone because choosing any one clip as the trigger clip and the other two being used only for holding, those two were too far apart to allow the drone to be lifted out easily. And the rim in the center was grabbing onto the body too tightly to let the drone loose without some effort.

OLYMPUS DIGITAL CAMERA

So version two (orange) fixes one of the problems. By putting the two holding clips closer together, they would now attach just to either side of the white area at the body’s middle equator. This allows for one clip to release the drone for a much easier release.

However, that central rim still held onto the drone too tightly, even though I had lowered it a bit.

OLYMPUS DIGITAL CAMERA

Version 3 (day-glo yellow) removes that inner rim entirely, and allows for a very tight grip, but an easy release.

Here the drone is sitting in the tray, quite snugly:

OLYMPUS DIGITAL CAMERA

Now that this is more or less finalized (there is still some work to be done thinning the trigger tab because it’s too think to open easily) I had to figure out how to get this thing onto the ATV easily.

Here are initial plans I drew up (rough) showing the first ideas for the drone, and near the bottom, how two would be carried by an ATV:

atdrone-early-plans

Using the same basic platform model from the GI Joe Adventure Team Action Pack Jetpack carriage:

IMG_0635[1]

I started with the platform, removing the struts and mounting pieces that grip the jetpack. I added some bolts both for embellishment, and to hide the cones underneath that allow a clean print for holes that the pins and legs would insert into. There is a diamond-shaped hole to allow for the hinge post to be glued in place.

Since the platform is angled, and I want them to be symmetrical, and I wanted the launching trays to be flat, I modeled the posts on a 5.4 degree angle, separately, so they can be glued to the platform in one direction on the left and in the opposite direction on the right.

atdrone-carriage-platform

Then I add the pins and legs:

atdrone-carriage-legs-pins

Then the hinge post:

atdrone-carriage-platform-complete

The hinge post has a bar at the bottom, and the tray itself has an equivalent bar. This allows for a free rotation, but also a stop point for the tray to stop at 180 degree angles perfect for storage and launch positions.

Then the tray itself. The tray had some alterations made from the photos above. I angled the base circle, combining it with a post that fits into the hinge post hole.

atdrone-carriage-1

Then the tray can swing out for launch position, or drone maintenance.

atdrone-carriage-swung-out

Once I get this all printed, I will show photos. But for now, this will have to do.

GI Joe Adventure Team Action Pack Jetpack – ATV Carrying Rack

A recent photo story I put together quite quickly shows my 3D printed GI Joe Adventure Team Action Pack Jetpack. It sits in the back of a GI Joe Trouble Shooter.

Part of the plan was to build a rack for the Trouble Shooter (also the Adventure Team Vehicle or ATV, which is a yellow wheeled version. Or rather the Trouble Shooter is a variant on the original ATV.)

Here’s the rack in all its glory.

IMG_0632[1]

The rack is made up of two unique pieces cleverly modeled to be 100% symmetrical.

IMG_0636[1]

The rack mount is the same on both sides. Each one is supported by two legs. However, since the back of the ATV slopes, the leg is taller at the front than at the back. Just flipping one leg around makes it fit perfectly, supporting the weight of the jetpack.

IMG_0633[1]

There are two pins in the center of each rack frame which fit into the jetpack engines when they are slotted to the sides of the jetpack body. This pin is the same one that is on the jetpack itself, so it fits tightly to secure the vehicle in the rack. The rack is then shaped to perfectly fit the engine housings.

IMG_0630[1]

The jetpack can fit in the rack facing the front or the back, however, the harness arms have more room if they face the rear

Here you see the black stealth version of the jetpack.

IMG_0629[1]

And now, befitting of the original, I thought I would introduce the Stealth version of the Jetpack, and the ATV Mounting Rack, in an appropriate but very very short Photo Story. Don’t look for a complex plot, though.

OLYMPUS DIGITAL CAMERA

OLYMPUS DIGITAL CAMERA

OLYMPUS DIGITAL CAMERA

OLYMPUS DIGITAL CAMERA


GI Joe Collectors Club Exclusives

I want to take a break for a moment from posting about 3D printing.

For a long time I owned a spot on www.adventureteam.com. I still do in a way. That is, the space is hosted for me for free by its owner. But I lost the ability to update it. I have tried contacting the owner, but have gotten no response. I’d just like FTP access again so I can make some necessary updates.

The GI Joe Collectors’ Club has been a stalwart champion for the past couple of decades of the GI Joe collector. Not just a club, it produces a newsletter magazine each month, now with full-color comics with stories from both the 3.5″ Real American Hero line, as well as the 12″ Adventure Team line.

With membership each year, costing $44.00 per anum (US Domestic – more in other countries) we get 12 issues of the newsletter each year, plus they put together a free bare-bones figure (either 12″ or 3.5″ depending on your preference.)

Then for an extra cost (not cheap, but these are custom items in a low-production-number run, so costs can’t be what you’d expect to find at Toys R Us) you can purchase an accessory set for the free figure which usually consists of an outfit and a collection of gear.

This year the figure is special because it’s the 50th anniversary of GI Joe. And the club has put together this free figure:

gi-joe-collectors-club-2014-figure

He’s a Man of Action with hard hands, celebrating the 50th anniversary of GI Joe.

Later, you will be able to purchase this accessory set:

gi-joe-collectors-club-50th-accessory-set

It’s a fairly pared-down set, featuring a Man of Action outfit with a special gold dog-tag and a “coffin box”. No price has been announced.

I wanted to post this because this figure has met with some criticism in online forums. Mostly because this set is not as elaborate as some have been over the past few years.

But when people make the claim that the club is mainly interested in 3.5″ collectors (and they certainly do some great things for that group) I’m a bit annoyed.

Look at this photo I took this morning: (Please ignore the bad lighting. I was in a hurry. I’ll reshoot it later.)

OLYMPUS DIGITAL CAMERA

This is, from left to right (by my memory… will fix errors later) the 2013 Comerade of Action (with his beautiful outfit), the 2007 Arctic Adventurer (with his gear),j the 2011 Man of the Sea (with his accessory set), the 2008 Man of Asia (with gear), the 2010 Urban Adventurer (with gear including a skateboard, yo!), the brilliant 2012 Man of Evil (with mask and disguise outfit making him the Lost Adventurer), a very small-run exclusive 2011 Stealth Infiltration Figure (still wrapped so far), another short-run figure (I forget the details on this one, if someone can help me out, I’d appreciate it.), then comes the MARS Henchman (a figure available to conference attendees) from the Spy Island 2010 Escape From Spy Island (which itself is a work of absolute genius!), then the 2004 exclusive Aged Adventurer (the gear set is hidden behind the group) and finally the 2003 Counter-Culture Adventurer. (Not shows is the Foreign Adventurer who is currently busy posing for my new Jetpack.)

Not shown are all of the coffin-box figures they created such as the Land Adventurer, the Sea Adventurer, Air Adventurer, Talking Commander, AA Adventurer, AA Talking Commander, because they are currently in storage. But you can see them here:

http://sean.adventureteam.com/gijoe/new-at/new-at.htm

Also not shown here is this: (the only Convention set I own because I attended in 2010):

eightlegslogo

(Let me just say that if no other AT sets were created after this, I’d be fine with that because this was the pinnacle!)

Add to this the Convention exclusives (not cheap, but amazing) that they create every year, which also usually come with an attending exclusive you can’t get elsewhere, I really don’t see how anyone can say this club doesn’t cater to its 12″ fan base.

Really!


GI Joe Adventure Team Action Pack – Airborne Surveillance

As my second GI Joe Adventure Team Action Pack, I decided to make a set that will again give the ATV a purpose. This set will snap to the back of an ATV or Trouble Shooter. This time, a rack will carry two remove aerial surveillance drones.

(The first Action Pack, a Jetpack, will also have an ATV component, but that isn’t printed yet. It will be a rack to store the collapsed jetpack for ground transport.)

Also in the set will be a computer tablet touch-screen video mapping and drone control system on a flexible armature which will attach to the back of the ATV or Trouble Shooter, most likely slipping over the back ledge and onto the tow hook for support.

Here are some of my first images, from Maya:

This is the top of the drone featuring a smooth ring-like body with a central hub and three bracers. You may be reminded a bit of the Jetpack design. This is on purpose. i want to have a consistent design aesthetic for these sets, and this is not an unfamiliar concept for science fiction aerial drones.
at-surveillance-prototype-1

The three central struts connect to the hub, but the bottoms also swivel down to form a tripod of legs for landing.
at-surveillance-prototype-2

Since the surveillance camera dips a bit below the ring (for a full panoramic video image) the legs are necessary for a landing that won’t damage the camera.
at-surveillance-prototype-3

While the legs will swivel down on hinge pegs, the cuts to make this necessary are not yet made to the model above, so bear that in mind.

I will probably print the body in white with black detail, much as you see here, but I may put some color on them, perhaps make the central hub red. Not sure.

On the ATV itself will be a rack that snaps into the slots (like ATV rails or the winch does) and the drones will snap into two harnesses there. No concept yet of what that will look like.

Stay tuned. More to come.

So here is the first prototype print. I think I will be changing the black insets to red, as well as putting a bit of red on the center of the hub.

OLYMPUS DIGITAL CAMERA

I have some refitting to do, the legs are a bit loose, and the camera is a bit small, but I think it’s actually 90% complete, and I just started it a couple of days ago.

The armature will be mounted on the back of the ATV, and two harness racks will also mount there that the drones will snap onto.

A sticker will go on the screen, with a printed map and control interface on it.

Here is the sticker, which should be set to print at actual needed size:

AT-Surveillance-Touch-Screen-print

It prints so that when you cut away the black edging you are left with a 6cm x 4cm image. The black is printed just to give you some leeway so the edge you cut (which is always so hard to cut exactly) is black instead of white, looking like paper. You can print this on sticker paper to make it easier, or you can glue it to the screen. Glossy paper recommended because it’s supposed to be a glass touch-screen.