Today’s Print – Gear Bearing by emmett

Thingiverse user emmett created a very clever single-print rotating bearing, a planetary gear.

bearing5_preview_featured It’s clever for three reasons:

  1. It prints in a single print
  2. It requires no support, so removing support (which is necessary for ball-bearing rings) which can be very difficult, is not necessary at all
  3. It is a series of gears with no axles

Each gear has a middle cut (if you’re thinking of 3D modeling) which is rotated around its center making each gear tooth a V shape. These fit into each other flawlessly, but also ensure that they cannot slide out of the ring. They stay put, and rotate very nicely.

Here is my print:

OLYMPUS DIGITAL CAMERA

Using a large Allen wrench inserted into the hex hole in the middle, I gave it a good turn and it began moving. Now it rotates easily.

It inspired me to think of other ways to make bearing rings that require no support, but will not fall apart. Rather than use spheres, I decided to use cylinders, bevelled at the top and bottom to keep them within the rings, which contour to the cylinders. Each cylinder is close enough to its sibling that it should rotate freely, but they should not bunch up causing the bearing to fail.

Here’s the model:

my-bearing-ring-02

The pyramids at the four compass points are my logo for 3D printing, a pyramid with two bits taken out to make it an “H”.

It’s a theory. I’m about to print one and see.

Update: Sadly, mine turned out like crap. The cylinders were too short and stubby, so they acted like spheres, toppling over in their tracks. There was too much open space between them, almost enough to fit a whole other one in the ring. That made it not rotate smoothly.

Oh well… back to the drawing board.


What’s Next? (Or Should I Say ‘What Now’?)

After my satisfaction with my Blade Runner Offworld M2019 Blaster Display Base print, I decided my next print would be my Space 1999 Stun Gun Display Base. One problem: I had to model it first.

First, the Stun Gun itself. I bought a very nice resin model, (pre-painted and pre-assembled) of the iconic Space 1999 Stun Gun, and I really like it.

If you’re not familiar with the TV series or this gun, you should get familiar. This was the TV show of the mid 1970s, and certainly the most popular Science Fiction show of that time. Here’s the gun:

space-1999-martin-landau-stun-gun

So I set out to model a base that the butt end of the pistol would sit firmly on, with the bottom (which has a hole in it) fitted into a slot for stability, and the front little nub sitting on its own little bed.

The goal was to angle the gun a little, allowing for the angular title logo from Space 1999, shown here:

space1999-year-1-title

I downloaded a similar font a while back in anticipation of making Space 1999 models.

I then printed out the “Space 1999” (without the colon… it just took up unnecessary space) in neon yellow, which I will probably use for the base when done. I could use white, but I’m not sure it would stand out properly. I may change my mind on that later.

So then, after three or four test prints of just the chucks that the gun fits into (for spacing, accuracy, fit, etc.) I noticed that my Afinia H479 printer is not heating the print bed for me.

It is recommended that the bed be heated to 100 degrees Celcius, and I always do pre-heat it. However now it wasn’t heating past 25 degrees. Sigh. Nothing I did, restarting, rebooting, reinitializing the printer, nothing worked. But I decided to print anyway, and I found that the results were as good as if the print bed was pre-heated.

I fired off an e-mail to Afinia to see what can be done about this. But until then, I was able to test-print the chucks for the gun, and the logo, both in yellow for now.

OLYMPUS DIGITAL CAMERA

The final base will be in black, with either this yellow logo or a white version. We’ll see about that later.

Tonight, with the base not pre-heating, I decided to print the base model of the gun anyway.space-1999-stun-gun-display-base-model-ready-for-printing

Here is the model in the Afinia printing interface. The yellow “Space 1999” logo should fit into the slots left for the letters you can see cut into the base.

Weird thing: When I finished the print, the bed was hot. Somehow it had decided to begin heating again, but not before part of the base had peeled up off the print bed. I guess it somehow kicked in part-way through the print.

Anyway, despite the warping, the result wasn’t bad. Here is the finished product, or at least a good first print of it, with the resin model of the Stun Gun on the stand:

stun-gun-display-stand-printed

Not too shabby. (That little black thing sticking up by the butt of the gun is actually a WiFi antenna on the back of the DVD player… not part of the model.)

Print of the Day – Heatwave Vase

Thingiverse user virtox created the Heatwave Vase. It’s a lovely, flourishing bit of solid fabric. I love this. I wanted to print this because I hadn’t yet really printed one of these wonderful geometric art pieces.

heatwave-vase-virtox

I saw the potential here for the Afinia Natural filament for this print. That particular filament is near-white, but not solid white. There is a translucency about it that would make this object stand out as a real art piece. The translucency will allow light to hit it in various ways making all of the fabric-like detail really stand out.

I’m shooting video in bits so I can later put together a cross-fade time-lapse of the entire print. If it works.

It’s about 1/3 of the way done and is looking rather good. There were a few places where it needed support, but mostly it printed without support.

People on Thingiverse were suggesting this vase (which was modeled as a solid with 1-2mm walls) be re-uploaded as a thin shell because printing it that way would be easier. As a double-walled vase, the print head would probably rip itself apart printing the thickness, whereas if you were to print it as a shell on a single-sided wall, it would simply whip around the shape layer after layer, which I’m pretty sure would result in a better print.

The creator has said, so far, he/she doesn’t want to upload any variants on it, and it’s under the “no derivatives” license, meaning people can’t upload versions based on it.

But that didn’t stop me from printing my own derivative. I just won’t upload it.

So this is printing rather nicely, and I hope photos of it will do it justice. This is the kind of piece I’d be proud to display alongside our real artworks in our living room, which include some lovely native Canadian carvings and other craft work from serious artists.

Update: Here it is, printed.OLYMPUS DIGITAL CAMERA

Today’s Print – Blade Runner Blaster Display Stand

From a previous post, you saw the basic work behind the design of a stable, solid display base for my Offworld M2019 Blaster replica.

OLYMPUS DIGITAL CAMERA

Here is the finished model:

br-stand-3d-model-first-print-ready

Hidden inside the block are the changes I made to print what I hope will be the real model.

– The front, left and right tiles now have interlocking connections for a solid join, as well as divots at the bottom to fit a bottom bracing part
– The top tile has the barrel holding brace built in. (It’s just two meshes combined, but it should print cleanly.) It also has a cut in it to accommodate the pistol trigger guard
– The rear tile has a cut in it to accommodate the pistol trigger guard, and a chunk removed from the bottom to fit the pommel stand

I’m starting by printing the top tile:

br-pistol-stand-tile-top-model

Printing at .25mm, Normal, with hollow fill – I could have printed this thinner, but there is no detail to catch. As long as a thicker print maintains the dimensions, this should be fine. I could even go thicker, but I’m not sure how refined the final print will look. Let’s experiement with .25mm for now.

91 layers
43.1 grams
1 hour, 38 minutes

Here is the Rear Tile, which faces the pistol grip. There is a notch in it for the trigger guard.

br-pistol-stand-tile-rear-model

55 layers
46.9 grams
1 hour, 33 minutes

Here is the side tile. I’ll need three of these, identical:

br-pistol-stand-tile-side-model

Each:
55 layers
43.2 grams
1 hour, 37 minutes (x3 = 4 hours 51 minutes)

This is the Base Square. It connects to the Pommel Base and ensures the base block’s tiles are all square. Each tile slots into this piece: (The pyramid is just my printing logo. It’s not a functional feature.)

br-pistol-stand-base-square-model

49 layers
15.3 grams
32 minutes

Up next: The Pommel Base:

br-pistol-stand-base-pommel-model

.2mm
155 layers
24.6 grams
1 hour 38 minutes

For a total of:

259.5 grams, or about 1/3 of a Premium Afinia reel, which cost $45. So this cost about $15 to print the final piece, not including test prints and earlier tests. Still, that’s not too bad.

Total print time: 10 hours, 12 minutes, not including bed pre-heating, head heating, etc.

Tomorrow I will post photos of the pieces, and the construction.

Note: The pieces did warp a bit, so they will not meet perfectly at the corners. I may have to do something about that, like apply a putty or something.

Here it is, assembled, glued together with clear binary epoxy:

OLYMPUS DIGITAL CAMERA

Today’s Print – Tom Baker’s Sonic Screwdriver

Of course before Christopher Eccleston’s and David Tennant’s and Matt Smith’s Doctors, the Doctor (in Doctor Who) carried a Sonic Screwdriver.

Most famous is this model:

drwho-tom-baker-sonic-screwdriver

Oddly enough, someone modeled a version of this and uploaded it to Thingiverse. A user named InnovationByLayers uploaded a version. But it was solid. I remodeled it to print in multiple parts, and so I could make the bullet and the head different colors.

classicdrwhosonic_preview_featured

In my first print, I had issues. Notwithstanding the fact that I printed the bullet center of the tip in red first, and the cowl in silver, which is the opposite of what it should be, I also got an error into the 2.5 hour print (I was also printing some other things in silver, so the print took a bit longer.)

About 2/3 of the way through the print the printer stopped and the software declared a Jog Command Error which I have never seen before.

I was worried. Could it be a catastrophic failure of the motors? I started the printer again printing the parts that didn’t finish (the two taller shaft pieces) and so far it’s at layer 180 of 367, and it’s going ok. I still have an hour to go, though. I’ll let you know if it failed again.

But the result of this particular accident is kind of cool. I actually have a stubbier version of the screwdriver I can call a variant. Because two shaft pieces didn’t finish, I can glue them together for a shorter screwdriver, and the head/bullet colors can be reversed. NEW VERSION!!

OLYMPUS DIGITAL CAMERA

This also gave me the opportunity to adjust a few bits to fit better, for the full-length one, which I also realized was not being modeled in the right colors. The ring around the eye bullet should be red. The front of the bullet silver, and the rear of it red. So I split the bullet and reprinted it in those two colors.

And here is the properly-printed one on the left, and the variant on the right.

OLYMPUS DIGITAL CAMERA


Today’s Print – Tintin Rocket from Destination Moon

Tintin is a world-famous cartoon boy detective. He’s been in print for decades and probably for Americans is most known for the recent Steven Spielberg CGI movie, but that movie didn’t do terribly well because Americans were unfamiliar with the character.

One of Tintin’s books is called “Destination Moon” and was a favorite of mine. It was a two-parter, continuing with “Explorers on the Moon”.

tintin-cover-destination-moon tintin-cover-explorers-on-the-moon

Both feature a huge red and white rocket.

Over on Thingiverse, elk published a 3D version of the rocket, built in 12 parts of interlocking red and white.

This is today’s print. Scaled at 1:1 as it loaded in, I was able to print all seven of the red pieces in one single print run.

OLYMPUS DIGITAL CAMERA

Tonight I printed the five white pieces and complete the model.

The model called for a metal threaded rod and a bolt, but who needs it when you have binary epoxy resin?

Here’s the finished product standing next to a die-cast blue Jeep (from the same books) carrying Tintin, Captain Haddock, the Professor and Snowy. The rocket makes a wonderful companion piece!

OLYMPUS DIGITAL CAMERA


Today’s Print Project – Thunderbird 3

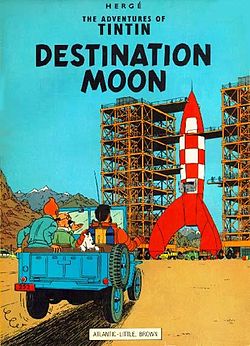
No, not my concept for Thunderbird 3, which I call TB3, and I’ve already printed a rather nice one of, but rather a concept done by someone else that blends the old, TV version with the new movie version in what I consider a very nice homage. It can be seen on Deviantart

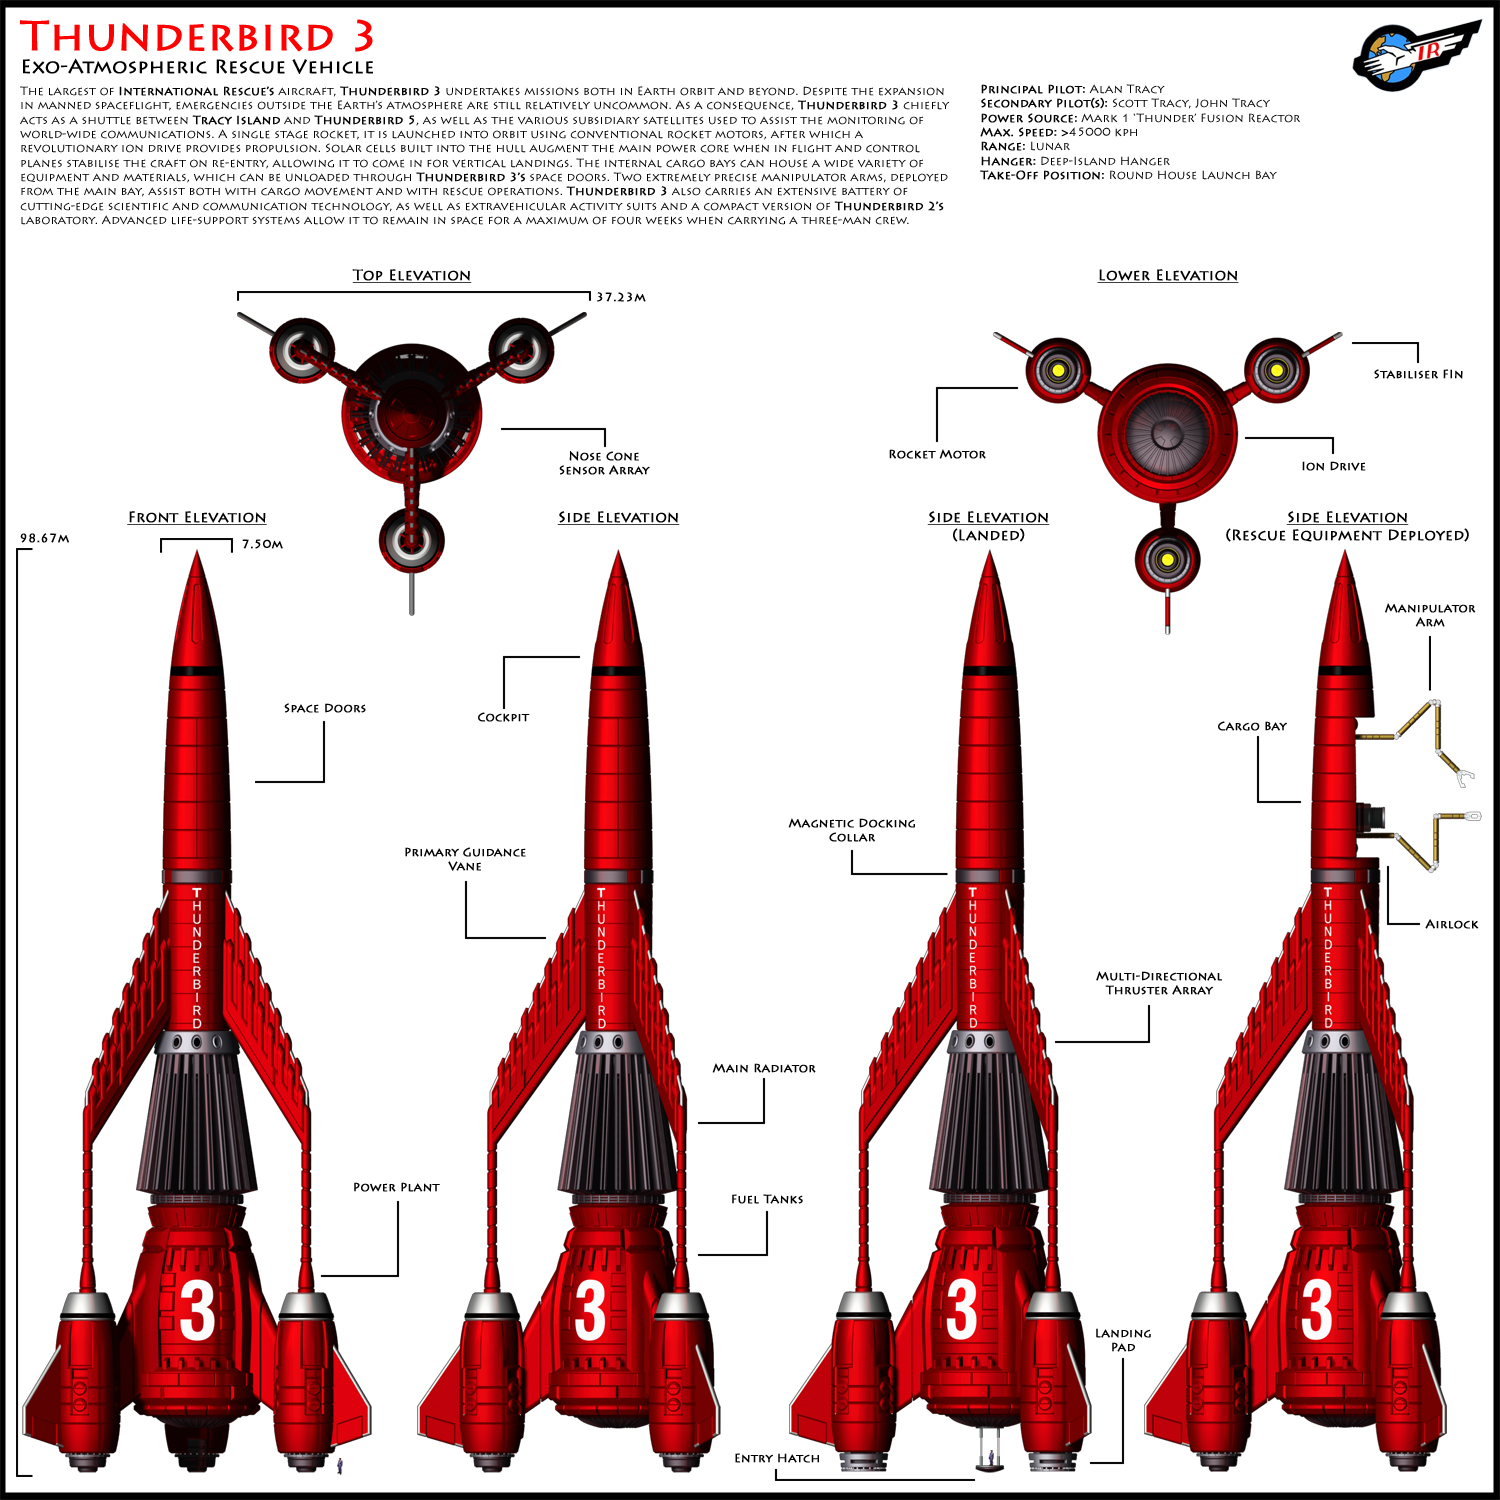
That’s the concept. Here’s the model as interpreted by a Thingiverse user, VanAllesWat.

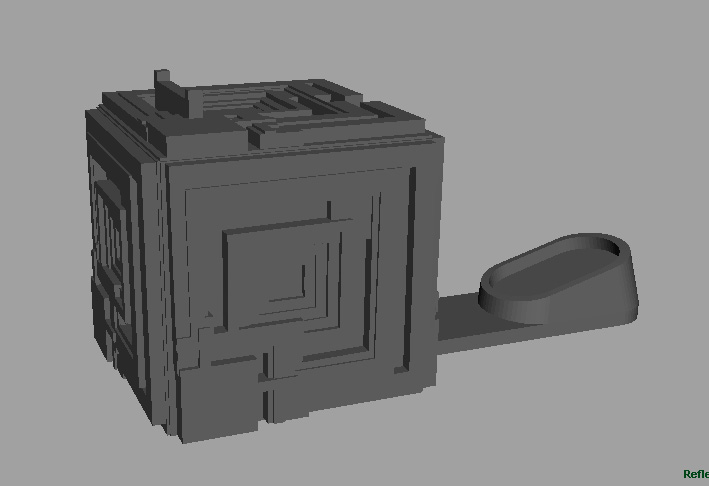
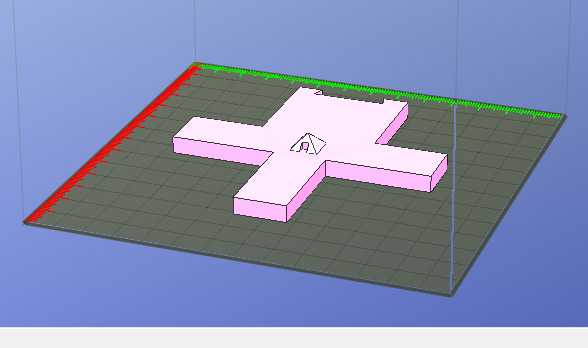
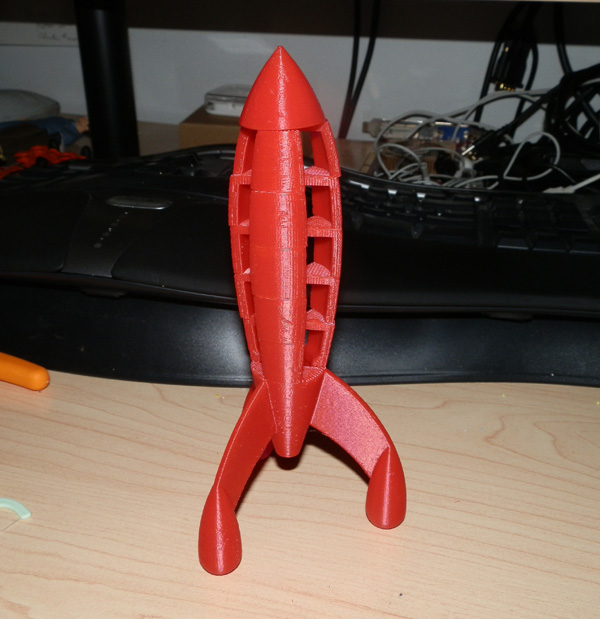
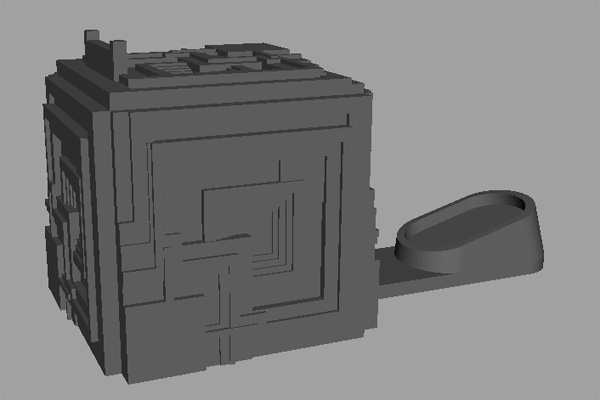
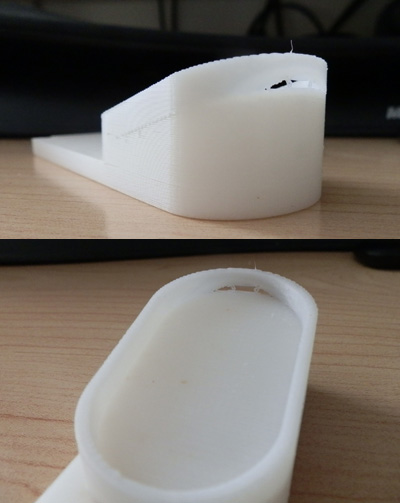
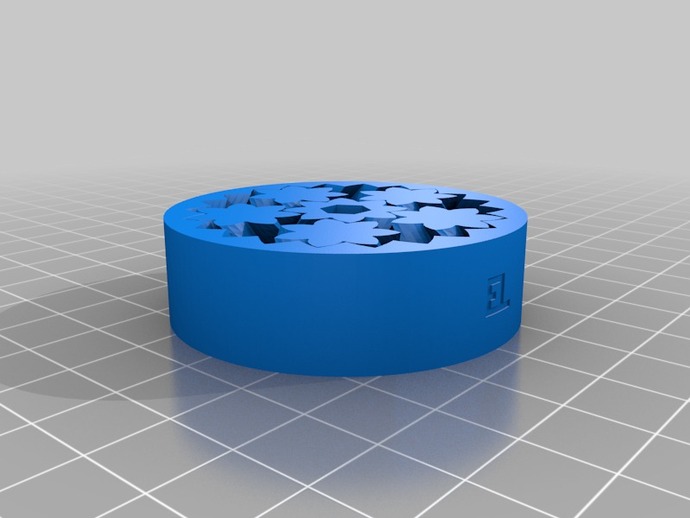
So I began by printing the most challenging bit, in case printing the lengthy struts was problematic. It wasn’t. It printed fine.

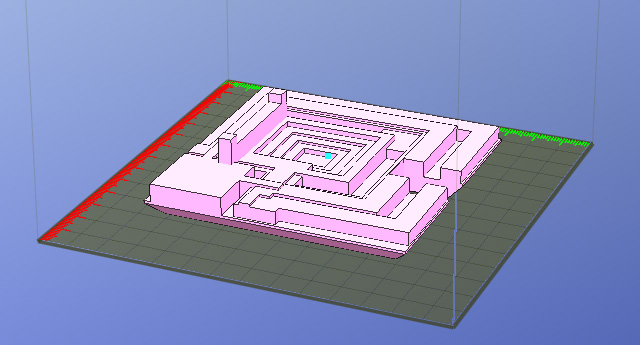
The model loaded into my Afinia software very tiny so I scaled it 15x, which will print a model just a bit smaller than you see in that photo.

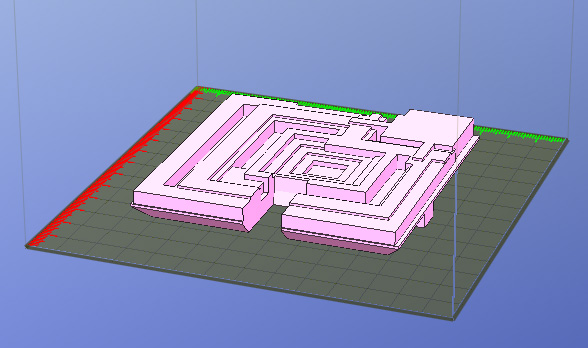
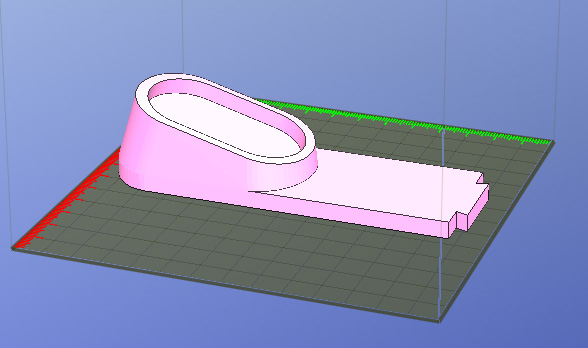
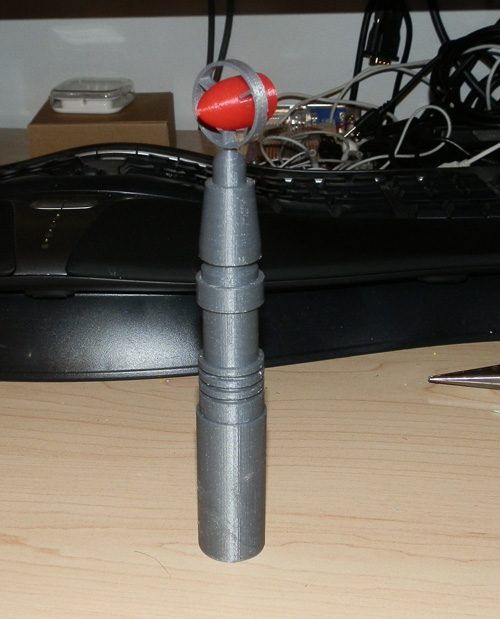
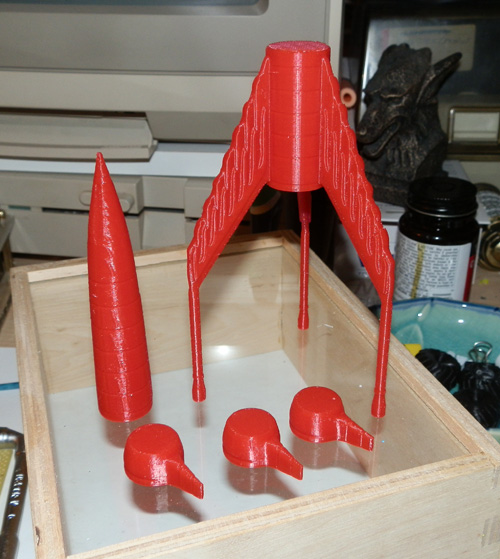
Here’s the mid-section with struts:

OLYMPUS DIGITAL CAMERA

It took about 2.5 hours to print this in .2mm slices in Normal mode.

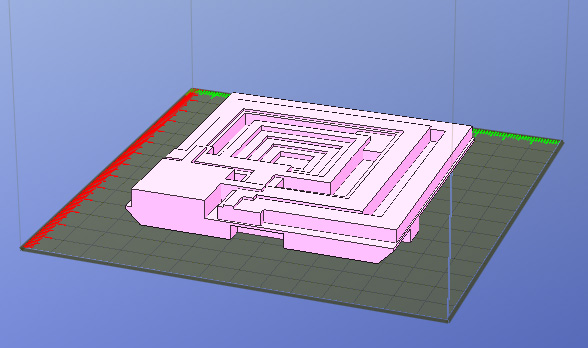
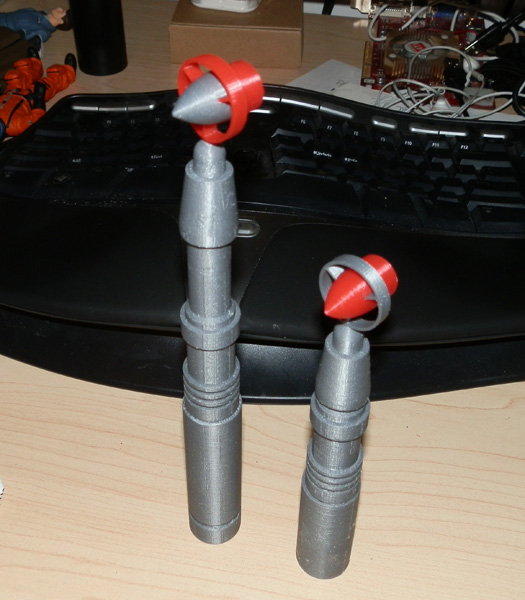
I loaded in the nose cone and it came in much larger than the other pieces I have loaded in. I have no idea what scale it comes in at, so I loaded it in with the mid-section and moved the two parts so they line up and scaled the nose by eye.

I’m going to take this print opportunity to print some other smaller parts, too, like the engine pieces.

So I loaded all pieces in and they do not come in at a consistent size. So I imported the various STL files into Maya and re-exported them. Now they come in at a sensible size.

I am printing them, however, at 1.5x scale, to make it a bit larger.

So the print I did (above) today was wasted, and now I’m printing this section again, along with the nose cone and the three engine bottoms.

Update:

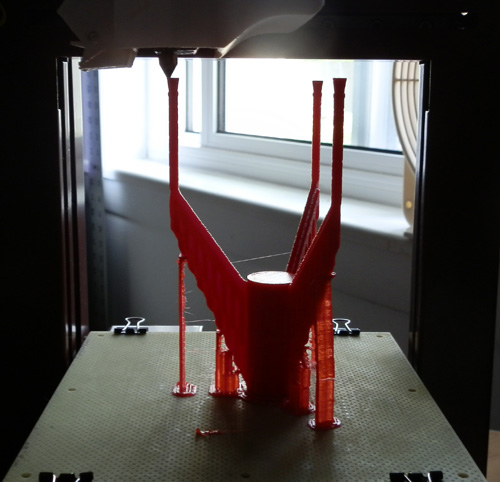
I loaded all of the .STL files into Maya and re-exported them. Now they all load into the Afinia software at the same scale. I decided to begin printing again and printed the above piece a second time at 1.5x the new scale. With it, I printed the Engine Bottoms and the Nose Cone.

OLYMPUS DIGITAL CAMERA

Even though it took longer, I used Fine mode, which is a slower print. I did this because by the time the print was getting near the tops of the three strut rods, the print was wiggling them significantly. This may have affected the shape somewhat so I slowed the print down. For most prints this is not necessary.

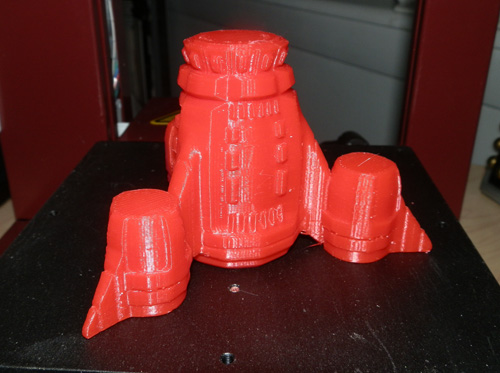
Then I loaded in the Main Engine section and printed it. Almost two hours later I realized I forgot to scale it to 1.5, so it’s too small.

Then I printed it at the correct 1.5 scale for a 3+ hour print.

OLYMPUS DIGITAL CAMERA

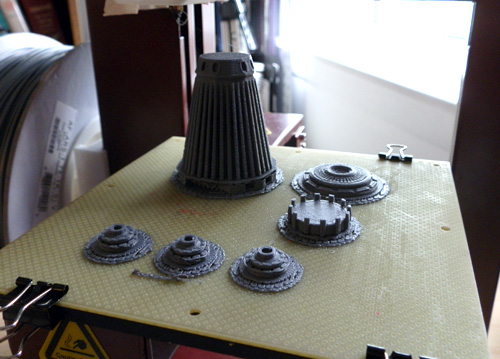
This morning I’m printing Vane section, the Engine Thrusters and Neck Ring in silver. On the above rocket they are black, but on the diagram they appear to be more silver. I’m thinking of mixing it up a bit by making the Engine Bottoms black, but the Neck Ring and Main Engine Bottom silver, with the Engine Tops white. I guess if you follow this page you’ll find out what I decided to do. I may print the same print in both black and silver so I can mix and match at assembly time to see which looks better.

A couple of hours later and the silver pieces are ready:

OLYMPUS DIGITAL CAMERA

After a 14 minute print, I have now printed the Engine Tops, which I’m doing in white to be accurate to the original Thunderbird 3, and which the concept kind of hints at.

Then I decided to re-print the three Engine Thrusters and the Neck Collar in black, for contrast and variety.

Since some of the detail in the model went missing (due to the fineness of the widths being culled out by the slicing component of the software) I’m going to try printing these in .15mm Fine mode. But I doubt it will improve. That only determines how many slices, not how fine detail can get within any given slice.

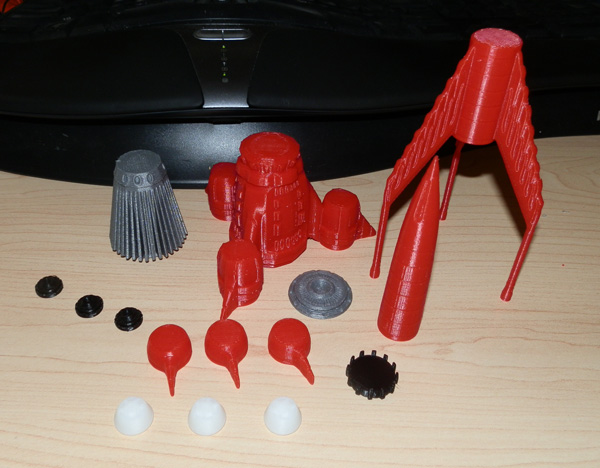
Here are the parts all together in silver, white, black and red:

OLYMPUS DIGITAL CAMERA

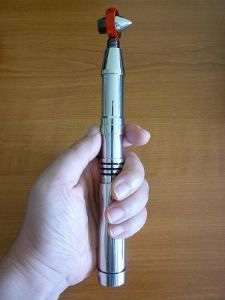
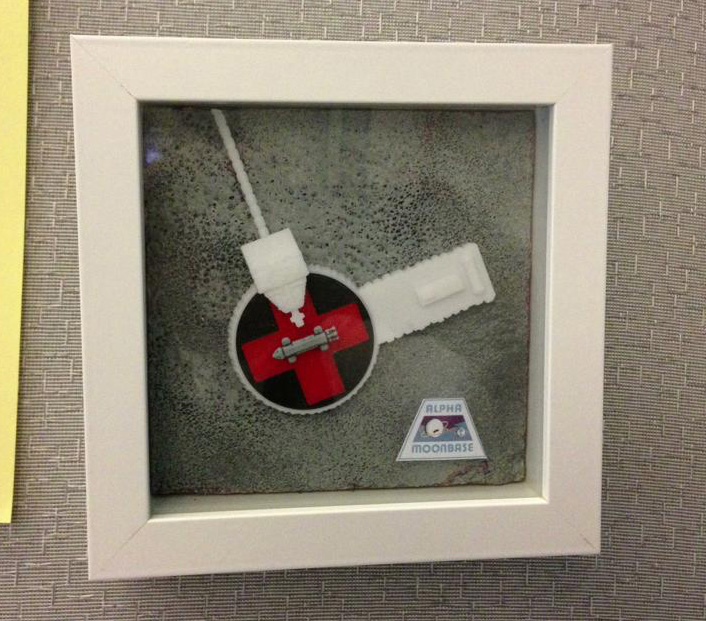
Before assembly I thought I would take a pic of the Main Engine Thruster just to show how fine the detail can get with the Afinia H479 printer.
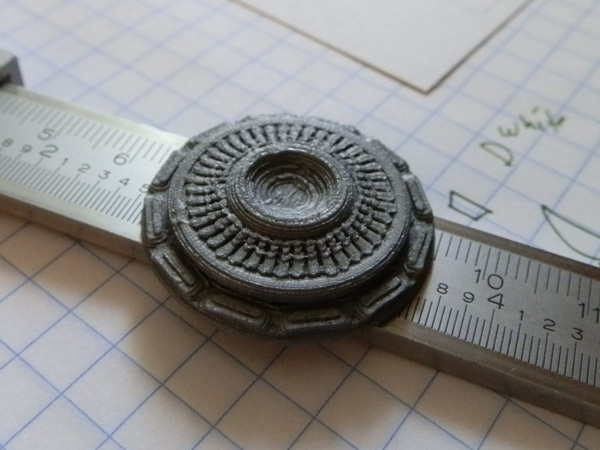
OLYMPUS DIGITAL CAMERA

Not bad at all.

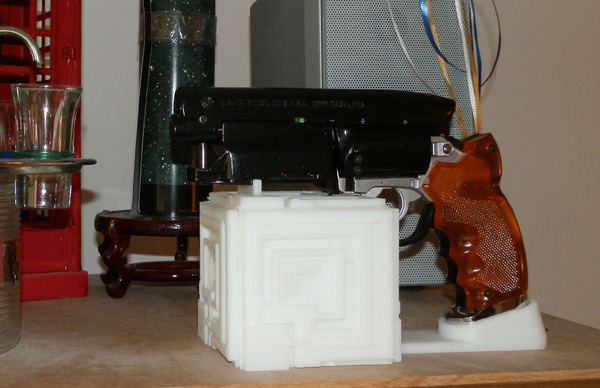
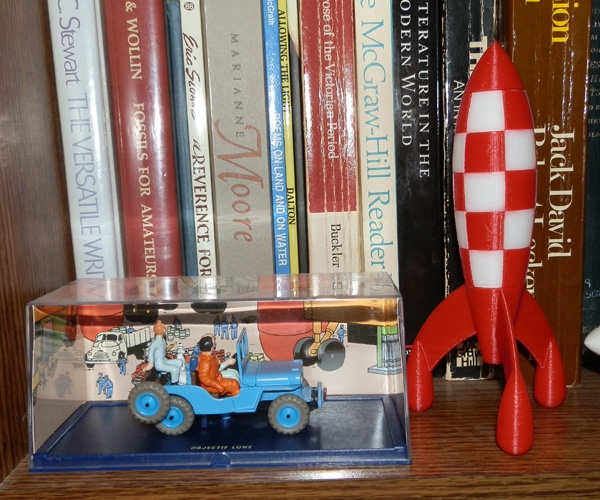
And here she is in all her glory:

OLYMPUS DIGITAL CAMERA

Heh. A true Thunderbird fan will know why the background items are significant in this photo.


3D Printing and Health Concerns

Yes. Depending on the filament being used, the 3D printer does emit fumes. Quite strong for some colors. Almost non-existent for others. At least by smell. This does not mean, however, that it’s not constantly filling the air with microscopic ABS particles.

And everyone I know has sent me the link this week, to this, or similar, articles. And I appreciate the thought, if not the sheer volume.

But fear not. I will now show you something. This is page ONE of a sketchbook I bought in order to jot down design ideas for my 3D printing. I drew this up several weeks ago, just after I got my printer.

fume-hood-design

I appreciate all the concern for my health. I do not take this lightly, as it is burgeoning tech, and can have unforeseen hazards. But I’m all over it.

This is a design for a hood to go over the printer, made from white PBC piping and connectors. And some of the connectors, if I can’t buy the exact ones I need, will be printed with my printer.

The printer at this moment is directly above an A/C duct, and directly next to a window which so far has been open during all printing. But it doesn’t suck the air away from the printer and out, so this hood design should do that for me.

You might say “I got it covered.” Well, not built yet, but I’m planning on upping the priority of building it.


Blade Runner M2019 Blaster Display Stand

One thing I’ve always wanted was a Blade Runner blaster, one of the most iconic weapons in movie history, next to the Light Saber. This past year, thanks to judicious sales of some of my collectibles, I was able to buy a very very nice one for under $300.00, which is low for this item. Some models can cost over a thousand, depending on the day, and how many eBay buyers are interested.

Known as the Off-World M2019 Blaster, it’s a lot of die-cast metal and plastic, has lots of moving parts, including an opening cylinder which spins, and can be loaded with fake bullets, and a working bolt. It has clear amber grips, and four LEDs that light up under the barrel housing.

It came with a silver plastic handle frame, trigger guard and pommel. I bought a custom-made die-cast metal replacement set on eBay, and what you see in this picture is my pistol, upgraded with that kit. What it’s on is the display stand I’m currently designing and printing with my Afinia H printer.

OLYMPUS DIGITAL CAMERA

What you see there is the bare frame, which is modeled in 3 pieces (because the Afinia printer only does 5x5x5 volume, and the bottom strip is about 8 inches long or more. I printed it in two parts with a dovetail connector which snaps nicely into place.

The pommel (both the original plastic one and this gorgeous polished silver one) fits into a cuff at the back of the stand. Then a post rises up to cradle the housing under the barrel.

However, that’s very bare-bones indeed. It serves the purpose, but it’s not overly attractive.

So I opted to design a nice, iconic base for the stand, and I decided to base it on the tiles used in Deckard’s apartment.

br-stand-3d-model

Deckard’s apartment was shot in the Ennis House, built by Frank Lloyd Write in 1924 for Charles and Mabel Ennis.

This house has been used in dozens of films due to its iconic Mayan-inspired tile design.

You can see Deckard in his apartment here, the wall made entirely from these tiles.

deckards_apartment_in_movie

So I put my M2019 blaster on my scanner and used the Maya measure tool to make various measurements, then modeled my 3D model to those specs.

I printed test pieces in ugly neon yellow (because I had a lot of this yellow and no desire to use it on anything finished) to test the fit, and once I had the fit right I simply had to design the aesthetic components.

What you see above is the structure of the stand that will fit under the block of tiles, and is really all you need for the display stand if you like minimalism. However, I’m going ahead with my block design, which will have a cut in the block to fit the trigger guard, which will also lend more stability. It’s unlikely this stand will fall over when I’m done, especially if I proceed with my plan to model it as a hollow block I can fill with pellets or BBs for weight.

Then I’ll put felt under it for a non-slip, solid standing.

Modeling it, however, proved to have some issues, as I modeled the back of the cuff a bit too close to the inner edge, and the printer didn’t like it, as you can see here.

OLYMPUS DIGITAL CAMERA

So I moved some vertices around and reprinted it, and the one above is the one that I fixed, and is nice and stable. Perfect fit too.