TB3 Rocket Test Print – First Printing in Red!

I spent last night scaling and altering my TB3 model to cut it into individually printable parts, with connecting holes and pegs, for a test print of the full TB3 rocket. When scaled, I ensured that no single part I intended to print would be taller than 5″. A bit less, in fact. And when completed, the full model should stand about 15″ in height.

I printed these pieces in white, so I used the premium white filament that came with the Afinia printer.

Docking Ring and Vane Upper Ring

Then, when these were printed I withdrew the white plastic, and then attached the Universal Reel Kit and Filament Holder, adding the tubing that came with the Afinia. Then when I had the new assembly attached, I printed a very tiny object just to ensure the filament still flowed properly.

Then I switched the reel holder to the Octave holder and began to prepare to print in red for the first time.

I have to say the first part of this was highly frustrating. The Octave spool was wrapped in a cling-wrap plastic to keep the filament from unwinding. But the filament and the plastic had fused, and I could not remove the plastic wrap cleanly. After some considerable time trying to remove all the bits of shredded plastic, I gave up and just spooled some of the filament off until I had cleared the last of the wrap.

Note: I e-mailed Octave about this and within an hour they had replied with an amazing letter saying they were going to change the way the filament was shipped, and apologized, and offered to make amends. I was very impressed with their Customer Service.

Once I had cleared the reel of fused wrap, however, the printing went ahead apace.

I printed the nose cone and the neck section of the rocket in red. I printed this at 2mm thickness rather than the finest 1.5mm because there was not a lot of vertical detail, and it sped it up. (This is a test print after all.) I printed it in Normal mode.

Neck Section and Nose Cone next to the Docking Ring and Upper Vane Ring

When printing with the lower quality red (not a Premium quality filament) there was fine spider-web-like filament stretched between the two pieces as they printed but only in two or three places. It printed fairly cleanly.

Here you see the body sections mounted onto the rings.

Rings Attached

And here is the first four sections of the rocket assembled. These are just placed right now. No glue. I intend to glue the rocket together later. (I may also think about coming up with an interlocking connection mechanism that won’t require glue, but that’s much later.)

First Four Pieces

And as a reminder, here is the 3D model, so you can clearly see where this is headed.

TB3 Render

I decided that the text on the rocket body won’t be a part of this project, not yet anyway, so I printed it without.

Printing Printer Parts – The Afinia Spool Holder & The Filament Feed Mechanism

The one thing I noticed when printing the Afinia spool holder is that the blue tape can cause a large flat print area to lift off the tape before printing, and this can warp the object. However, I also noticed when the thing was printed, that my printer is off calibration vertically. There is a calibration object and steps to fix this, but I haven’t done that yet. I was just basically putting the printer through its paces, and truthfully, the Afinia spool holder doesn’t need to be perfectly vertical to work.

OLYMPUS DIGITAL CAMERA

^ The Afinia Spool Holder hot off the presses.

OLYMPUS DIGITAL CAMERA

^ The Afinia Spool Holder cleaned up.

Note: During the printing of the Afinia reel holder, I came up with a way to do a single holder that should be able to hold either the Afinia reel or an Octave reel without changing it out. I’ll talk more about that later as I design it.

So next was the Filament Feed Mechanism. Two pieces. The first is a bracket that screws to the Afinia printer side replacing the current Afinia spool holder which has its own Filment feeder. This won’t be there when the Universal Adapter Assembly is attached, so Octave provides a Filament Feed Mechanism has to be attached to make up for it.

I printed the two pieces in one single run and it went perfectly using Fast mode and .25mm layers. But I found out something on cleanup. You really have to think about your support material.

I printed the Stalk Nipple so that the small groove that takes the filament (and feeder tube) is at the top. This was perhaps not the smartest thing to do because that meant for it to print a hollow cylinder inside (to fit over the base’s shaft) it had to print support material inside the hole. Oooops. Hard to clean out, and harder to smooth out. So it fits too snugly.

OLYMPUS DIGITAL CAMERA

I then printed another version (using Normal mode instead of Fast) and I hope that printing it upside down may fill the slot with some support (easier to clean) but leave the inner shaft cylinder completely material-free. Funny enough, when it was done there was still material in the shaft hole. Oh well… It turns out the first one fit better, so I used that one. I had to file out the slot a bit to fit the filament smoothly so it wouldn’t kink while moving through.

Addendum:

I just noticed something not so great. There is a small tab underneath the fan on the print head housing, and the tab is attached to a shaft that comes from the housing under the fan. This is snapped. Probably happened during assembly. The printer has been working fine, but I saw this piece drooping. I e-mailed Afinia and they sent me out a file to – get this – print the entire fan attachment assembly!

They are attempting to repair my Afinia H-Series printer via e-mail!!! – I mean come on! How awesome is that?

So I printed it. It had a lot of support material because of its shape. And the handle didn’t print well. The little tab that rotates the fan baffle.

OLYMPUS DIGITAL CAMERA

But check this out.

OLYMPUS DIGITAL CAMERA

OLYMPUS DIGITAL CAMERA

OLYMPUS DIGITAL CAMERA

The tab is a rotation handle, and the shaft, printed in one go, allows this wind baffle to be rotated up and down.

Printing the Octave Universal Spool Adapter

As I posted below, in order to use other sized filament spools, I will have to use a different spool holder than the one supplied with the Afinia printer.

This is the result of 3 hours of printing on fine with medium internal structure.

OLYMPUS DIGITAL CAMERA

I probably could have printed this in Fast mode or using a thicker extrusion, but I did it the finest way, and it took 3 hours. And the base of it warped during printing. When I pulled it off the bed, the rafting had already lifted off the blue tape.

Cleaning it was difficult because the object has support material on bottom because there is a raised area, allowing the adapter to fit around the arm of the printer.

Looking at the model now, I realize that if I had printed it upright instead of flat, I could have done it with no support material except in the screw holes. I’ll probably print another one later to test this theory.

But the hardest part was the two grooves that had to print on the sides. I managed to get all of the material out, using various tools.

Final result:

OLYMPUS DIGITAL CAMERA

Tomorrow I will print the Octave reel holder and the Afinia reel holder because those are the two I need at the moment. Later I will print the rest of the kit.

I think I will print directly on the perfboard, and use Fast mode and use a thicker extrusion. I don’t think I need the best and slowest print quality to print utilitarian parts.

And I just thought of something cool. I think I can create an adapter that will work with both the Afinia and Octave reels on one holder. More on that later.

Here It Gets A Little Meta… Printing Parts for the Printer

When I bought the Afinia H Printer I bought it from USB Copiers, as a bundle with the printer, three extra spools of (Octave) filament in my color choices (Red, Yellow, Black), a set of chisel tools for cleanup, and a head temperature switch (to lower the head temp for the lower-temperature filament, which Afinia says isn’t really necessary. Besides, installing the switch will void the warranty.)

Here’s the thing. The spools of filament Octave makes are much wider than the spool that came with the printer. But the spool holder that came with the printer can only fit the thinner spools.

Here’s where it gets a little meta… I went to the Octave site and found that to fit their spools (and others) I could simply download and print several files that will print new spool holders that you just screw into the printer using the current screws.

The system involves screwing in a universal adapter piece, and then you can just slide in various different spool holders to suit the spool you wish to use.

And with this, you download a new feed system, since the current filament feed holder is a part of the Afinia spool holder.

Weird, right? I can print parts for the printer that’s printing the parts.

Weirder, some models even allow upgrades by swapping out gears and other actual moving parts with new parts printed on the same printer. It’s getting weird out here, folks.

Third Print – Testing For Another Future Project

Afinia’s print software allows you to print the interior of objects with a grid-work lattice that strengthens the model, but also allows it to print nicely for any shape. It saves material over a completely solid interior, and you still get the strength of the material.

Last night I decided to try Afinia’s new “Shell” feature which prints your model with nothing in the center at all. I knew this would only work on certain models.

First, here’s the 3D model I’m trying to test print. I’m test-printing, meaning I’m not separating out colors or modeling it in nicely connecting pieces, I’m just printing parts of the model.

tb3-concept-test-render-500

It’s a rocket I designed to be an updated Thunderbird 3 from the Gerry Anderson TV series Thunderbirds. (This model was done in the late 1990s and was later used on the cover of a comic book without my permission, but I later got credit for.) I wanted to update the Thunderbird ship to use no straight lines. Everything is curved, with the exception of the rods sticking up out of the engines.

Here’s the section I wanted to test-print, as seen in the Afinia printing program. The nose cone with the docking neck ring as a single piece. (This would be two pieces in a later, more complete model.)

tb3-nose-cone-section-ready

Here’s what happened when I tried the Shell option. It got to the part in the model where the neck ring has a ledge, and it had nothing to print on, so it extruded out a bunch of plastic hair into the cup shape you see here. Stupidly I removed the junk extrusion before thinking to snap this picture.

tb3-nose-cone-shell-test

So I printed it again with normal (large) interior lattice.

tb3-nose-cone-regular-test

And here is the final product. It’s actually rather nice. But it shows me my model’s circular resolution needs to be brought up quite a bit. It was modeled for a render, not a physical model.

OLYMPUS DIGITAL CAMERA

Second Print – A Test for a Future Project

My first test-print that Afinia volunteered to print for me was of a Space:1999 Moon Buggy, which someone else modeled. I began working on a 3D model of my own from scratch.

Here it is partly done. This is just the body. There are wheels, seats, trim, mirrors, etc. yet to be done. But I wanted to see what my Afinia could do with this rough early version.

Amphi-cat Rough 3D Model

At the scale I chose, which should result in a 2″ long body, the print should take about an hour and a half and is smaller than I intend it to be, so I’m not sure how detail is going to look. Not that there is any real detail on this piece at the moment. That will get added later.

I’m videotaping the print in several segments (1.5 hours is too long). I hope to edit that together and put that up later in a post of time-lapse print runs.

The real model won’t be printed solid like this. Since you can see from the above model that there is a significant overhang above where the wheels go, the printer has to print support material so when it prints that first overhanging layer, it has something to stand on.

The final model will be cut in half at the mid-body line (sharp edge in the photo) and the bottom half flipped upside down. This way it can be printed with virtually no support material except for the leg cavity where the driver would sit. Careful splitting of the model will be required. And the trim (not shown here) is a rubber bumper that covers the sharp line mid-body, that will be printed separately, as will the seats and other small bits, which will, like a model-kit, be glued into place, or I can create snap joints.

The final model, like the early version Afinia sent me, will be printed in yellow, and the wheels, seats, etc, in black.

And here is the final result. This took just under a couple of hours on the first morning with the printer.

Amphi-cat printing

^ Fresh off the print bed. Rafting attached to the blue tape.

Amphi-cat with Support Material

^ Front 3/4 view of the model, just two inches in length, with the support buttresses in clear view. Later I will trim that support material and show the final product.

Amphi-cat from behind showing the rear vents

^ Due to the translucency of this white ABS filament, you can clearly see the louvered vents at the rear. Even at this tiny size (this will eventually print at 5″ in length) those vents printed very nicely!

For future print runs, I hope to set up a web-cam with software that will shoot at a frame every few seconds, which will make printing videos easy to watch because the print will come together rather fast before your eyes.

Here is the object after removing support material and doing some cleaning:

Amphi-cat cleaned - Front
Amphi-cat cleaned - Three-quarter view
Amphi-cat cleaned - Back
Amphi-cat cleaned - Bottom

And He’s OFF! First Print!

Eager day as I hit Refresh on the UPS Tracking page a buzillion times… by the time I got home at about 6:30 there was still no printer at my door. Took Charlotte to Music Lessons, got some groceries, filled up on gas, and when I got home, there was a box on my doorstep!

afinia-box

I took it inside and began opening it.

It contains a box of accessories, a reel of white filament, and the printer, plus paperwork.

The “Unpackaging” sheet showed how to remove the two shipping clips and the rest, and the “Installing” sheet showed how to attach the spool holder, and how to feed the filament into the head and calibrate the nozzle to within .2mm of the print plate.

afinia-set-up

I then boldly selected an object I downloaded from Thingiverse, and scaled it down to about 1 inch in height (for a very fast print) and set the print preferences (to fine) and hit Print!

And I watched the action. I took several video segments of the 22 minute print, which I hope to edit together at some point.

But here is what it looked like part-way printed.

afinia-printing-dalek-first-print

And here is the final result after the removal of some support material and some X-Acto knife fine cleaning.

first-print-dalek-one-inch

Keep in mind that this is my first print, and the object has a lot of modeled detail, but I printed it at only one inch in height. So the detail that’s there is actually quite good!

I got the package at about 8:30pm. Opening it (carefully, methodically) and getting it set up to print, selecting a print object, upgrading the software (I had installed the software earlier to get familiar with it) scaling the object, hitting Print to cleaning, it was done by 10:15pm.

The print took about 22 minutes. Larger objects will take 4 or more hours, depending on size of course.

It is now the next morning. It’s 7:04am and I just set it going to print a very early version of an Amphi-Cat ATV (used in the TV show Space:1999) that I modeled in Maya. I have a ways to go before the model is really ready, but I wanted to see what it would do with this version in one solid body piece. Will show that later.

3D Printing is About to Begin!

(Originally written May 31)

My interest in 3D printing began several years back when the current game project I was working on was in mid-development, and not yet released. Lord of the Rings Online was not yet shipped, and we were working away when one of my co-workers and friends pointed me to a web article about 3D printers being used at MIT, and I was fascinated. There were various ways to print something in physical space at the time, but they were extremely expensive, but nonetheless I was excited because the article kind of led us to believe that this kind of technology would be available at reasonable hobbyist prices in the next few years. Being known as a collector of lots of plastic (toys, collectibles, etc, in fact my desk was a tour stop on the Turbine tour because I had 5 shelves full of the coolest stuff you can imagine) I was of course excited at the prospect of being able to make my own “stuff”.

Another co-worker and very good friend of mine at the time said something along the lines of “Oh, great. More junk to toss in a landfill.”

Well, perhaps some people would print a lot of junk. I planned to print cool things, even if I was the only one who thought it cool.

In the last two years, the MakerBot has become a well-known hobbyist machine, and for under $3,000 (about the cost of an elaborate computer in the 1980s when I was first computer hobbying) it brought 3D layer printing in ABS plastic to the home hobbyist. And since then, the industry has sort of boomed. There are many printers now that can print 3D layered objects. Many of these are, themselves, a hobby. You buy the kit and build it. I’ve seen the results. Not always great.

So I kept my eye on the market and two promising printers showed up:

The Form-1 Resin Printer

The Afinia H479 ABS Layer Printer

About 8 months ago, I guess, I bought Make Magazine’s special edition on 3D printing in which they pitted somewhere around a dozen different home-priced 3D printers and ranked them. I read through those articles, saw the test prints, and they ranked the Afinia H479 their “Best In Show” for various criteria. Where they lost out was on speed. But when I think about it, speed is not that important for the patient. Where they really won was in accuracy and precision. And in ease of use. It is touted as one of the first “out of the box” printers you can just plug and print.

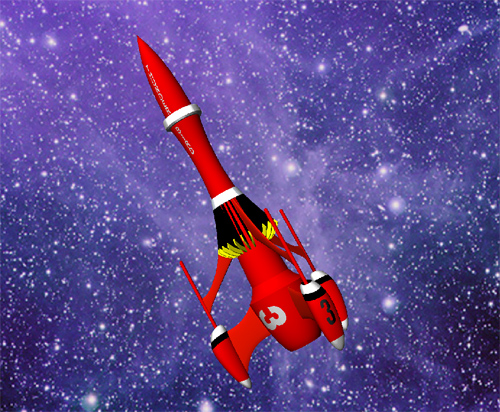
Around the same time I heard of a Kickstarter campaign for the Form-1 . This excited me too, because the printed item is made of resin (which interested me because I mainly want to print garage hobby resin model kits for hobbyists, such as a Space 1999 Moonbuggy, or space ships I design myself.)

I looked into the Form-1 and I found that while the process is fascinating (it actually prints using a laser which hardens the liquid resin on a flat surface that’s lowered into a shallow tray of resin. It hardens a layer onto this surface, and lifts it slowly out of the tray of resin, printing layer after layer, and you see the whole thing rise up upside-down out of this shallow bath of resin.

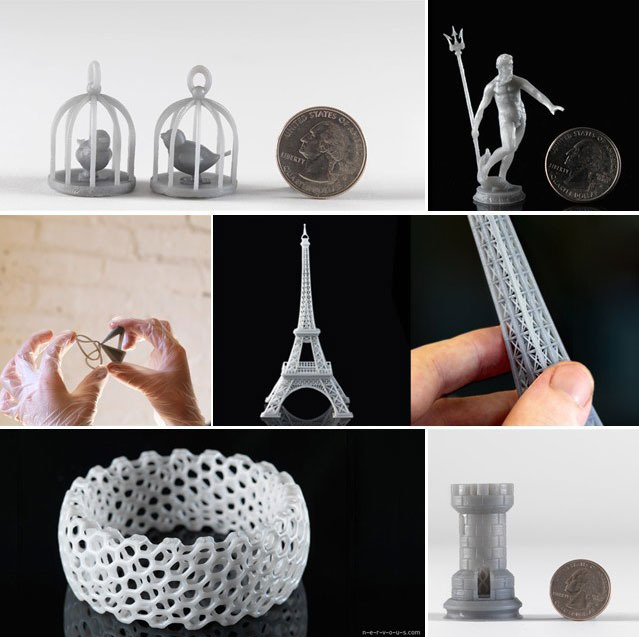
If this wasn’t magic, then it was close enough! And look at these results!

Don’t get me wrong. I WANT THIS PRINTER!

But it had its problems. First, the Kickstarter campaign indicated they were some way off from production. And the cost was about double the Afinia H Series printer.

And there was word that they were being sued for patent infringement . Not sure how that’s going either, but it lends uncertainty to the project.

But the printing results speak for themselves.

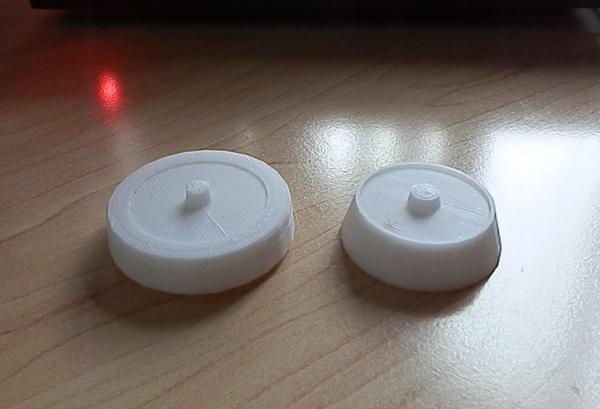
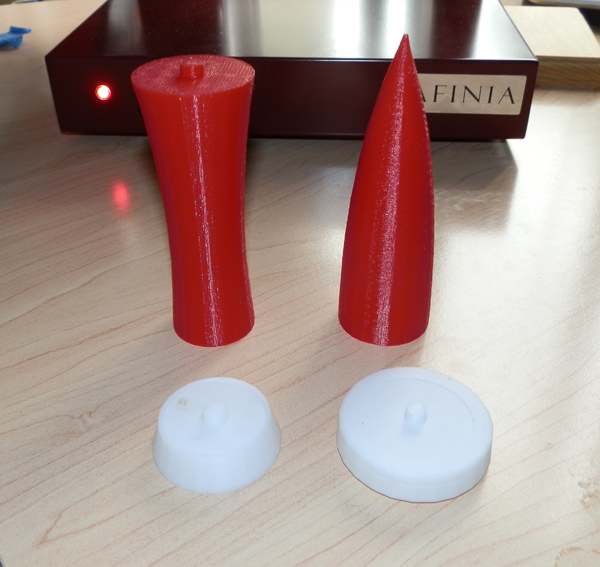
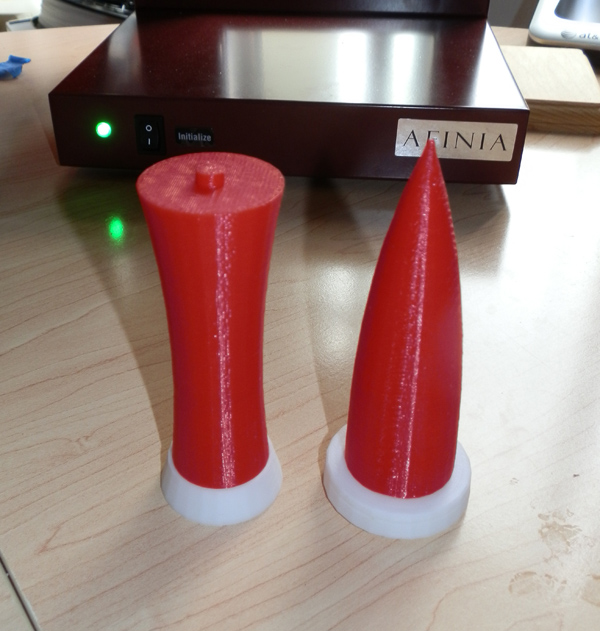
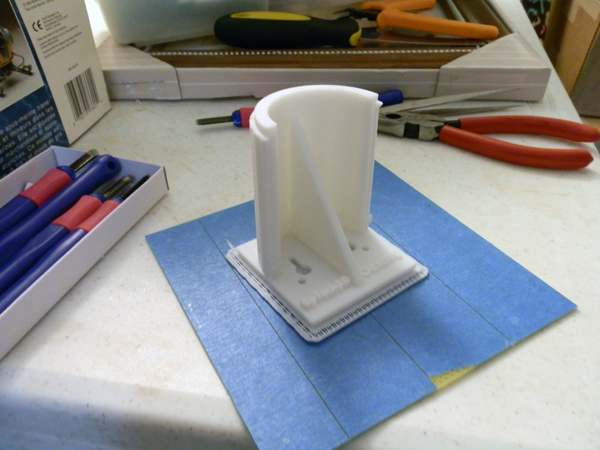
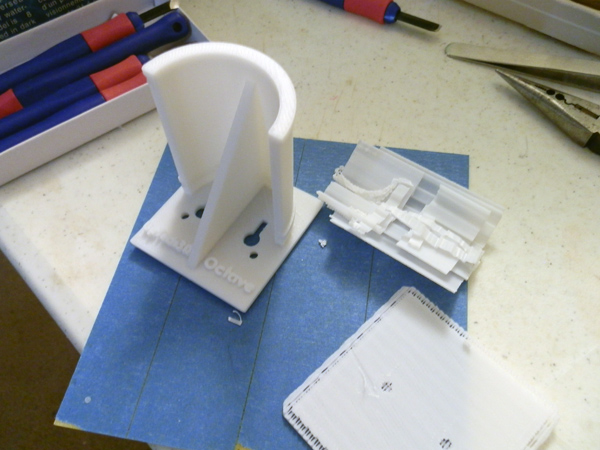
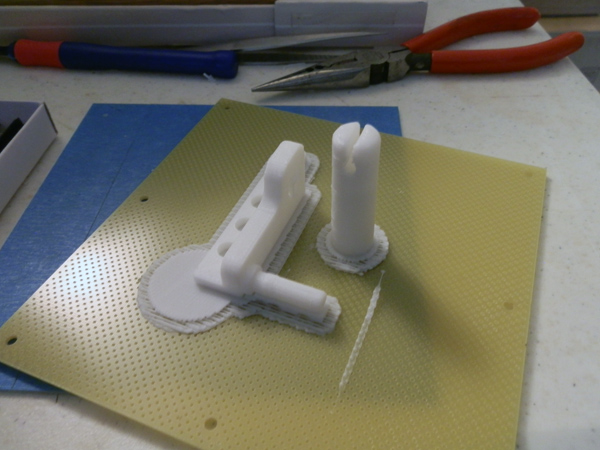
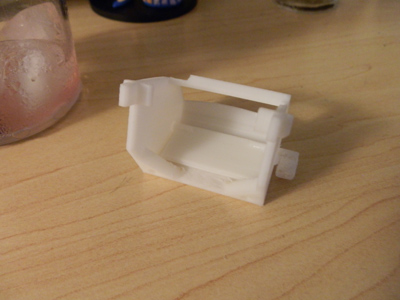
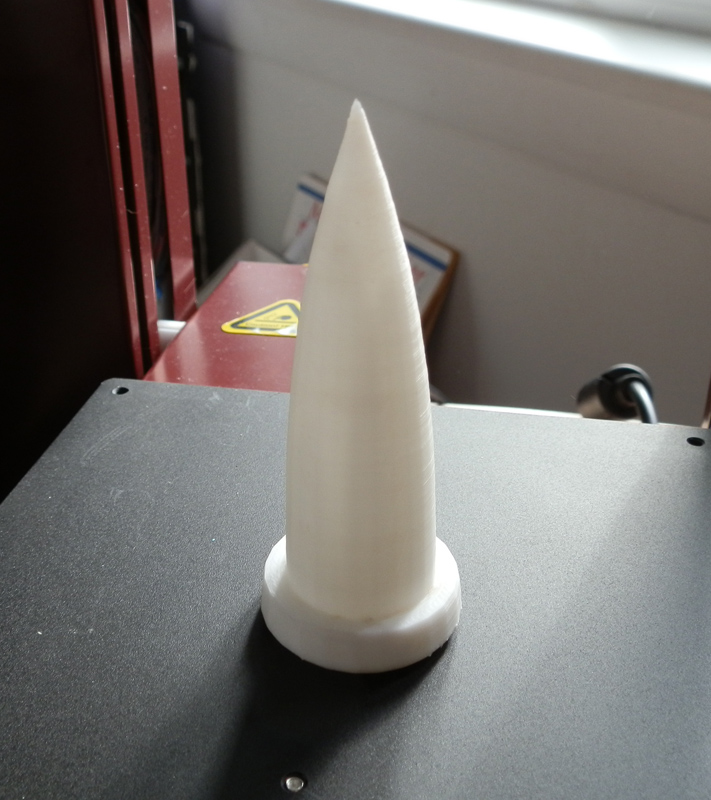
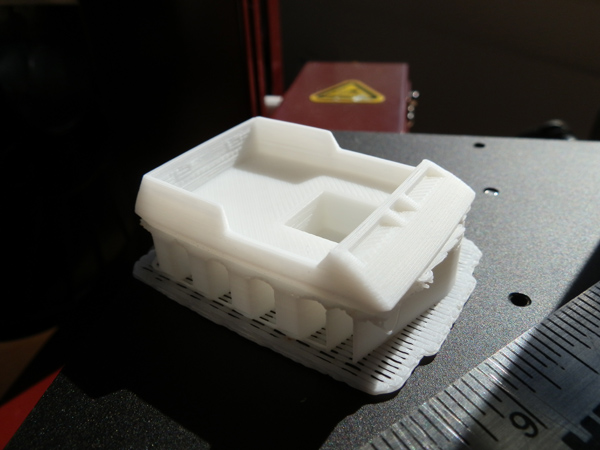
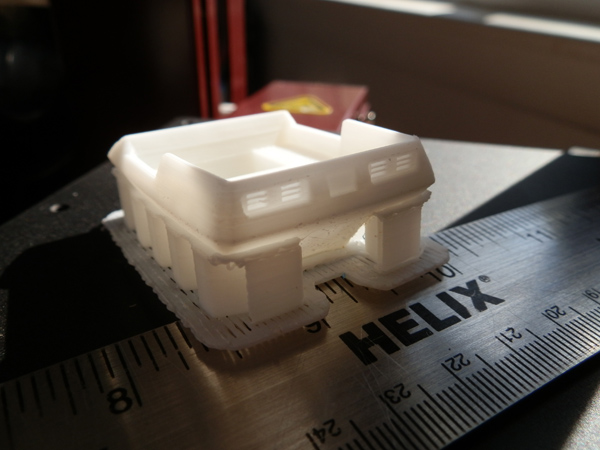
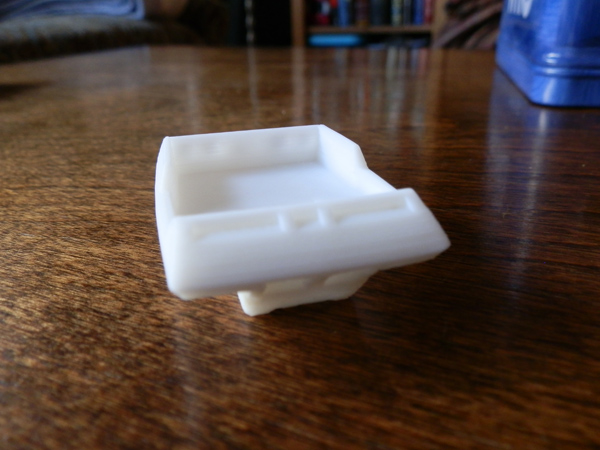
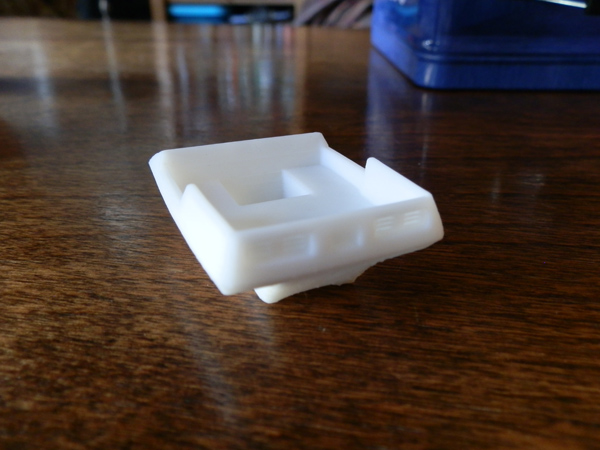
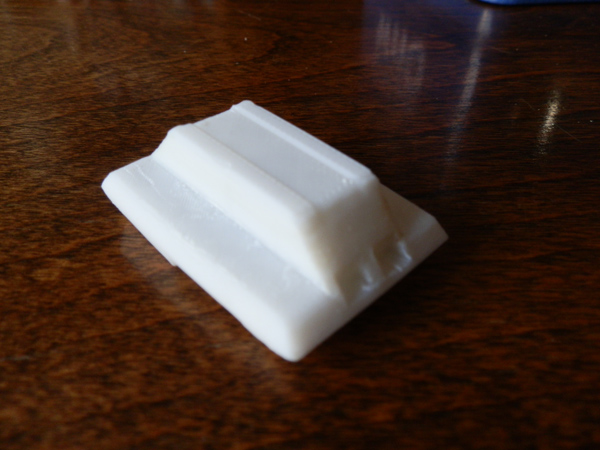
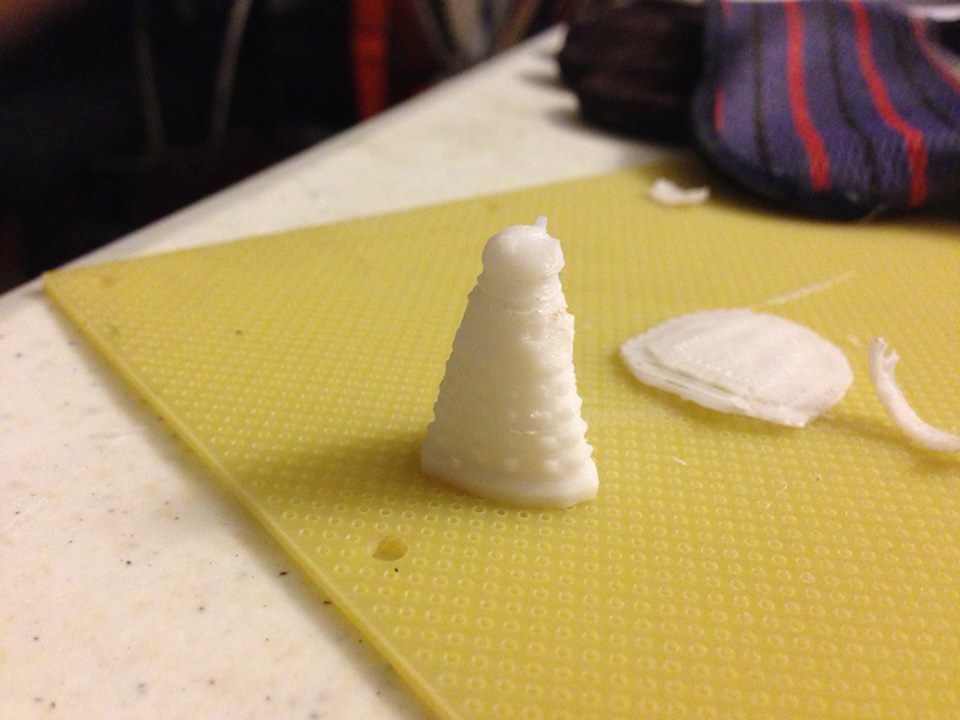
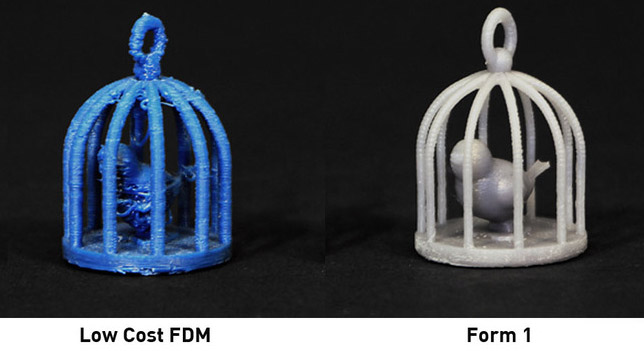
Here is a side-by-side sample of the two methods of printing. On the left is a small item printed in ABS layers, and on the right, the same 3D model printed on the Form-1 with laser-hardened resin process. (Not sure which actual printer printed the layered version. They just labeled it “Low Cost FDM” which is another print material and process.)

But for now the Form-1 is out because it’s not shipping yet, and is a bit too expensive. Also, the special liquid resin required to print is very expensive, something like $140 per liter. Now a liter sits in a shallow tray and can print a lot of items, but it would still make for a very expensive per-object cost. I think I’ll want one of these when they’re at market and the prices drop a bit.

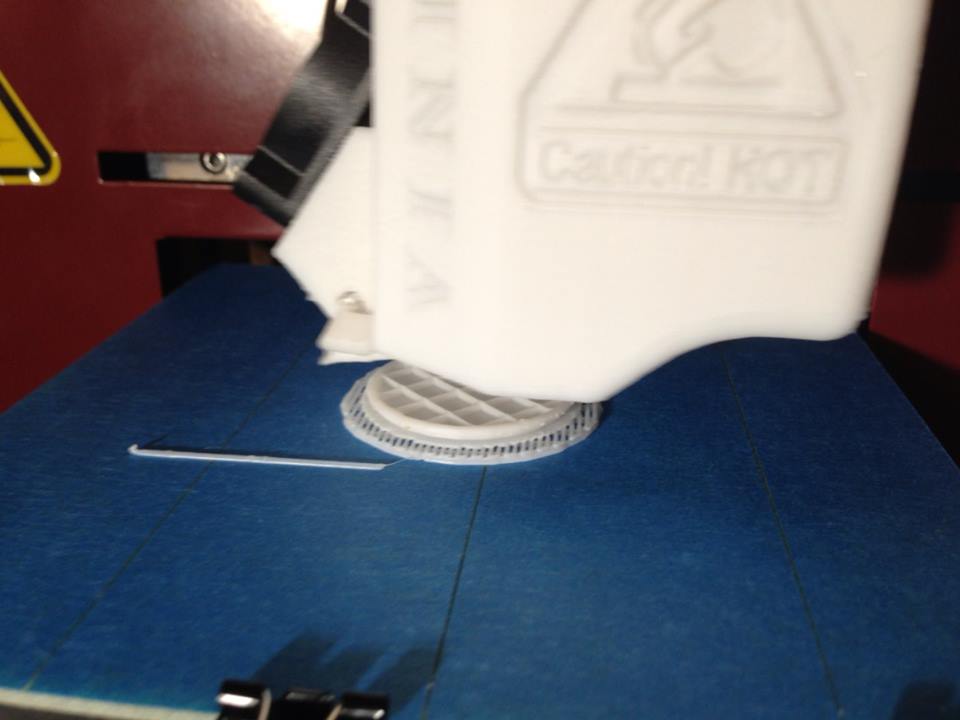
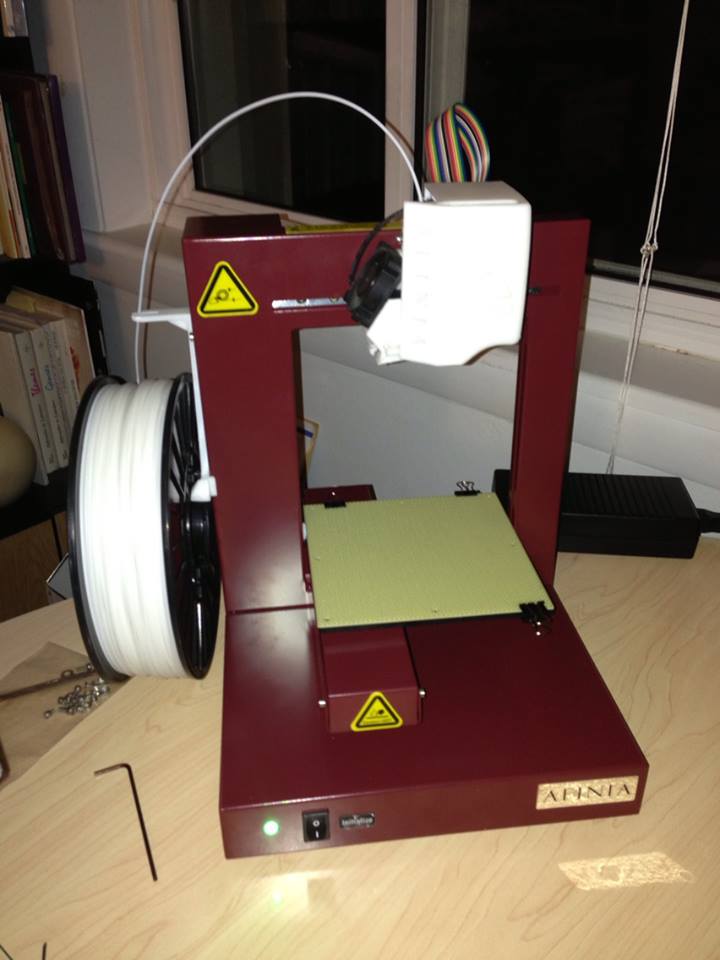
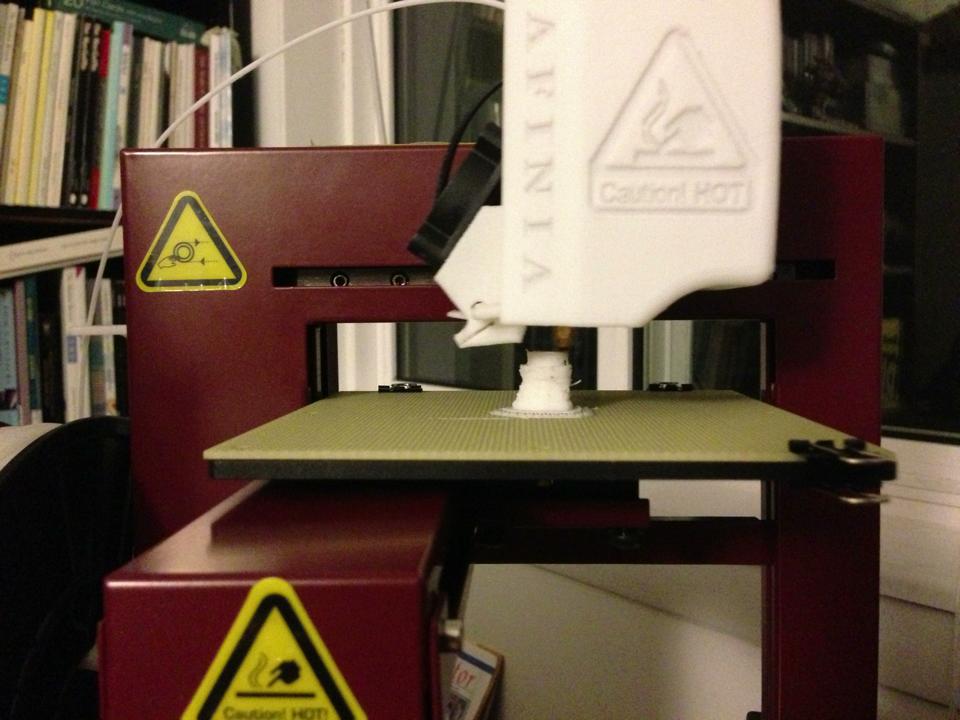
So I investigated the Afinia H Series .

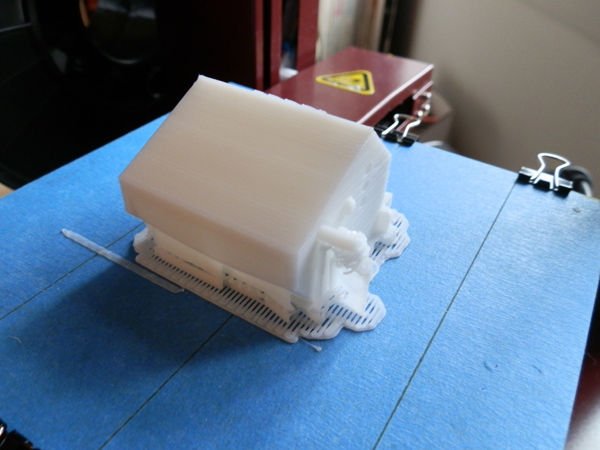
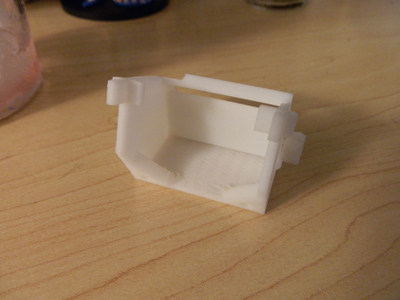
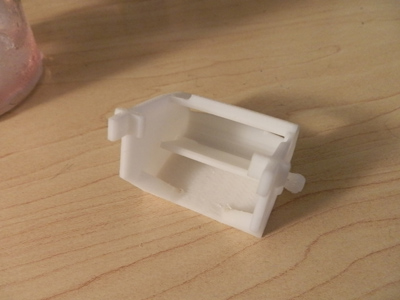
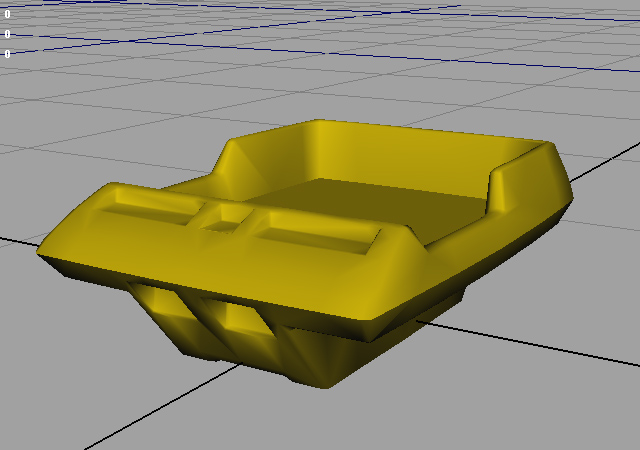
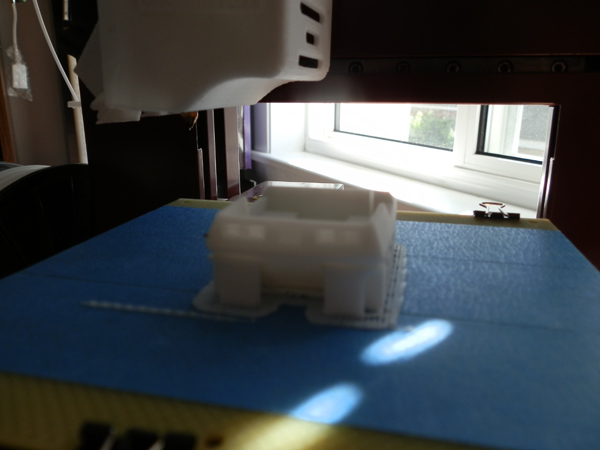
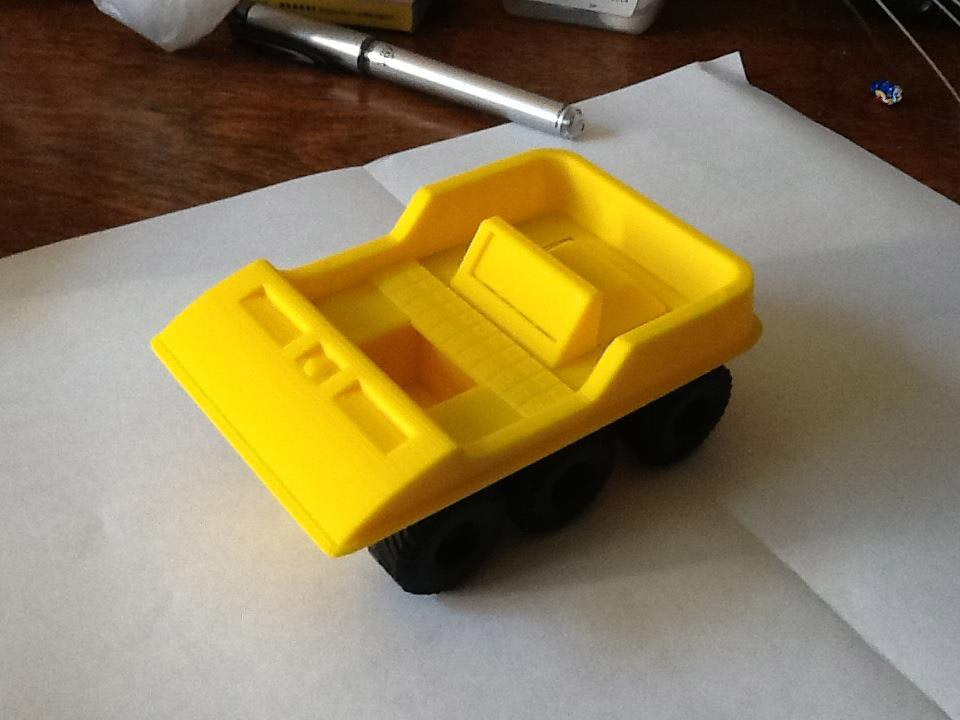
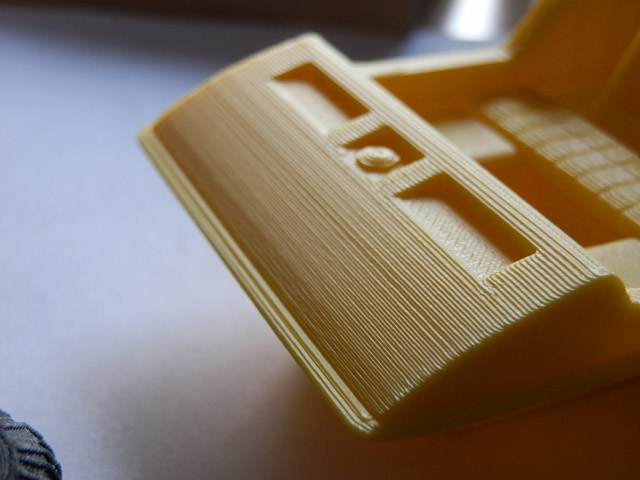
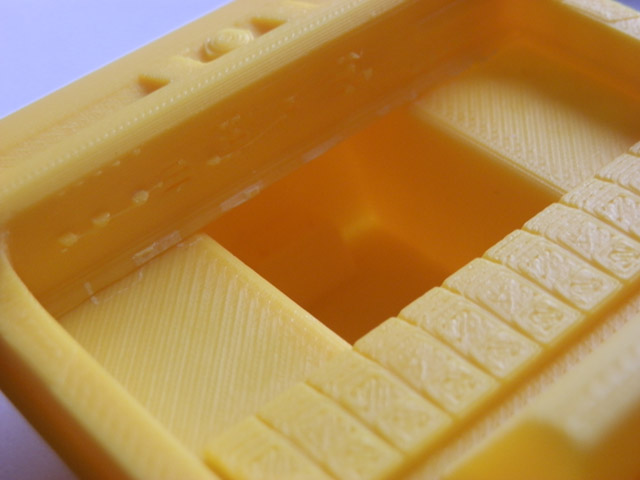
Afinia was good enough to offer to print me a sample item if I sent them an .STL file (standard file format for 3D printing.) I wanted to see how feasible it was to print a Space 1999 Moonbuggy so I downloaded a model from the internet just for testing purposes. Meanwhile I began to model my own. But for now this would do.

The model was NOT optimized for 3D printing, and I sent it in without alteration. I expected the worst, but what I got back actually surprised me. You can read about that in my previous entry, here.

They also sent me a sample print of a Taj Mahal that they do, and I was pretty sure this would be my first 3D printer.

At a price of $1599 I figured this would be my starting printer.

At the time I just got my tax refund back, and got a bonus from work, and had enough money in the bank to outright buy this printer. But with Charlotte’s college coming up rapidly, and who knows what costs ahead, we figured it would be smarter to keep that money in the bank. So I had a plan.

Each year at Christmas I usually go through my collectibles in storage and sell a few on eBay to make some extra money to buy the family Christmas gifts. I decided I would make the purchase of this printer a project. An eBay project. I would sell enough of my collection (things I didn’t cherish as much) and try to raise enough money to buy this printer outright. I knew it would take some time. I figured if I began auctioning in January, I should have $1600 by April.

I began auctioning the big ticket items first, items that would bring in over a hundred bucks and my PayPal account began to grow. Then I found a few things on eBay I wanted myself, and it shrank a bit, but not much. I kept auctioning, and the account began to grow. I wrote a spreadsheet to keep track of all my eBay auctions and the totals, the shipping costs, and the net result, and had a little window for how much I had left to go towards the Afinia printer.

Then in late March Charlotte and I were involved in a car accident that totaled my van and took me out of auctioning for a few weeks. I had too much else to concentrate on to be selling things on eBay, which is a hobby in itself. So I was delayed.

But when I bought a new car and finally took possession of it almost a month later (long story) I got back to selling.

Since January I sold over 115 items on eBay, and made $2300. As I said, some of that money had to go elsewhere. But I declared victory around May 25 when my PayPal account had reached over $1700. Enough to buy the printer and ship it.

Earlier this week I was about to pull the trigger. $1599 plus $40 expedited shipping for the printer and one reel of premium plastic, as well as a set of tools to help in the printing process.

But I looked around the internet for coupons and deals, and found that for $1650 I could get all of the above (shipped from Afinia’s warehouse, so it’s the same product) but add to that a set of knives (not expensive) and a heat switch (to lower the heat of the print head for some reason) but most importantly, three reels of filament in my color choices. Each reel of lower-quality filament usually runs $33 or thereabouts. So this was a great opportunity to get some extra colors off the bat. And one company was shipping $500 or above orders for free.

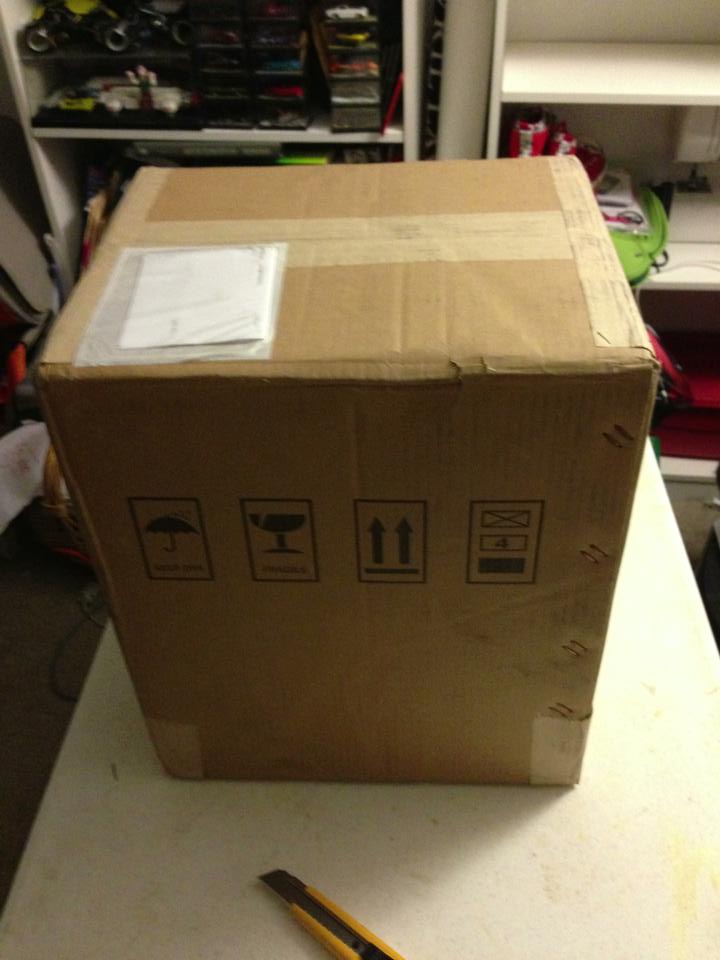
I ordered. Now I await the printer, which is grinding its way slowly to me by UPS Ground.

When I get it, I will begin blogging about it hopefully excessively. I will have to design a whole new page for it.

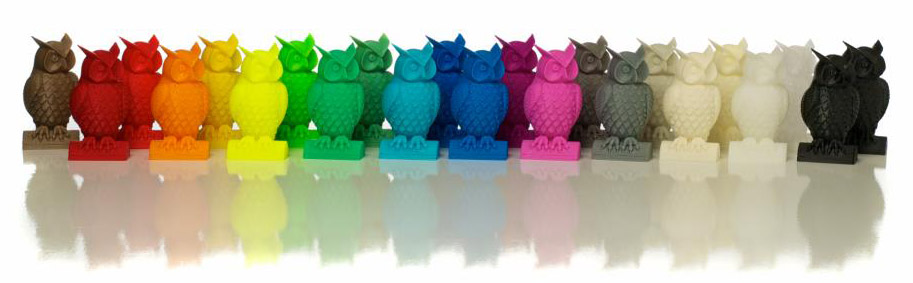
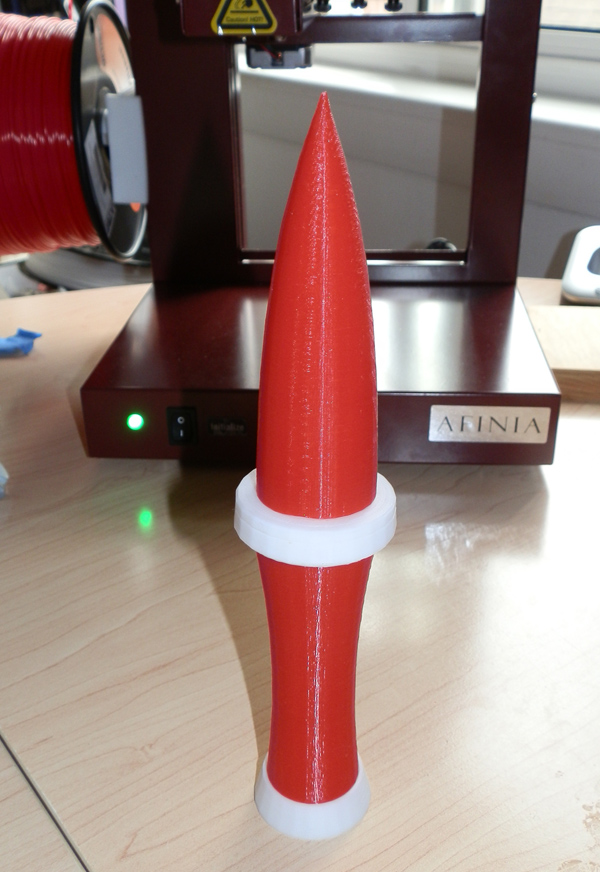
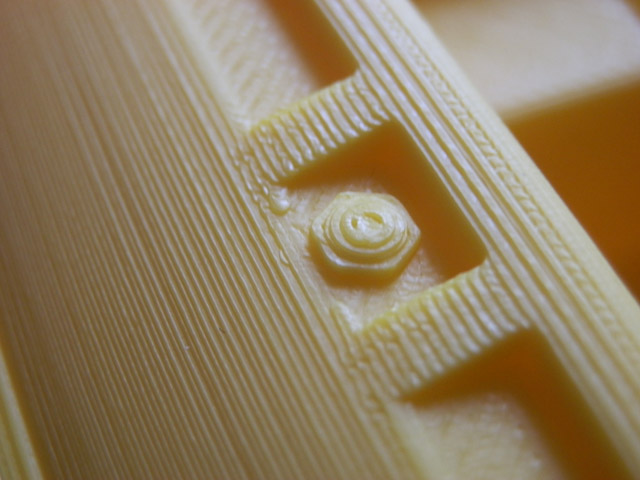
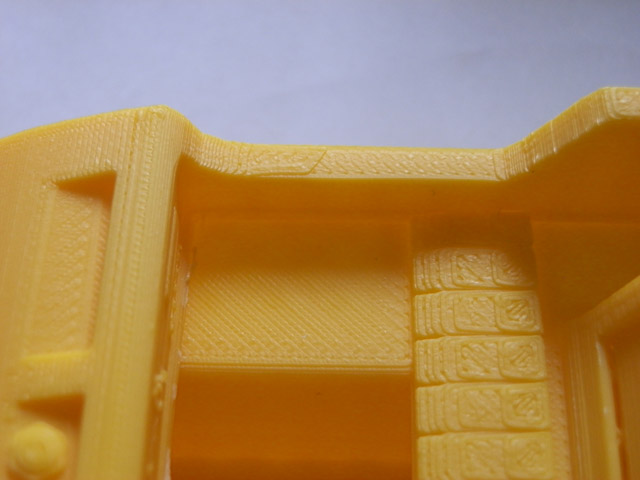
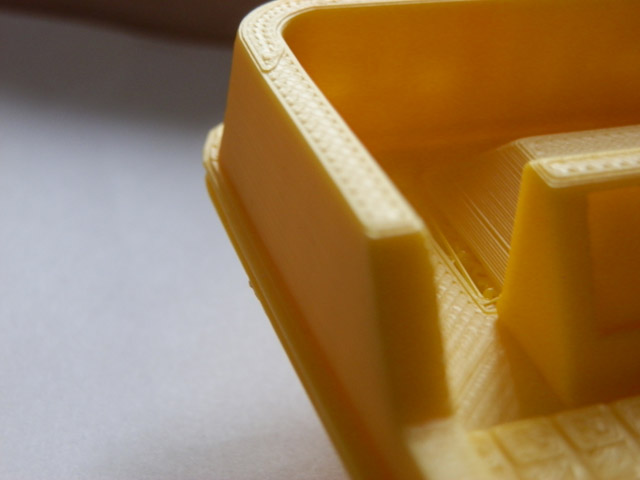
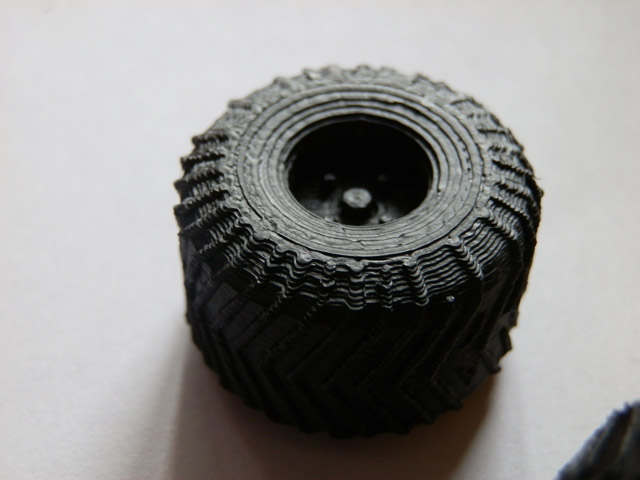
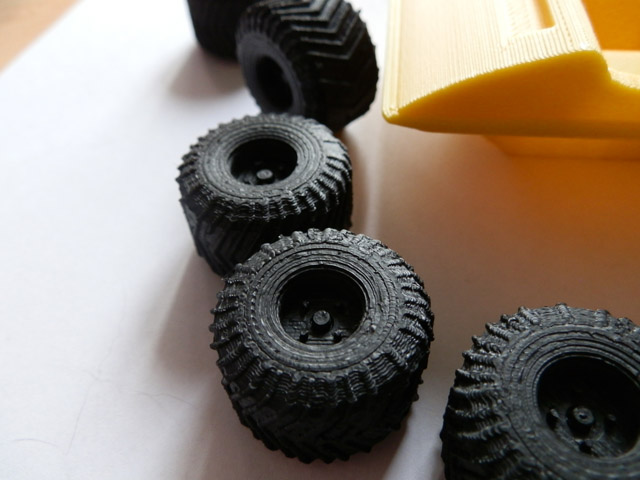
This is what an Afinia can do in the various colors of filament they sell:

My Introduction to 3D Printing

(Originally written May 4, 2013, so some things are now out-of-date. The printer is ordered and on its way.)

You may have heard a lot lately about 3D printing. This is not a new thing, but it has become far more accessible to normal people in the last year. For many years now, machines have created items out of layers of plastic in what’s called an “additive printing process” whereby a plastic melting head (not that different from a glue gun head) passes over a surface laying down a layer of shaped plastic, then lifts itself and lays down another layer, and continues until it prints an entire object from plastic (or sometimes other materials.)

I’m working now to buy an Afinia H printer, which prints things in ABS plastic, at .015mm layers, so about 8 layers per millimeter.

Just to show you (and me) what it’s capable of, I sent a computer file (one I downloaded from the internet and did not alter) to Afinia for a test print, which they offered me when I expressed interest in their printer.


Here is the finished product, with tires in place.

Here we see the real problem with current layered printing. The more shallow your angle, the more stepping is noticeable. You have to realize, however, that this is an extreme close-up. It’s not this bad in person, as it’s a bit smaller.

This shows how the rounded seat is printed in layers, and how the flat area is diagonally cross-hatched. Certain methods can be used to better finish surfaces, often involving acetone vapor bath.

This is the fuel knob, which on the actual model is only about 1/8 inch in diameter.

This shows the general surfacing. For current tech, this isn’t bad.

This shows the side and surfacing pattern.

A single wheel. The bolts inside print rather nicely, however, the gently curved surface is layered.

Here are some of the wheels together.

Please note that I can make a much cleaner model than this, and one that’s more accurate to an actual Amphi-cat, as seen in Space 1999, posing as a moon buggy. This one had problems with unclosed model portions, something I would easily fix if I knew it was a problem.

I began selling some of my amazing toy collection on eBay to pay for it, and after months, I’m almost all the way there. I had to take a brief hiatus from auctioning things after my car accident , but I got back on track and am now very close to the amount I need to purchase this printer.

I have many plans including making rocket ship models, airship models, other props from TV shows and movies, as well as clocks. I have some great ideas for non-traditional clocks using normal clock motors you can buy in hobby shops.

Welcome to my Words

This is a blog. Make no mistake. I was writing blogs well before the word “blog” was coined. And I really hate the word “blog” because it makes you sound like you’re gagging in your throat.

Before then, when Turbine was Second Nature Interactive, and we were allowing employees to host their own web sites, I started what I called a “Rant” site, which exists today, even though I host the files in a /blog directory.

I do many things I consider fun and cool to pass the time. I write stories, even a couple of novels, a couple of text adventures, a few Commodore 64 games, the best of which run under GEOS. I also do other things including collect toys and cool stuff. I even wrote a column called “Cool Stuff” for the Science Fiction Channel (which it was then known) for about seven years before they changed their name to SyFy and altered the format of their web magazine(s).

However, I’m creating this “blog”, which I will instead call “words”, in order to document my impending experiments with 3D Printing.

Please comment as you see fit. I am just setting this site up now, but soon I will be updating it to include two posts from my original “Rant” site. But for today, this is it.