Komani Eagle Pods – VIP Pod

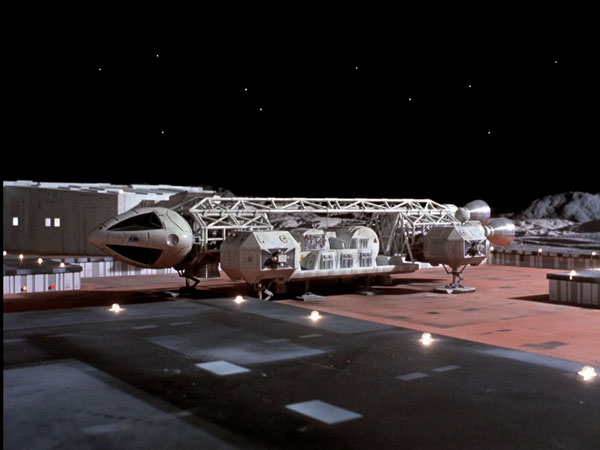
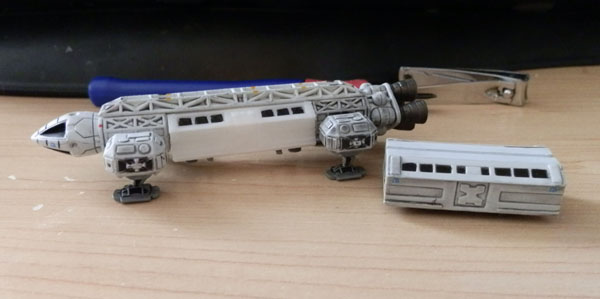
In “Breakaway”, Space 1999’s first episode, the moon’s nuclear waste storage facilities are proving unstable, and an investigation begins to determine why. At one point, Commissioner Simmonds flies to Moonbase Alpha to oversee operations. He travels in a VIP pod attached to an Eagle:

space1999-eagle-vip-pod-landing

As you can see it is a standard Passenger Pod with distinctive orange side panels and door.

So this should be a fairly easy job, now that I already had my own Passenger Pod already completed.

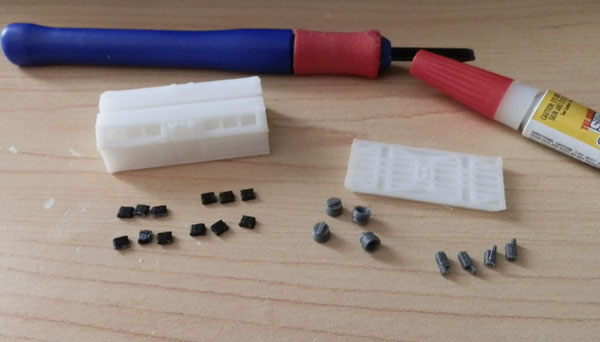
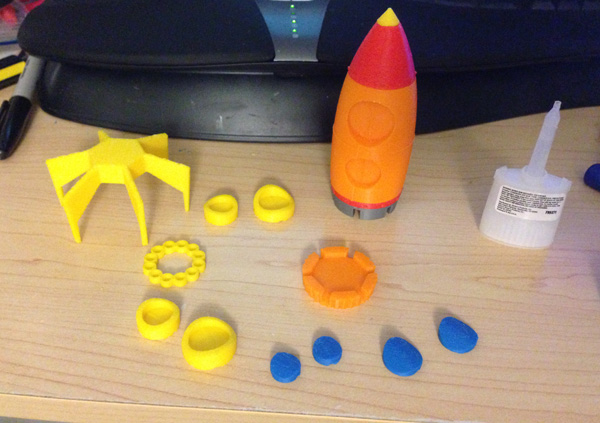
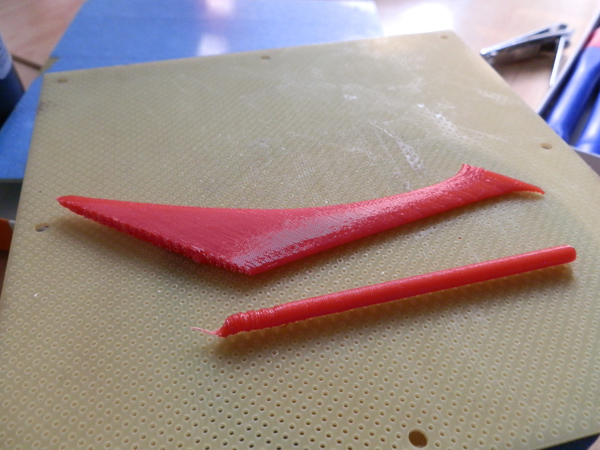
I wanted to print it in its native colors, since I do have orange filament. I cut away the side detail on the passenger pod, separating it out into its own thin strip, and leaving a space on the main body to snap it in place when it was printed in its own color.

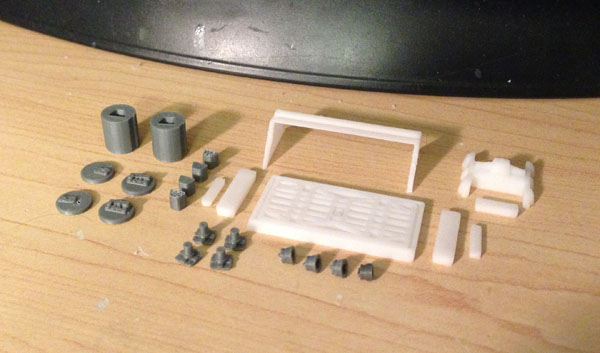
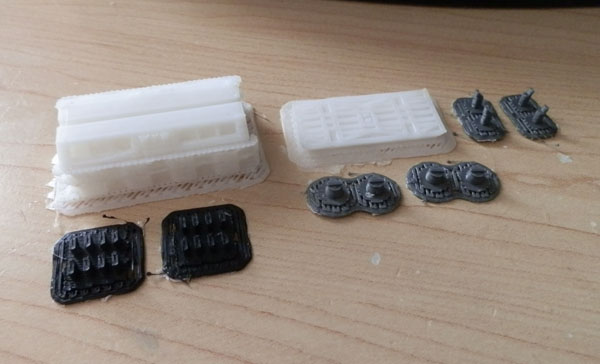
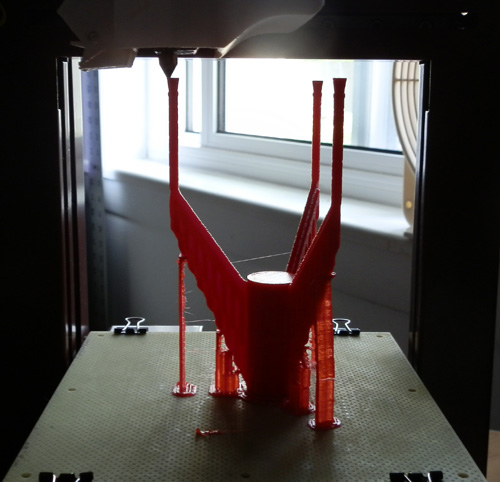
Here, you can see it in progress:

vip-eagle-pod-in-progress

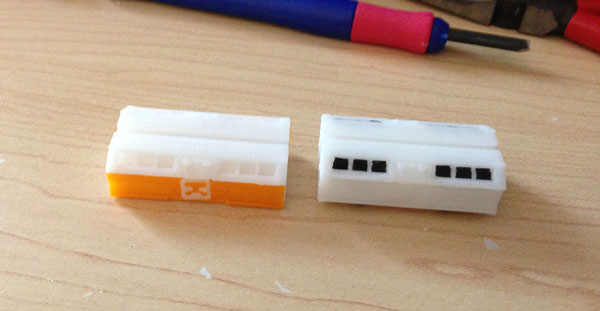
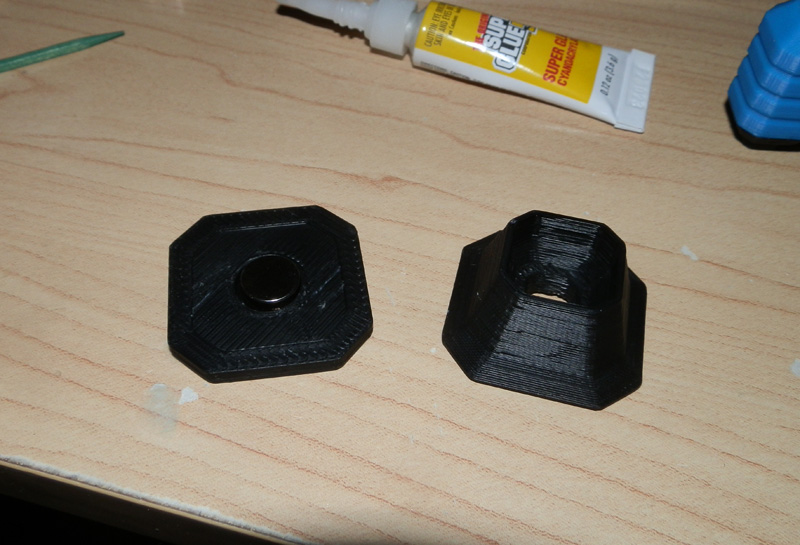
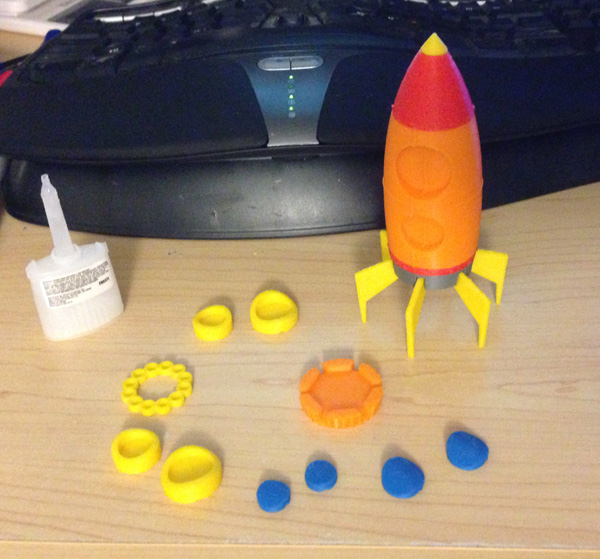
The door panel was the biggest problem. At these tiny scales, printing can be quite iffy. The orange panel had to be fairly thin, and I would have to print it flat. In these photos, due to the semi-translucent nature of the plastic, it’s hard to see the details, but they’re there.

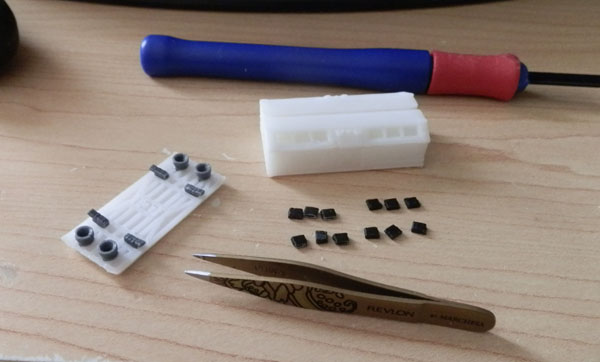
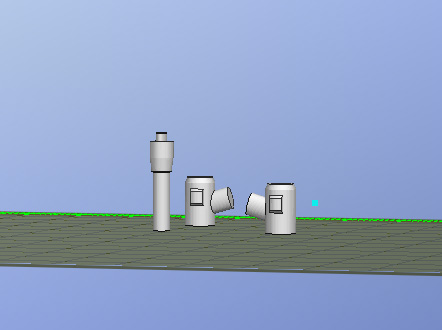
The door panel was going to be a problem. I wanted to make sure the orange door was its own color, and so I had two choices. I could print the orange panel with a hole for the door space, and then indent the door, and print an orange door insert.

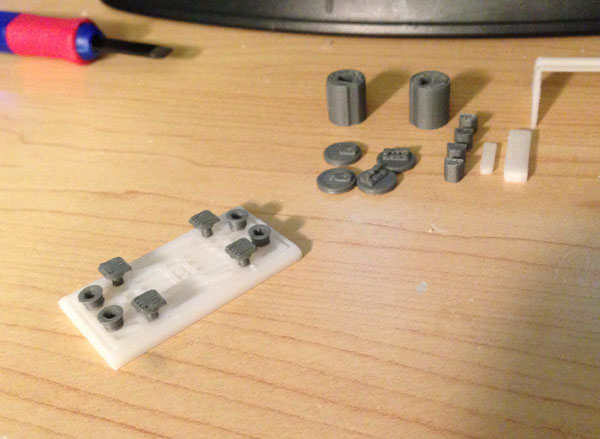
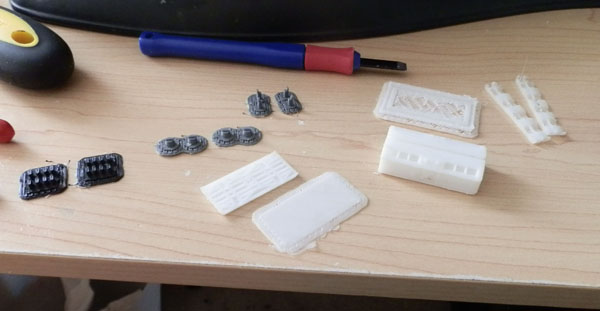
I chose instead to print the whole side strip and indent the white door space, extruding the orange door out a bit. Then the white part of the doorway would become its own piece and snap over the door.

Thusly:

vip-eagle-pod-side-panels

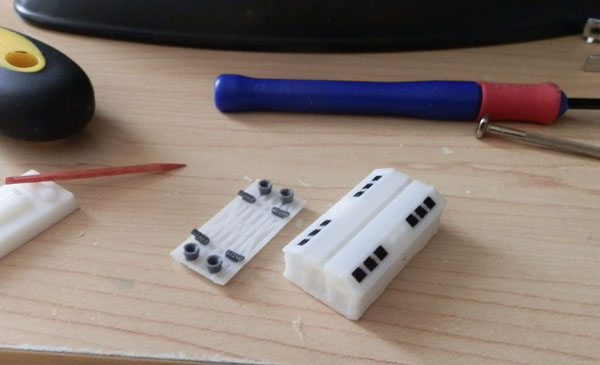
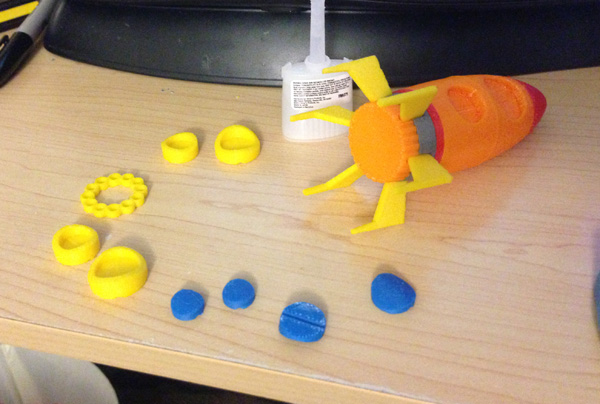
At this tiny detail, flat, filled surfaces sometimes get left somewhat open by my printer. It’s a problem for making small text letters or any filled areas that have a very small surface area. But I soldiered on.

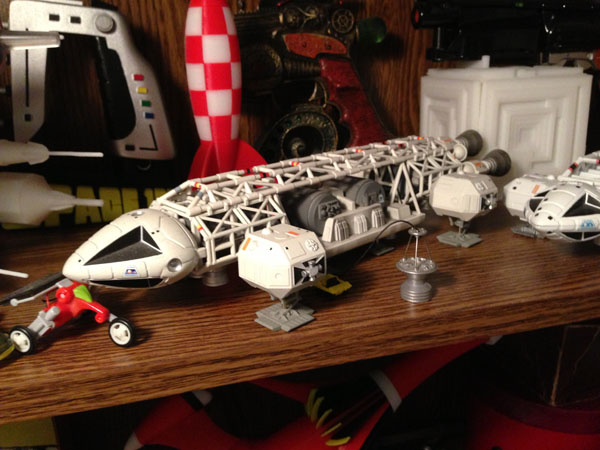
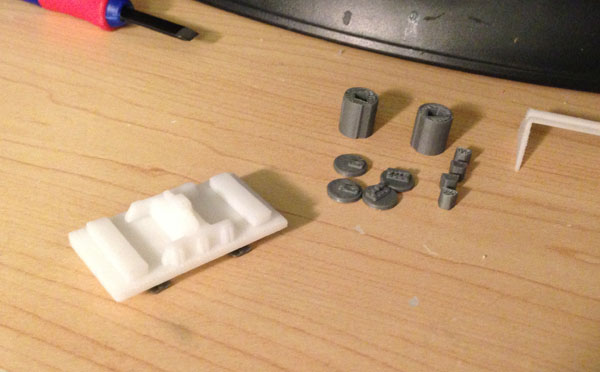
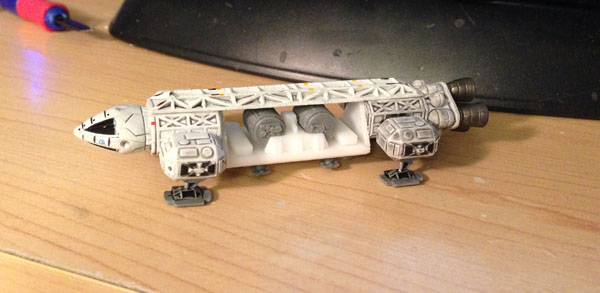
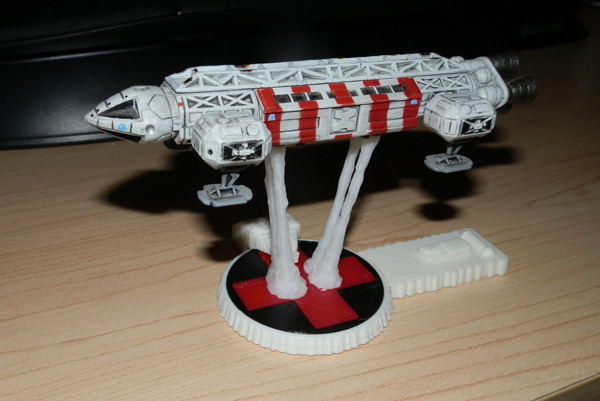
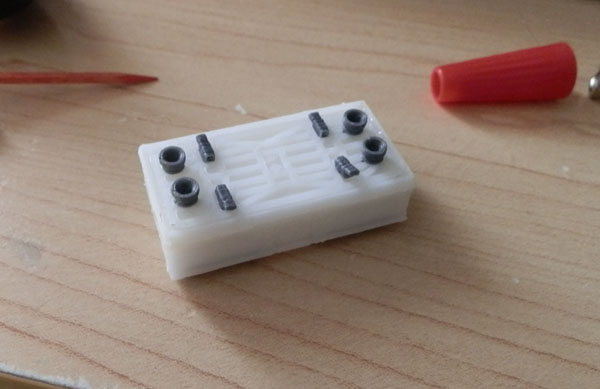
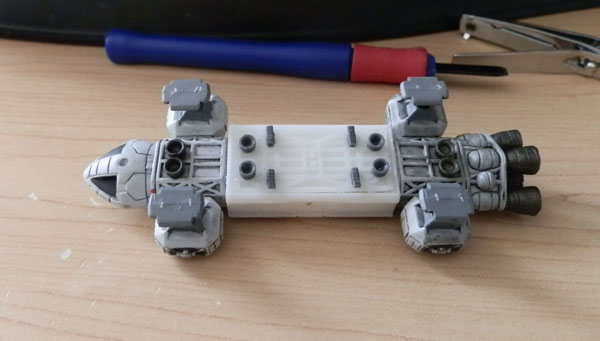
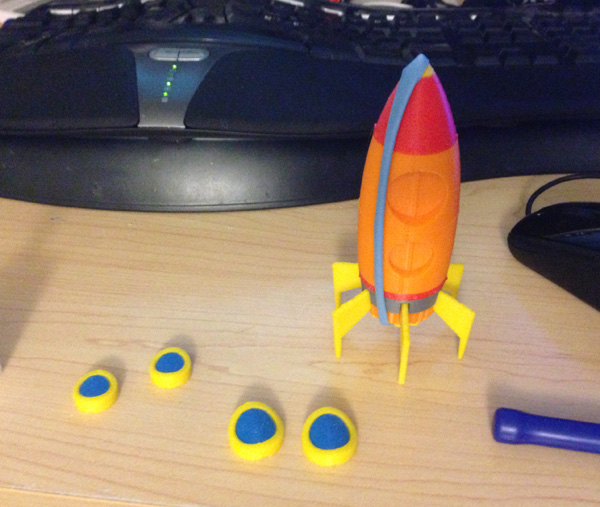
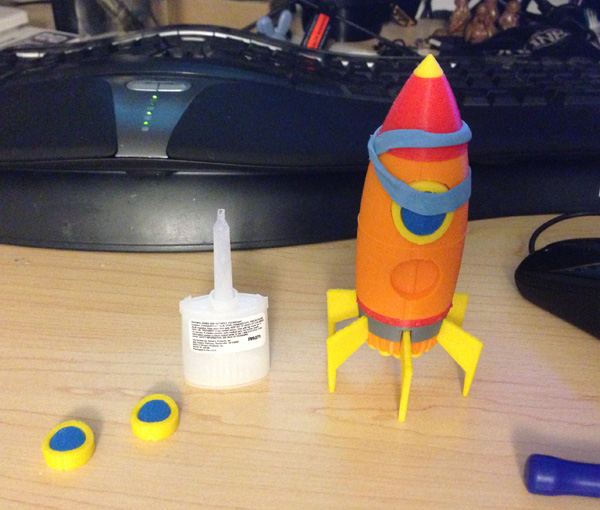
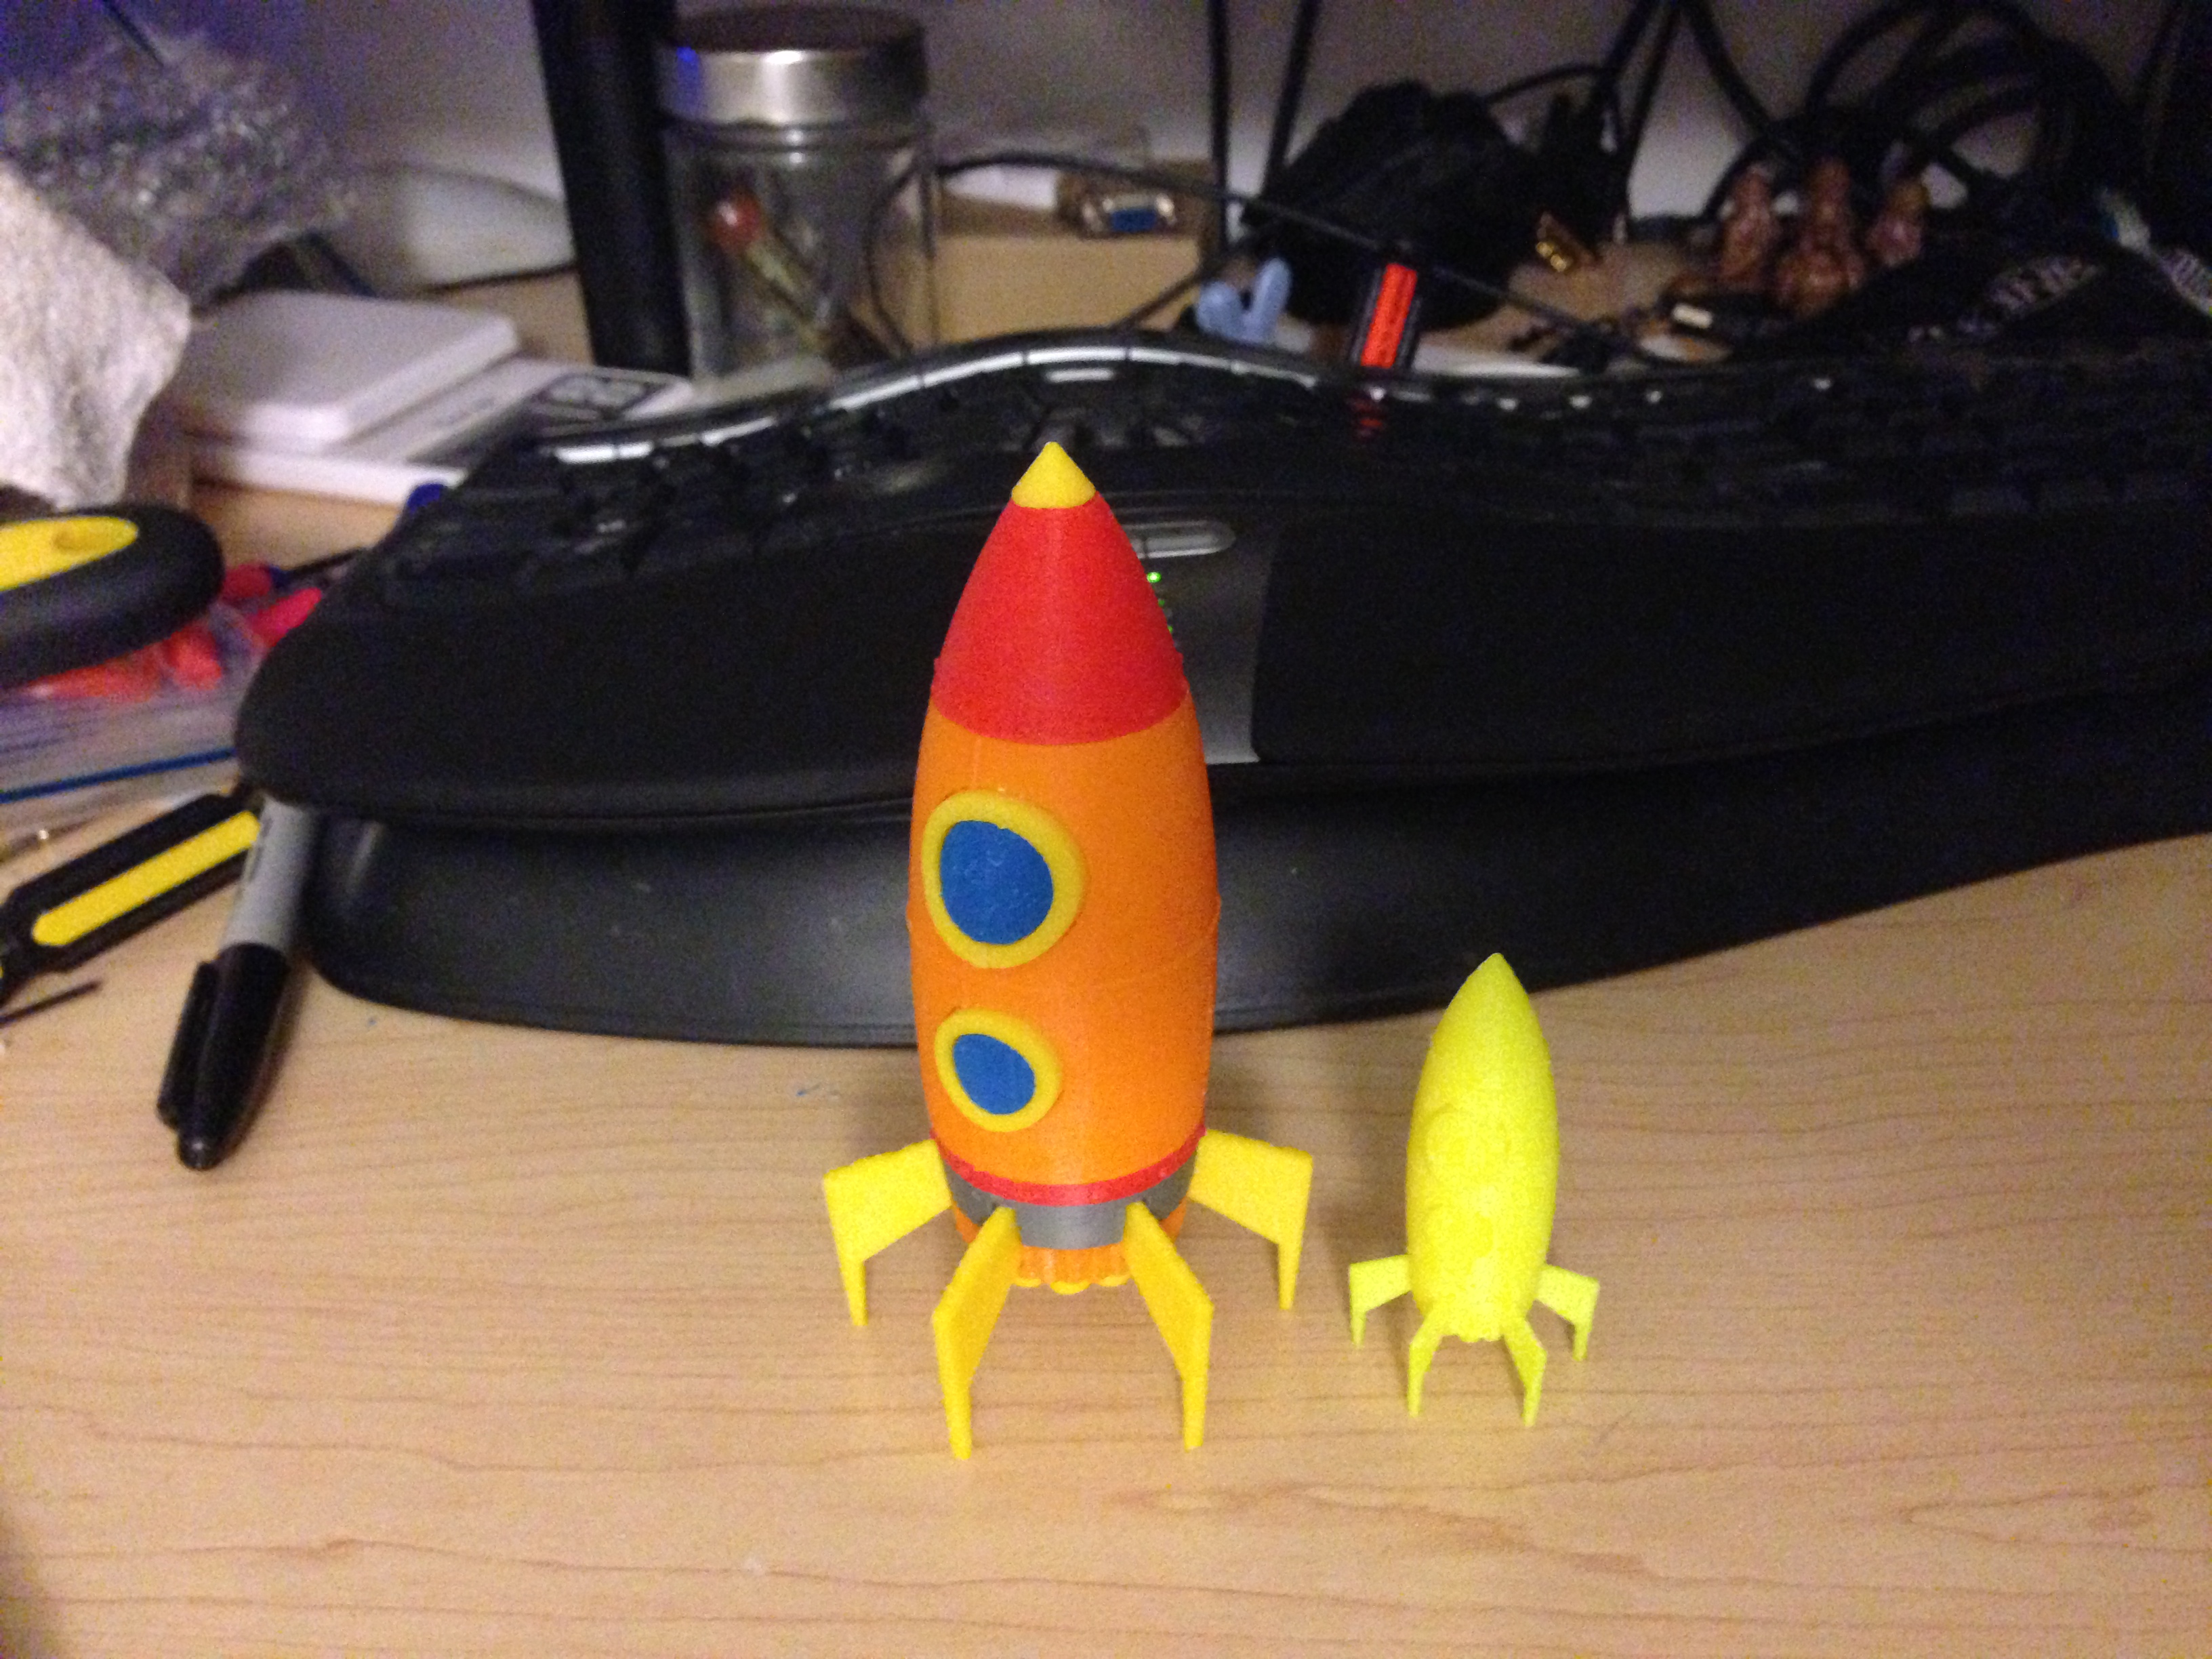
And here is the final result, showing first the underside, and second loaded in an Eagle, with the other pods I created:

vip-eagle-pod-underneath

vip-pallet-pods-complete

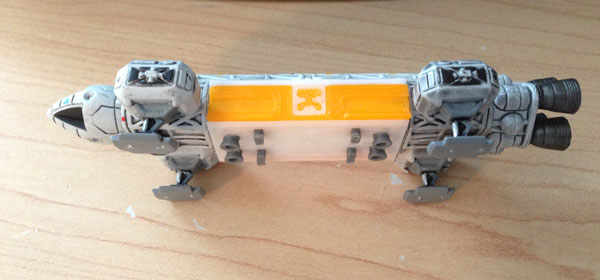
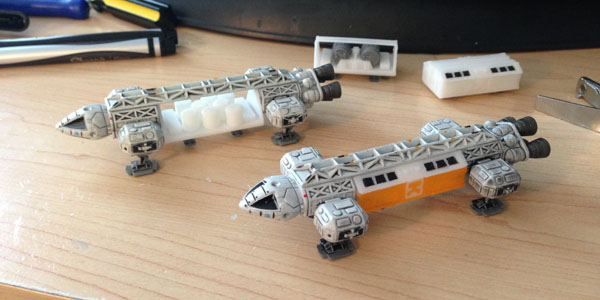
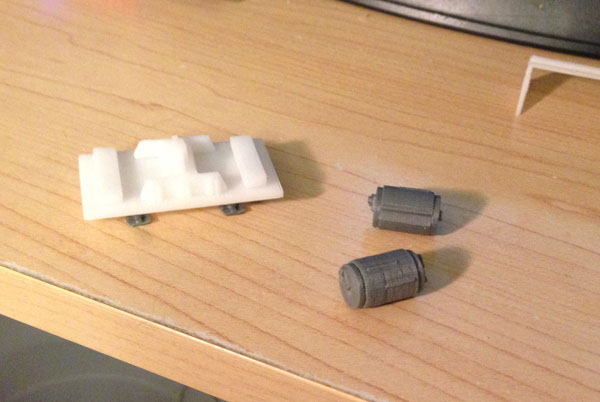
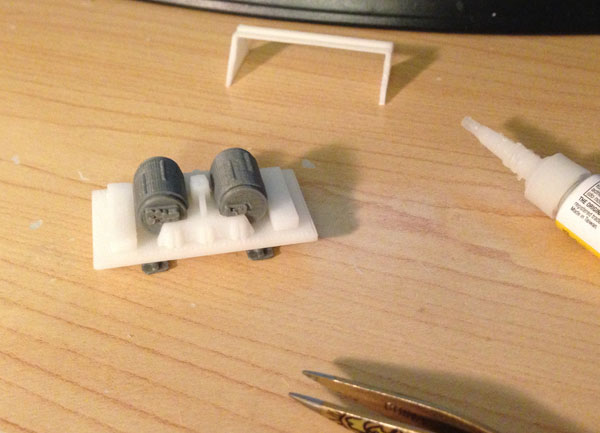
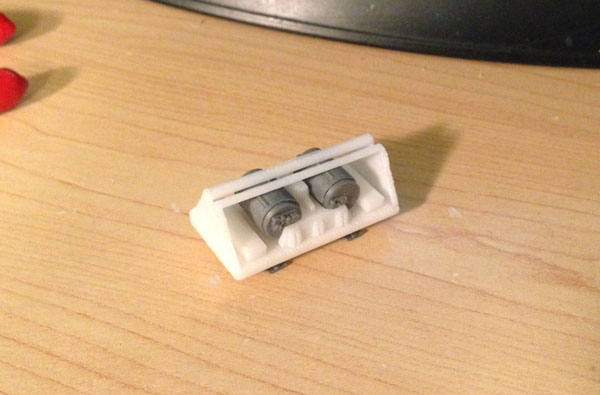
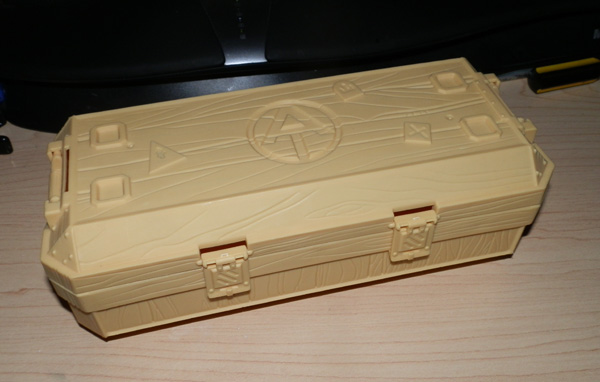
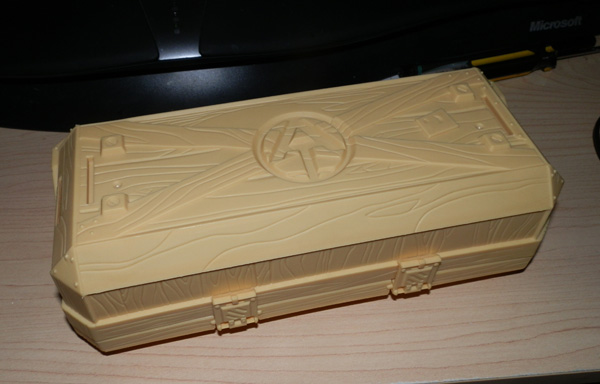
Oh. Right. Behind it is my Pallet pod, which is used to transport containers of radioactive waste.

What I have not done yet is print water slide decals for the containers, which should have a radioactive warning sign and a text sign on them. That’s coming.

I won’t do a page on the Pallet pod because it’s really just the Winch pod with the winch removed, and cylinders added.

Konami Eagle Pods – Winch Pod

Moonbase Alpha exists as a colony on the moon partly in order to maintain a nuclear waste dump. Earth, by 1999, was powered almost exclusively by nuclear energy plants, and getting rid of the dangerous toxic waste became a problem. Why not just store it on the moon? Well why not?

In “Breakaway”, the first episode of Space 1999, Eagles are seen transporting and managing containers of radioactive waste. This waste builds up in energy and explodes in a massive nuclear blast that knocks the moon out of Earth’s orbit.

The Eagles used to transport these hold winches on a cargo flatbed with a magnetic winch head that picks up and deposits nuclear waste cannisters.

eagle-winch-pod

Konami, makers of a quite nice and sought-after 4″ Eagle model, made two pods for their model: A passenger pod and a Rescue pod. These are essentially the same pod with the exception that the Rescue pod has red stripes.

But they did not make any of the other pods the Eagle could be seen carrying in the TV show.

So I set out to make a Winch (often called Freighter) pod for this Konami Eagle.

I started by making a copy of the original pod (for scale and fit) so I could then use those dimensions to make further pods.

I decided to model my small Konami Freighter (Winch) pod after Product Enterprise’s 12″ Eagle model from a few years back, a gorgeously detailed model. They painted the winch barrels grey, so I made mine grey, though they appear to be white in the TV series.

Here is the Product Enterprise Eagle with Winch Pod (Product Enterprise called this the Eagle Freighter)

product-enterprise-eagle-freighter

Here, then, is the progress I made in the past two days on my Winch Pod:

fp-parts
Here are all the parts: Winch Barrel bodies, Winch Barrel heads (two different per barrel), plugs to make the heads fit on the bodies, four Legs, four Engine Cones, two Rectangles (no idea what purpose they serve) for the pod flatbed, the Pod Flatbed itself, and the Winch Holding mechanism, and finally at the top, the superstructure holding it all together.

(Note: The superstructure is not shaped like this, but for this small Eagle, this made more sense. The front and rear baffle walls are completely open in the real deal, with piping acting like a scaffold for strength. My printer would not print those with any consistency or neatness, so I abandoned that idea for this one, which works, and looks pretty good when the pod is installed in the Eagle, as you will see.)

fp-bottom-assembled
Here, the four engine cones and four legs are installed on the underneath of the flat bed.

fp-floor-partly-assembled
The two rectangles are placed, with small plugs underneath for alignment. The winch holding mechanism is placed in the center, with a similar plug to align it to the flat bed.

fp-winch-barrels-assembled
Here I put the caps on the winch barrels. These are two identical barrels, which are turned at 180 degrees to each other when on the Eagle.

The caps are printed separately because the barrel is printed vertically, and the cap detail would disappear if it had to be printed on the bottom of a single-piece barrel.

Four plugs are used to align the parts.

fp-pod-mostly-assembled
Here the winch barrels are glued in place.

fp-pod-assembledAnd the superstructure is glued in place, which allows the pod to attach to the Konami Eagle:

fp-pod-in-eagle

NOTE: For anyone who buys these models from me at my shop (Fourth D) on Shapeways, you may want to print the decal sheet I created. The two links below are to PDF files you can print.

Pod-Decals-Better-Layout

Pod-Decals-Instructions

You can print them on white waterslide paper either in laser or inkjet (make sure you have the right paper and follow instructions that come with the paper) or you can print them on simple white paper and use simple glue if you like. The decal sheet has both the Konami and Dinky scaled decals. Also, the instructions for the decals (for waterslide) are available here.

Konami Eagle Pods – Passenger Pod

Konami, a Japanese company, has made an amazing collection of vehicles and figures from Gerry Anderson’s body of work. These are small models, about 4 inches or less, and gorgeously detailed.

I have had the Eagle with Rescue Pod from Space 1999 for some time now, seen here, mounted on a display base I created in my 3D printer some time ago:OLYMPUS DIGITAL CAMERA

This one came in a two-set box along with the SID satellite from the TV show UFO.

Last week I happened upon the rarer white version (no stripes on the pod). It hit me then that these are the only two Eagles Konami made, but there are others Eagles in the Moonbase Alpha fleet.

Well, first, the Eagle itself (the lifting body) is standard, but can be made to carry different pods. The red striped one is a Rescue Pod, the white one is a standard passenger mission pod. There are also a VIP pod (essentially the same pod with orange detail), a Laboratory Pod, which has extensions to either side and extra attitude jets, and a Freighter pod, used to carry nuclear waste around the moon.

So I set out to create extra pods for my Eagles. First up, a replica of the passenger pod.

I iterated through many variations of the model, tweaking it for fit and detail. At this size (4cm long) the tiny detail tends to get lost with my printer. But I made some adjustments to accentuate the details. It’s still not perfect, but here is the result, which isn’t bad, if I must say so myself.

Here, I assemble the “model kit” I created.

OLYMPUS DIGITAL CAMERAHere are the various parts as they came off the printer. There is extra “rafting” material underneath all of the parts. Here you see the pod upper body, the pod bottom (printed separately to retain detail), four legs, four engine cones, and a bunch of window inlays.

OLYMPUS DIGITAL CAMERA
Here, the rafting material and support scaffolding (supporting the roof overhangs) are pulled away.

OLYMPUS DIGITAL CAMERA
Here you see all of the parts, cleaned up and separated from their rafting bases.

OLYMPUS DIGITAL CAMERA
Here, the four engine cones and four support legs are glued in place. The windows are all pieces designed to fit into deep holes in the pod’s upper part.

OLYMPUS DIGITAL CAMERA
And here the 12 windows are glued in place.

OLYMPUS DIGITAL CAMERAThe assembled bottom, glued to the assembled top.

OLYMPUS DIGITAL CAMERA
And here it is docked with the Eagle. The white is not a match, but I intend on priming and painting later versions of these.

OLYMPUS DIGITAL CAMERA
Et voila! The Eagle, with my pod in place, next to the original white pod.

Lazy Sunday 3D Projects

Today I had some time so I got myself busy working on a couple of projects I’d been meaning to do for a while.

The first was to make a profile image of myself and lathe it around to form one of those urn profile busts that are seen in optical illusion shots:

faces-urn-image

So I got Carol to take a direct profile picture of my face:

20140406-103312.jpg

I brought it into my 3D modeling program and drew the profile, lathing it around 360 degrees. (Not a terribly flattering picture, I know. But it was just for this project.

I won’t reveal quite yet what the result was, because then I did a second Lazy Sunday project:

This is a TeeFury T-Shirt I bought last year that I really loved:

tron-space-invaders-t-fury

So I set out to create the Space Invaders / TRON Recognizer mash-up in the shirt.

And here are the results of both projects. (The robots on the left were other Lazy Sunday and Snow Day projects.)

tron-space-invaders-model

Adventure Team Crates (Sigma 6)

A couple of years ago Hasbro tried a new line of GI Joe toys which I thought were quite beautiful. Sigma 6 were six-inch stylized versions of the GI Joe figures from other lines. Despite the fact that Snake Eyes and Storm Shadow are Real American Hero Joes, created in the 1980s for a new 3 3/4″ toy line and comic book series, Hasbro incorporated them into a few Adventure Team Sigma Six sets and the sets were quite nice. They also created a couple of more traditional, bearded GI Joes in this line for the AT sets.

The released Adventure Team Sigma 6 sets are shown here:

 Pyramid of Perilsigma-six-snake-eyes-front-01

Snake Eyes here is trying to retrieve a rare green gem from a pyramid, protected by a giant cobra (irony?) and the gem itself is booby-trapped behind two spring-loaded swords. The set comes with a bunch of gear including a zip-line for Snake Eyes.

Danger in the Junglesigma-six-tiger-front

This reprises the vintage Hunt for the White Tiger set from the original GI Joe Adventure Team line, as well as the Save the White Tiger from the more recent Adventure Team revival of a decade ago. Here, for some reason, Storm Shadow faces down an orange tiger.

Terror of the Swampsigma-six-crocodile-front

This also reprises the Secret of the Savage Swamp sets from both the original Adventure Team line as well as the more recent Classic Collection Adventure Team line.

There was a fourth set that Hasbro apparently planned, but I don’t think it was ever released. I only know this because a web search brought up this image:

sigma-six-land-adventurer-gorilla-concept

This one would have reprised the famed Pygmy Gorilla sets from the Adventure Team’s illustrious past.

Holders of these sets will appreciate the packaging. Sigma 6 sets were packed in plastic boxes sealed at either end with an intricately molded cargo box in two pieces. When the package is opened, you can snap the two pieces together to form the top and bottom halves of a cargo crate which you can fit all the gear into.

The regular Sigma 6 sets had gray ammo cargo boxes, but the Adventure Team line had them modeled in Adventure Team theme, including the familiar and beloved AT logo.

Top:OLYMPUS DIGITAL CAMERA

Bottom:OLYMPUS DIGITAL CAMERA

Here my 3D printer comes in handy again. I designed an AT logo that can fit into the recessed AT logos here to add color to the crate.

Here is the AT logo fresh off my Afinia H479 printer:

OLYMPUS DIGITAL CAMERA

It prints on a raft of plastic to secure the print to the bed and ensure good printing. Using a small chisel I lift the logo off the bed and clean it up:

OLYMPUS DIGITAL CAMERA

Then I can glue it into the recess. Here is the top:

OLYMPUS DIGITAL CAMERA

And here, the bottom:OLYMPUS DIGITAL CAMERA

Voila. Another nice GI Joe Adventure Team project created with my 3D printer.

Adventure Team Set Five: Cyber Counter-Attack – EMP Grenade

As I posted earlier, I’m creating a new GI Joe Adventure Team gear set. This one is to counter cyber-terrorists. It’s called Cyber Counter-Attack, and features several helpful bits of equipment to thwart an active local cyber attack.

First, the concept:

at-cyber-counter-attack-set-concept

The first model I tackled was the Cyber EMP Grenade. It’s a bulky hand-thrown grenade that contains a very powerful magnetic pulse circuit. Simply push the plunger and throw. A timer, set by using the hacking console, counts down and then BOOM! A massive localized Electro-Magnetic Pulse knocks out any electronic equipment a hacker may be using.

To make it a bit more useful, there is also a magnetic base the grenade can fit in to make it a plantable mine. You simply stick it to a wall and let it count down. Same result without having to toss it.

To make this, I modeled five separate parts:

– Plunger
– Body
– Body Bottom
– Base Cup
– Base Bottom

I also use three rare-earth magnets in each grenade/mine combo. One very small one for the base of the plunger, a cylindrical one for the bottom part, and one for the mine base.

OLYMPUS DIGITAL CAMERA

The first one is glued to the base of the plunger:
OLYMPUS DIGITAL CAMERA

The second magnet, the cylinder, is fitted into the grenade bottom, rather snugly. No glue is necessary for this one:
OLYMPUS DIGITAL CAMERA

Then the red plunger is fitted up inside the blue body from below, and the black bottom glued in place. The two magnets repel each other so they act as a spring when you push the red plunger:
OLYMPUS DIGITAL CAMERA

Then a third, flat magnet, is placed into the base bottom piece:
OLYMPUS DIGITAL CAMERA

Then the base bottom is glued to the base cup. This is intended so there is no magnet exposed. You can see part of this largest magnet from the top, but it’s safely glued into the base:
OLYMPUS DIGITAL CAMERA

Here’s a little movie I shot showing how it works:


GI Joe Convention – The Fiftieth Anniversary of GI Joe

It’s true. GI Joe turns 50 this year. And it’s also true we were born in the same year, within weeks of each other.

gi-joe-fifty

This year the GI Joe Collectors’ Club is holding its annual convention in Dallas and as a birthday gift, my wife and my daughter gave me this convention.

The only other convention I was able to attend was the 2010 Con in Providence, because it’s a half-hour drive from here. I went, met some great people, some of whom I have known for years online, and I had a good time. I got the Convention Set, which is this amazing piece of work:

eightlegslogo

One thing the Convention offers is contests. There are two diorama contests I will likely be entering. One is restricted to a 15″ x 15″ table space, and the other is less restrictive at 30″ x 48″.

Here are my two entries from the 2010 Convention. I scored a prize for the TARDIS Interior dio.

Large Diorama: – The Regeneration.

Here, two characters from my epic 8 chapter “The Second Key” photo story, Sir Edmund of Sussex and Ellanuir of Aquitanis, watch as my Doctor undergoes a regeneration.

This one was my full TARDIS interior set, on a foam-core floor, with a small hole cut into it for a blue LED which slowly flashed. I used a clear GI Joe figure, whose head diffused the light beautifully, lighting up the whole head. He was dressed in my Doctor’s costume, and there was a photo frame monitor in the back wall flashing images of space, and the title of the diorama.

2010-convention-large-diorama-entry

Small Diorama: Return to Metabelis III

This one did not win a prize. You could have knocked me over with a feather. The thing is, this is a GI Joe convention, not a ComiCon. This diorama shows MY Doctor character with a blue crystal in his hands, landing on a planet, leaving the TARDIS, and being approached by dangerous spiders. This is a fairly deep diorama in that it makes many references to the Jon Pertwee Doctor Who era. In that era, he keeps promising his companion, Jo, that he will take her to Metabelis III because it has these amazing blue crystals. He never gets to. For most of his time his TARDIS is out of commission as a punishment from the Time Lords. But he does get there at one point, and steals a blue crystal. This comes back to bite him in the ass in another episode “The Planet of the Spiders” because the spiders want the crystal back. It is a very important crystal to them. However, at one point, the Doctor mails the crystal to Jo who is in the South American jungle doing missionary work. While there, the crystal, apparently, spooks the natives. They can feel its power.

So my diorama is the Doctor returning the crystal to Metabelis III. The crystal is a real cobalt crystal, the spiders are Shelob from the Lord of the Rings series, and one from a creepy Little Miss Muffett action figure.

2010-convention-small-diorama-entry

Photo Contest: Remote Delivery

This one is a dog sled in the snow, being driven by one of my Joes. It’s a photo from my “Remote Delivery” photo story, a one-page sentimental story I did when Charlotte was young.

2010-convention-photo-entry

So this year I will be entering two dioramas, but probably will not submit a photo.

The two sets will highlight my 3D Adventure Team sets.

1) The Adventure Team Backpack Flight Pack

2) Save The Endangered Pygmy Rhino

Without going into too much detail, since I don’t want to alert the competition, I will be doing a test flight of the Flight Pack, and I will be displaying the Rhino set as an AT set.

save-the-endangered-pygmy-rhino-case

Here is the comic I did. This is not the final, and it has test fonts, but it’s close. This will also be a part of the set. I’m also going to print a bunch to give away.

save-the-endangered-pygmy-rhino-comic-01

I’ll do a more detailed photo spread when both dioramas hit the Convention floor in April.


A Second Snow Day’s Work – A Second Rocket

Not really a snow day. I mean it snowed today, but I had booked the day off anyway.

I spent a lot of it making the next rocket in my fleet.

This is a Fathers Day Card Charlotte gave me some years ago. I kept it because I really loved it, and I am a big fan of retro-styled rocket ships.

fathers-day-card-rocket

Obviously it is stylized, and shows only two fins. This would not work as a real rocket, and if I decided to be literal, it would fall over. So I opted to go with 3 fins, with the windows being in the span between, making for 3 windows, six rows of rivets, and 3 fins.

Here is the 3D model. I have not yet printed any of this. I will post pics when I do.

rocket-fathers-day-card-model

Well, I test-printed the rocket. It was a bit smaller than I want the final to be, but it’s not bad. Here it is, pictured next to the card that inspired it:

rocket-fathers-day-first-test-print

A few minor adjustments to make, including making the insert cuts for the fins a bit deeper, and to scale it up maybe 1.2.

The proportions may look wrong but that’s only because you’re seeing a 2D model become 3D. The contours of the body, the height of the nose cone and the windows, the fin shape, are all modeled against the photo in Maya so they are very accurate. Even the number of rivets going down the body is accurate.

A Snow Day’s Work – 3DAGOGO Rocket Ship

As some of you may know, I entered three design contests at 3DAGOGO in December. Turns out I won all three, and won two reels of filament and a 3D scanner!

But I also won three t-shirts declaring the win. Like a trophy.

3dagogo-shirt-trophy

I really liked the cool rocket ship and thought, you know what would make a better trophy?

Exactly.

Today New England got socked with yet another snow storm and the weather reports were so bad for later in the day that driving would be dangerous. So my company shut down for the day.

I took the opportunity to watch a movie or two (“Battleship” which is universally panned, but I don’t know why. I rather enjoyed it.)

But during the day while doing various other things, I sat down and modeled the rocket seen on the 3DAGOGO shirt.

Here is the first test-print, which is about 6.5cm tall. It was a proof of concept, printed in my go-to test color, neon yellow (so the photo sucks. This color just does not photograph well.)

3dagogo-rocket-test-print-yellow

Concept proofed, I went to work printing the five-color rocket ship, starting with yellow, which had the most parts, but not before doubling the scale.

Here are all the parts laid out:
3dagogo-rocket-

Here, I have assembled the main body in orange, the top red body section and yellow nose cone:
3dagogo-rocket-assembly-1

Here, I have glued on the bottom red section with the engine cowl in silver:3dagogo-rocket-assembly-2

Then the fin section snaps into the grooves of the engine cowl:
3dagogo-rocket-assembly-3

Then the orange engine section snaps onto the remains of the fins:3dagogo-rocket-assembly-4

Not shown well here, the engines themselves (the ring of yellow circles above – a slight embellishment on my part since the T-shirt is very vague on this area) are glued to the bottom section and a strong rubber band is used to clamp the pieces together while the Krazy Glue sets. Meanwhile I glued the blue window “glass” into the yellow window frames:3dagogo-rocket-assembly-5

Then the windows are glued in place and clamped:3dagogo-rocket-assembly-6

The finished model next to the test-print. Believe it or not, the larger one is 2x the size of the smaller one but looks quite bigger:
3dagogo-rocket-complete


And here I placed the model rocket on the shirt above the graphical version. I think I nailed it! If you think the fins don’t angle back enough, you may be right, and my next version may address that, but I think it’s mostly due to the angle of the photo. In the shirt graphic, it’s angled back more, and the fins disappear into the perspective cone towards the back. The plastic model doesn’t, not at this angle, but does at others.

3dagogo-rocket-with-shirt

3D Printing Tips – The Lightning Rod

I have printed probably hundreds, if not thousands of individual things on my Afinia H479 printer. And I’ve learned some things that make printing easier with better results.

Today I’m going to talk about how the printer prints, and why it can cause issues when printing multiple small parts.

When the Afinia prints layers it often runs through the layer in a particular order. Then when it begins printing the next layer, it does this layer in reverse, which works. Or for that matter it may not be exactly in reverse, but it does often print the next layer starting with the part it just left, meaning it prints twice on that one part in short order.

To create the part, the order of printing really doesn’t matter – except it does.

It matters when at the end of a layer the bed drops to the next layer and begins printing with the same part again. This means if you had, say, six equal cylinders of just a few .mm in diameter, it goes around to each cylinder, prints that layer’s circle, moves on to the next. But at the end of the layer it prints one cylinder’s circle, the bed drops a layer’s height, and it prints on the same cylinder again without giving that previous layer any time to cool, then goes through all of the other cylinders in reverse order of the previous layer.

One of the things that makes for a more accurate, more precise print is cooling time. If the head lays down a layer on Cylinder A and then goes to B, C, D, E, F and G, the plastic on each of those cylinders gets some cooling time before the head comes around again with its molten plastic. However, the way the software prints layers means that G now gets two layers at a time. The first layer has not had time to cool before the second layer comes down. Then it goes back G through A, and prints A twice. So cylinders A and G can end up with slightly gummy layers where two layers printed right after each other.

I first noticed this when printing posts for my Thunderbird 3 variant rocket design I made very shortly after I got my printer.

The first thing I noticed is that after some shorter parts had printed, the taller posts got very gummy at the top, like they had lost their shape entirely. It didn’t take long to figure out that the reason was the cylinder printed in sequence until the shorter parts were done, then the head just kept going over and over this one post, and the result was like melted plastic.

These two photos depict the problem very clearly:

OLYMPUS DIGITAL CAMERA OLYMPUS DIGITAL CAMERA

But I also noticed when I printed this part for someone else’s redesigned Thunderbird 3, it had three posts with some separation between them. Note how in this photo you can see they printed very precisely, without the gumming. Even in this model, one or two of the three cylinders got the multi-print treatment.

OLYMPUS DIGITAL CAMERA

I soon began to print things with one superfluous piece on the print bed. This piece was thin, and taller than all of the others, and its purpose was to give the printer something to waste time on. When the head prints the layer of the parts I want, it is forced to go print this thing. This gives the plastic on the wanted pieces time to cool while the head went off to print this unwanted thing. And since it’s taller, it completely finishes my good parts and goes on to gum up this taller useless piece, and when the print stops, it doesn’t stop hot on one of my parts leaving that tiny hair of plastic on it to clean up.

I call this superfluous part a lightning rod. Consider that its purpose is to stand taller than its surroundings and stop them from taking damage from the hot thing.

Here, you see a lightning rod in use. (It has more detail than it needs because it is an actual part I need, but not for this print run. I used the software’s scaling tools to make it thin and taller than the main parts I’m printing.)

printing-blog-lightning-rod

(It didn’t have to be quite this tall… I just got lazy. It really only needs to be one or two layers above the main parts you are printing. But that’s hard to gauge in the view window, so I play it safe.)

Now when I print multiple parts, I always print a lightning rod. The wasted time and plastic are not a concern to me. The rod is usually a very thin thing that I toss away after printing, but is thick enough to stand up to a tall print, but not thick enough to waste much plastic. More plastic is usually used on the raft than the lightning rod and I always end up with cleaner parts.

I am also going to use this knowledge to ask Afinia to provide a print mode that does not reciprocate adjacent layers, so that every layer goes around in the same direction. This will completely eliminate the problem of having one part get two layers in a row, thus making for a more mushy print.